Page 1 of 2 12 LastLast
Results 1 to 10 of 18

Thread: Series 2A SWB restoration

  1. #1
    Join Date
    Sep 2008
    Location
    Toad Hall - SEQ
    Posts
    313
    Total Downloaded
    0
    Hello chaps,
    favourable weather conditions have allowed much resto work on 'Sir (Searle) Bertie' over the last several weeks.
    Pics show some masking up prior to spraying with Flexcote sound deadener, and dad wearing ppe whilst weilding the schutz gun.
    The sound deadener product is a good protective coating for inner guards and chassis.
    I painted the chassis rails by brush.
    This rare Carawagon already had it's entire underbody coated in a black thick bituminous product, applied 41 years ago (prior to it's exotic travels). The coating was/is still largely in good condition. So the new sealing coat we applied is a 'refresher' .
    More to come in the following days.

    Harry Jnr
    Attached Images Attached Images

  2. #2
    Join Date
    Sep 2008
    Location
    Toad Hall - SEQ
    Posts
    313
    Total Downloaded
    0
    More resto pics as promised.

    Pictures from left to right:
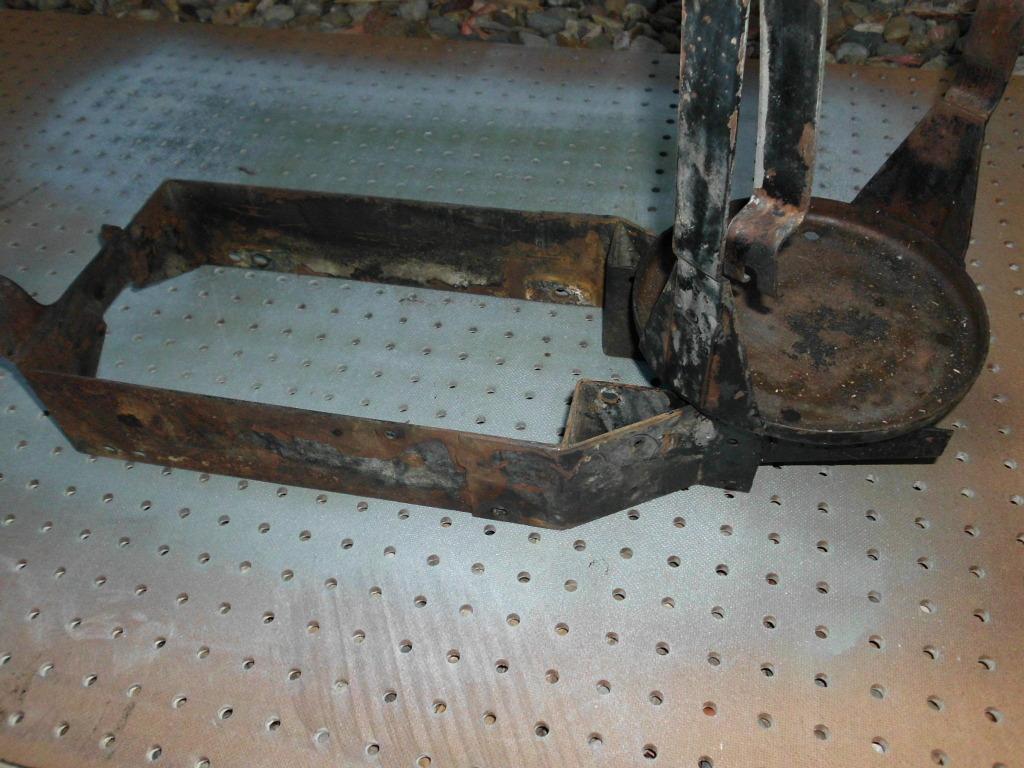
    #1 shows the passenger side rear brake assembly after it's initial clean/degrease (but before sanding).

    #2 Passenger side rear again, the brake assembly now cleaned, sanded/de-rusted, and painted. Also shows the chassis painted and the wheel arch sprayed in sound deadener.

    #3 Me painting the primer onto the passenger side front brake assembly after cleaning and sanding.

    #4 Passenger side front brake assembly now painted in primer.

    #5 shows the passenger side front brake assembly with the top coat of paint, the chassis & wheel arch painted, and a new zinc-coated footwell MIG welded into place. [PM me if you want the contact details of the mobile welder].

    Harry Jnr
    Attached Images Attached Images

  3. #3
    Join Date
    Sep 2008
    Location
    Toad Hall - SEQ
    Posts
    313
    Total Downloaded
    0
    Hello Chaps,
    much resto work has been carried out and continues.

    It looks like a part off the Titanic, but no it's the air cleaner assembly, before cleaning & sanding.


    Air cleaner assembly, oil filler & breather caps - cleaned, de-rusted and painted.


    Here is a photo of our custom-fabricated aluminium fuel tank versus the leaking original


    Here is the replacement fuel tank, some splash panels, and the steering box cover awaiting a coat of sound deadener.


    Spraying the sound deadener onto the splash-guard


    More to come over the following days
    Harry Jnr

  4. #4
    Join Date
    Apr 2011
    Location
    Wandong,Victoria,Australia
    Posts
    3,379
    Total Downloaded
    0
    Hi Harry Jnr,

    Wow - fantastic work. Great pictures - very motivating... Keep the pictures coming! You are doing a great job there.

    Regards,
    The Grey Ghost

  5. #5
    Join Date
    Sep 2008
    Location
    Toad Hall - SEQ
    Posts
    313
    Total Downloaded
    0
    More resto work.

    Here is one of the four brake drums after being sandblasted:


    Here one of the drums is being masked up on the inside (where the brake shoe linings will contact the inside of the drum), prior to being spray painted:


    Here are the drums, all looking nice and shiny after Dad sprayed them in Ceramic brake paint that can withstand brake temperatures of up to 500 degrees Celsius . Standing on the picks whilst the Landy is hurtling down a steep winding mountain road will certainly make them glow. We write from experience . . .
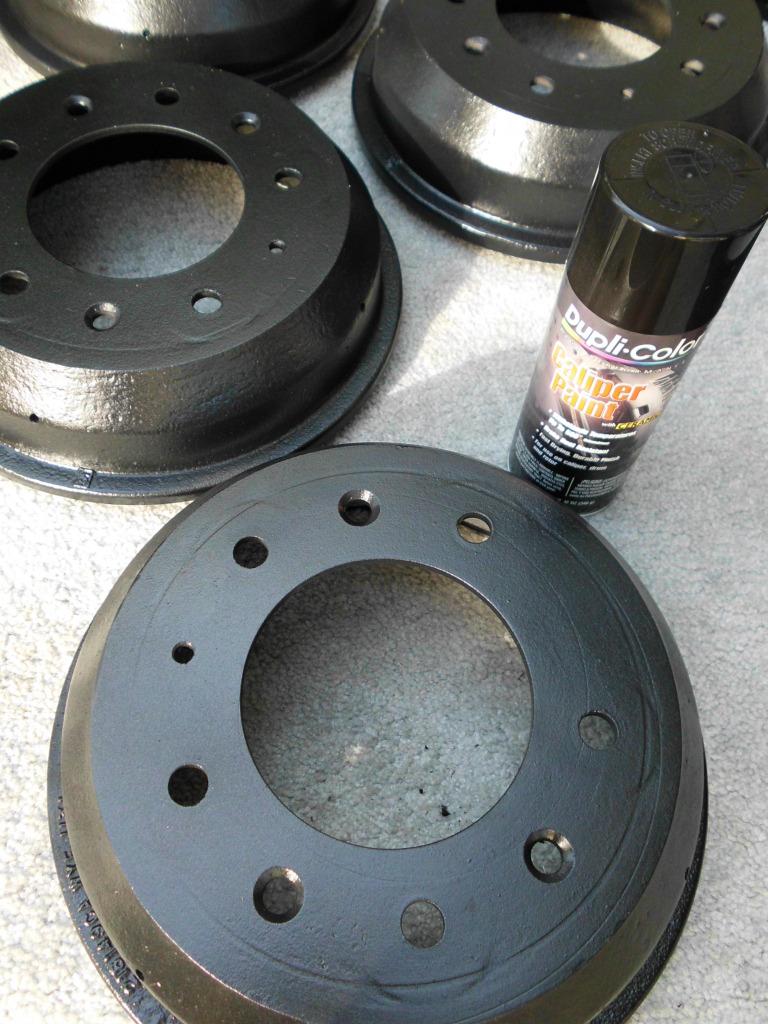

    And now it's goodnight from us. Sweet dreams, dear 'rivet counters'

  6. #6
    Join Date
    Nov 2007
    Location
    Gold coast
    Posts
    3,130
    Total Downloaded
    0
    Looking good guys...

  7. #7
    Join Date
    Sep 2008
    Location
    Toad Hall - SEQ
    Posts
    313
    Total Downloaded
    0
    Yet more sanding. . . .

    Here is the combined brake and clutch remote reservoir, affectionately known as the 'jam tin', by fellow Land Rover spanners.


    To de-rust it, i used this


    ...and this


    And then after being treated with a proprietary convertor chemical, painting begins with a zinc primer.

  8. #8
    Join Date
    Nov 2007
    Location
    Gold coast
    Posts
    3,130
    Total Downloaded
    0
    Quote Originally Posted by harryj View Post
    Yet more sanding. . . .

    Here is the combined brake and clutch remote reservoir, affectionately known as the 'jam tin', by fellow Land Rover spanners.


    To de-rust it, i used this


    ...and this


    And then after being treated with a proprietary convertor chemical, painting begins with a zinc primer.
    Bean Tin I have heard this called too...

  9. #9
    Join Date
    Sep 2008
    Location
    Toad Hall - SEQ
    Posts
    313
    Total Downloaded
    0
    Restoration continues. . . . .

    Here is the battery surround/air-cleaner support before sandblasting.


    Here it is again, sandblasted, primed, and painted in hardened industrial gloss-black enamel.


    Cheers,
    Harry Jnr

  10. #10
    Join Date
    Sep 2008
    Location
    Toad Hall - SEQ
    Posts
    313
    Total Downloaded
    0
    Here is the underside of the gearbox tunnel cover-plate (before cleaning).

    and here it is after cleaning and sanding/paint-stripping


    Here is the topside of the gearbox tunnel cover plate (before cleaning etc)

    And here it is after cleaning, sanding and paint-stripping


    Here is the cover-plate that fits over the bell-housing (in front of the gearbox cover-plate) - after cleaning & sanding/paint-stripping

    Now to decide on a colour to paint them.....

    Harry Jnr

Page 1 of 2 12 LastLast

Bookmarks

Bookmarks

Posting Permissions

  • You may not post new threads
  • You may not post replies
  • You may not post attachments
  • You may not edit your posts
  •  
Search AULRO.com ONLY!
Search All the Web!