

 Reply With Quote
Yes, definitely valve cotters. Someone lost them down the pushrod holes I expect.
I don't recognise the other bits though.

 ChatterBox
The washer locks the oil pump pick up filter to the pump.
large nut, right hand side of the horizontal tube.
whitehillbilly
RoverLord
Yes, definitely valve cotters. Someone lost them down the pushrod holes I expect.
I don't recognise the other bits though.
John
JDNSW
1986 110 County 3.9 diesel
1970 2a 109 2.25 petrol
ChatterBox
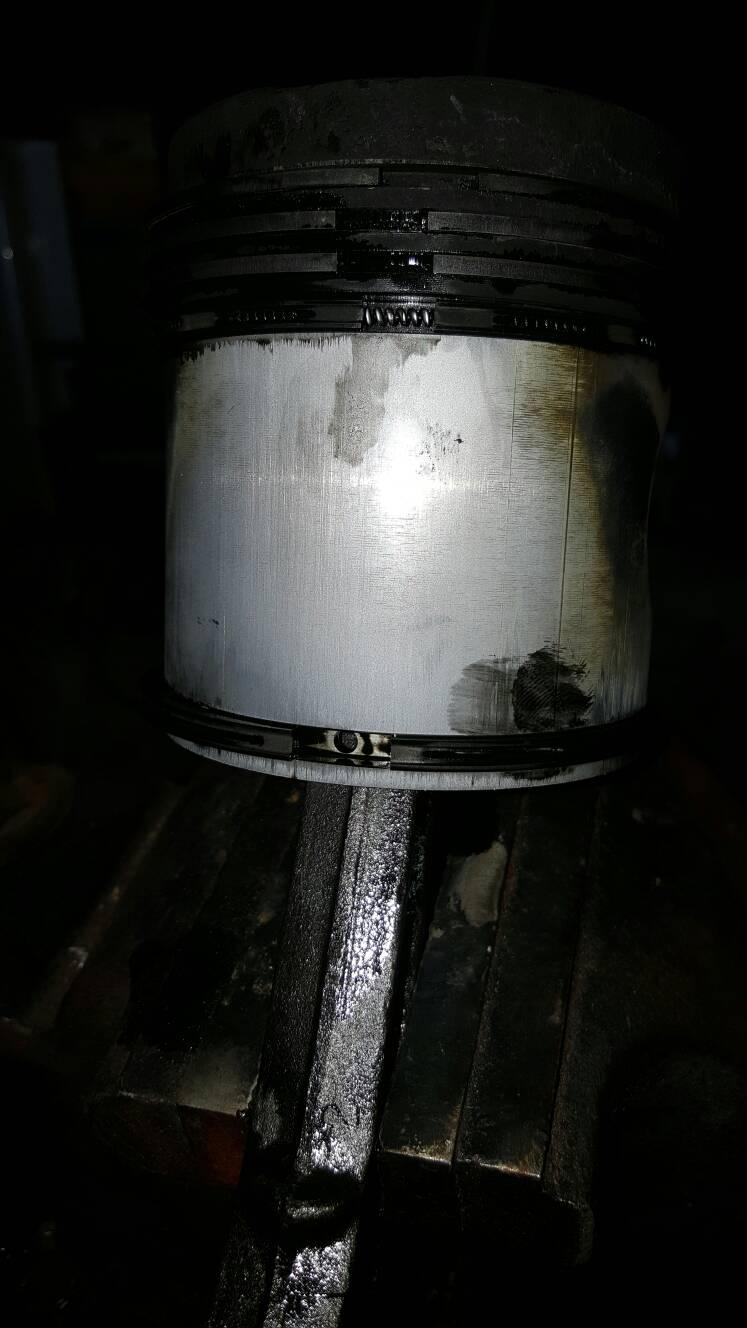
Ok bit more to the story...this evening i pulled no2 piston out, the one i had removed the bigend shells on. Well.... the not such a good mechanic saga continues. Check this pic of the piston...note the position of the ring gaps.
All 4 pistons i've pulled out are like this. The top ring was slightly off set on all of them but the ring gaps were lined up very nicely. I worky great on ingins
Hmmm...so glad i pulled it apart now for sure.
Check out these other pics...
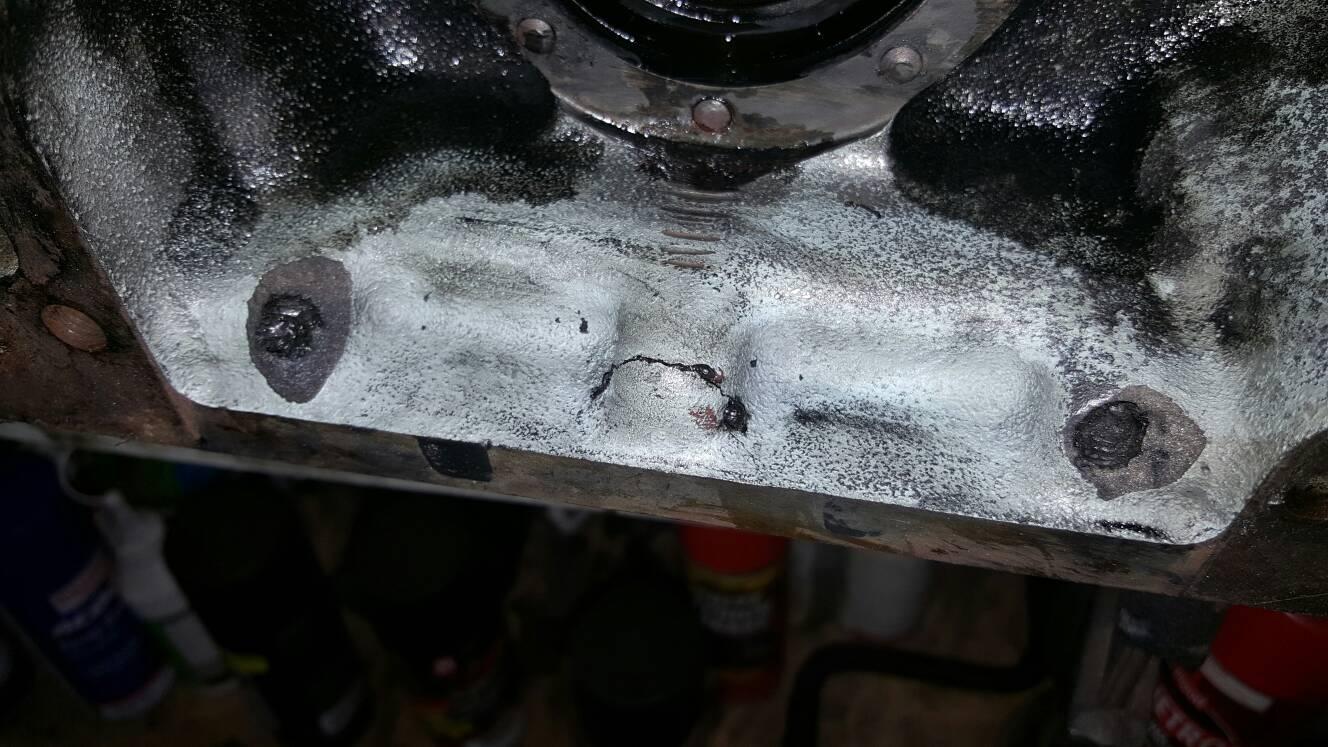
Found out where the two bits of painted cast iron came from and i know why they broke off. See the middle is cracked as well. The holes broke out coz some dipstick filled the holes with silastic and the resulting hydraulic lock up from screwing the bolts in, broke the housing on 2 holes and cracked the middle hole. I hope the petrol timing cover is the same.
This dropped out when the timing cover came off. Broken through both bolt holes.
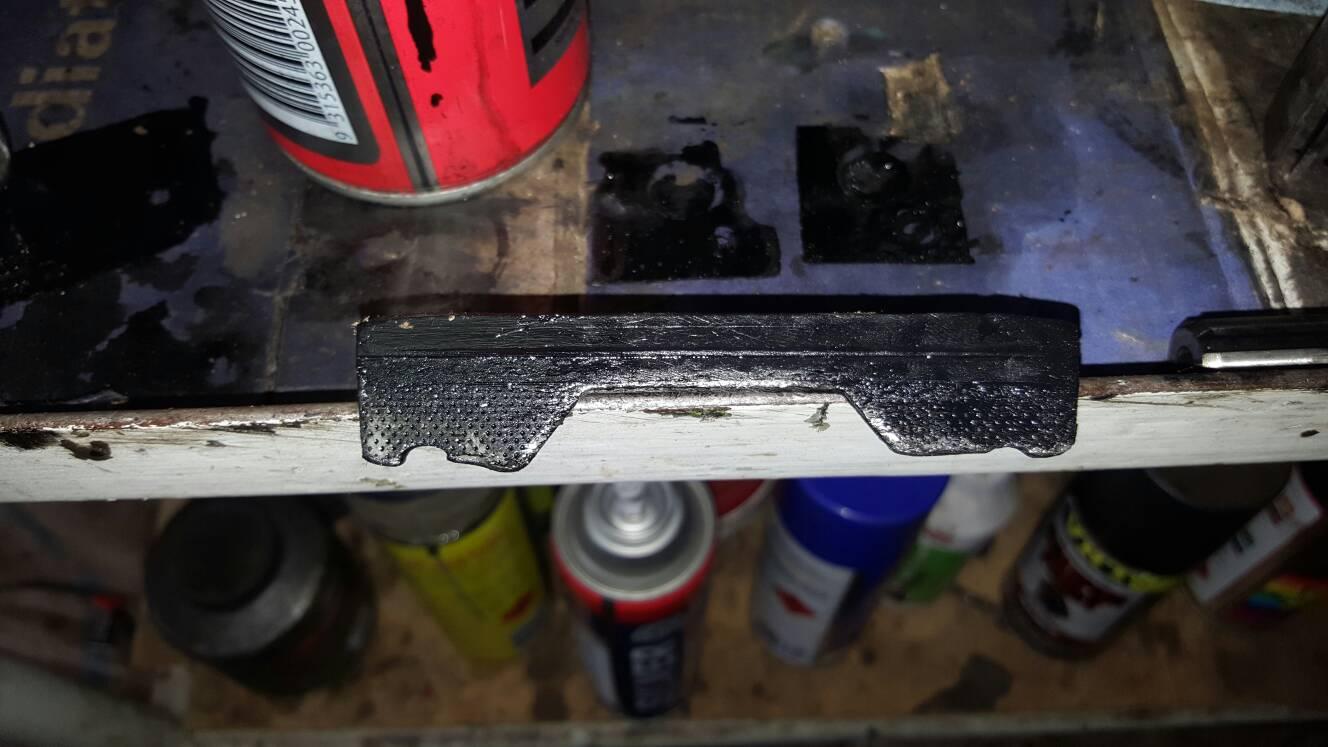
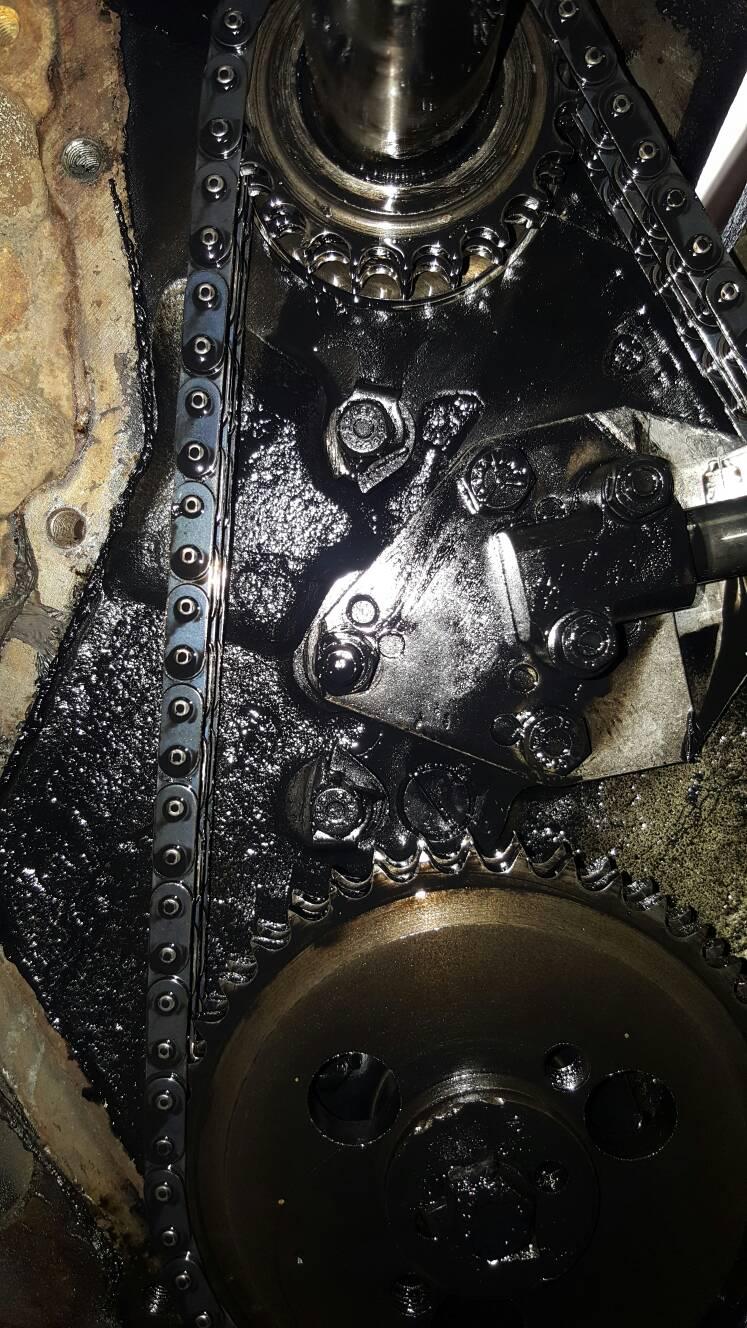
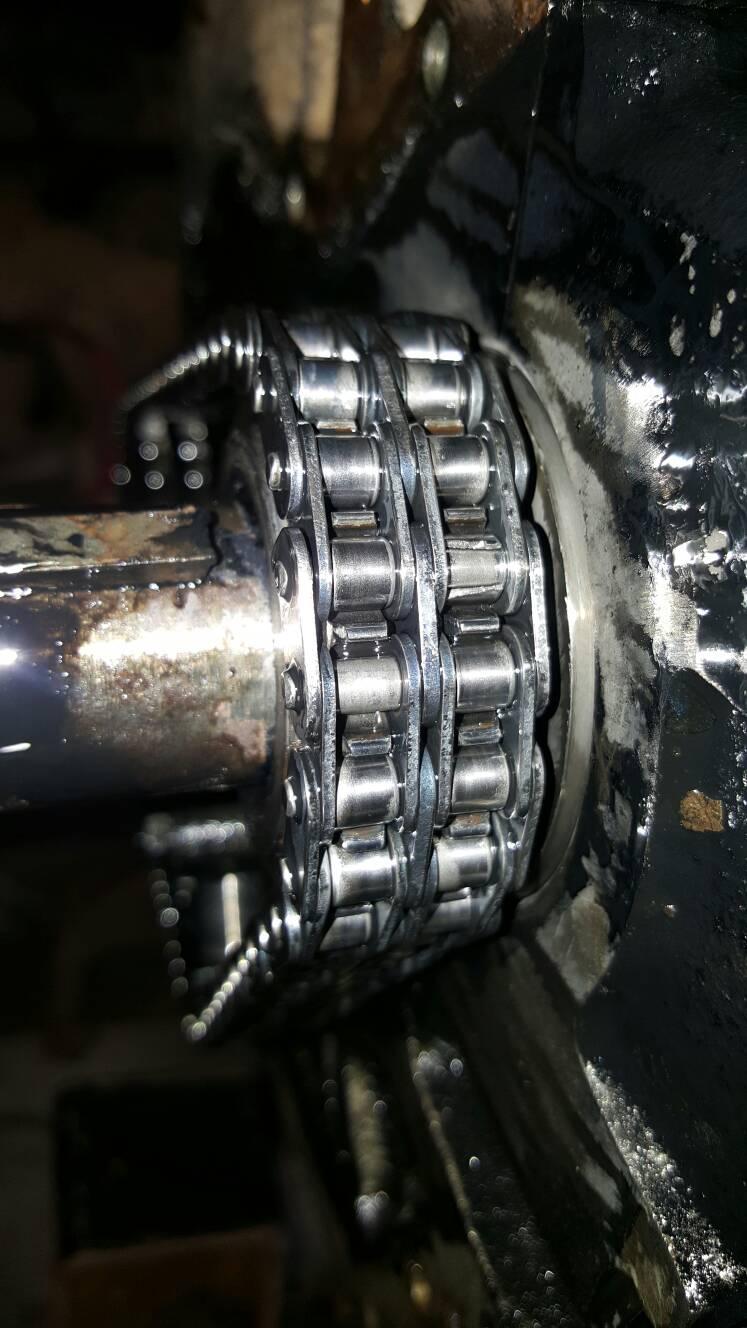
This is where to cylindrical hardened steel bits came from. I suspected as much when i found them so thats why i looked at the chain after the cover came off.
Still dont know where the lock tab came from yet. Its a bit dark now.
Well i suppose the camshaft will be pulled out in the next couple days. I hope that is ok but im not holding my breath.
I havent found out if i can get 001 mains yet or where and how much $$ to get the crank polished.
At least the rings are ok and might be used again. The ring grooves in the pistons are still clean so it hasnt done much since the bigend bearings and rings were done. Maybe a small win??
That is all for now...
Cheers Rod
Lord Jock
Gee, some rough work has been done on that engine!
He probably spent ages lining the ring gaps up?
Is that a second oil ring at the base of the skirt?
Good luck with it Rod.
Cheers, Mick.
1974 S3 88 Holden 186.
1971 S2A 88
1971 S2A 109 6 cyl. tray back.
1964 S2A 88 "Starfire Four" engine!
1972 S3 88 x 2
1959 S2 88 ARN 111-014
1959 S2 88 ARN 111-556
1988 Perentie 110 FFR ARN 48-728 steering now KLR PAS!
REMLR 88
1969 BSA Bantam B175
YarnMaster
SupporterRing gaps should be set at 180 deg to one another.
ChatterBox
Yes it is Mick. This engine has 5 rings on each piston. 3 compression rings and 2 oil control rings. A bit unusual i would have thought as there are no piston crown oil squirters usually used to cool down the underneath of the crown. I dont know very much about diesel engines just hate getting black from the oil in them. So messy.Originally Posted by mick88

Cheers Rod
ChatterBox
Having read thru the genuine s3 and s2a diesel engine workshop manuals, it turns out that the lower oil control ring was NOT fitted at the factory. The workshop manual says to leave the lower ring groove empty. Now im wondering why they leave it empty. It says NOT to fit the 3 piece type oil ring to the lower groove, just the one piece type. Why would they say that if ur supposed to leave the groove empty. Got me stuffed. Do i fit the lower ring if i get one or not??
The next thing is the chain tensioner is different to both the books. WTF?
The engine is 1975 the book is 1978. Surely the upgrades would be in the later book. Its so frustrating. Things are supposed to be right. Why cant they even get a workshop manual right. Is the parts manual right? No wonder so many ppl get frustrated and cant fix things right if the information isnt right. How has land rover lasted so long. I know im ranting but i dont like things to be wrong when they arent supposed to be
Cheers Rod
YarnMaster
SupporterHi Rod - read through your thread and must say you are doing an outstanding job given your financial circumstances and working conditions. Great work so far! With the chassis prep, I was smiling as I was thinking of doing the same thing, that is standing the chassis on its end and hosing from the top (dumb irons). Then fish oil the inside...
Your 'refresh' is spot on with mine, just getting it up and running safely without taking out a second mortgage! Its also much more doable for me as it keeps the size/cost of the project to a reasonable level.
I am also putting in a diesel in place of the original petrol, so the issues you spoke about with throttle cables and stop cables are also on my mind. I have the original throttle cable, all I need it the lever that bolts onto the throttle rod (bulkhead). For the engine stop cable, I may see if I can retrofit the petrol choke cable, but realistically its a small expense to get one and you may have the one from the donor vehicle.
The motor issues you had would have me going mad also, but I suppose they are 30+ years old with many hands trying to fix over time. Given the issues you had and me in the same situations with my unknown motor, I think I will have a closer look inside too. However, you seem to be much knowledge about motors than I do... anything below the head is very much new territory for me so I will read with interest your progress and learn from you and others posting on here.
Cheers,
Carlos
1994 Land Rover Discovery 300tdi
1963 Land Rover Series 2a 88
Youtube Channel: https://www.youtube.com/channel/UCu3...BtsNIuTyGkAo5w
Instagram: https://instagram.com/rover_tasmania/
ChatterBox
Thanks very much for ur comments and prasise for the work ive done. I would like to do more but at present im busy helping a friend with his service station as hes just had major surgery and hes recovering well. I know petrol motors very well but diesel engines are definatly a different kettle of fish to me. Im not sure how to time the pump so ive not taken it off yet. I still need to get some parts for the engine but its getting the time at the moment. I was gonna take it into work when theres quiet times and work on it but theres not much free space there and no parts washer. Anyway ill get by. Thanks again for ur kind comments. Good luck with ur build. Ill be watching urs and others with lots of interest.
Cheers Rod
ChatterBox
Hi Cap, regards the stop cable, the cable wasnt there as it had broken sk it was just a piece of wire hooked up. I believe the stop cable is located in the same posi as the choke cable. Im yet to get one. There are 2 different types as one type is used if a steering lock is fitted in a s3. The steering lock actually locks the stop cable in the stop position when the key is off. But i wont be fitting that coz the key is on the dash on my s2a. Still got to get the right one. I got heaps of crud out of the chassis by tipping it up and washing it out. This is the main reason that galvinisers dont like to galvinise old chassis coz it contaminates the tanks. Ive fish oiled the chassis and will be doing it again in summertime this year. Anyway im rambling on. Have fun with ur freshen up as i will as well.
If i can help you or anyone else with advice or anything else i will do my best.
Cheers Rod
 Posting Permissions
| Search AULRO.com ONLY! |
Search All the Web! |
|---|
|
|
|
Bookmarks