

 Reply With Quote
A large socket modified with a thin angle grinder blade will produce the tool you need for that unusual nut, or from memory you can get at it from above with a pin punch.
Cheers, Mick.

 Fossicker
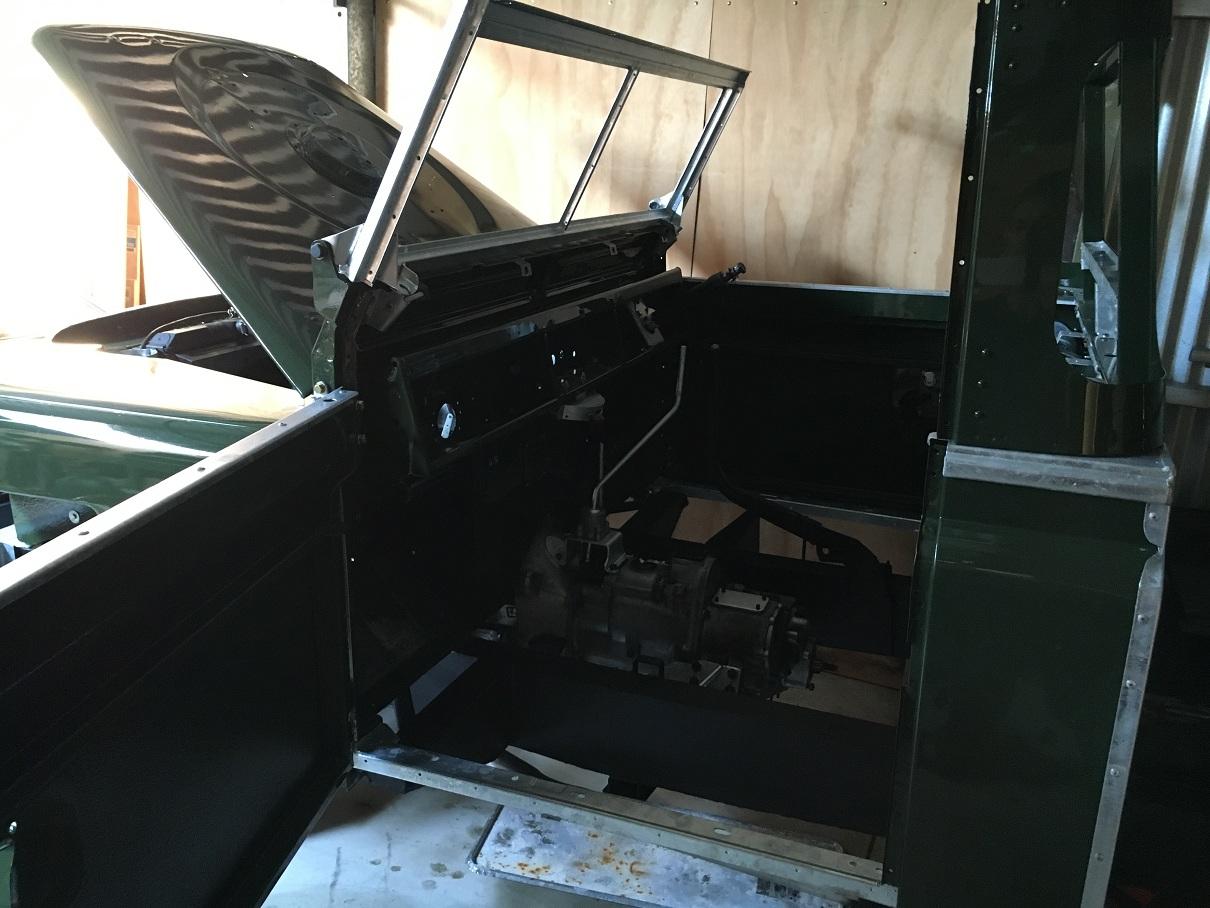
Got the windscreen frame mounted to the bulkhead, but the day was otherwise fairly unproductive. I got stuck on the gearbox and until the gearbox is in the cabin assembly is on hold.
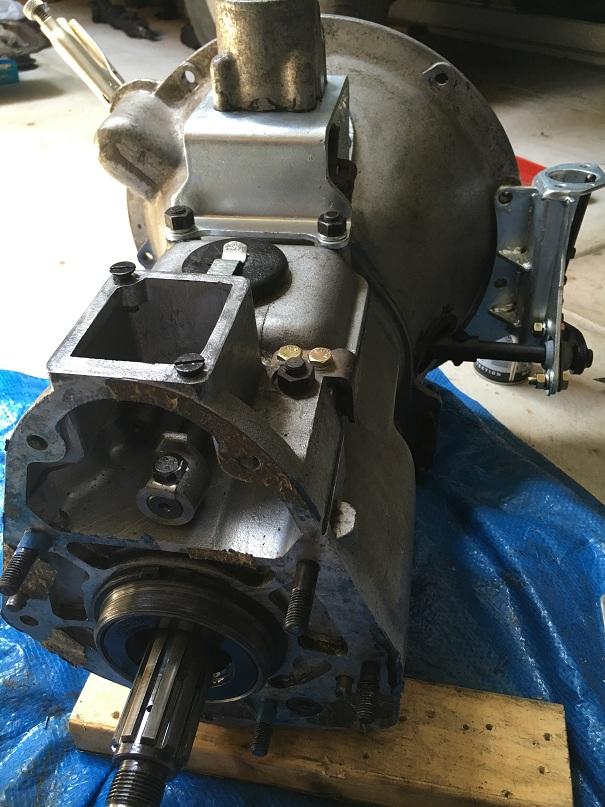
I've replaced all of the various seals in the gearbox bar the one that seals the output shaft (if that is what it is called) between the box itself and the transfer case. There is a castellated-like "special nut" on this shaft. I spent sometime trying fashion a custom tool to engage with this nut but it just didn't work out. I strained an intercostal muscle a week ago and I just cannot simultaneously hold the gearbox down on the floor and apply enough force to my breaker-bar to crack this bloody nut.
Can anyone answer for certain if it is a relatively straightforward job to assemble the transfer case onto the gearbox with the gearbox mounted in situ, to the engine? Having the gearbox mounted by itself in the vehicle would make it easy to crack this nut but I don't want to go through the trouble of installing the gearbox without the transfer case if I am only going to have to pull it out again.
Also, the stationary window glass was originally sealed to the frames with this rubbery/putty-like black tape. Can anyone tell me what this stuff is called and where I can buy it?
Cheers
Lord Jock
A large socket modified with a thin angle grinder blade will produce the tool you need for that unusual nut, or from memory you can get at it from above with a pin punch.
Cheers, Mick.
1974 S3 88 Holden 186.
1971 S2A 88
1971 S2A 109 6 cyl. tray back.
1964 S2A 88 "Starfire Four" engine!
1972 S3 88 x 2
1959 S2 88 ARN 111-014
1959 S2 88 ARN 111-556
1988 Perentie 110 FFR ARN 48-728 steering now KLR PAS!
REMLR 88
1969 BSA Bantam B175
ChatterBox
Have you bent the lock tab back on the nut first??
Cheers Rod
Sent from my GT-I9507 using AULRO mobile app
Wizard
It is possible to fit the transfer case to the gearbox with the gearbox and engine mounted in the car.
Aaron
Fossicker
Okay, thank guys..... I tried the pin punch and a 5lb hammer this morning - that did it with ease. I persevered with the tool that I made to engage with the special nut and I managed to torque it up without too much difficulty in the end. I put the old clutch plate onto the input shaft and clamped it with vice grips, turned the box on its side so that the gear lever (and my left foot) stopped it from rotating. I actually did chop up a socket to make the tool but the largest socket I had at hand had a too small internal diameter, so I welded a pair of prongs to it 180 degrees apart. It was a pain to use because with only two prongs it would lever itself off the nut if you didn't put considerable force against it.
I finally managed to get the box in late this afternoon but somewhat annoyingly I seem to have misplaced a fair number of BSF nuts. I turned the place upside down looking for 'em so I think I am going to have to conclude that they were put into a zip-lock bag that was inadvertently thrown out in one of the half dozen or so garage clean-outs since I removed the transfer case from the gearbox.
This includes all of the 1/4" BSF nuts (including two studs which had pulled out with their nuts) for the transfer case bottom cover plate and the four 5/16" BSF nuts that secure the transbrake backplate to the speedometer gear housing. So the seat box is just going to have to sit on the garage floor for a little while longer.
Fossicker
Originally Posted by 68s2alwb

I believe this is the stuff, have a reel on the way:
Black Structural Glazing Tape 3mm Thickness
Lord Jock
One of the Sikaflex products is an alternative.
Cheers, Mick.
1974 S3 88 Holden 186.
1971 S2A 88
1971 S2A 109 6 cyl. tray back.
1964 S2A 88 "Starfire Four" engine!
1972 S3 88 x 2
1959 S2 88 ARN 111-014
1959 S2 88 ARN 111-556
1988 Perentie 110 FFR ARN 48-728 steering now KLR PAS!
REMLR 88
1969 BSA Bantam B175
TopicToaster
When I have done this job in the past I use the black windscreen sealer, apply a good amount around the edge of the window frame, place the glass insitu with small rubber spacer blocks, then using rubber strips that can be bought from Clark rubber, cut a length to suit fit the alloy strips do up the screws using a stanley knife cut the off the excess rubber strip (glazing strip) and repeat to operation on the 2 remaining alloy strips and of course the same applies to the other windscreen, cheers Dennis
ps nice vehicle you have there
Master
If you use this product or Dintys suggestion could you post some pics as I have to reglaze my windscreen in the future.
Have removed glass and original sealant you described.
Car looks good, love the green in the process of doing mine the same colour
Cheers Paul
ChatterBox
I just glued my left screen in with sikaflex for windscreens. Didn't even put the alloy strips back on, on my s3. Its great and it flexes like it should and hasn't cracked at the edges like my last one did.
Cheers Rod
Sent from my GT-I9507 using AULRO mobile app
 Posting Permissions
| Search AULRO.com ONLY! |
Search All the Web! |
|---|
|
|
|
")
Bookmarks