

 Reply With Quote
Doesn't look too much worse than the factory welding on my chassis!
Does look nice and solid though
Cheers,

 RoverLord
Seems to have held up fairly well!
John
John
JDNSW
1986 110 County 3.9 diesel
1970 2a 109 2.25 petrol
Wizard
Doesn't look too much worse than the factory welding on my chassis!
Does look nice and solid though
Cheers,
Master
Thoughts from the Brains Trust please.
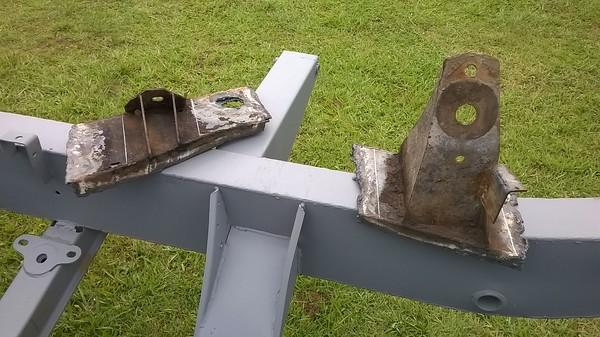
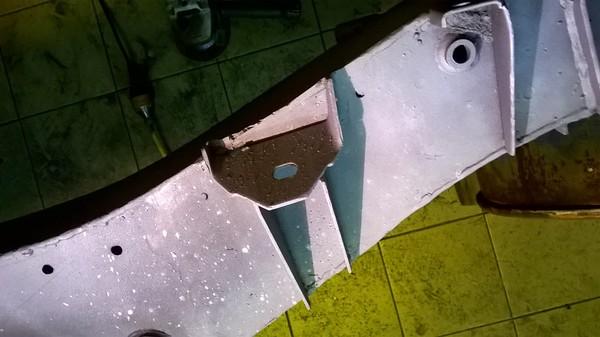
That dodgy welding on the brackets that hold the engine mounts was obviously done as part of the Holden conversion, and the left hand bracket looks to have come of a Holden itself. This means the brackets must have been moved from their original positions, and I am willing to cut them off to reinstate them but I have no idea where they should be relocated to, I assume it would need to be millimetre perfect to avoid any number of alignment/vibration/wear issues down the track.
I have searched all the usual suppliers but none seem to supply those particular chassis parts.
My thoughts are to cut the current bits out and clean it up, try to locate some replacements, then assemble the motor (when I get it back) with the gearbox and block mounts and the new bits and carefully lower it into the chassis based on using the gearbox mounting points.
This will give me the correct distance front to back, but not up and down, if that makes sense...
Anyway, that's my thoughts...
Can anyone help with -
1. Locating someone to sell me these pieces?
2. Any other suggestions on how to correctly position them for welding?
3. Anything else?
Thanks,
Peter.
ChatterBox
I think the only way you will get the original style mounts will be to cut them out of a beyond repair chassis, no point in damaging a repairable chassis. You might find the correct locations by looking in an old workshop manual. There were chassis specifications in original workshop manuals. Couple pics attatched. These are s2, s2a chassis specs from a s2, s2a manual. Hope they help you.
Cheers Rod
Sent from my GT-I9507 using AULRO mobile app
Master
Thanks Rod,
So I can see they are 835mm forward of the gearbox support crossmember, but it's blurry and I can't make out the vertical height. Is it dimension "S" = 121mm?
I have this manual for the series 1 but not the series 2 and there are chassis dimensions in there, but I don't want to take the chance it may be different.
I will chase up on the wrecked chassis idea, perhaps the HoHars can help...
Thanks,
Peter
RoverLord
Dimension 'S' is 121mm, but that is not the height of the engine mounts, it is the distance below datum of the mounting holes for the steering box/bulkhead support. The chassis diagram does not show the height measurement of the engine mounts, although it does show the plan position measurement.
John
John
JDNSW
1986 110 County 3.9 diesel
1970 2a 109 2.25 petrol
LordRover
SubscriberThanks for the PM You are doing an excellent job
We have most bits you need hereAnd can help with parts
Mrs hh
Series Landy Rescue
Parts, welding, finger folding, Storage, Painting, Fabrication, Restorations,
Our FB Page..
https://www.facebook.com/SeriesLR?ref=bookmarks
'51 80", Discovery 2, Defender 130, 101 FC + 20 other Land Rover vehicles
LordRover
SubscriberWas nice meeting you todayLooking forward to seeing at one of the SLOw Club meetings
Mrs hh
Series Landy Rescue
Parts, welding, finger folding, Storage, Painting, Fabrication, Restorations,
Our FB Page..
https://www.facebook.com/SeriesLR?ref=bookmarks
'51 80", Discovery 2, Defender 130, 101 FC + 20 other Land Rover vehicles
Master
Thank you Mrs HH,
It was good to meet you both, and if anyone could use welding tips it'd be me.
A fascinating place you have there, sort of like Willy Wonkers Chocolate Factory for roverphiles... so many bits I need...
The parts Harry gave me have been prepped and sandblasted and hopefully installed this week. I'll post pics of the results when I'm done, providing my welds are suitable for public examination.
Peter.
Master
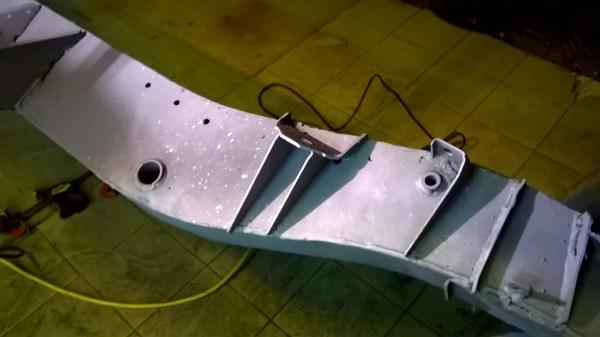
Right! Job done. So here's some pictures as promised.
When I arrived at the HoHars Harry was busy with the gas axe cutting these out of a sad old chassis
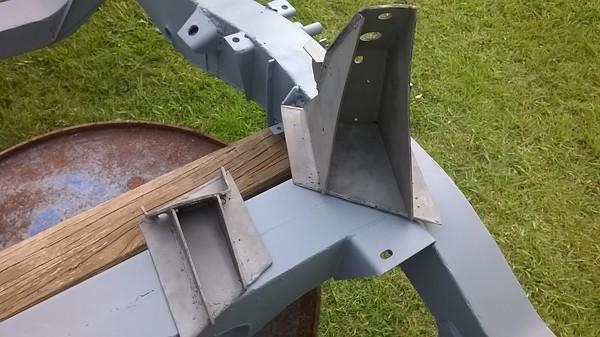
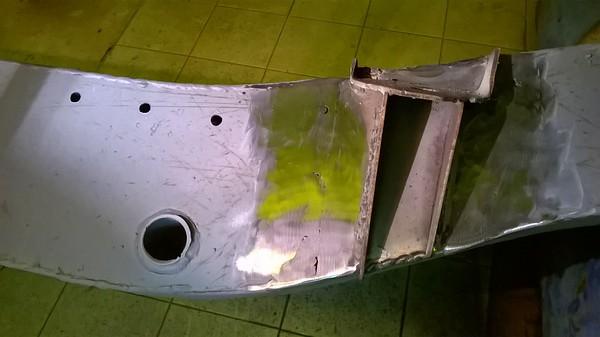
I trimmed them up and gave them a hit in the sandblaster, then removed the old mounts and ground them back.
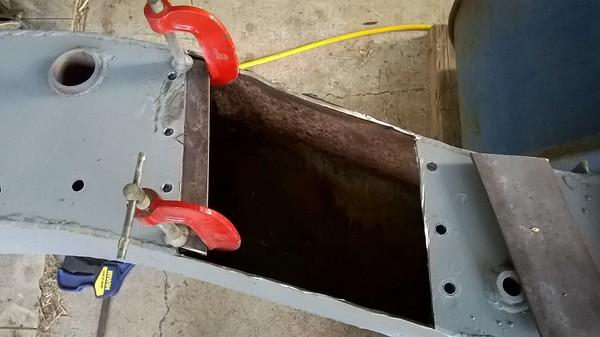
I put a string line between the gearbox mounting holes and using a metre ruler clamped to a square, I could clamp the new bits exactly 835mm from there as per the Workshop manual diagram.
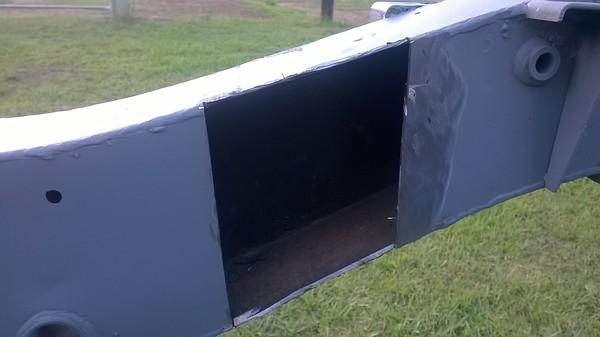
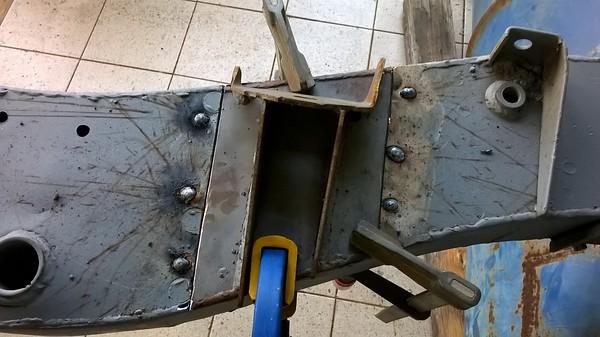
Then it was just a matter of cutting down each side and removing the offending piece.
I drilled three 1/4" holes down each side, this allowed me to attach some backing plates, this has the dual benefits of adding strength to the join, and helping me to not blow gaping holes with my welder (thanks for that tip Harry)
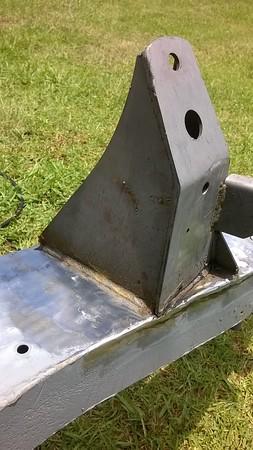
So from there. I welded, ground back, welded some more, more grinding, clean up with the flap disc, and a touch of primer...
Looks pretty good to me and I know it's a lot stronger than it was.
I'm lucky I picked a Series Land Rover to restore, and lucky to be only a half hour from a place like the HoHars. The sheer number of these vehicles that were produced virtually unchanged for so many years means even the oddest parts can be found out there somewhere. And the uncomplicated nature of the construction means a numpty like me can even make a decent job of it.
Peter.
 Posting Permissions
| Search AULRO.com ONLY! |
Search All the Web! |
|---|
|
|
|


Bookmarks