

 Reply With Quote
New chassis? Actually I have a spare chassis that could be used to supply necessary bits, but I am a bit far away. In my opinion, your best approach would be to find a chassis with the necessary bits still OK, probably somewhere inland.
John

 Fossicker
Hey all
Whell I have been slowly working away on the rover in between work, sleep and family and have got a few more jobs done.
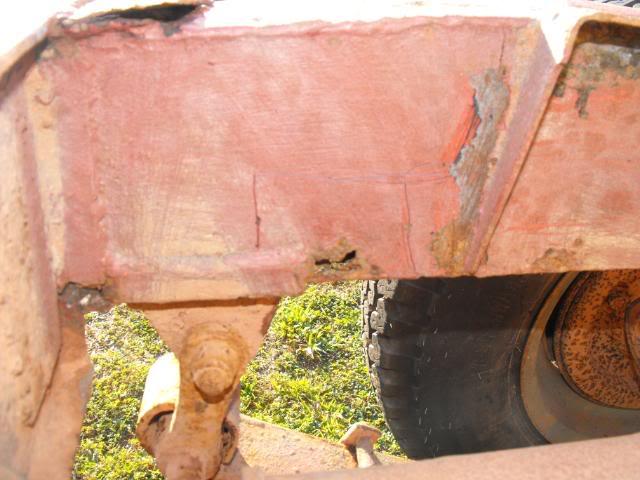
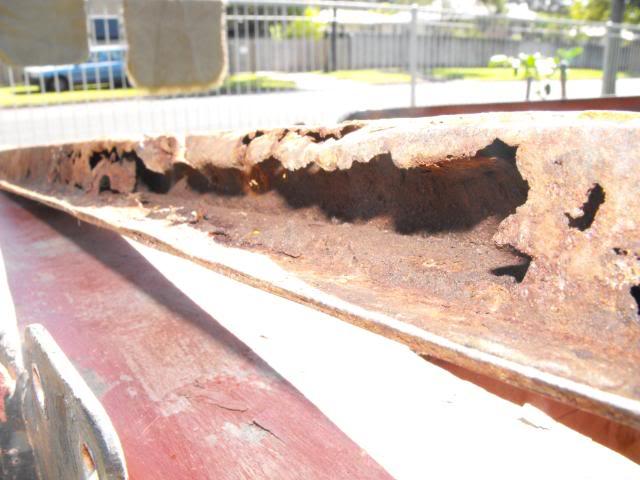
have given the rear of the chassis a good scrub with the wire brush and found lots of flaking paint and surface rust but allup its preaty good realy.
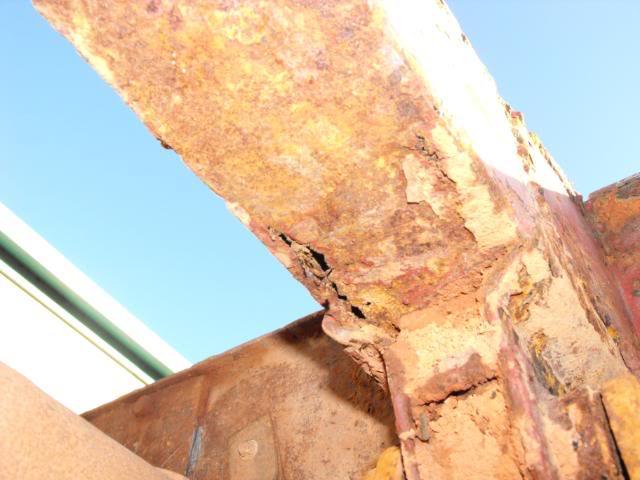
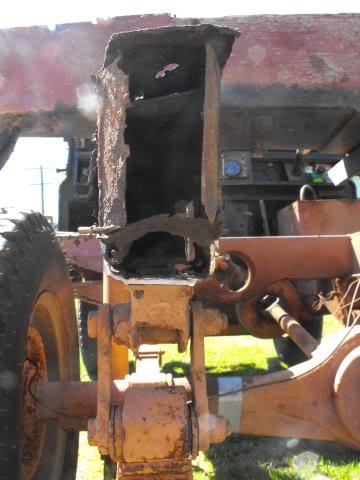
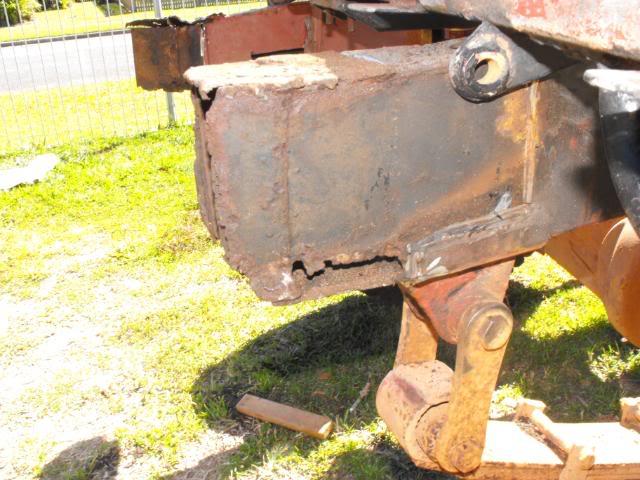
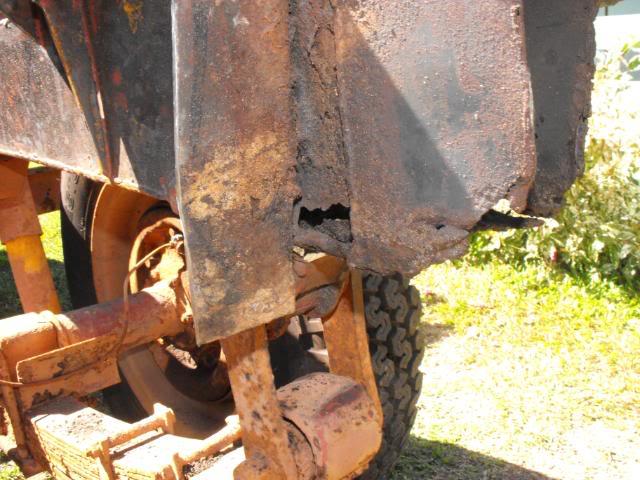
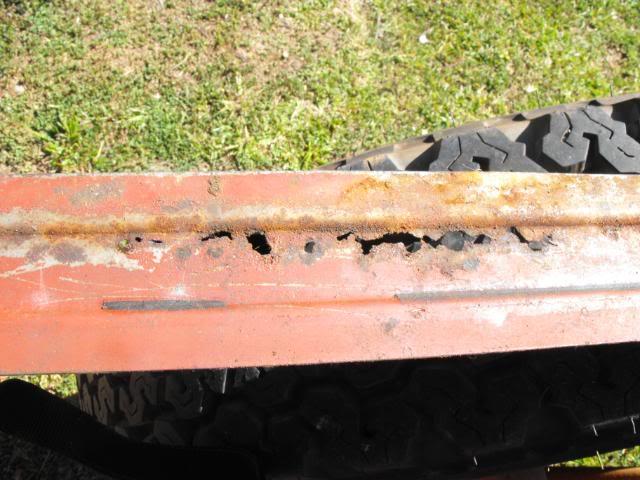
there was only one rust hole on the pasenger side above the rear spring hanger.
So I got out the grinder and started chopping only to find the rot went right back tu the rear cross member that had been replaced by the p/o at some point. so off it came.
Passenger side
Drivers side
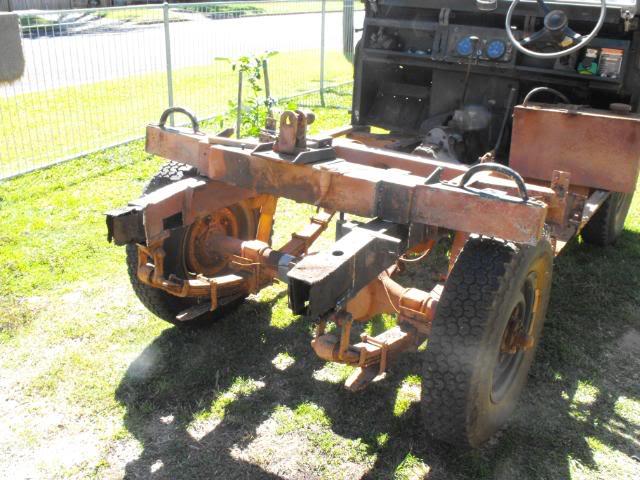
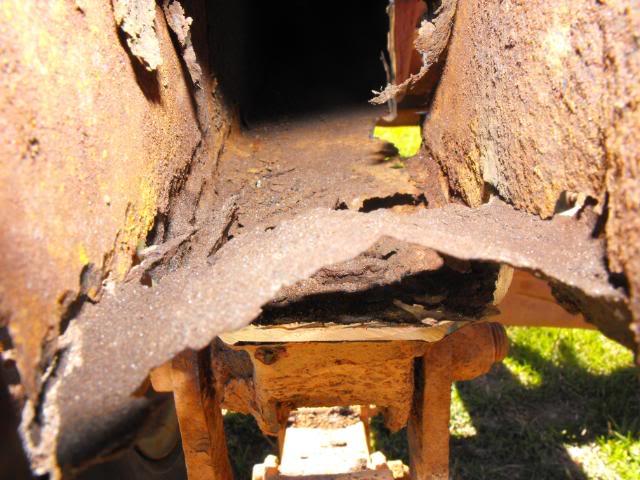
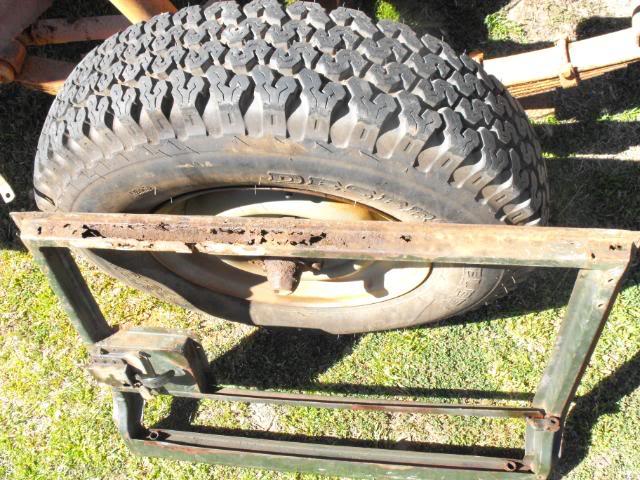
The crossmember itself is ok but have removed about 10 kilo's of dirt out of it.Now the truck has sat for atleast 18 months before I got it and the dirt was still WET.
So thats where Im up to now. Am sourcing some steel, have got to get new spring hangers and just bought a welder, all I need to do now is come up with a plan of atack. Any ideas?
Cheers
Joel
RoverLord
New chassis? Actually I have a spare chassis that could be used to supply necessary bits, but I am a bit far away. In my opinion, your best approach would be to find a chassis with the necessary bits still OK, probably somewhere inland.
John
John
JDNSW
1986 110 County 3.9 diesel
1970 2a 109 2.25 petrol
Fossicker
Hello again,
Well I had some time to work on Matillda after nite shift last week and was looking for a quiet job to do at 2am, so desided to deskin the drivers door. It was a nice easy job, I took my time peeling the skin back and lucky for me most of the rivets were long gone.
Pics were taken the next day, only the bottom of the frame is rotten. Have cot some duragall sheet and have a guilotine and folder at work so will make a new bit for that.
On a different note the drivers door top is missing, so dose anyone know of a landy wrecker/part horder in north QLD?
Cheers
Joel
Fossicker
Cheers John I may take you up on that but will see how I go localy first. As the rest of the chassis is ok I was hoping to save it. the rot is realy only in the bottom of the chassis where the spring hanger is. Im thinking if I cut that bit out and replate it I can save the top half. Whilst the cross member is off I might atatch some 12mm plate to the chassis and extend out through the crossmember to make some rear recovery points. should be stronger than the tow bar atleast.Originally Posted by JDNSW

YarnMaster
I think your chassis is quite saveable and you have started your investigation well and with a sensible approach.
If you intend to remove the bulkhead, engine, axles, etc. then you may well find more rust under the front spring hangers. Use a hammer and centre punch to check that there is solid steel in all places especially under the reinforcing plates where the re-bound rubbers sit. If you strip the chassis you can then turn it over to make welding repairs easier, however, it may be easy to weld anyway without stripping.
For the rear hangers I have used the following approach:
1. Scribe a line up from the vertical edges of the hangers with a scriber and rule to the top of the chassis and centre punch identifying marks on the line so that it doesn't get lost later.
2. Centre punch the chassis where the top corners of the hanger are - these may be useful reference points for later when the hanger goes back on. Make a jig that has a length of rigid steel with two bolts welded on the ends that will fit into the front and rear spring hanger eyes when the spring has been removed. This will ensure that the hanger goes back in the right place.
3. Remove the hanger and inspect closely. On my car I de-rusted it in molasses and built up the thin metal with pad welds before putting them back on the car, which saved the hassle of finding new ones. I did one side at a time leaving the other side for reference. If the forward hanger on the rear needs replacing, do it after the rear one has been repaired/replaced.
4. Make new repair patches for the sides of the chassis before you cut the rust out so that you can be sure that they are the right size and shape. Use mild steel of the same thickness as the original. On the S1 it was 2mm; yours may be thicker, so measure a clean unrusted part of the chassis with a vernier caliper, or micrometer. I like to make a cardboard template first so that I know it will fit.
5. Tack the repair patches into place on the vertical sides - depending how powerful your welder is you may need to leave a gap so that the weld can penetrate; practice on some offcuts first until the weld comes through to the back and your test piece survives a 180 degree bend in the vice. Remember that good welds can only be done on bright and shiny steel in this case, so sand off paint and rust and degrease with prepsol if necessary. The toe of a file can be handy for cleaning inside the chassis at the back of the weld.
6.When the two side patches are in place clamp them together with a suitable spacer in between to control distortion - I used a piece of timber
7.Weld the patches in short stages, I did mine in 20mm beads to control distortion and I let them cool before doing the next one. Spread the welds out evenly across the repair so that the heat isn't concentrated in one place. Use vertical down welds on the vertical faces.
8. Make the bottom patch, which will be a rectangle, and tack it at the forward end. If the bottom of the chassis is curved, shape the patch with a hammer and tack it 25mm away and so on, down to the end of the chassis.
9. When the patches are in, locate the spring hanger using the jig and punch marks and weld it in place using longer welds but being mindful to spread the heat as evenly as possible.
Then you can start on the other side
Cheers Charlie
Fossicker
Chazza
Mate thanks heaps for the advice I would never have thought of a jig, great idea. I will keep everyone updated as the repairs proceed, albeit slowly.
Cheers
Joel
Fossicker
Hello again.
Well its time for another update. I have not had much time to work on the landy of late but have decided that the best way to repair the chassis is to strip it down compleatly so I can turn it upside down.
So I have started to strip the bulkhead in preperation for removal.
First up I started to lable the electrics for the engine.
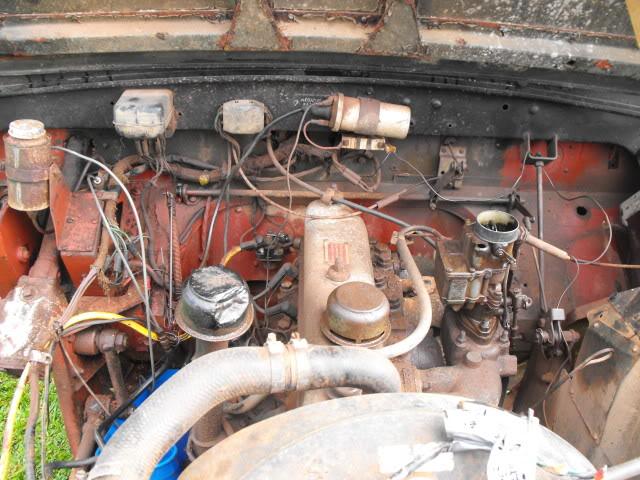
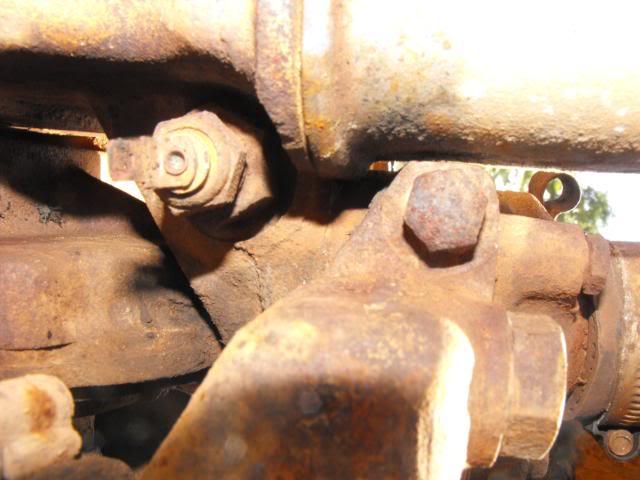
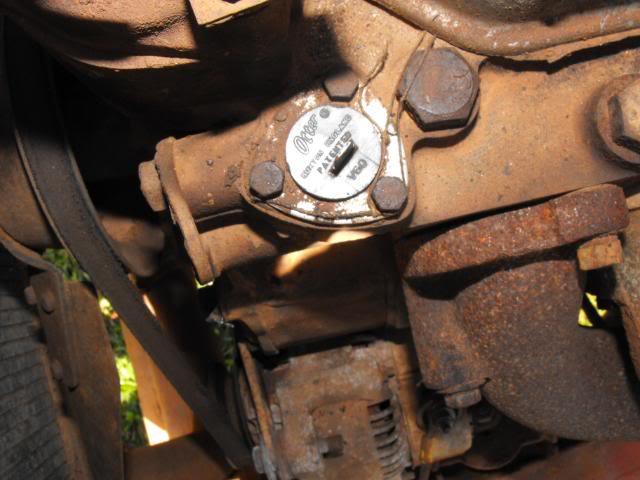
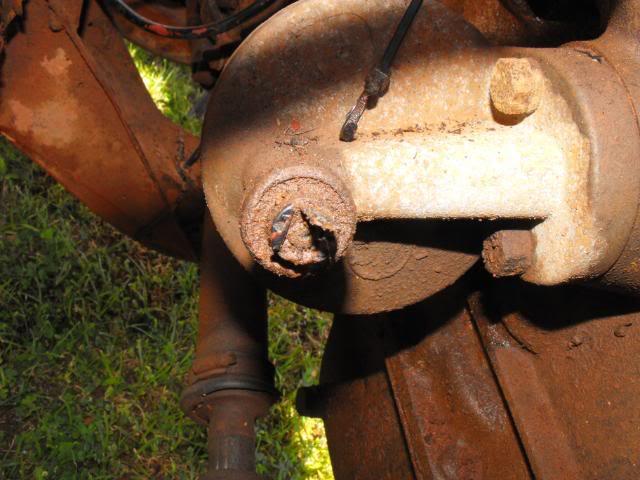
Now I have a question for the series experts. Is there 2 temperature senders for the 2.25 petrol engine?
I have found 1 under the thermostat housing that looks like a normal sender
and another that is located on the front of the head near the manifolds.
Is that a head temp sender?
I dont think its the oil presure sender as that is on the oil filter housing?
Any help would be greatly appriciated.
Cheers
Joel
Swaggie
By the way that holden carby fuel bowl should be pointing towards the front of the car
Although the carby is the least of your problems
Master
The one on the top of the engine at the front is a dolphin switch which is part of the choke warning light system. You only need it if you want to reinstate the choke warning light.
Peter
Fossicker
Hey all
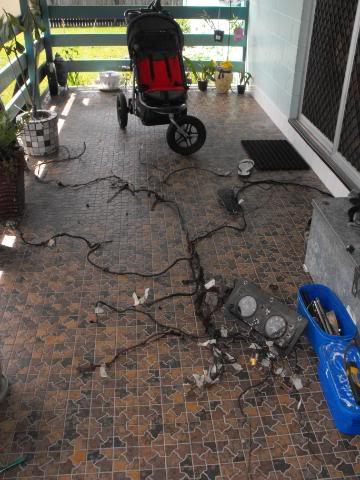
Well had some moretime to work on Matillda this week and got the rest of the eletrics stripped out. spent quite allot of time labelling all the conections so I can put it back together and hopefully it will still work.My plans are to make a new loom for the old girl but have kept the old loom as a template.
Any way here are some pics.
Here is the old loom. I didn't think there would be so much wire in such a simple truck.
Instuments all stripped out.
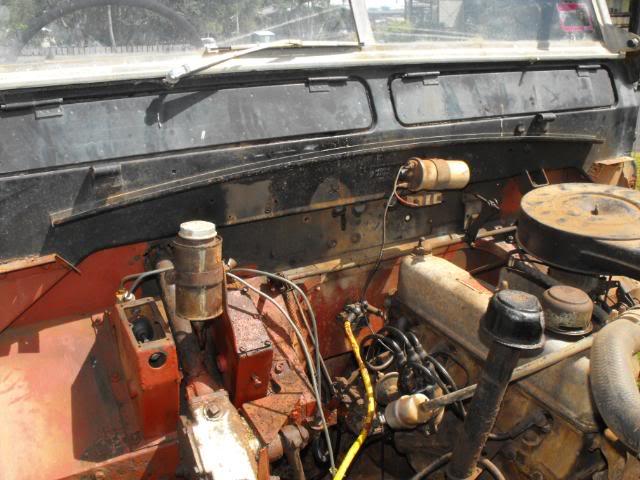
Just the coil and starter solinoid to go. I left that in so I can still drive her arround the yard
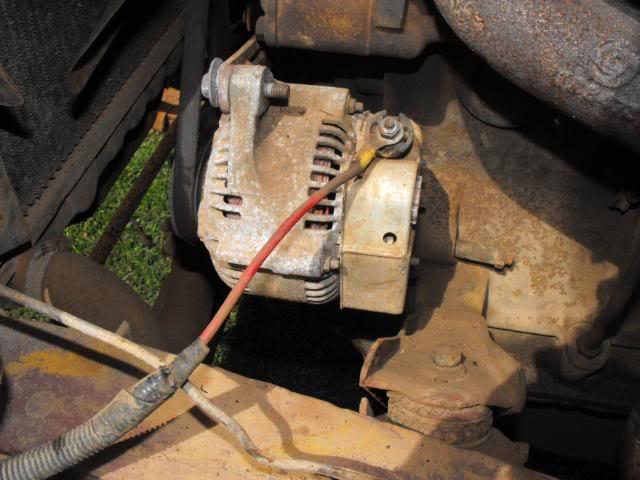
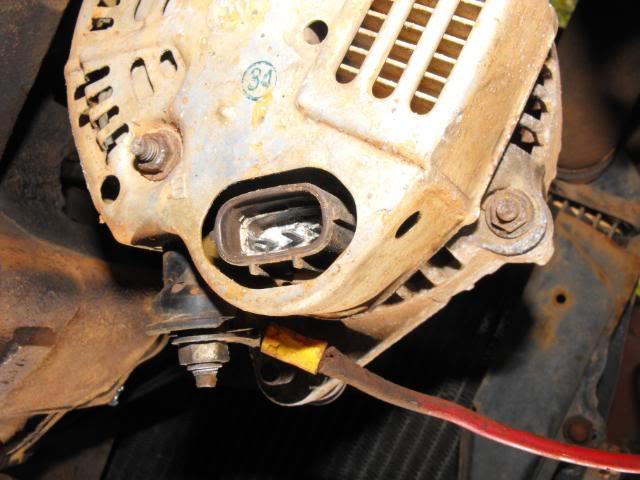
I dont think that this is the origional alternator as the main feed to the regulator had been cut and a nice fat feed hooked strait to the bat. The charge light never worked so I may havesome drama when I put her back together.
Dose any one have a wiring diagram for a 2a petrol as i want to get rid of the old regulator, but of cause I have much more prseeing issues first.
Next job, windscreen, pedel boxes and hydrolics then the bulkhead can come off
Cheers
Joel
 Posting Permissions
| Search AULRO.com ONLY! |
Search All the Web! |
|---|
|
|
|
")

")

Bookmarks