Results 1 to 6 of 6

Thread: Wiring for onboard compressor?

  1. #1
    Join Date
    Oct 2007
    Posts
    370
    Total Downloaded
    0

    Wiring for onboard compressor?

    After a bit of help here please.

    I'm in the process of converting my portable ARB compressor to onboard with air tank (in my Puma 110). I also have a 40L Engel fridge. The fridge wiring comes off the 2nd battery as installed by an auto leccie. If possible, I would like to splice the compressor supply into the wire from the battery (to minimize the number of wires clamped to the battery). I know there will be plenty of people with good electrical knowledge there, and ask if anyone could tell me the following please...

    1. For a start, is this idea OK? If so,
    2. What amp wire should I use from the battery to the junction of fridge & compressor wires. (Compressor has 40 amp fuse inline, not sure on 40L engel)
    3. Is soldering the junction OK & then heat shrink? Or would some sort of junction box be better?
    4. I haven't checked if fridge has an in line fuse, but it does have one at the fridge itself I think.
    5. Is there any way to tell what amp rating the existing wire from the battery to fridge is? Eg, diameter of wire under insulation??

    Also, does anyone have any suggestions where I should mount the air snap connect on the wagon?

    regards
    Brid

  2. #2
    dmdigital's Avatar
    dmdigital is offline OldBushie Vendor

    Gold Subscriber
    Join Date
    Jun 2006
    Location
    Arnhem Land, NT
    Posts
    8,492
    Total Downloaded
    0
    The fridge only draws enough to need a 10A fuse. If the wiring is standard Engel kit and has the Engel plug mounted then it will most likely have the 10A thermal fuses in line (10A) on both +ve and -ve at the plug end unless whoever fitted it removed them. There should be a 10A or 20A fuse inline near the battery if the Auto Elec has done their job well.

    The compressor draws a lot more current than the fridge (probably between 20A - 30A) and I would be wiring this directly to the main battery with a much heavier wiring (at least 6mm2). There is plenty of room to terminate additional cables onto the +ve battery terminal and the -ve is easily terminated on the earth point directly under the battery box on the chassis.

    Be very interested to hear how you go with this as I've considered getting an air tank and fitting my compressor on board my Puma. Where did you get the air tank from? I priced some and nearly fell over when they told me how much.
    MY15 Discovery 4 SE SDV6

    Past: 97 D1 Tdi, 03 D2a Td5, 08 Kimberley Kamper, 08 Defender 110 TDCi, 99 Defender 110 300Tdi[/SIZE]

  3. #3
    Join Date
    May 2002
    Location
    Heathcote (in "The Shire")
    Posts
    5,348
    Total Downloaded
    0
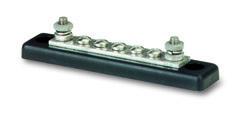
    Why not a heavy feed to something like this


    Whitworths Marine: Bus Bar - 2 Stud 5 Screw


    Martyn

  4. #4
    Join Date
    Jan 1970
    Location
    Melbourne, outer South East
    Posts
    2,283
    Total Downloaded
    0
    I agree with the above posts, install separate 6 sq mm minimum wiring for your compressor, or upgrade your fridge wiring to red and black 10 sq mm (that's about the thickness of a pencil ) from the battery to the point you want to splice - You'll need a heavy fuse at the battery ( maybe 40 amp ) then suitably rated fuses to each device. ( 20 or 30 amp for the compressor and 10 amp for the fridge )

    Also the switching side for your compressor ( both on/off and pressure cut off switch ) should operate a 40 amp rated relay which then switches the high current supply.

    Splicing and soldering thick to thin wires and then taping or heatshrink over is OK ( providing you can do a good solder joint ) but a distribution box/fuseholder is probably more practical.

  5. #5
    Join Date
    Oct 2007
    Posts
    370
    Total Downloaded
    0
    Thanks DM, Bushie & Wayne

    That all sounds like good advice, which will be very helpful.

    I am using an expired gas BBQ cylinder, which is in good condition, and has a high pressure rating (3.3Mpa or 458 PSI), so it'll handle the 100PSI compressor cut out rating very comfortably. I have fabricated a bracket to locate it off the chassis outrigger under the RH passenger floor. I welded the bracket direct to the gas bottle bottom ring, and top valve protector/handle, & then bolted to outrigger.

    Prior to welding onto the bottle, removed the valve & was surprised to find about 100mL liquid "gas" still there after being vented to empty for some time. It evaporated as soon as I blew some compressed air at it, so it was definitely liquified gas residue. I filled with water prior to welding.

    This one holds 7L exactly (as measured by the water taken out after), so it should be reasonable useful.

    At this stage, I won't fit a drain cock immediately, rather remove & drain at regular service intervals, as it won't get an enormous amount of use. I may do so later on, by which stage there will be no trace of any old gas residues, and will be safe (or me game enough) to weld directly onto the bottle itself.

    I love these sorts of projects, and Defenders lend themselves to them so easily.

    I'll post some pics when it's finished, but thanks for the advice.

  6. #6
    Join Date
    Jan 1970
    Location
    Melbourne
    Posts
    2,972
    Total Downloaded
    0
    I've got an ARB compressor in the Defender for the air lockers, but being the older type, I found it painfully slow for tyre inflation, so have now installed one of the AirBoss continuous duty cycle ones from Hobzee (ebay - Melbourne). I've put a heavy duty fuse in line, but it's a fragile piece of copper / plastic, so I will replace it with a 50amp circuit breaker from jaycar for $25. I've decided to run battery cable right to the compressor, given it's h/duty draw, and then use Earth (-ve) to switch it ON / OFF. That way the switching circuit doesn't need to be complicated with fuses. I'm about to put in a small air tank, but don't know whether it would be enough to seat a tyre or run air tools, but at least it will build up a reserve of air as I go from one tyre to the next.

Tags for this Thread

Bookmarks

Bookmarks

Posting Permissions

  • You may not post new threads
  • You may not post replies
  • You may not post attachments
  • You may not edit your posts
  •  
Search AULRO.com ONLY!
Search All the Web!