


 Reply With Quote
The hole in the tin sound proofing cover can be left open without any worries,you can fit a rubber grommet if you like though.

 TopicToaster
Subscriber
TopicToaster
SubscriberGeez - its been 3 weeks since I last did an update...
I've done quite a bit of work on it but not a lot of visual progress (as usual).
rar110 got a filter spacer and I made another one for myself..
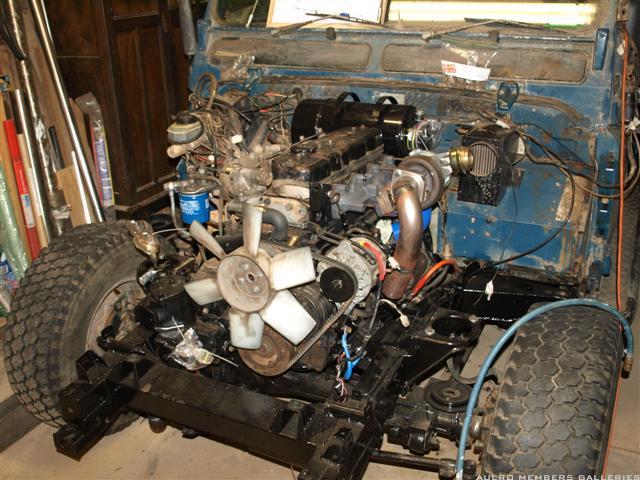
Engine is back out of the car, engine mounts fully welded and just waiting for the engineer to come back from holidays to give me the OK before I paint them and the front half of the chassis.
Had the flywheel machined, and fitted new genuine clutch plate and the turbo pressure plate (Isuzu). Christmas is an expensive time of year
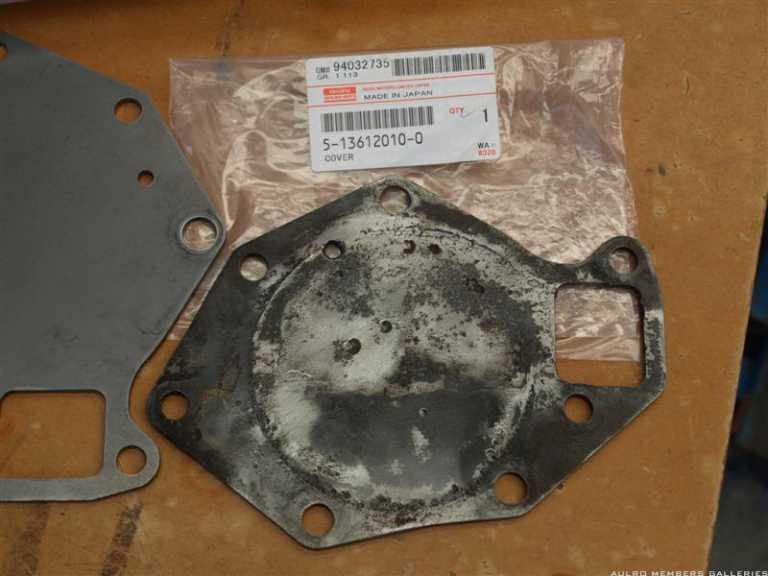
Removed the water pump to give it a good clean up and fit new gasket etc. Found that the cover plate on the back of the pump was corroded about half the thickness (cant really see in the photo) - was going to repair it but a new one was only around $20 so just replaced it.
Nice new one on the left.
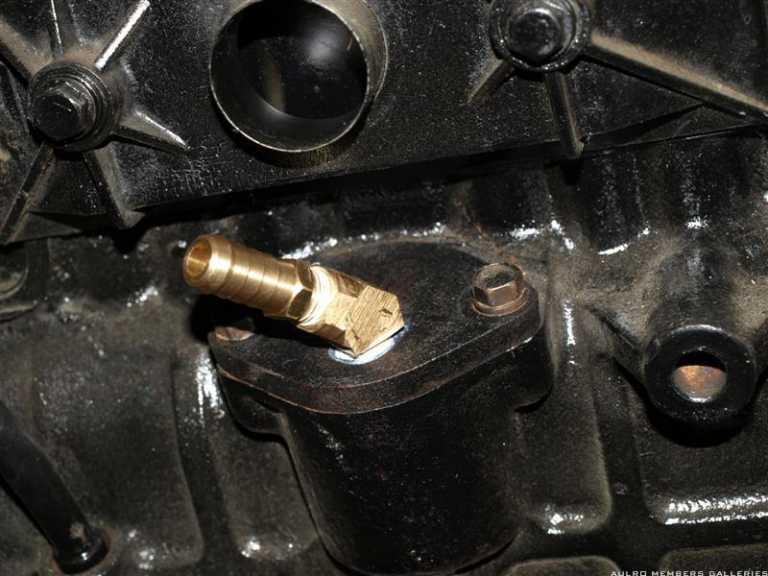
Drilled and tapped the oil pump cover plate for turbo oil return:
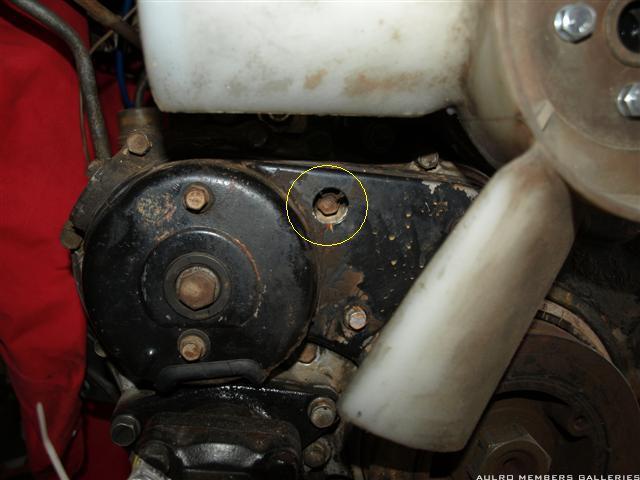
BTW - is this hole in the front cover meant to be open or filled with some sort of plug?
Been painting a few bits and pieces - gearbox mounts, P/S box, crossmember etc. Used Penetrol as a sealer then used it as a flow agent in the paint. Gives a great brush finish (looks like its been sprayed), and brush painting enamel at over 30degC with no dramas is awesome.
First time I've used it, but pretty impressed so far.
This week I stripped my other LT95 in preparation for a rebuild.
But that's a project in itself ...
Steve
Master
The hole in the tin sound proofing cover can be left open without any worries,you can fit a rubber grommet if you like though.
TopicToaster
SubscriberAt this stage that's where I'm going to hook the provent up to.Originally Posted by THE 109

I would have thought there wouldn't be enough crankcase ventilation with it blocked and only the small vent on the rocker cover though?
Steve
Swaggie
THE109 is talking about the front cover. Mine has a grommet.
Re the breather - do not block the side vent unless you fit a turbo tappet cover. The na cover has an 8 mm breather, the turbo has a 19 mm breather. If you want to keep it standard and use the 8 mm breather and side breather, I have a brass T I made for mine which you can have.
TopicToaster
SubscriberThanks - and ignore my dumb previous post. Maybe I should re-read my own posts before replying(and thanks Isuzurover for putting me back on the right track).
Steve
TopicToaster
SubscriberAlmost ready for the engine/gearbox to go in for real.
Front half of the chassis cleaned, a coat of penetrene, and painted with chassis black.
Also replaced the front diff pinion flange and seal while access was easy:
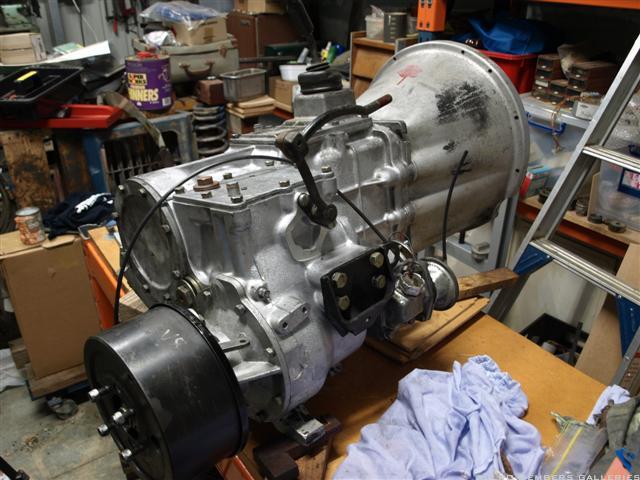
Gearbox rebuild completed:
Still have to treat a few minor bits of rust in the firewall and put some soundproofing on it, but will do that once the engine's back in as the engineer wants to have a look at clearances etc with engine fitted.
Steve
TopicToaster
SubscriberFinally fitted the motor and gearbox for real (and not planning to remove them any time soon)
Had a bit of a false start as I forgot to fit the clutch pushrod before I bolted the gearbox up to the engine. Didn't realise until I had it almost in place in the car. You CAN fit the pushrod in situ, but if you're stupid enough to drop something in the hole - you CANT get it out again without splitting the motor and box
Gave the starter motor a freshen up with new bearings and brushes.
Fitted a new 1" diameter clutch slave as I realised that the old one from the 200tdi was only 7/8".
Master cylinder has previously been sleeved with stainless so just put a seal kit in it. Wasn't planning to touch it at all but noticed there was a fair bit of gunge in the bottom of the reservoir when I let the fluid drain during the slave change - and I didn't want to end up with the gunge in the new slave.
Engineer has visited and is happy with what I've done so far. Doesn't want to see it again until its all complete and running.
Hmmm ........ felt that way myself a few times recently
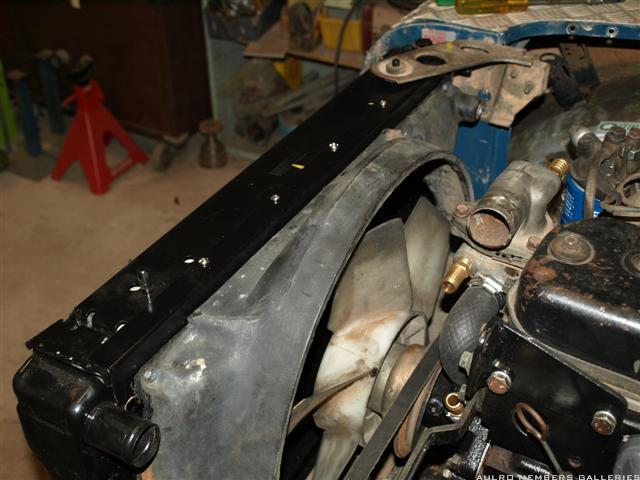
The Stage1 Isuzu fan cowl I've got fits nicely (with some minor trimming) - just needed a bit of a support angle made up as its shorter than the 110 radiator. The angle bolts to the cowl and sits on top of the radiator, attached by some screws through the top support plate. Radiator core is only about 2/3 the thickness of the surround so plenty of clearance on the screws.
The new front prop shaft I got is **just** binding on one lug of the rear uni when the suspension is fully extended. Think it only needs to be rounded off very slightly on the edge to clear. Could also be that the longer Stage1 front output housing (compared to 110/RR) is contributing to a slightly increased shaft angle.
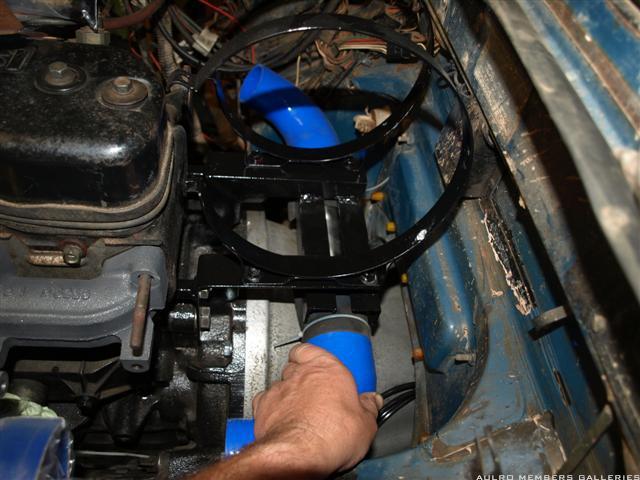
Made up a turbo crossover pipe that goes under the airfilter bracket behind the engine. Planning to put a WTA intercooler there eventually, so just made up a dummy pipe the same diameter and length as the I/C so the rest of the plumbing doesn't have to change when I fit it.
Steve
TopicToaster
Looking good Steve!")
Cheers......Brian
1985 110 V8 County
1998 110 Perentie GS Cargo 6X6 ARN 202516 (Brutus)
ForumSage
SubscriberHave to agree with Brian - looking good.
re the cross over pipe position - have you considered the dust dump on the air cleaner? I am thinking of cutting my dust dump off when I install the intercooler under there. I took some measurements re the location of the air cleaner relative to the bonnet. It looks like I can lift the air cleaner 50mm before being anywere near the bonnet, making more room for intercooler under it. The only issue is the extra leverage/stress on the angle brackets supporting the aircleaner. I think bracing and beefing up the bracket will fix that.
L322 tdv8 poverty pack - wow
Perentie 110 wagon ARN 49-107 (probably selling) turbo, p/steer, RFSV front axle/trutrack, HF, gullwing windows, double jerrys etc.
Perentie 110 wagon ARN 48-699 another project
Track Trailer ARN 200-117
REMLR # 137
TopicToaster
SubscriberI'm running a modified Fleetguard housing, and the dust evacuator was originally where I'm going to have the air inlet. For now I'm not going to bother with one but will re-evaluate once I've got it up and running. For dusty trips I'm thinking of running one of the bowl style pre-cleaners.
The factory brackets only bolt onto the two flywheel cover bolts - there is a lot of leverage/vibration and I've seen them fatigue crack the ends of the brackets off.
When I fabricated mine I made them out of slightly thicker/wider angle, and also picked up on the holes in the back of the block, and welded on a small spacer tube so the whole lot is rock solid. You can see the upper bolts/spacers in the photo.
Steve
 Posting Permissions
| Search AULRO.com ONLY! |
Search All the Web! |
|---|
|
|
|


Bookmarks