Page 5 of 13 FirstFirst ... 34567 ... LastLast
Results 41 to 50 of 129

Thread: The 85 Classic

  1. #41
    Join Date
    Jan 1970
    Location
    Yinnar South, Vic
    Posts
    9,943
    Total Downloaded
    0
    Keep the late chassis, there is a few subtle differences that make them alot better

    Oh 3.9 rover v8 is quicker than your 4bd1 but it still spins wheels? Hahahaha,

  2. #42
    Join Date
    Sep 2007
    Location
    Kiwiland
    Posts
    7,246
    Total Downloaded
    0
    Quote Originally Posted by Benji4BD1T View Post
    Dougal, how have you done your selector on MSA?
    This was done back around 92 before I got the vehicle. It appears to have an austin allegro or similar gear linkage and housing grafted into the MSA top-cover.
    The concept was a masterstroke of genius, but the execution leaves a lot to be desired.

  3. #43
    Join Date
    Sep 2007
    Location
    Kiwiland
    Posts
    7,246
    Total Downloaded
    0
    Quote Originally Posted by rovercare View Post
    Keep the late chassis, there is a few subtle differences that make them alot better

    Oh 3.9 rover v8 is quicker than your 4bd1 but it still spins wheels? Hahahaha,
    There are too many hassles to keep it legal with the later model chassis. Not to mention with the 85 I'm about 3 years off getting cheaper registration.
    By swapping chassis I also keep the engines, gearboxes and exhausts together in their own chassis with their own mounts and cross-members. This will save dozens of little jobs.

    The 3.9 can't spin anything. It's misfiring at higher rpm.

    93 factory figures:
    17.8 seconds quarter mile.
    11.1 seconds 0-100km/h
    176.2 km/h max speed.
    18.8 litres/100km urban
    10.7 litres/100km highway
    14.7 litres/100km combined
    ~310Nm at 3100rpm
    ~130kw at 4750rpm

  4. #44
    Join Date
    Jan 1970
    Location
    Yinnar South, Vic
    Posts
    9,943
    Total Downloaded
    0
    Quote Originally Posted by Dougal View Post
    There are too many hassles to keep it legal with the later model chassis. Not to mention with the 85 I'm about 3 years off getting cheaper registration.
    By swapping chassis I also keep the engines, gearboxes and exhausts together in their own chassis with their own mounts and cross-members. This will save dozens of little jobs.

    The 3.9 can't spin anything. It's misfiring at higher rpm.

    93 factory figures:
    17.8 seconds quarter mile.
    11.1 seconds 0-100km/h
    176.2 km/h max speed.
    18.8 litres/100km urban
    10.7 litres/100km highway
    14.7 litres/100km combined
    ~310Nm at 3100rpm
    ~130kw at 4750rpm
    Nothing a set of letter stamps won't fix

    Neither 3.9 can spin anything

  5. #45
    Join Date
    Sep 2007
    Location
    Kiwiland
    Posts
    7,246
    Total Downloaded
    0
    Quote Originally Posted by Benji4BD1T View Post
    Dougal, how have you done your selector on MSA?
    Here is the picture of the assembled MSA-5G, adapter plate, LT77 back end and 1.003:1 LT230.
    This is the alleged austin allegro shifter grafted in the top.

  6. #46
    Join Date
    Sep 2007
    Location
    Kiwiland
    Posts
    7,246
    Total Downloaded
    0
    Quote Originally Posted by Dougal View Post
    New plan for tensioning my output shaft:


    This way it can all be done in-situ (once the LT230 is removed) to see if it works or if there is another source of my rumble. I can send the shaft off for boring (or EDM if it's too hard to bore) and get the internal nut made once I confirm the thread on the output shaft.
    Cap screw and o-ring are bits I already have here for other jobs.

    Mainly I avoid having to drill/tap the MSA output shaft. Which means I don't need to pull the gearbox from the vehicle.


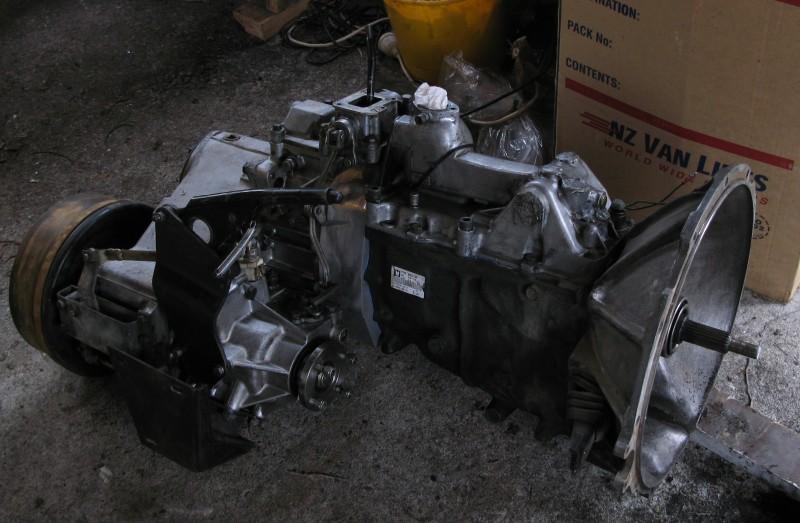
    Existing setup is below
    So finally got some progress on this. I got the adapter shaft out last night, measured up today and sent off for EDM machining. They'll need to sink the internal hole deeper to clear the internal adapter nut and then spark erode the 13mm down from the other end. It's hardened so this should be a much cheaper and easier option than either hard drilling/boring or soften and reharden.
    Then I'll see if my low rpm rumble and over-run issues get better or even go away.

    I was going to get some photos of how the shaft looks after 6 years, but ran out of time. It's polished on the outside of the splines where it's a tight fit in the LT230 input gear, but no visible wear. I do have some rather interesting marks around the shaft where it is held in the middle by the bearing in what was the LT77 tail section. I'll be reassembling it without this bearing when the time comes. Too much restraint methinks and bearings possibly fighting each other.

    The LT230R is leaking from the back side of the intermediate shaft. Front side is holding fine. This is a low km's box which had all seals go hard and leak when I got it. The shaft bore in the case was still okay 5 years ago when I had it back out, either I damaged an o-ring on reassembly or it's chewed up since. It stayed dry for maybe a year.

  7. #47
    Join Date
    Sep 2007
    Location
    Kiwiland
    Posts
    7,246
    Total Downloaded
    0
    A while back we were surmising where the weak point of the LT230R might be. Consensus was the thrust washers were the likely soft spot and yes they are.

    Here is my LT230R on the bench with the handbrake removed and the leak clearly visible from the intermediate shaft:


    The cause of the leak appears to be the o-ring groove for the shaft is too small. Not enough (if any) compression on the o-ring to seal it. I've fixed that using an old and dodgy technique which involves teflon thread-seal tape to build up the groove diameter.
    Why not do a proper job you ask? Well take a look.

    I really didn't want to look inside, but remove the shaft and a thrust washer fell out. So off came the cover to retreive it.
    Washer:


    First impression, that's badly worn.
    Second impression, why is it worn over such a small area? Well, the inner step that's worn through the bronze and into the steel backing is the needle roller chewing away. the larger less worn circle is the gear thrust face. That's the way landrover designed it and they don't use the full wear face.

    Here is the gears thrust face that the washer runs on:


    Yes it really is the plastic cage on the needle roller that has eaten it the worst. Which is interesting but shouldn't be a big problem as the plastic cage should run on the steel backing quite well even with the bronze gone. I can't help thinking that bigger to use more thrust washer area could only bring good things for the gear thrust. But alas.

    While I'm in there, I've decided to deal once and for all to the dreaded hand-brake linkage rattle. I've drilled out all the 8mm steel on steel pivots and pressed in IGUS top-hat style polymer bushings. Two of the main pivot pins I've replaced with stainless bolts (using the full shank of course). It used to jangle like a key ring full of spanners. But now testing on the bench it's snug, rattle free and still moves as freely as it should.

    The before picture:


    The workshop with the EDM job on the adapter shaft is expecting to get it done tomorrow.
    Attached Images Attached Images

  8. #48
    Join Date
    Sep 2007
    Location
    Kiwiland
    Posts
    7,246
    Total Downloaded
    0
    Looks like a 1.003:1 LT230 will be 695 quid from Ashcroft: Ashcroft Transmissions - LT 230

    Plus 300 quid for an ATB diff: http://www.ashcroft-transmissions.co...&productId=381

    Or I can rebuild my spare 1.2:1 box with 1.003:1 gears: http://www.ashcroft-transmissions.co...&productId=175

  9. #49
    Judo's Avatar
    Judo is offline ChatterBox Silver Subscriber
    Join Date
    Feb 2012
    Location
    Parkdale, Melbourne
    Posts
    2,919
    Total Downloaded
    0
    Found any engine bay pics yet Dougal?

    You're obviously an outstanding engineer, but you're terrible at posting pics.
    - Justin

    '95 Disco 300TDI - sold
    '86 County 110 Isuzu
    2006 Range Rover Vogue td6

  10. #50
    Join Date
    Sep 2007
    Location
    Kiwiland
    Posts
    7,246
    Total Downloaded
    0
    Quote Originally Posted by Judo View Post
    Found any engine bay pics yet Dougal?

    You're obviously an outstanding engineer, but you're terrible at posting pics.
    Here ya go.

    As dusty and dirty as it is right now:


    You can see the 12/24v series/parrallel switch and the remote oil filters on the drivers side. The passengers side has the T25 turbo low mounted (manifold neck cut and flipped) with my home-made air-cleaner housing which holds a 100 series landcruiser denso filter element.
    Each side has a battery isolator switch.
    Attached Images Attached Images

Page 5 of 13 FirstFirst ... 34567 ... LastLast

Bookmarks

Bookmarks

Posting Permissions

  • You may not post new threads
  • You may not post replies
  • You may not post attachments
  • You may not edit your posts
  •  
Search AULRO.com ONLY!
Search All the Web!