
Originally Posted by
TerryO

The bloke who put up these pics is / used to be a van builder and repairer, many of the pics are quite old now. He used to build Pheniox Caravans which were rated as being very good and extremely expensive.
I have not read anything he writes for several years because the way he talked to people made me feel like I should drive up to his repair yard and smack him in the gob, he is such a rude arrogant *****.
I'm sure his work is very good but there is no need to be such a rude bastard.
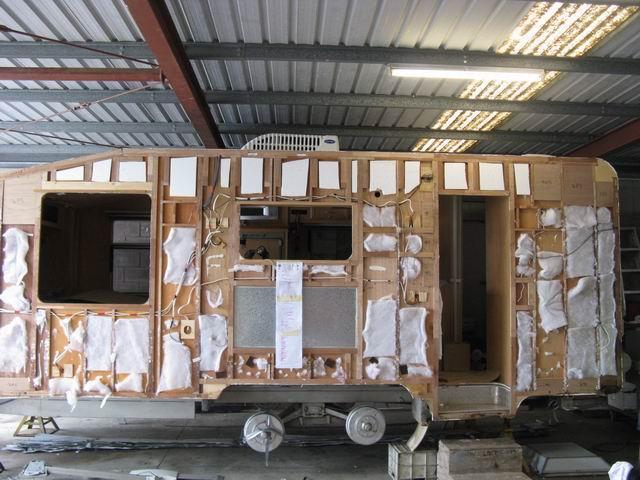
The one thing his many pics in his link prove is owning a aluminium glad van that has that wood based product, which I can't remember the name off right now, for its frame is asking for trouble.
Yeah that's him. If I'm trying to work something out, I search the forum with his username. I can understand him getting abusive, he'd advice people over and over and over ... hundreds of times of the way to do something that works. And he'd have people argue with him they know better (even when they have probably never worked on a caravan in the lives). eg: installing windows with urethane or silicon.... and how this makes it near impossible for a repairer to remove them in the future.
That picture *is* how the majority of aussie vans are made. Heavy chassis, wooden frame and cladding. The alloy framed 'vans he pictures appear to be just as poorly assembled, only the frames don't rot when they leak (the floors still will though).
seeya,
Shane L.
Proper cars--
'92 Range Rover 3.8V8 ... 5spd manual
'85 Series II CX2500 GTi Turbo I :burnrubber:
'63 ID19 x 2 :wheelchair:
'72 DS21 ie 5spd pallas
Modern Junk:
'07 Poogoe 407 HDi 6spd manual :zzz:
'11 Poogoe RCZ HDI 6spd manual


 Reply With Quote
")


Bookmarks