


 Reply With Quote
I found this on the net, it's not the best picture but might help.
You might want to remove the trim, it's very easy.


 TopicToaster
Subscriber
TopicToaster
SubscriberThought for the day... at what weight should I start thinking about different suspension mods for a 90? I get the ever increasing idea that my 90 is getting fat and needs a diet.
Being conservative, I probably have an extra 300kg of accessories on it
Bullbar, winch, rear bar, roof rack, lights, shorkel, hi-lift, shovel, and an imperial ass-tonne of wiring that I've added into it. When I get the chance, I might run it over a weighbridge to see where it sits in full battle trim.
In other news, I've been feeding the landy some more parts.
Spent some time taking measurements behind the LHS rear speaker panel, and weighing up my options for switchgear back there. Today I crammed the fuse block in there to create a central wiring point for whatever I might need in the rear load space.
The fuse block is a Baintech 12 slot unit that I got with the ex box, however I ended up using 2 of the 6 slot units for the ex box build. It was secured to the rear body panel with some Sika clear automotive silicone adhesive / sealant. Same stuff I used for the blanking plates for the rijidij rear bar. Somehow I don't think it's going to co-operate if I ever need to remove it from the cehicleThat stuff is super strong!
For the record, this solution would also work for those who have factory rear light locations (ie no rijidij rear bar), as the fuse block just manages to miss all the rivets and other protrusions back there.
There are some spare wires coiled up for future use, if needed. 1 runs to the front battery box, and one to the RHS rear corner inside the rear bar (this will probably be diverted into the RHS rear load space). These are smaller wires, but would be perfect for the low current trigger circuit for switching a relay which will be fed straight from the fuse block.
It all fits behind the speaker panel Nicely, you'd never know it was there.
One questions I need to ask the masses playing along at home:
How much room is there behind these panels?
I know the bottom of the window trim has the 'hips' of the vehicle, and there is some capping that holds the window panels to the tub. UI've felt around behind there as much as I can, but it feels like there are other brackets and tomfoolery going in behind there too...
I also understand there is a rear seatbelt reel hiding behind there somewhere that I'll need to contend with should I wish to install a panel mount switch or similar.
Does anyone have any 'naked' pics of this area without trim?
-Mitch
'El Burro' 2012 Defender 90.
Master
SubscriberI found this on the net, it's not the best picture but might help.
You might want to remove the trim, it's very easy.
TopicToaster
SubscriberCheers for the Pic Aguy!
I hate working with plastic trim panels, it's like my kryptonite. I've broken so many tabs, clips and everything in the past, and whatever I work on never seems to go back together the same.
I pulled a dashboard once in a nissan 300zx, and installed a new wiring loom... Not only did I end up with a good handfull of nuts, bolts, and screws (I like to call this 'over-engineering') but the dash developed a heap of creaks and rattles, and the air con vents now blow thru the cracks in the ducting, not the vents
I looked at the whole window panel in the 90, and looked at how it covers the rear and front seatbelts, as well as everything else, and thought I'd consult the wisdom of others before breaking more trim panels!
-Mitch
'El Burro' 2012 Defender 90.
TopicToaster
SubscriberSo today I did just a small job- removing the terrible plastic scrivets that hold the rear speaker panel to the vehicle, and replacing them with some M6 aluminium riv nuts and some stainless fasteners.
The standard items look like this, and out of the 6 I removed, I managed to bugger 3 of them- the plastic thread (its more of a broad rounded spiral than a thread) can easily bind and snaps the head off the scrivet, if the phillips head part doesnt round off first
So out came the old items- the scrivets and their plastic press-in securing grommets - and a M6 rivnut was installed. I picked up some 316 stainless M6 dome head screws to suit, and installed them with a coat of duralac to prevent any undue corrosion.
Finished result:
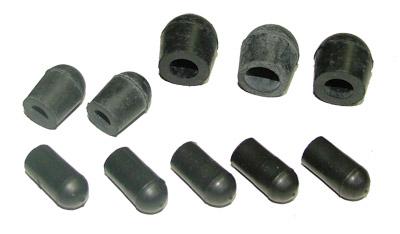
Depending onhow keen I want to get, I might seal the bottom of the riv-nut with some silicone to prevent any water and mud getting into the thread, or pick up some of those rubber hose blanking caps like thus
-Mitch
'El Burro' 2012 Defender 90.
Fossicker
I just read through all 23 pages of this thread and wow, very impressed with all your mods even though I didn't understand half the things you said
Your ingenuity and attention to detail is quite inspiring. keep it up
TopicToaster
SubscriberI had a few chequer plate accessories I've been sitting on for a while, uninstalled.
Thought today mgiht be a good time to get them fitted up for install.
Rear 1/4 panel chequer plate
I think I got these off ebay a year or so back, but had never got around to installing them.
Once I was more serious about fitting them, I came to the realization that they may interfere with the rijidij rear carrier.
Now that the carrier is fitted, I was able to eyeball the dimensions and make it work.
All that was needed was for the small wrap around sections to be lopped off with the grinder, leaving a small enough section to 'wrap' around the panel and meet with the rijidij bar.
A small piece also needed to be removed from the bottom edge, and possibly some more fine tuning with the file once I get the rivets removed and the piece fits squarely on the panel.
Fuel filler plate
I picked this up mid last year. It was one of those spur of the moment items which was somewhat cool, and was not going to add to the shipping costs of the order i was already placing. So what the hell, I thought. Everyone needs panel protection from dings from the odd mis-aimed fuel nozzel right?
Only problem is it didn't fit!
Turns out the item I'd bought was for an older model, and it appears the dimensions of the piece I had were not going to fit into the fuel filler recess that I have. Good news is it was easily able to be cut down to size to make it work.
The layout
All cut up
Test fit
The dimensions if you are interested.

-Mitch
'El Burro' 2012 Defender 90.
TopicToaster
SubscriberForgot to mention...
With the fuel filler plate, it's a rather tight fit left to right, but the more astute amongst you may have noticed the gap at the top edge.
Due to the space needed to get the plate in there, it needs to go in vertical, and be pushed in on one side to get the other side of the plate into the cavity.
If one were to make a new plate themselves, you might be able to squeeze perhaps another 4mm of material in on the top side of the design before it starts to affect the ability to squeeze the piece into the fuel filler space.
Also interested to know if anyone has any tips on removing the fuel filler grommet?
It appears to be a metal filler spout pressed thru a rubber grommet which ideally, I'd like my chequer plate to squeeze underneath.
Any tips chaps?
-Mitch
'El Burro' 2012 Defender 90.
TopicToaster
SubscriberAlso cut the 2 plastic mudflap liner things that stop stones dinging the rear panel of the vehicle from the inside.
Cut to suit the new wiring
You can se the underside of the 2 riv nuts I installed for the rear interior panel, from a few posts up. Not too obtrusive. Will definately look into getting some caps to stop them filling with mud and crap.
Bonus pic!

-Mitch
'El Burro' 2012 Defender 90.
TopicToaster
SubscriberStill haven't installed the new checker plate parts as above.
Instead, I've been working on some other mods!
The rear Ladder I had was a OE land rover part, and was on the vehicle when I purchased it.
When the rear bar went on, it had to go, but on the other hand, I was left with a number of holes / riv nuts in the vehicle from the ladder that needed to be filled. I like the ladder to get onto the roof rack, so I opted to modify the OE item to suit my new needs.
With a few swift cuts, this...
Became this...
After some grinder surgery I was left with this.
Ready for welding
After a few coats of paint, it is somewhat presentable (no pics yet).
I did however have a mishap with the plastic coating that land rover uses on these parts. Even though I was welding at as low a setting as I could, the very low melting point of the plastic caused some bubbling of the coating. I had to sand and repaint some sections, which is a relatively decent colour match, but still not as nice as the original finish.
This mod will allow me to utilize the existing top holes in the roofb gutter sill, and I will need to install 2 more approx M8 holes for the bottom mount in the body capping area of the tub. Need to decide on some fasteners for this, hopefully I can get a bolt with some kind of decorative head so that it is not too obtrusive as it's right at chest level on the back of the car, and needs to look a bit more presentable than just the plain hex head or tek-screw approach. Maybe some nice stainless security Torx screws or something
On another note,
I found some 8mm vacuum pipe blanking caps at supercheap. These were used to cap off the exposed riv nuts which were installed for the rear fuse block access panel / speaker panel. Safe from mud ingress now, so should stop any potential galling of the threads.

-Mitch
'El Burro' 2012 Defender 90.
TopicToaster
SubscriberMy take on the melting mud-flap problem with the 90's was a two-fold problem.
Not only have I experienced the melting mud flap syndrome, but I do in fact also take this car offroad, and have fallen victim to 2 separate incidents where the mud flap was plucked off when it becomes pinched between the tyre and a rock. At approx $300 for a replacement pair, this would get tiring pretty quick, and my conveyor belt rubber home-jobs were starting to look a bit tired (I've avtually been rocking only 1 mudflap for 8 months now!)
So the idea was born that a 'quick release' mud flap arrangement was needed. My goal was to have a quick way to remove the mud flaps to prevent damage- either while on-road from melting (at the supposed >100km/h which cause melting), and while offroad.
The design is simple, using the existing, factory mounting points on the vehicle, which are M6 riv-nuts affixed to the rear crossmember. From here, studs would be drilled to accept a R-Clip (or cotter pin, if you were so inclined), and a wing nut would secure it all together. A section of rubber would provide some tension on the wing nut arrangement, and the R-clip hole would be spaced sufficiently to stop the wing nut backing off too far.
I initially wanted to get some M6 exhaust studs, as these would be an easy way to get a stud on the chassis to which to attach the flaps. But I didn't find these to be readily available, so I decided to manufacture something myself to make a weekend project.
I used 6 off 316 stainless M6x40mm bolts, and lopped off the heads
From there, a Mild steel nut was threaded onto the stud, and a hole drilled thru the nut and Stainless bolt, to create a 2.5mm diameter hole for the R-clip.
Please don't judge me because of the size of my vise. It's little but it works well
The threads were cleaned up with a Die and thread file.
I also chamfered the end of the stud to make lining up the wing nut a bit easier. This was done by chucking it up in the drill and running it against a smooth file. This allows the wing nut to be located in the right spot before you start turning it, I hate messing about trying to get a thread started in upside-down. out of position places. This idea was an absolute win.
A 8mm thick piece of rubber was then cut to make a gasket to match the size and hole spacing for the mud flap bracket. This puts pressure on the wing nut, similar to what a spring washer does, so should help to alleviate the wing nuts backing off under rough conditions.
I then set up a lock nut arrangement to determine a 20mm stud 'depth' for the vehicle side of the arrangement. This measurement allows the thickness of the rubber gasket, mud flap bracket, and wing nut to be closer to the location of the hole I drilled for the R-Clip. The stud was installed with loc-tite 243 thread lock sealant, and installed on the vehicle, ensuring that the holes in the bolts were aligned towards the sides of the vehicle for easy access and insertion of the R-clips.
Once the loctite was set, it was then an easy matter of installing the rubber gasket, spinning up the wing nut, and sliding in the R clip. It is very sturdy. It takes approx 15 seconds per side to remove a mud flap, so that's a win in my book.
I'm still undecided as to how I'll go with stopping the mud flap from bending into the hot exhaust gas. The little stainless trim piece I made is still up in the air... not sure whether I'll go this way or not. But something will be done eventually.
-Mitch
'El Burro' 2012 Defender 90.
 Posting Permissions
| Search AULRO.com ONLY! |
Search All the Web! |
|---|
|
|
|


Bookmarks