

 Reply With Quote
I've made a tribute to the step I grew to know and love. Please follow the link and show your support.
So long good friend
RIP Step. 2012-2016
unnamed masterpiece - makeMeGoogly.com

 TopicToaster
Subscriber
TopicToaster
SubscriberMISSING- PLEASE RETURN IF FOUND!!!
1 rear step. Wanted dead or alive.
Turns out some time during "dirty weekend 2" I lost the rear step off el burro.
There were a few steep departures which dinged up the rear a bit, including the latch mech for the rear jerry carrier. I thought it was the rear tow bar carrier that was taking the brunt of the hit, but it appears I was mistaken. I'm now short 1 rear step, sacrificed to the gods of 4x4 on a dusty track up a mountain somewhere.
When I was washing down the car, after the dirty weekend, I noticed there was a bit of a rough rusty section on the rear cross member, which I put down to land rover QC.
Today, in my meanderings, I opened the rear door, and kicked my foot around the usual spot to get the rear step down so I could climb in the back of the vehicle. Alas, the step was gone, and the two rusty spots I'd noticed before were in fact the remants, and last known location, of the rear step!
There's a big empty space in my life where that step used to be. RIP step. 2012-2016.
Deez Nuts
I was playing around with my nuts today. Removed the old locking ones, and installed some good ol' honest normal ones. Fitted some anti sieze to the wheel studs while I was at it, I know there is some conjecture out there as whether this is a good idea or not, but meh. Sue me. The wheel nuts I hadn't yet removed in my ownership were rather tight, and it took all of my 80kg frame on the tyre iron to shift them. One of the few times that I yearn for the all the weight I've lost over the past 18 months or so...
Removed these:
Fitted a shiny one to each wheel:
Doing some house work
I thought it was time to pay some attention to the winch line. I always give it a bit of a blast with the pressure hose when I clean the car after a muddy trip, but I was going to give it a relaxation spa in the laundry bucket.
After unravelling the winch line and undoing the flimsy feeling M4 allen bolt holding the winch line to the drum, I bundled it together for its wash. I'll let you know how it goes, It's a tedius task, but hopefully it's a bit easier in the comfort of the laundry rather than hunched over a bucket in front of the car. I should also be able to be much more thorough this way.
Booz Revooz:
Another naked wine- Jen Pfeiffer's "Rock it like a redhead" Cab Merlot '14. Cherries, plum, mint, ethanol, you get the drift. I'm drinking it out of the bottle, because I'm classy like that.
-Mitch
'El Burro' 2012 Defender 90.
TopicToaster
SubscriberI've made a tribute to the step I grew to know and love. Please follow the link and show your support.
So long good friend
RIP Step. 2012-2016
unnamed masterpiece - makeMeGoogly.com
-Mitch
'El Burro' 2012 Defender 90.
Ha ha haMitch. Always entertaining reading your posts.
My condolences on the rear step
Cheers, BabsSent from my iPhone using Forum Runner
Mmm Naked Wines

TopicToaster
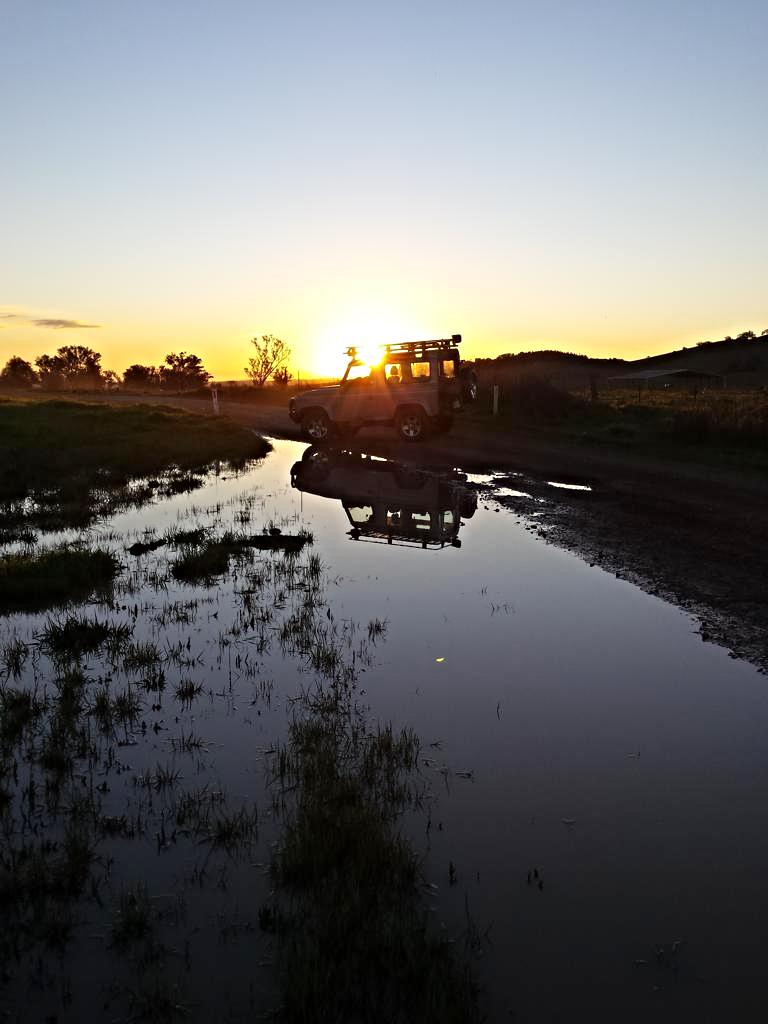
SubscriberTook a few pics yesterday afternoon.
Inlet Road, Attunga. (About 20km from Tamworth).
Had a scratch around at the Attunga state forest and saw a bit of a photo op. I'm no shutter bug, but they turned out OK.
Had an audience of cows at the time.
Imgur albumn if img links break Attunga NSW - Album on Imgur
-Mitch
'El Burro' 2012 Defender 90.
ChatterBox
hahaha I was wondering how often those rear steps went missing!
TopicToaster
SubscriberYeah. I guess now we know!
-Mitch
'El Burro' 2012 Defender 90.
ChatterBox
I've been waiting for my step to get hung up on something and damaged beyond repair. But simply tearing it right of is far easier. ☺
You need to get a mate with a 110. That way u can follow him around and check to see you won't bottom out lol
Sent from my SM-A300Y using AULRO mobile app
TopicToaster
SubscriberOr collect all the parts that fall off his!
-Mitch
'El Burro' 2012 Defender 90.
TopicToaster
SubscriberHad another 'easy' job to do this weekend. Simple task of drilling a hole in the dash, and installing a switch panel. Easy, huh?
It still gives me the heeby-jeebies having to drill into parts of the car which are visible. Those big, irreversible mods make me think twice, three, or twenty-three times about whether I'm doing the right, or wrong job. This was one of those times...
I made a thread >here< about placement of switches in the puma side dash panel.
On face value it's an easy job, but messing it up will give you a very long period of regret when you have to stare at it whenever you are behind the wheel. The side panel is slightly curved, and has a angled top section which is not square to the vertical lines on the dash. For placement on one switch panel, it's not much of a big deal where it is placed in this space, but when you start adding additional switch units, it can lead to some funky alignment issues.
I ended up aligning the switch panel with the vertical edge of the dash. This leaves a 'crooked' look relative to the top edge, but any other mods below this unit will be easily aligned.
Marking out
Cut out
I used a mini hacksaw blade to get the rough cuts, then trimmed up the rest with a knife. The dash is made from a very forgiving and soft plastic. I was expecting it to have at least some percentage of glass fibre or other stiffening components to it, but not the case. Be wary of the ribs that sit behind the panel, as they wil also need to be cut and trimmed to suit any locking tabs on the switch panel.
It's hip to be square
Much switch. Very click. Wow.
All in all I'm happy with the result. Despite the curvature of the panel, the switch sockets I used have gripped very well into the material with no slop whatsoever. There is a fraction of a mm of gap on the steering wheel side of the switch panel, and looks about as close to OE as you could expect.
The switch height should be sufficient to allow single handed operation of the high beams and spot lights. The existing location of the spotties and light bar controls were on the RHS of the steering column, which was awkward to operate at the best of times.
10/10 will cut again.
Carling switch install on Land Rover Defender 90 - Album on Imgur
-Mitch
'El Burro' 2012 Defender 90.
 Posting Permissions
| Search AULRO.com ONLY! |
Search All the Web! |
|---|
|
AULRO.com Copyright 2001 - 2025 Independently Owned and Operated by Dave Blears Computing - DavecandoIT - AULRO.com LAND ROVER and its logo are the registered trademarks of Land Rover. Land Rover is not affiliated with AULRO.com. |
|


Bookmarks