


 Reply With Quote
But the question is, does she like it AS IS or with the mods? Reason I ask is that my better half curses me and the disco every time she climbes into it... our other tdi is stock and she loves it as is.

 Master
Originally Posted by pando

We did look at it, I spoke to a couple of mates who would be helping & they reckon swapping the rest over is a far easier option. It really is only the diffs, cutting guards & all the accessories
An the minister for travel likes the updated dash in the 94")
YarnMaster
SupporterBut the question is, does she like it AS IS or with the mods? Reason I ask is that my better half curses me and the disco every time she climbes into it... our other tdi is stock and she loves it as is.
Carlos
1994 Land Rover Discovery 300tdi
1963 Land Rover Series 2a 88
Youtube Channel: https://www.youtube.com/channel/UCu3...BtsNIuTyGkAo5w
Instagram: https://instagram.com/rover_tasmania/
Master
Yer she loves the 93, but being 6 months pregnant again she is not really liking it. Although she only has to get in it once every couple of weeks at the most.
She also hates buckling the other 2 kids in the 93, being vertically challenged she struggles.
The minister for modifications is all for me swapping it over, it will be my daily driver with a trailer in tow for work & she can have the rodeo dual cab as her daily driver, either that or I loose my landy's all togetherA defender 130 would be the ultimate goal, although funds just don't allow at the moment
But with the 94 it will be a bit lower to start with, as I am leaving out the 2" body lift & the 1" coil spacers
Maybe the body lift will go in later, although I doubt it.
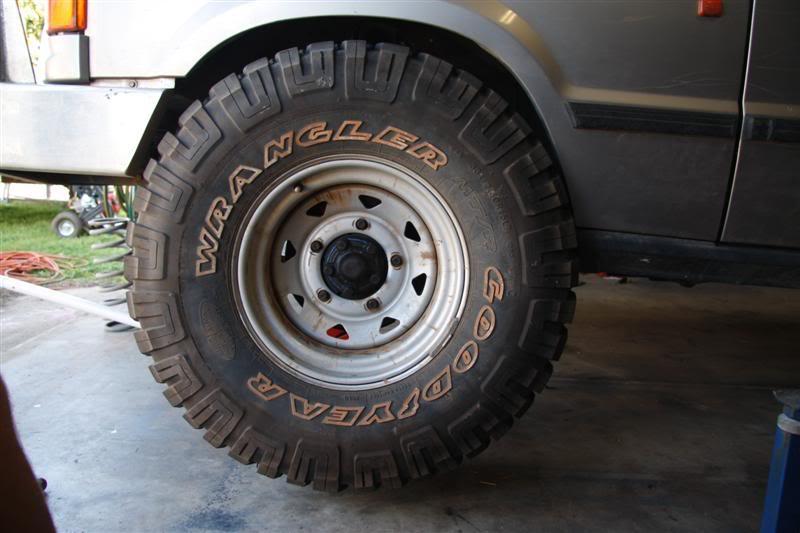
But I get where you are coming from, a set of 265's would be a sight less workprobably get away with standard diffs as well

Master
Well with over a dozen oil stains on the drive way I decided it was time to give Ace's little vacuum pump fix a go.
Worked a treat, not a drop of oil coming from it so far & it has done 200km in 2 days.
While I was going I replaced the bearings in the a/c pulley & the idler bearings on the a/c belt as 1 of them had a squeak when cold
Might start swapping diffs over next week if I get time
All in all though she is going well, give her a full service once I have all the new diffs in.
Bloody fuel economy is unreal (been driving the V8 to long) We have been getting 800km - 900km to a tank
Soon the missus Lancer will be for sale & I will get a few $$ for a taipan exhaust & a tune up. If there is any $$ spare, lpg may make an appearance earlier than expected
Anyways, will post a few pics once I get started on the face lift")
Master
SupporterLooks a good buy for the price you paid.Might be a good idea to look out for the later expansion tank,unless you can swap it with the V8[if the tank is white]It might look ok now,but it is only a matter of time before it leaks on the seam.Keep an eye on the P gasket for leaks ,oil cooler hoses for leaks and the 90 degree turbo hose getting soft.
Master
Ok, the expansion tank in the green one is black as well
The P gasket ?? excuse my ignorance, but where might it live ?? Not heard of it eitherVery educational day for me so far
The 90 degree hose on the turbo has recently been replaced, well it looks it. I am going to give it the full going over & service once the diffs have been swapped, so I should pick up any problem hoses then.
I am going to do the timing belt once all the bits & pieces have been changed over.
Who knows what is involved in changing the heater unit in the dash ?? Not a real priority, but it will get the better of me as it has been disconnected by the previous owners
Master
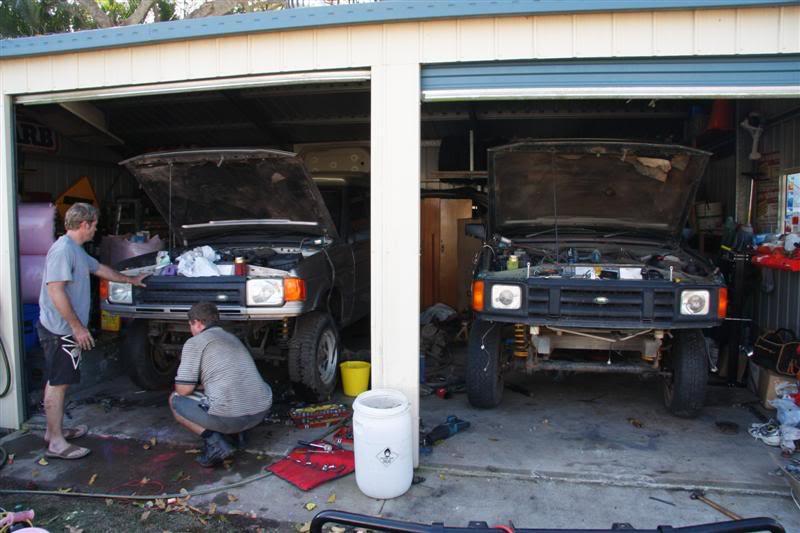
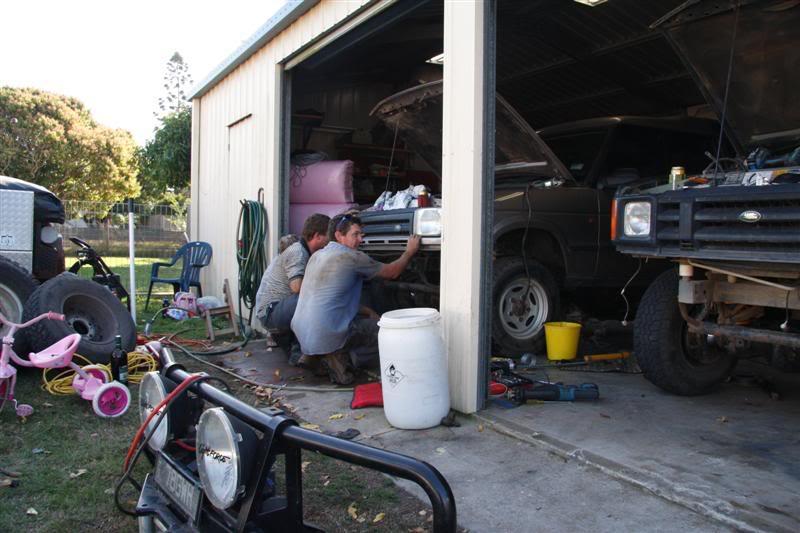
ok, so things are in full swing.
I had Grom around here all weekend helping me start the process of swapping bits from the green machine over to the new silver rocket.
Everything went reasonably well, a few things slowed us down, but the majority went well. Probably didn't get as far as we 1st thought we would, but that is nothing unusual for us.
We had a few beers, a few laughs, there were nearly tears after we lost control of a diff coming down. Lets just say I was happy my old fella didn't get any closer than it did. It got a way with just a few scratches :shock:
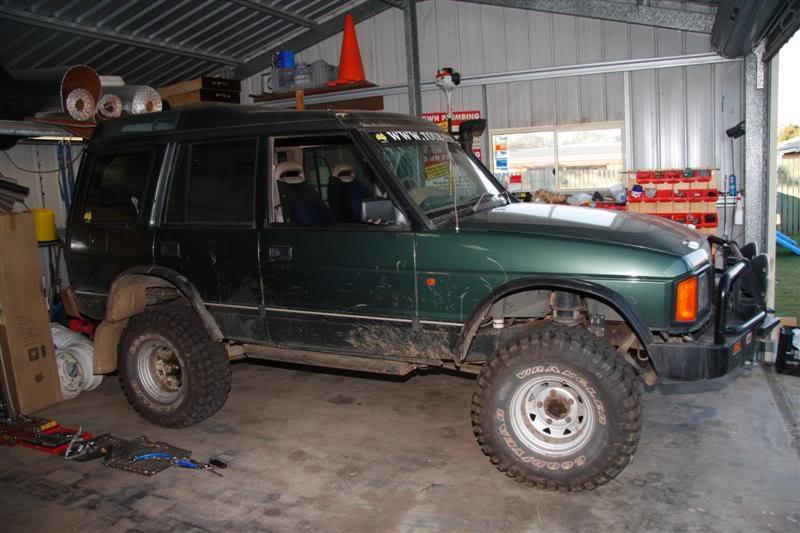
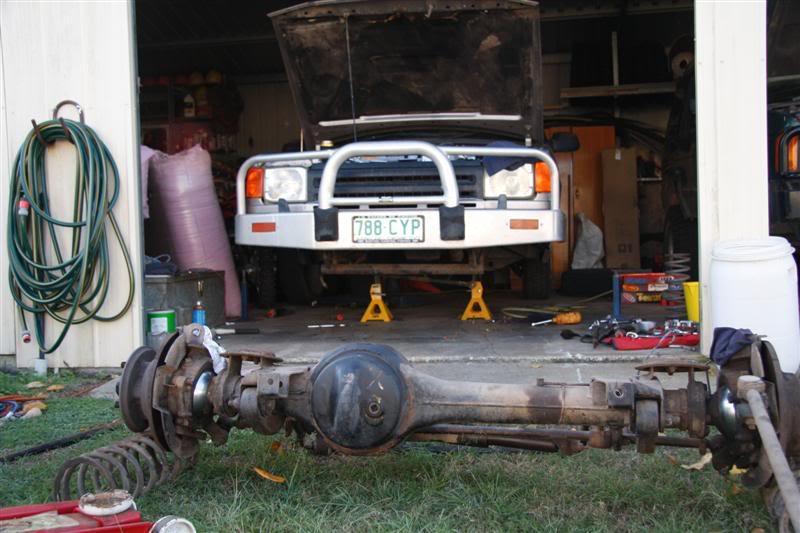
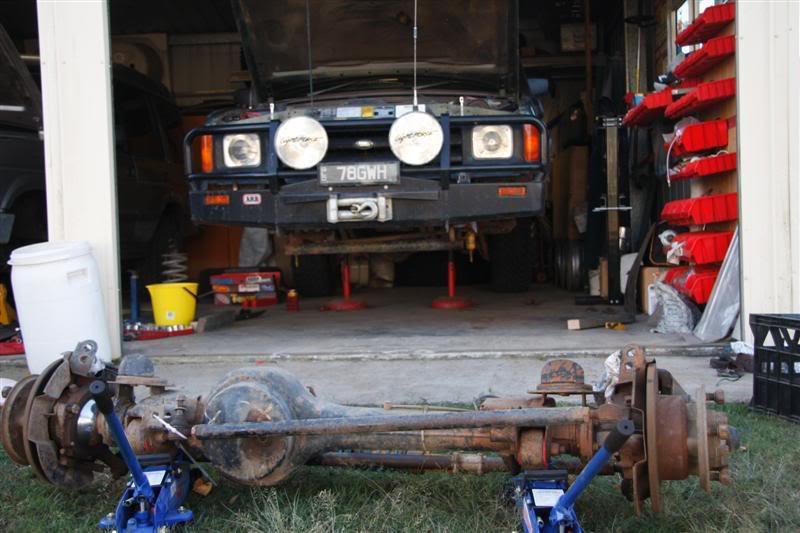
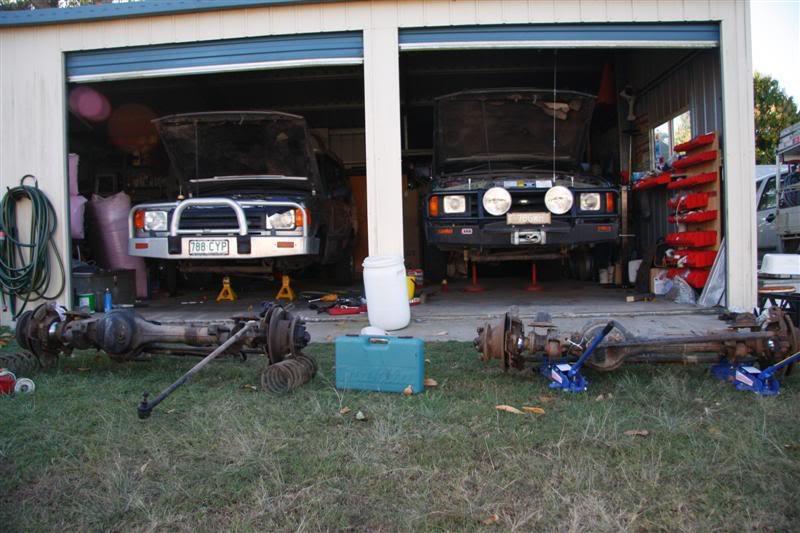
The silver beast now has the diffs from the green beast under it, a development for suspension has been fitted (there may be a few changes until I get that right $$ permitting) The green one has the front diff in, but no rear diff, it needs a few bush's & a ball joint.
The bull bar from the green beast now resides on the silver wagon.
And the removal of accessories has started from the green bus.
A few piccies
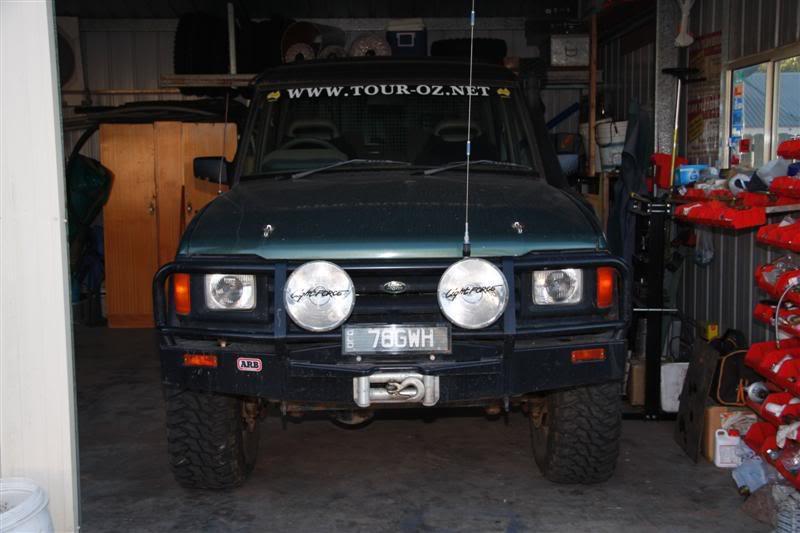
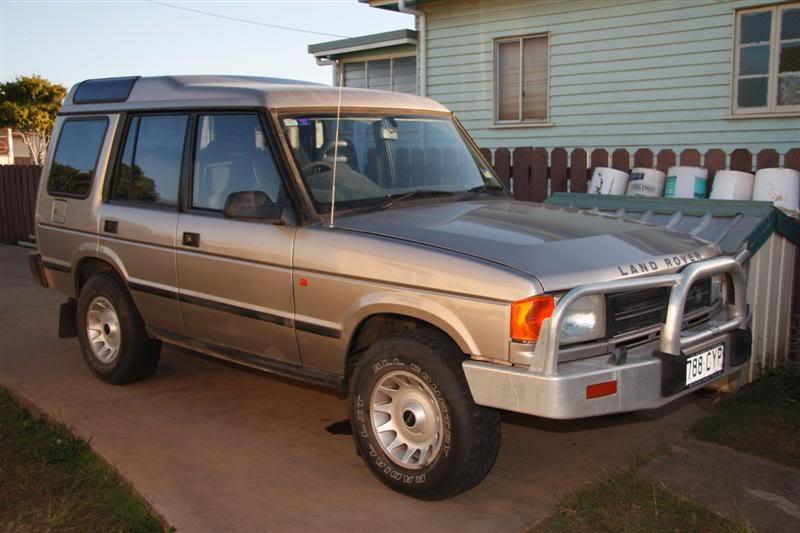
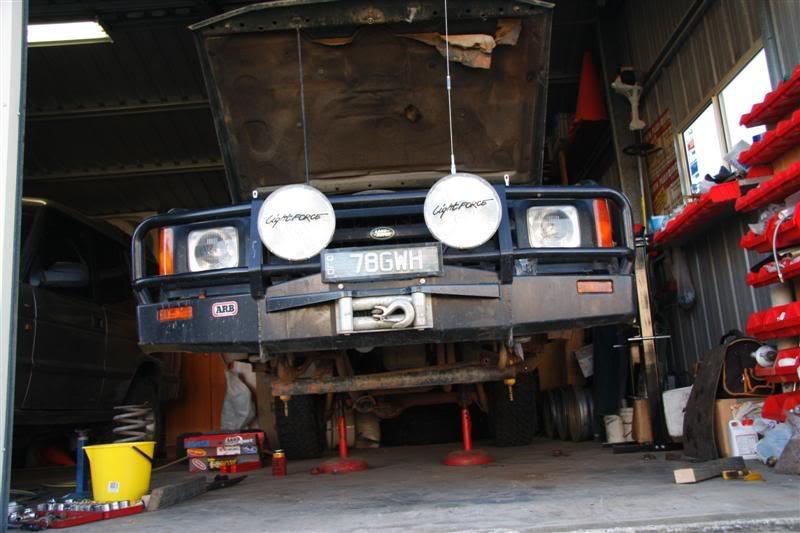
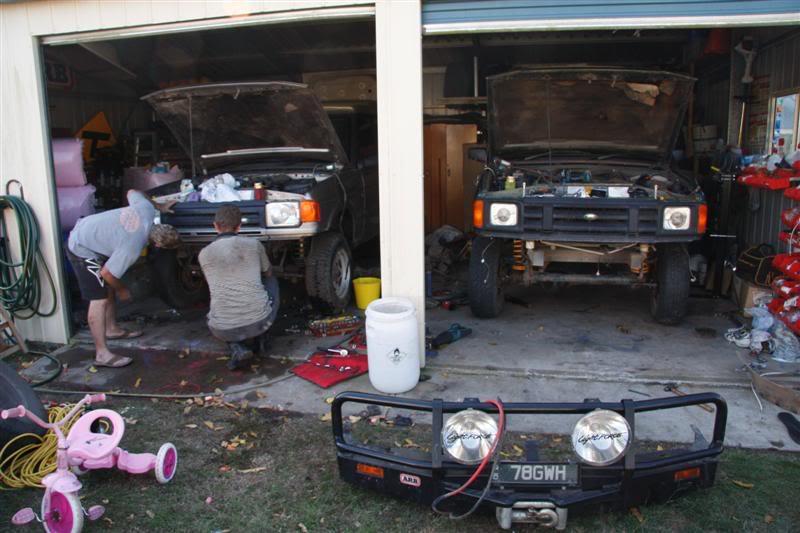
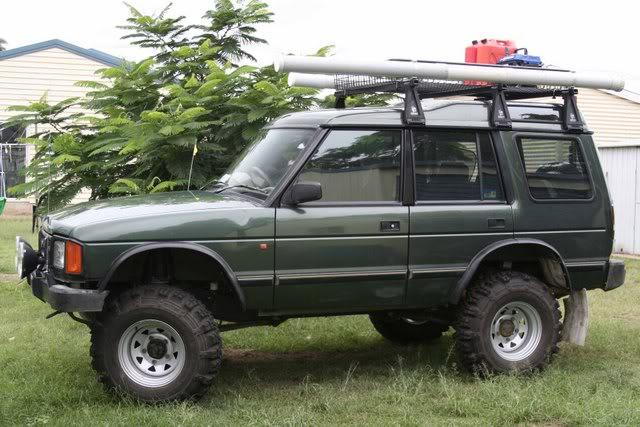
What the green one looked like before this all started..................
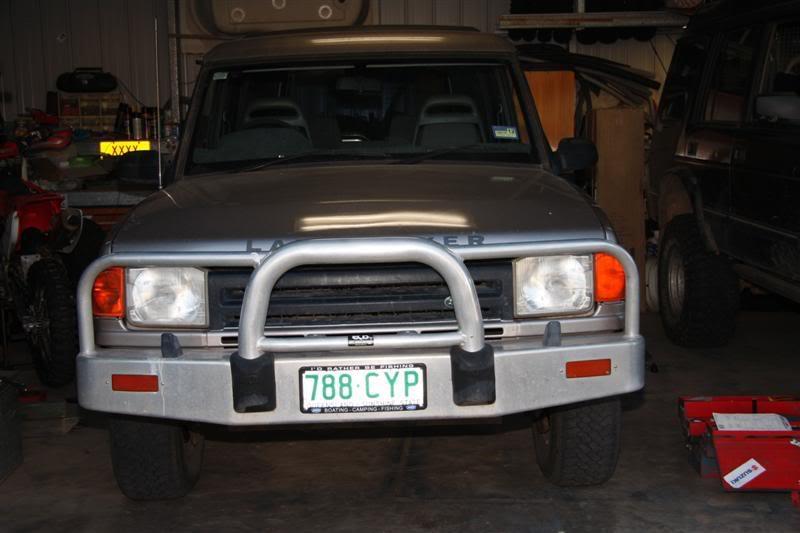
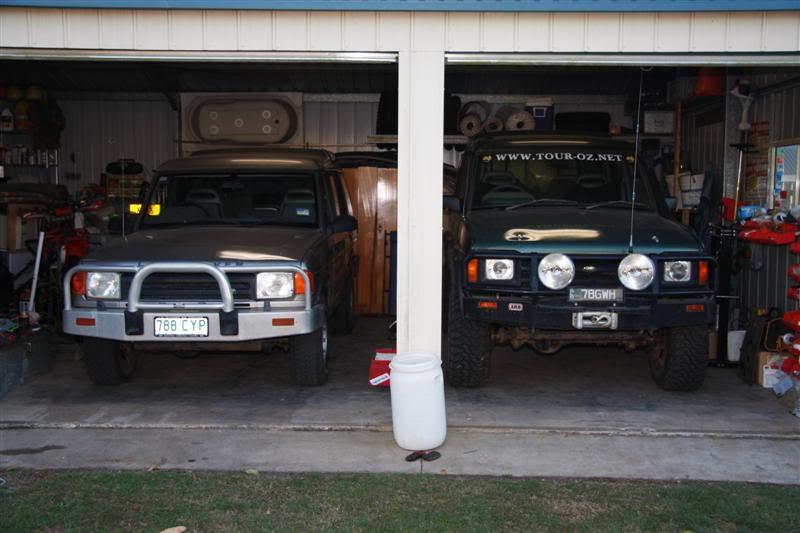
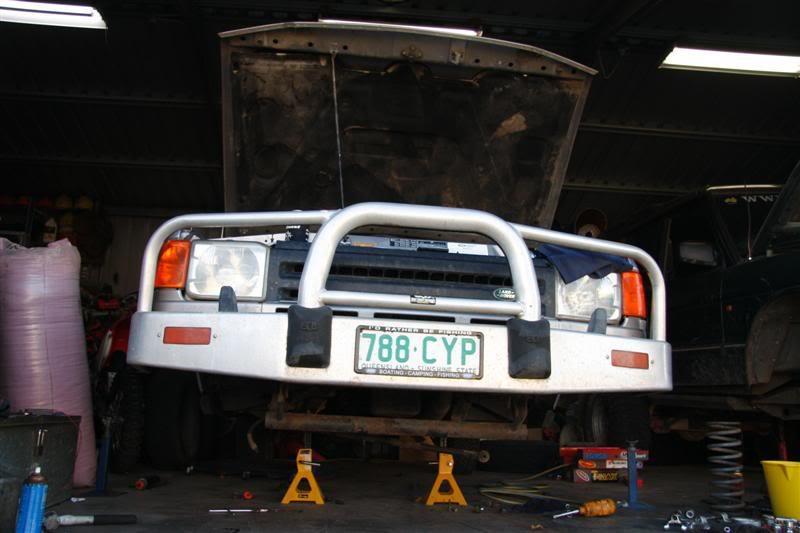
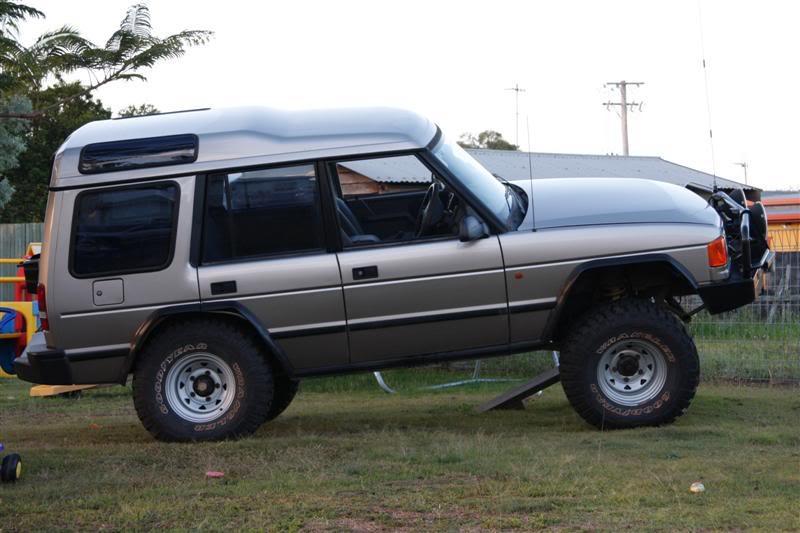
The silver rocket (that might be an exaggeration [pmsl] )
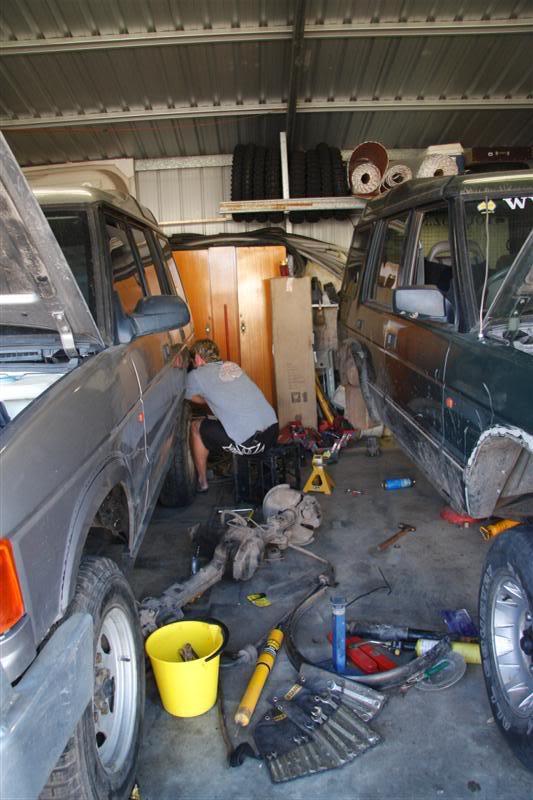
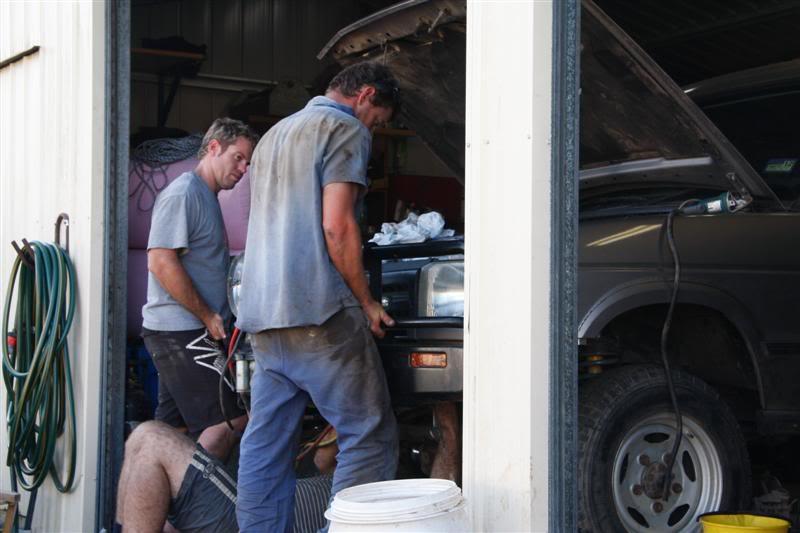
The 2 in the surgeons room[oops] [pmsl] [pmsl] [pmsl] [pmsl]
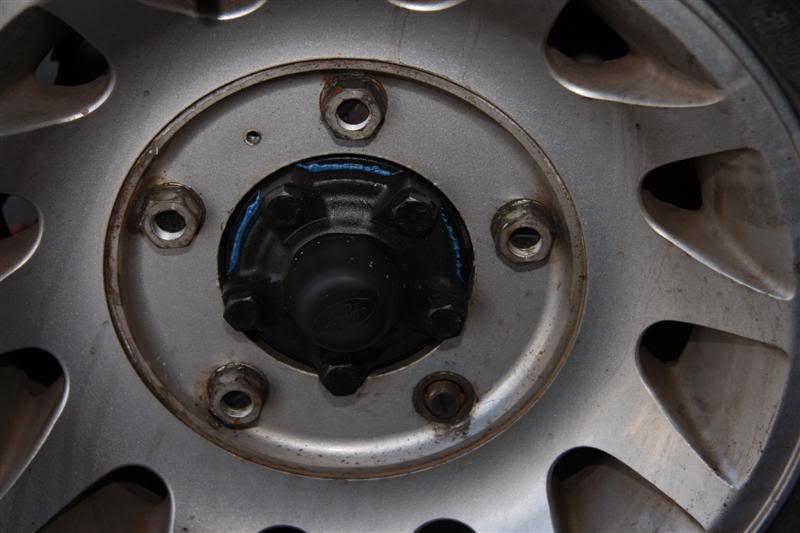
1st little surprise was to remove a wheel from the Silver rocket to find that the last bloke decided 4 wheel nuts was enough :shock: :roll:
Then a discovery (pun intended) that the Silver & green bus's actually had different front calliper set ups, the green one had 2 brake lines & the silver had 1. But everything else was the same, so we just swapped the callipers over & all was good.
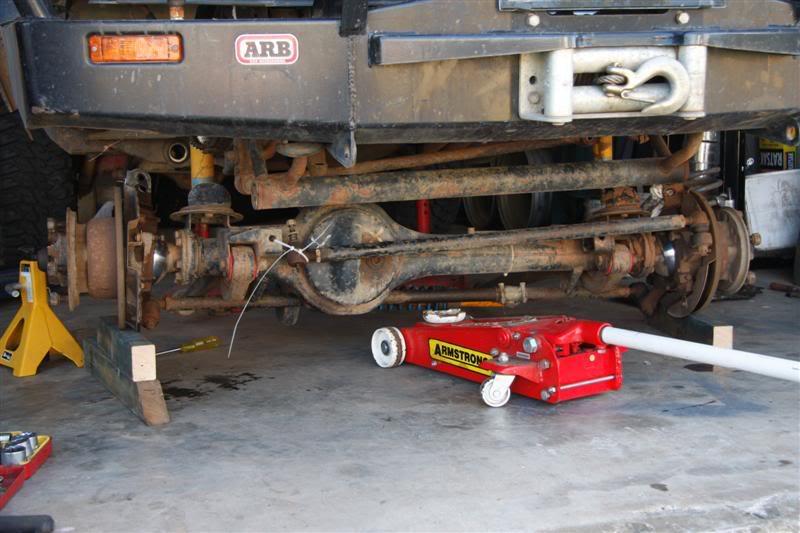
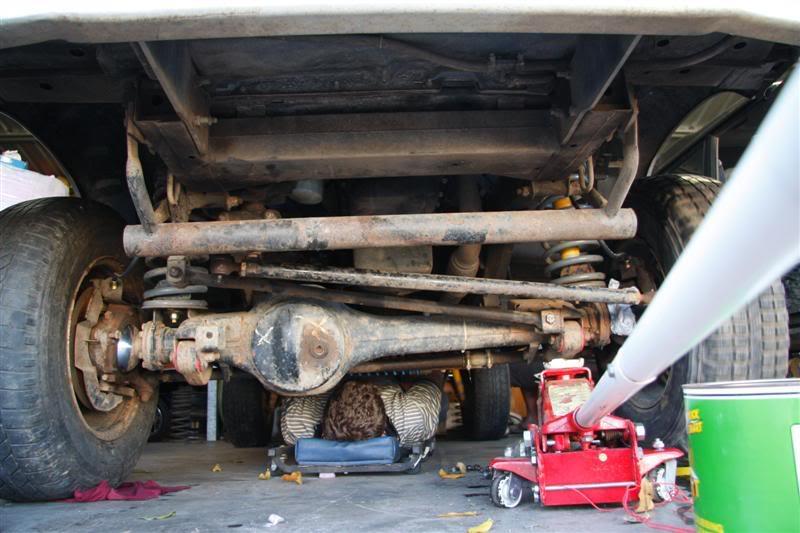
Green Front diff coming out
A dry run shows why the guards need a trim to fit my tires inside
The fronts are out
Grom doing up tail shaft bolts (or is he sleeping)
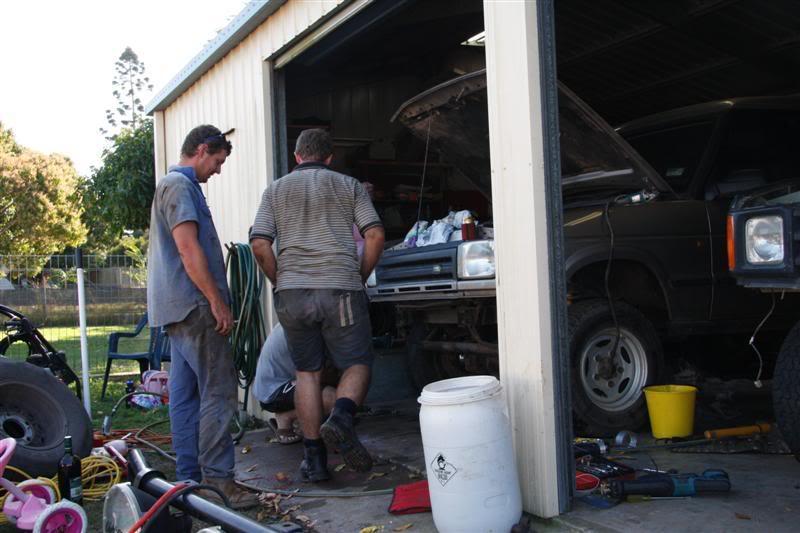
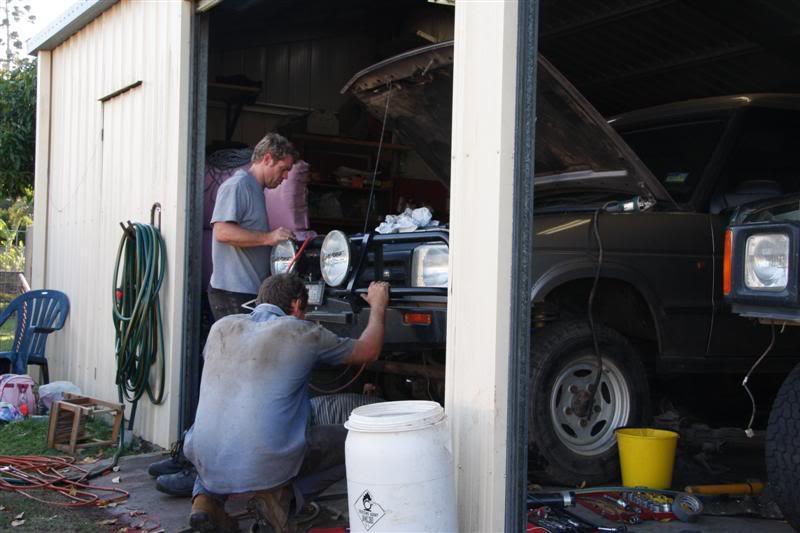
Gareth dropped in to lend a hand on Sunday, so we put him to use, removing bits & pieces in ready of the panel trimming to take place later in the week.
Thanks again for dropping down mate, was muchly appreciated
Checking to make sure the bull bar was as easy as it 1st seamed
A couple of the young ladies watched on as their Dads probably tort them some new words
On she went
A check of why the bolts struggled to go in & all was good.
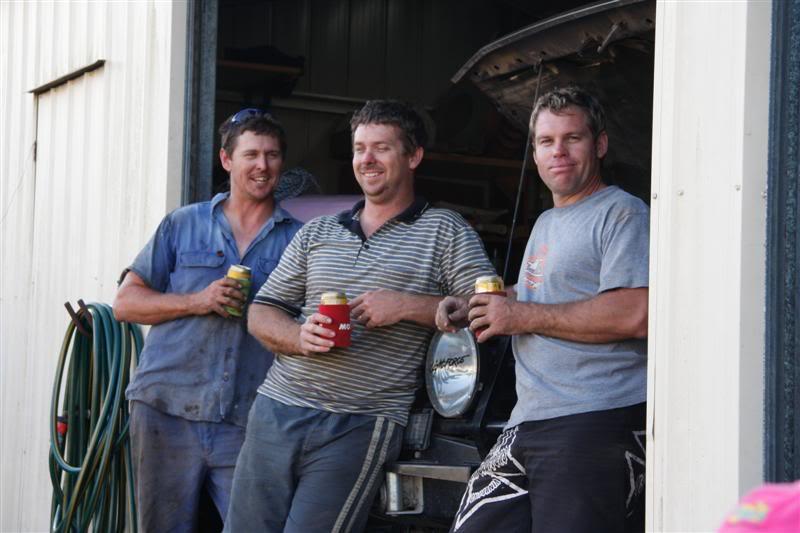
A couple of blokes pretty proud of what they achieved in a small shed for a weekend
Thanks again guys
So the silver one is drivable, just needs a few things done, but it wont be leaving the shed for a while, it's got plenty more to be done to it
Thanks for reading & I will keep you all informed of the coming developments.
Master
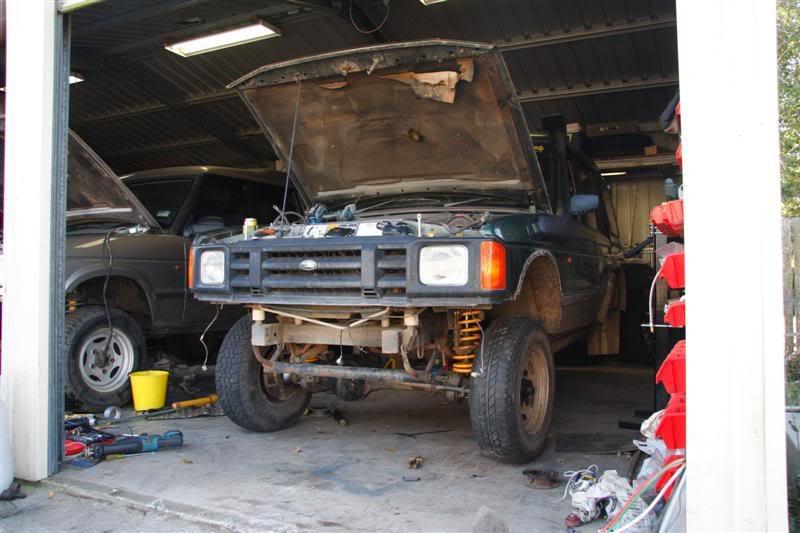
Not making much progress during the week, I only have an hour to spare when I get home from work before the troops arrive. Then it's time to down tools & get inside for the nights formalities :roll:
But I have got the harness in for the locker, just got to tidy up the switch & add a few zip ties.
Next will be to sort out the wiring for the winch & dual batteries, then drive it out of the shed for some guard trimming.
I have had a bit of a thought with this, last time on the green beast I had roundish shaped guards after I trimmed them, this time I thought I may change the shape a little
What shape I have on the green beast.......
The shape I am thinking of
I am leaning towards the square shape for some reason, it just seams to look better, or maybe it's just a little bit of ........ the grass is always greener ;-)
I would love a set of the real flares, but as this disco is a budget conscious build, just like the last one was, I doubt I will get the go ahead ;-)
Whats your thought people ???
Round............. or square ??????????
Also, the Maxi drive locker switch seams to be leaking, after I plumbed up I followed the test procedure in the instillation instructions. Run vehicle at fast idle for 10 seconds & then switch off & wait 5 minutes. There should be enough vacuum power to have 2 cycles of the locker on & off.
It doesn't even have vacuum after 5 seconds after turning the car off. So I started tracing to find the leak.
So had the boss blow down the line to slightly pressurise the line so I could use soapy water to find the leak.
The air was only coming out of the brass body of the switch ??
Is there a seal in there I can replace, or do I need to chase a new switch ??
Master
Ok got the guards cut & the flares on. Also got the gme 3400 uhf removed from the green beast & installed in the silver rocket. Like wise the arb compressor got a change of location
I will get a few better pics later in the week. I have the guards to finish off, just got to finish some raw edges & tidy it up & all will be sweat. Although I did make a boo-boo & take a bit to much out, but it will be fine
Still to go.......................
Finish the guards.
Dual batteries.
Service & oil change everything possible.
Fit inverter from green beast.
Find a new steering wheel & fit.
Remove home made cargo barrier from green machine......... Finish it & paint it & install in silver rocket.
Sort some storage & fridge set up for the back.
New exhaust & a tune up
I am sure there is more on the list...... but I can't remember it right now
Master
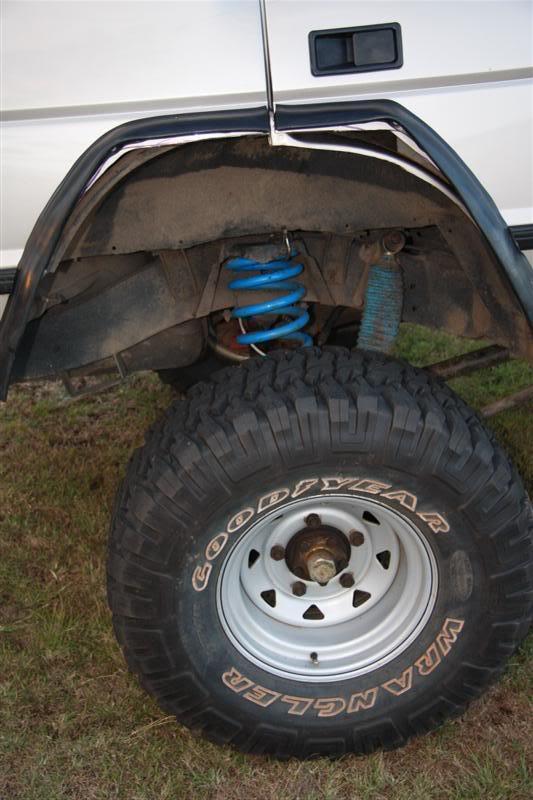
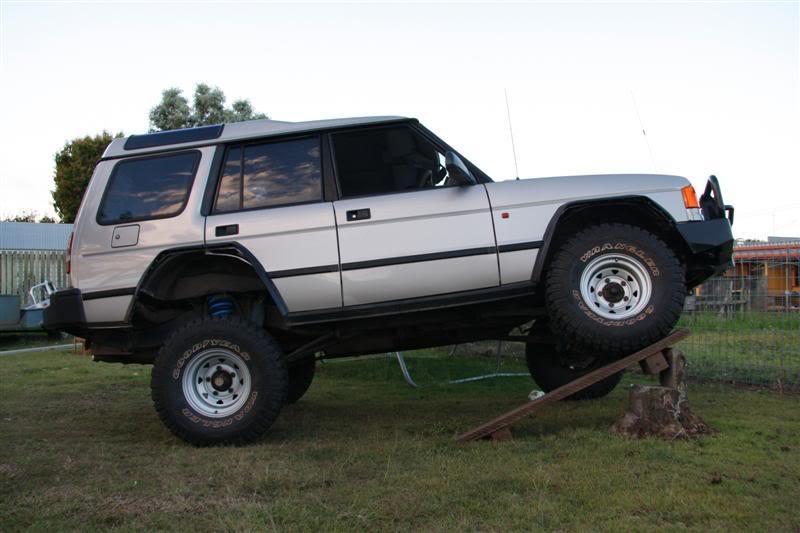
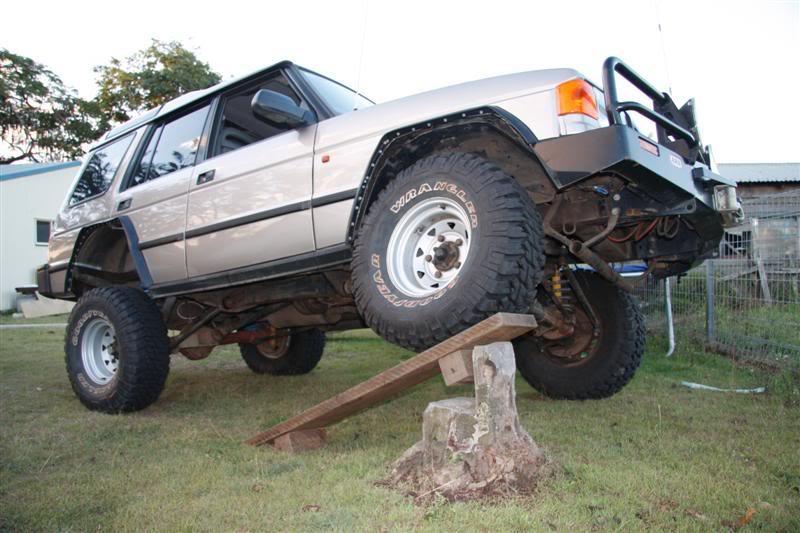
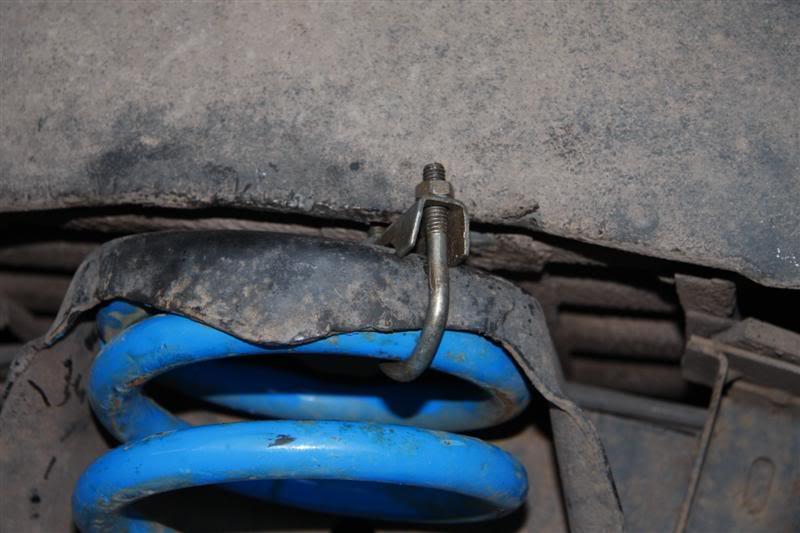
Righto, fixed the coil falling out issue this arvo & stuck it on the gidget travel-ometer
Yep, it's a stump we stick a plank of wood againstIt got to the top with no drama, so I was happy
The crude yet effective way to stop the coil from falling out
 Posting Permissions
| Search AULRO.com ONLY! |
Search All the Web! |
|---|
|
|
|


Bookmarks