

 Reply With Quote
Looks good! I'll definitely be following your progress.
I'm still in the planning stage of mine.

Hello Discoverers,
I am embarking on a self build for rear drawers and fridge alcove/slide and am going to post updates here if you are interested. Goal is to save a bit of money and get exactly what I want, rather than trying to make something prefabbed fit. Also to keep the weight down by using mostly aluminium (weight is the enemy!).
Without further ado:
Materials (to date):
$145.37 30 m (5 x 6m lengths) 25 mm square tube
$31.63 6 m lipped (flanged) 25 mm square tube
$19.01 24 x 3 way 'Y' connectors (qubelok or cube lock or handyman or whatever brandname you want. Mine came from Ullrich.)
$2.73 4 x 2 way corner connectors
$7.92 8 x 4 way 'Y' connectors
$209.28 3 x Pairs 700 mm 125 kg locking drawer slides
$415.94 Total so far
Tools Used (to date):
Tape measure
Sharpie
Cutoff Saw
File
Dead blow hammer (Best tool EVER! Or you can use a less awesome rubber mallet)
Process:
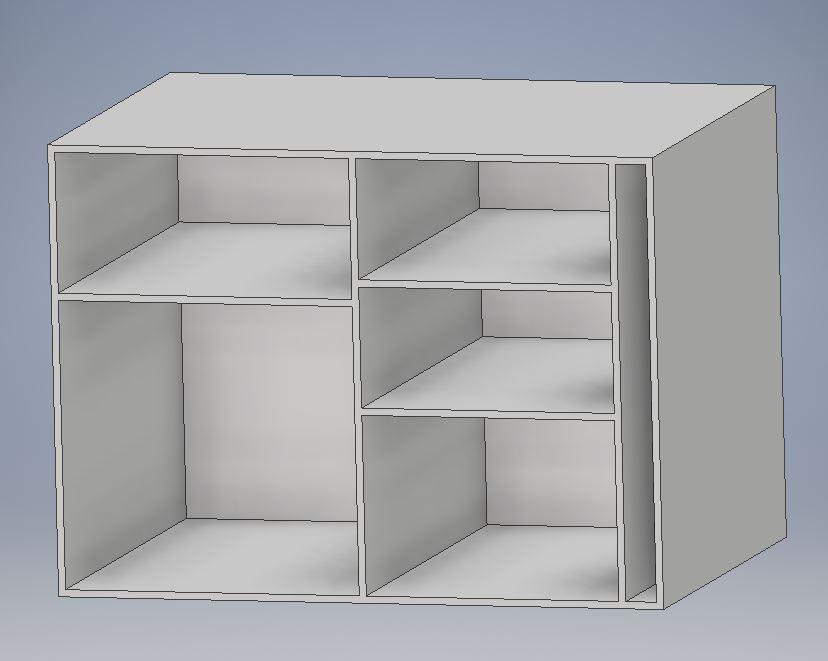
1. Make a Plan.
IMG_0319.jpg
2. Let your plan marinate. Are the drawers deep enough for the things you will put in them? How snug will your fridge fit? Where does the fridge power cable go? What about when you plug in the mains the night before a trip to cool it? how about future expansion when the rear seats come out? Permanently fixed or easily removable? How are you attaching the dooverlackey to the thingamajig? Change numbers. Is it symmetrical and aesthetically pleasing? Can you use that tray of 5/16 SS bolts you found in Grandads shed?
3. Let there be frame! Measure, Measure, Cut, File Burrs, Hammer. Repeat.
IMG_0317.jpg
Mine is 995 wide (460 space each side of the central post), 675 tall and 700 deep. Drawer spaces are 460 x 300. Fits with the back seats still in and will be tie-downable to existing points.
Back to step 1 for fitting drawer slides. Will be wooden mounting blocks or channel or angle. Not sure yet. Marinating. May clad in Aluminium sheet or 6 mm Marine Ply, undecided.
More to come!
 Fossicker
Supporter
Fossicker
SupporterLooks good! I'll definitely be following your progress.
I'm still in the planning stage of mine.
2000 D2 TD5: Tunit Chipped, EGR Delete, 2" lift, 265s, TJM bullbar, full length roof rack
 Master
Supporter
Master
SupporterI used the same approach years ago in our D2 ahead of our first Simpson Desert trip - keep the weight down, I couldn't believe the weight of steel systems and even plywood.
It was a bit of a rush job. I bolted the fridge slide to a ply base that covered the D2 cargo area then built the alloy frame over that and had a space next to the fridge for a set of plastic drawers from the hardware store. Intended to be a temporary measure and has lasted 10 years. Everything is fixed to the floor anchor points and the cargo barrier with zip ties. No squeaking, shaking etc and minimalist approach.
It's done Simpson, Hay River, multiple High Country trips etc without a problem.
_________________________
1996 D1 V8 - gone
2002 D2 Td5 ES- gone but still running elsewhere
2013 D4 SDV6 HSE - gone
2023 Defender 110SE D300
Fossicker
Much the same setup I built for back of last Pajero. A suggestion, take out the cross pieces on the floor and mount the whole thing on a ply base, that will give you more drawer height. I didn't have drawers but roller boxes .. I build the shelf height to suit. You will need to put some panels on it to stiffen it up, otherwise they can be a bit Flexi especially when loaded up and stuff falls behind the fridge.
I think I might go this way myself for the disco, that's the last job that is waiting on the cargo barrier to go in and build upto that.
Keep the updates coming !
Master
Mate I'm about to do all of this aswell so your guides are spot on for me except I think I'm going to do a ply base and make a box with the tube for the fridge and leave the other side open
Master
Where did you get the slides? And how do you mount to them? Ply base?
Slides from indrub, do a google. They had a deal going on 2 pairs of slides the other day, not sure if it's still on.Originally Posted by Mclaren00

Going to mount them with some unequal angle I think. Countersunk screws on the drawer slides and rivets in the frame I think. Then aluminium or ply cladding for rigidity, similar to an airframe. The slides are heavy and will help stiffen up the frame too. No base. Anchor to tiedowns with overkill turnbuckles.
Stay tuned!
Materials cost (to date):
$145.37 30 m (5 x 6m lengths) 25 mm square tube
$31.63 6 m lipped (flanged) 25 mm square tube
$19.01 24 x 3 way 'Y' connectors (qubelok or cube lock or handyman or whatever brandname you want. Mine came from Ullrich.)
$2.73 4 x 2 way corner connectors
$7.92 8 x 4 way 'Y' connectors
$209.28 3 x Pairs 700 mm 125 kg locking drawer slides
$62.50 1800 x 1200 x 2 mm aluminium sheet remaining from my rear door card project (1200 x 2400 sheet was $79.77)
$19.24 100 x trumpet head metal screws (25 mm)
$6.05 25 x M6 x 40mm bolts and nuts
$3.90 M6 washer pack
$507.63 Total so far
Consumables:
$16.93 Pack of 5 sheet metal jigsaw blades
Tools Used (to date):
Tape measure
Sharpie
Cutoff Saw
File
Dead blow hammer (Best tool EVER! Or you can use a less awesome rubber mallet)
Jigsaw
F clamps
Drill and bits
Some wood offcuts for clamping and drilling
Straight edge
Process Update:
4. After making the skeleton it took a few days of thinking to settle on a plan for mounting the slides. I settled on this:
IMG_0332.jpgIMG_0333.jpg
Each slide will be attached to an aluminium mounting plate that bolts onto the skeleton and a reinforcing square section. Plates pair up in the centre and pair with the external cladding on the sides. I decided on this setup because if (heaven forbid) my frame is a little out of true and the slides are not parallel after mounting, I can tidy them up with some extra washers or shims behind the mounting plates.
5. I cut two 700 x 675 x 2 mm aluminium panels to clad the sides of the skeleton.
6. Cut out the seven mounting plates I will need.
IMG_0328.jpg
7. Cut the five 650 mm reinforcing tubes
8. Drilled and bolted the first pair of plates together with their reinforcing tube. Super happy with how it turned out.
IMG_0330.jpg
9. The slides will fit nicely.
IMG_0331.jpg
10. ...and the side panels to be affixed.
IMG_0329.jpg
I should get all the slides in and squared up this week, then and only then will I take measurements for the drawers. Still debating wether to make the drawers sit inside the line of the slides (deeper drawers) or on top with a mounting bracket (slightly wider drawers).
Conceptual question: do you actually need slides?
I decided not, which saved a lot of money and weight.
Just a thought...
OldBushie
SupporterI did a breakdown of all the materials that I would need to build a 2 drawer system with a fridge slide and it worked out to be over $1200 and I think that I would have spent a bit more than that eventually ( the drop down slide was about $700 on its own) .
I went with the Titan drawers in the end at $588 delivered including a fridge slide.
I haven't received the drawers yet so I cannot say if they are any good or not yet.
If they are as good as they say they are then I will have saved myself a heap of money, time and effort, If Not then it won't be the first time I have bought something that wasn't up to scratch.
 Posting Permissions
| Search AULRO.com ONLY! |
Search All the Web! |
|---|
|
|
|
Bookmarks