Page 3 of 5 FirstFirst 12345 LastLast
Results 21 to 30 of 44

Thread: GME TX3340 install.

  1. #21
    Join Date
    May 2012
    Location
    St Ives
    Posts
    59
    Total Downloaded
    0
    sneigy ....disregard my lst question on the brake booster cover ....i found the Grommet and can get clear through for the wires

    i just realised my D4 has electronic seats ....and not a lot of room to fit unit under also they can move quite a bit with possible consequences for the radio wiring .....so i will fit up in the extreme left of the driver footwell and look for powersource under the bonnet ....any suggestions ...or can i hardwire into the battery terminals ........

    now that i have wireing access the installation should not be too difficult .....much appreciate your info on the grommet ....you would necver know it was there unless some one told you where to look ....apprecaite your comments on how it performed under your seat with out auxillary mic

    cheers
    thomas b

  2. #22
    Join Date
    Jan 1970
    Location
    Melbourne
    Posts
    2,622
    Total Downloaded
    0
    Thomas,
    My unit sits under my seat with the speaker facing upwards, I do not have an extra speaker as I can hear it all ok.
    Maybe when I get older I may need an external speaker

    Yes, you can run a twin cable to the battery direct, but make sure you run the earth to the battery earth terminals in front of the battery box.

    Cheers

  3. #23
    Join Date
    May 2012
    Location
    St Ives
    Posts
    59
    Total Downloaded
    0
    thanks Pete ....i assume the wireing from the radio will have a positive,a negative and an earth .....and i attach the earth to the battery earth ....note in this photo there are what looks like two eartbolts out side the battery box .is this what you mean ....does ot matter which one i use ....

    many thanks

    thomas
    Attached Images Attached Images

  4. #24
    Join Date
    Jan 1970
    Location
    Melbourne
    Posts
    2,622
    Total Downloaded
    0
    In previous vehicles I have run the thicker style speaker cable (figure 8 flex) to the battery direct, so you just have 2 cables to run. The positive & the negative(or earth as some people call it).
    Yes that is the spot to connect the negative cable to, it does not matter which one you use.

    Cheers

    Sent from my iPad using Forum Runner

  5. #25
    Join Date
    May 2012
    Location
    St Ives
    Posts
    59
    Total Downloaded
    0
    ok pete ....got it ...red?positive to the positive battery conection ....black?(negative earth ?? )to the points in the body work as per the photo .............
    now i just got to buy the radio and fit it ....sounds easy ......one last question ...is it hard to disconnect the MIC from the radio ?.....as when not in use this is what i intend to do

    thanks a million
    this makes it all understandable

    thomas

  6. #26
    Join Date
    Jan 1970
    Location
    Melbourne
    Posts
    2,622
    Total Downloaded
    0
    Disconnecting the Mic is not hard, can be a little fiddly at times but just a matter of you getting used to it.
    The hardest part is the rubber cap protector that can make it difficult, when you see the unit you will understand as the cap acts as a dust protector & lock at the same time.

    Cheers

    Sent from my iPad using Forum Runner

  7. #27
    Join Date
    Nov 2007
    Location
    Brisbane
    Posts
    395
    Total Downloaded
    0
    I have the SE model with the standard stereo system which means that the centre speaker cavity up on the dash is empty.

    Decided to install a remote 5watt speaker up into that void and works quite well, makes it easier for passenger to hear as well.

    To stop the speaker rattling around just padded out with some foam.
    New :- D3 TDV6 2006 SE
    Bullbar, traxide dual battery
    General grabber ATs
    Mitch hitch
    Home made drawer and fridge system
    Foldable UHF antenna on roof rail

  8. #28
    bomber1 Guest

    Installing UHF aerial on Disco 4

    Quote Originally Posted by sniegy View Post
    Morning all,
    Thought i would do a quick photo shoot fit for the UHF i fitted this morning.

    These instructions are for the Discovery 4 (any model).

    So here goes,
    I decided to fit a TX3340 as this gives the info & all controls on the Mic' head.
    So there is no need for the head unit to be fitted anywhere that would get in the way. You will need to remove the centre console to gain power from the cig lighter plug..

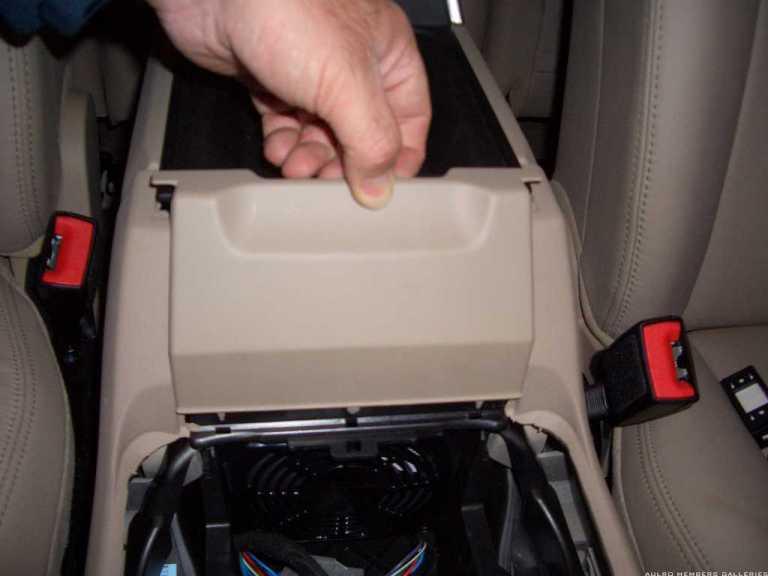
    Remove drink holder cup insert by lifting out, Grab a hold of the drink holder & lift upwards like in the photo.

    This next panel just lifts out in an upward motion as you can see,


    Undo the 2 screws & remove the gear knob by lifting upwards, be careful not to knock yourself in the chin as they can be stubborn.


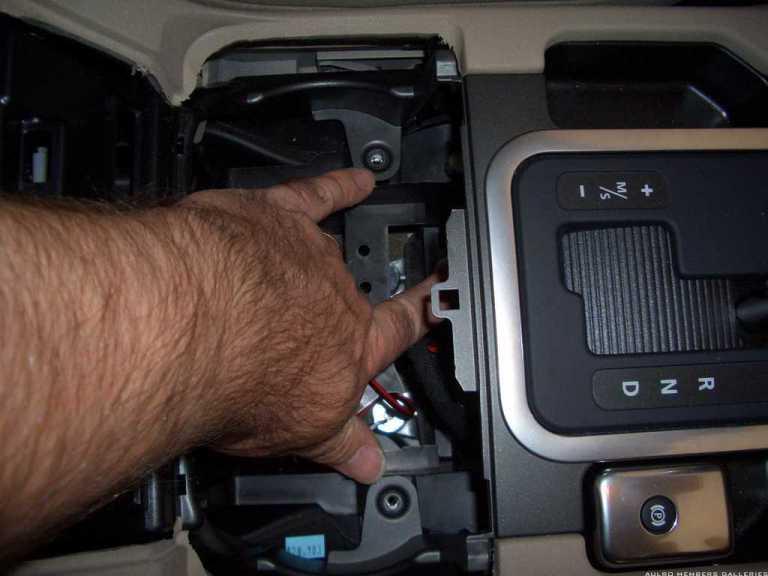
    Gently lift the centre console area by lifting from the rear end upwards, you will need to set the gear lever into neutral & then lift over the gear stick.
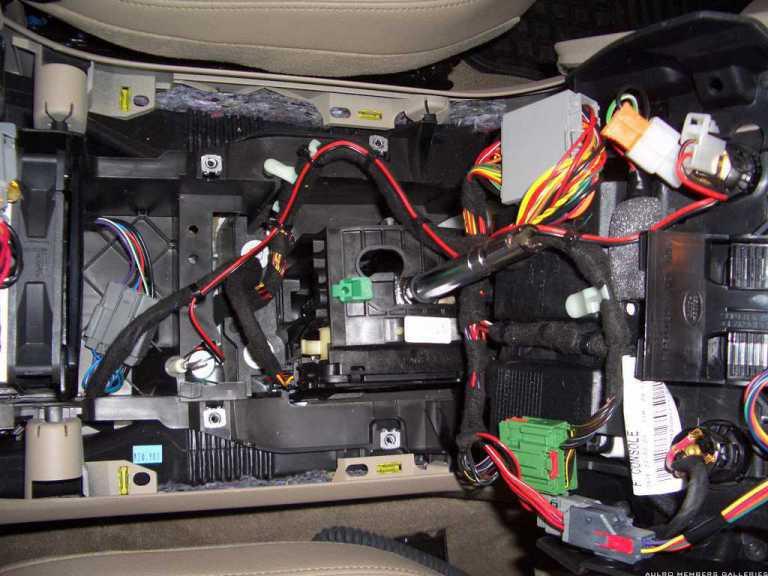
    You dont have to remove the entire unit as mine just sat neatly leaning against the gear lever. I ran the power wire with the main loom & cable tied it with it, you can solder into the +ve & -ve wires from the power plug but i had a few connectors lying around so made a male/female adaptor.
    There is a split in the carpet towards the rear of the centre console, so i ran the cable in that & hid it under the carpet so you cant see it.
    As you can see the clips that hold the unit are the yellow ones on the side, this gives an idea of where they are & how many.


    I mounted the main unit under the drivers seat, for 2 reasons.
    1. there is a big amplifier under there with a nice steel cage & you can use this to mount the unit on. I made a steel plate for the unit to sit on then spaced the bolts as the cage has a lip.

    2. It was easy to just run the Mic' cord to it without having to use the extended piece that would of been too long. Also the speaker faces upwards to me too. (we will see if the speaker is good enough?, its ok in the garage when its quiet, but out on the tracks will be different).


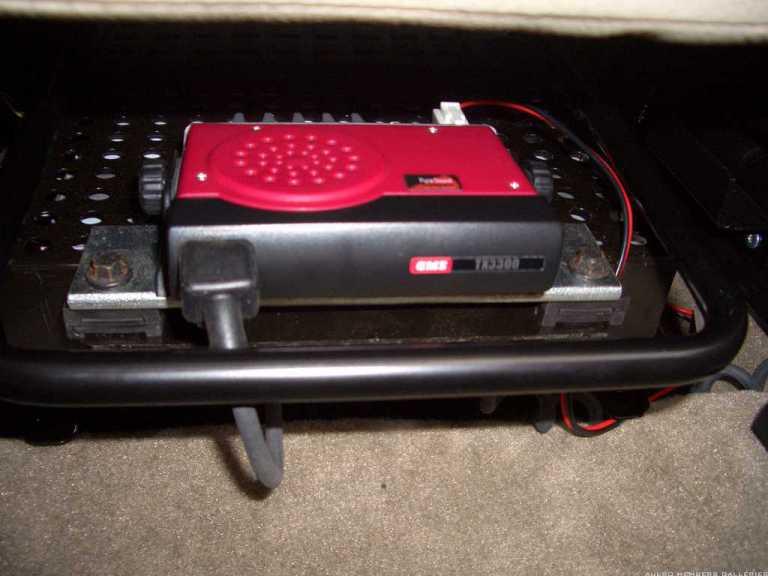
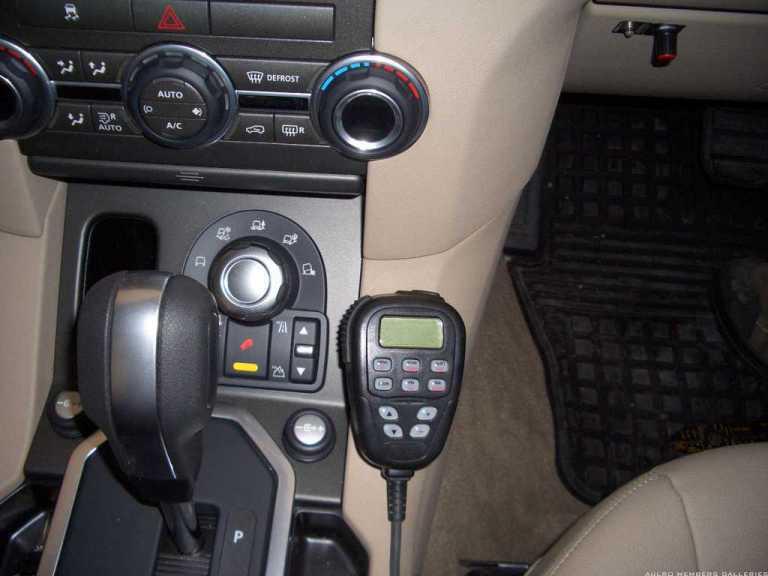
    THis is what you end up with in the final shot, Just a nice simple place for the Mic' to sit. Not in the way anywhere & easy to use when i need it.

    You can also see the Electric trailer brakes in the top r/h side, i fitted a RedArc remote head unit. See install at end of post
    http://www.aulro.com/afvb/d3-d4-rrs/...-brakes-4.html

    I have a bracket to fit to the aerial which i am in the final process of finishing. I will do another shoot for this piece as i plan to fit this on the tail gate section.


    Cheers all.
    Great photos and came in really handy for installing my unit. Now the big question where to mount aerial front or back?? Also if on the front where is the best place to go through fire wall?

    Regards Bomber1

  9. #29
    Join Date
    Dec 2009
    Location
    Sydney
    Posts
    523
    Total Downloaded
    0
    Quote Originally Posted by bomber1 View Post
    Great photos and came in really handy for installing my unit. Now the big question where to mount aerial front or back?? Also if on the front where is the best place to go through fire wall?

    Regards Bomber1
    For the aerial mounting options, try this thread for the discussion and photos.

    The standard place to go through the firewall is via a grommet where the clutch cable (on a manual model) would go through. Check out the instructions (and first 4 photos) for installing the Traxide auxilliary battery kit here.

    Apparently, since talking to Tim (of Traxide) there might be another place that is even easier, lower down the firewall, but I have not personally looked yet.

  10. #30
    Join Date
    Jan 1970
    Location
    Melbourne
    Posts
    2,622
    Total Downloaded
    0

Page 3 of 5 FirstFirst 12345 LastLast

Bookmarks

Bookmarks

Posting Permissions

  • You may not post new threads
  • You may not post replies
  • You may not post attachments
  • You may not edit your posts
  •  
Search AULRO.com ONLY!
Search All the Web!