

 Reply With Quote
Ill second that! Coming along nicely!

 Fossicker
Looks good mate
AT REST
Ill second that! Coming along nicely!
Wizard
Cheers guys. Surely, there should have been a commercial version available by now. Heaps of work, but wouldn't do it if I didn't enjoy pottering around tinkering and so on. Just hope it's waterproof. Hoping to get to the fibreglassing stage next week.
Master
SupporterThat's looking really good mate, thanks for keeping us updated, you have inspired me to need a snorkel!
Master
SupporterSome additional info on this point, last week I ripped the single point LPG fumigator/thing from between the upper inlet manifold and air intake tube. When it was in place it created a large reduction in throughput for air, down from the original 90mm to I'd guess 65-70mm. I was hoping removing it would improve things in terms of power or torque or something, but it made no difference at all. Not even top end. I dont think using 75mm snorkel piping would cause you trouble.Originally Posted by FANTOM P38

Now: 2005 L322 Vogue 4.4 M62TU (Black)
Before: 2000 P38A HSE 4.6 - stately capability | 2008 Kluger KX-S | 2004 Forester | 2000 Yamaha XJR1300 | 1993 VR Calais | 1974 HQ Statesman - 308 V8 | HT | HK
Wizard
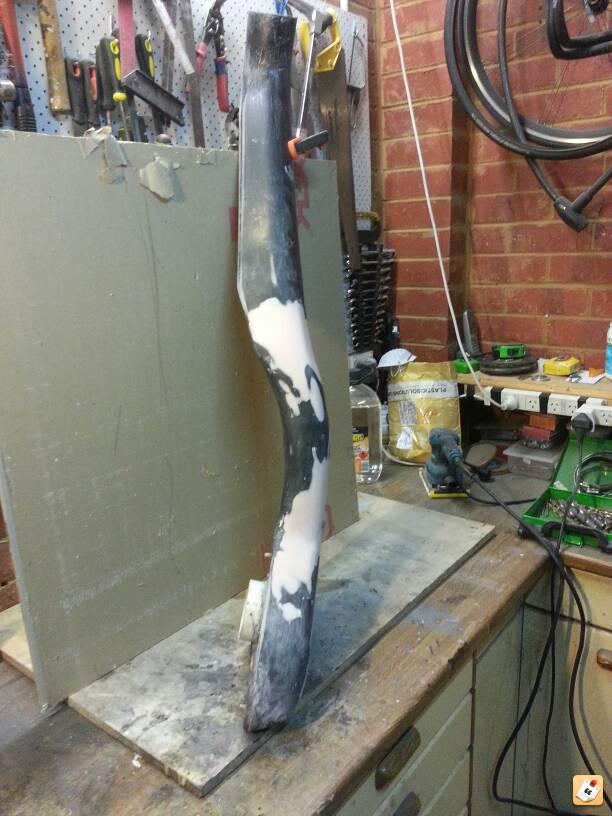
Ready to start fibreglassing. I've covered the sculptured polystyrene mould with water based paint, then masking tape, then car wax and finally lanolin. Got to get the bugger out.
Reckon my fibreglassing will be fine - after lots of sanding! The epoxy resin can be built up to an inch thick - so should provide room for tinkering.
Wizard
Well it's been a long drawn out job. Plenty of hours. Once I was happy with the mould, I did some fibre glassing off the car using the jig I'd made. But of course the jig wasn't rigid enough and when offering the snorkel back up to the car, it didn't line up the way I had intended.
Therefore I had to make two partial cuts top and bottom of the filler piece and then fix it back to the car and apply more fibre glassing to the joints I'd cut. Bingo. Happy bunny. But of course that was only the start of getting it to look right and be strong enough.
So I've been applying more layers. Sanding. Some more sanding. And then a little more sanding. Then some body filler. And back to sanding.
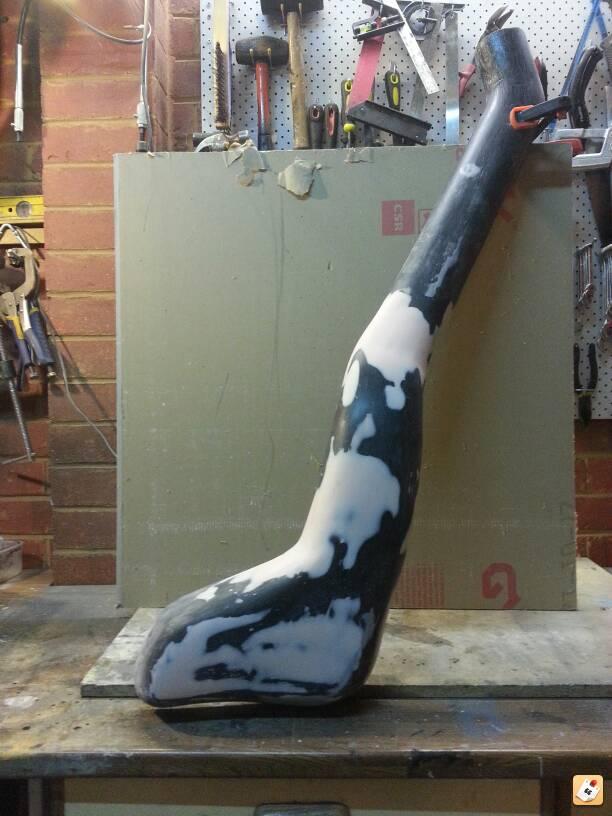
I had some fun getting the extruded polystyrene out. I used a combination of smashing (bbq rotisserie spit), drilling using flexible cable, rotary wire brushing plus a few other tries with compressed air and a pressure washer. Oh and some petrol to dissolve the leftovers. But that was messy and sticky.
So here's where is at. Ready for high build primer (then sanding of course) and the top coat. Hopefully so I can install it soon. All the prep for the actual installation is done. It's just a matter of finishing the snorkel now.
I'll obviously post some pictures of the finished article.
I'd like to apply a sticker or badge to the side other snorkel. Any suggestions?
Wizard
SupporterWell done, I'll look forward to seeing the end result installed.
Gary
AT REST
That's looking really good mate! Can't wait to see the finished product!
Master
Well done!! Looking really good. I look forward to the finished product pics
 Posting Permissions
| Search AULRO.com ONLY! |
Search All the Web! |
|---|
|
|
|
Bookmarks