Page 2 of 8 FirstFirst 1234 ... LastLast
Results 11 to 20 of 71

Thread: Camp stove conversion from LPG tank

  1. #11
    Join Date
    Sep 2008
    Location
    smurf village
    Posts
    8,332
    Total Downloaded
    0
    we cooked a roast with just 2 pieces of wood or half a round log for the fire

  2. #12
    Join Date
    Jan 1970
    Location
    Stockton, NSW
    Posts
    2,769
    Total Downloaded
    0
    Hey Khos,
    I see the use of the ozpig over the weekend must have inspired you, i wish i have gone that way myself, it was bloody expensive and if i was to make a custom one i would use a bigger gas bottle. They are handle little things thats for sure!

  3. #13
    Join Date
    Jan 1970
    Location
    Stockton, NSW
    Posts
    2,769
    Total Downloaded
    0
    Quote Originally Posted by Disco_owner View Post
    Hi Mike;

    they work quite nicely , with the Flu drawing air the intensity of the heat can be controlled with how far the hatch is "open" or "closed".
    or how much air you blow into it with the air compressor

  4. #14
    Join Date
    Dec 2006
    Location
    NSW , Pennant Hills
    Posts
    3,477
    Total Downloaded
    0
    Quote Originally Posted by cal415 View Post
    Hey Khos,
    I see the use of the ozpig over the weekend must have inspired you, i wish i have gone that way myself, it was bloody expensive and if i was to make a custom one i would use a bigger gas bottle. They are handle little things thats for sure!
    for sure mate , seeing your ozpig definitely inspired me to make one, they are great not only as a heater but also a cooktop stove. one big downfall is they take up a little too much space in the truck for when we're going camping.

    Quote Originally Posted by cal415 View Post
    or how much air you blow into it with the air compressor

    lol. that's to get the fire going well initially then you back off and no smoke, nice clean burn

  5. #15
    Join Date
    Jan 1970
    Location
    Stockton, NSW
    Posts
    2,769
    Total Downloaded
    0
    with the car space issue, i was thinking i dont really want to store it in the truck after its been used, not nice smelling ash while driving around. I was thinking it would be good to make some kind of carrier to hang off the spare or rear of the vehicle, i think mine will fit in my rear door basket but i havnt tried yet, they are not overly heavy when packed up and empty so a rear carrier shouldnt be to hard.

  6. #16
    Rangier Rover Guest
    Hey Khos, you been playin with compressed air again Seems to be a trade mark of yours
    Hmm, I have a spare 100lb bottle here

  7. #17
    Join Date
    Dec 2006
    Location
    NSW , Pennant Hills
    Posts
    3,477
    Total Downloaded
    0
    Quote Originally Posted by Rangier Rover View Post
    Hey Khos, you been playin with compressed air again Seems to be a trade mark of yours
    Hmm, I have a spare 100lb bottle here
    who , me ? nah

    wish I had come over a week earlier , could have cought up with you and rovercare. that 100lb bottle would make a very nice ozpig , may be next time I make it over to your joint i could get started on a nice ozpig for the rangier's shed. but then again there is the rangier rover wood heater..

    ...now what was that about compressed air...

  8. #18
    Rangier Rover Guest
    Quote Originally Posted by Disco_owner View Post
    Part 1


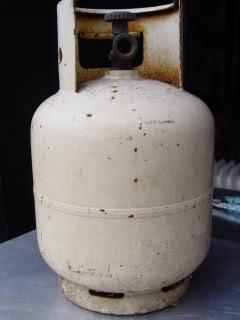
    While I was down at the metal scrap yard this morning dropping off a heap of steel for recycling , I happended to notice a few "old LPG tanks" next to the Big Skip. I couldn't help myself so this is what i brought home with me x 3


    I have seen many different variations of this cooking stove/heater.
    But I thought I'd do my own and I appologise in advance if my design is a copy,
    I make no attempt to go commercial with this design.

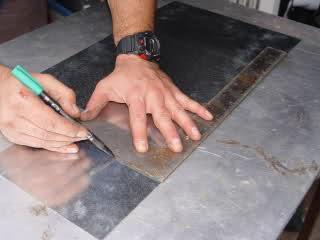
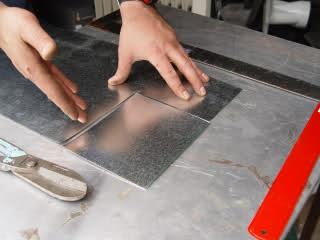
    so,to mark out the hatch I make a simple Template so that it would be easier
    to mark out with a permanant marker by simply placing the templet over the
    face of the gas tank and drawing around it.

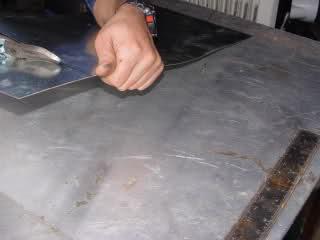
    I had some left over gal sheets from another project and squared off 1 side
    of the gal sheet with a reasonably large set square to ensure the templete is
    completely square before marking out the hatch template.


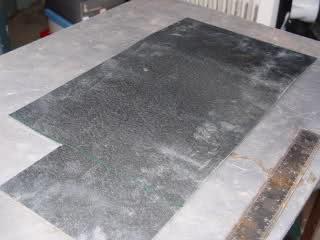
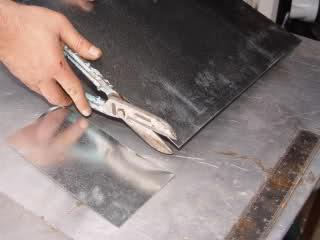
    cut off the excess piece marked off with tin snips.


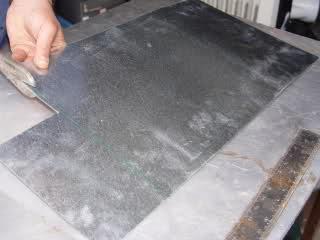
    after checking all side with the set square to make sure
    the sheet is square on all 4 sides.


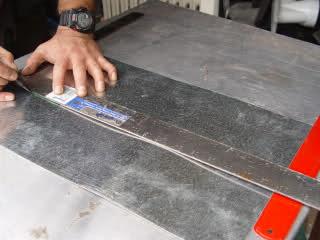
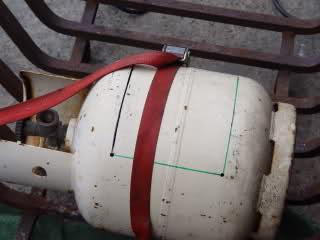
    I placed an engineering ruler on the face of the gas tank and took some
    measurements and worked out that a hatch 180 mm x 140 mm was a
    reasonable size but others may make their hatch smaller or slightly bigger ,
    the inside of the heater/stove will have a circular steel mesh to place firewood
    on top so I didn't want to cut a hatch any bigger as hot coals would probably
    fall out of the front hatch if it was open .

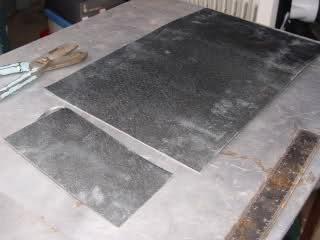
    marking out the template for the hatch


    180 mm x 140 mm Template cut with tip snips


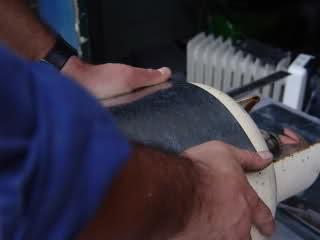
    I placed the template over the face of the gas tank and work it with
    both hands so it takes the same curvature of the tank so on marking
    out it is easier to hold it in place with 1 hand and mark out around it.


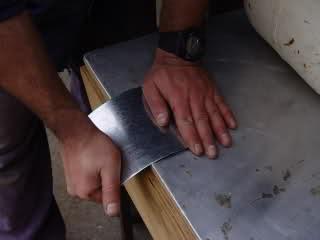
    placed the sheet of metal over the edge of the bench and placed my
    left hand on one side while trying to give it a nice gradual curve with
    the other hand by pushing down and continued this until it has a nice
    even curve to it until I was satisfied it followed the same curvature on
    the face of the gas bottle.


    I then placed the template over the face of the bottle and
    marked out around the edges of the template.


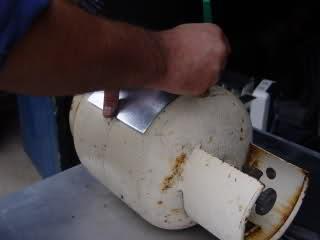
    there it is , a nice straight clear mark and I have a template to
    mark out another one if I have to make another one.


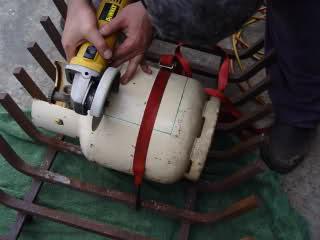
    ok , cutting a round tank on the ground can be a tricky experience
    and one shouldn't attempt to do so, needs to be strapped down,
    I found the best way to strapp it down was to attach it to a very
    heavy cast steel base from our own fireplace with a strap for my roof rack.


    now before anyone picks up from the pic below that my fingers are in
    the way and I should be 1,0000,000 times more careful,the
    angle grinder Wasn't running.this pic was taken for a demo only.
    I still have all my fingers

    you may like to drill a small hole ( say about 4.5 mm ) in each
    corner for easy cutting and removal of the hatch
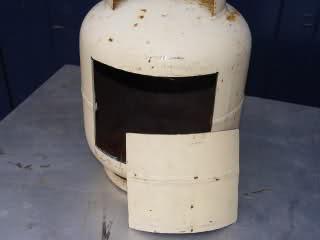


    one side is cut


    the front hatch is completely cut out.


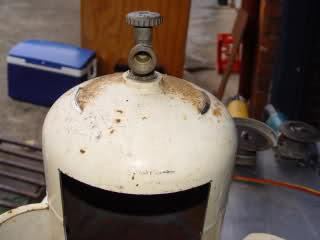
    now it's time for the handle on the top to be cut for easier
    marking out of a circle that needs to be cut on top of the
    gas bottle for a stove and the steel plate for cooking.


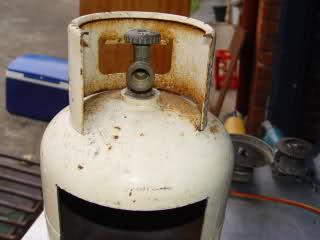
    top handle cut with a thin disc on the 4 " inch grinder.


    Please Note !! These Bottles are all Empty meaning the
    pressure inside is the same pressure as the outside .

    Looks like your a lot more careful with an angle grinder than a kitchen knife

    Nice work Since you have two bottles left over why not join them together. Extenda pig

  9. #19
    Join Date
    Dec 2006
    Location
    NSW , Pennant Hills
    Posts
    3,477
    Total Downloaded
    0
    Quote Originally Posted by Rangier Rover View Post
    Looks like your a lot more careful with an angle grinder than a kitchen knife

    Nice work Since you have two bottles left over why not join them together. Extenda pig


    I like the idea of extended stove , which way would you join them together thou?

    2 x horizontal bottles welded together to make one with a single flue..

    I like the horizontal version with a round hatch , think I will do one of these next ...


    I'd unscrew and remove the valve and cut out a circle on top which will be the hatch hindged off down the side .

    what do you reckon...
    Last edited by p38arover; 23rd July 2010 at 08:14 AM.

  10. #20
    Join Date
    Jan 1970
    Location
    Close enough to their Shire to smell the dirty Hobbit feet
    Posts
    8,059
    Total Downloaded
    0
    Khos


    how about building a spit from a horizontal 100l LPG tank?

Page 2 of 8 FirstFirst 1234 ... LastLast

Bookmarks

Bookmarks

Posting Permissions

  • You may not post new threads
  • You may not post replies
  • You may not post attachments
  • You may not edit your posts
  •  
Search AULRO.com ONLY!
Search All the Web!