


 Reply With Quote
Well done, professional install and excellent write up.
I note Safari have improved their Disco snorkel with a single piece going between the outer guard and the inner guard, making sealing far more positive.
Erich

 Master
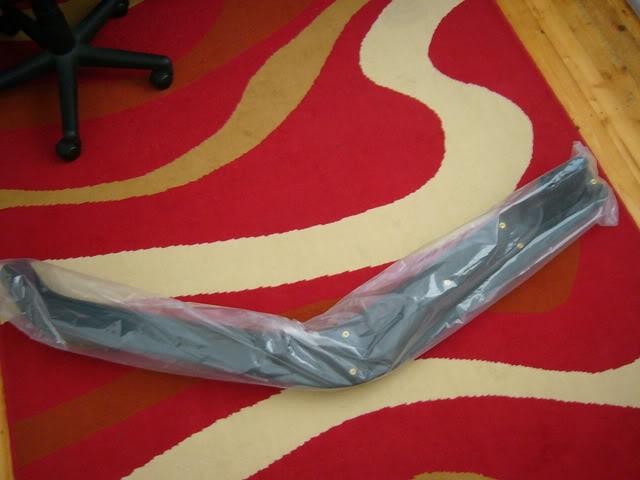
Well I went to the Victorian 4WD show last weekend (what a great day) anyway I ended up coming home with a safari snorkel.
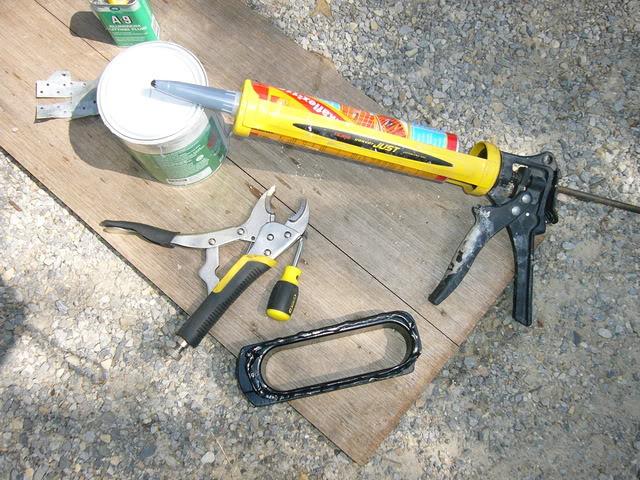
The plan was to do the install this weekend and I was lucky, the weather was fine. During the week i had to purchase a few extra tools & material that I needed.
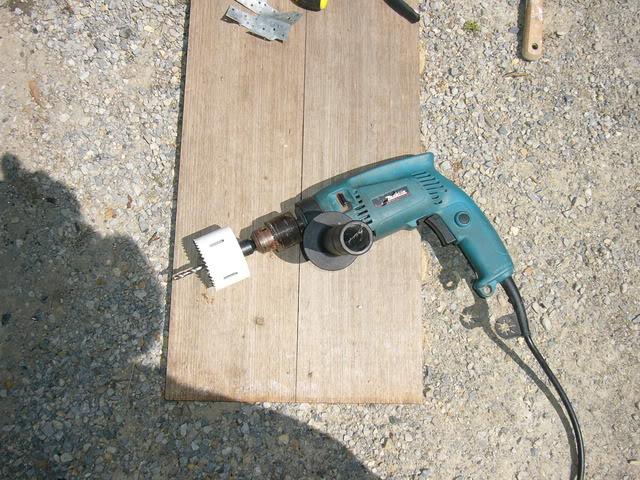
70mm hole saw
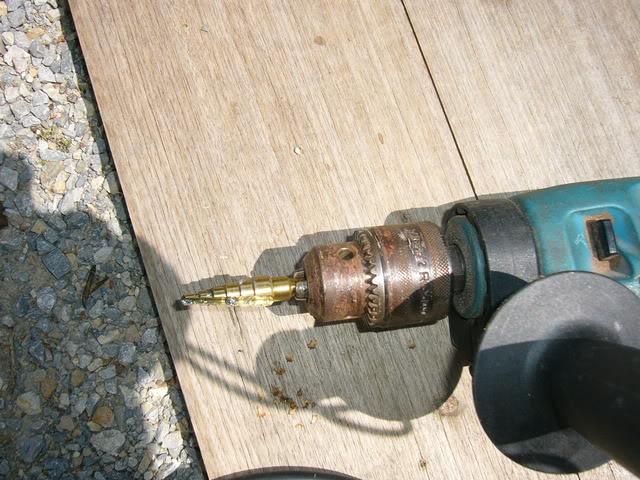
stepped drill bit set
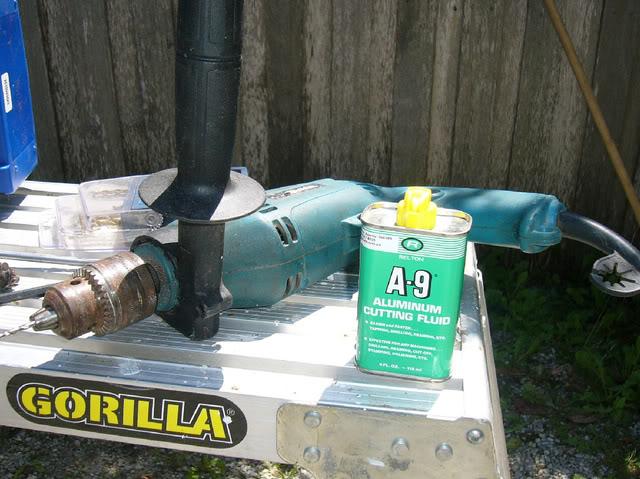
Cutting compound
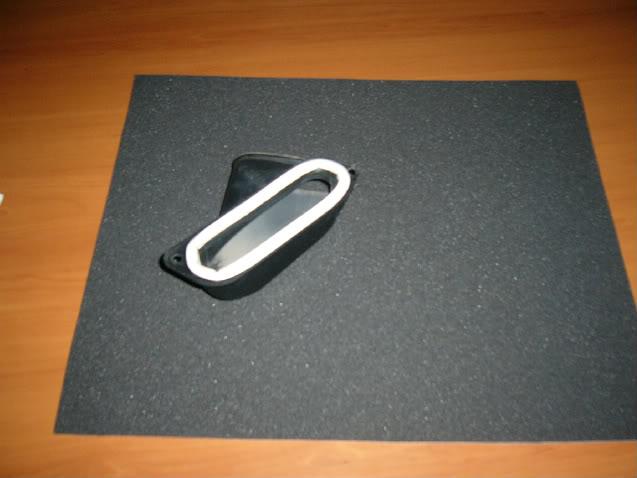
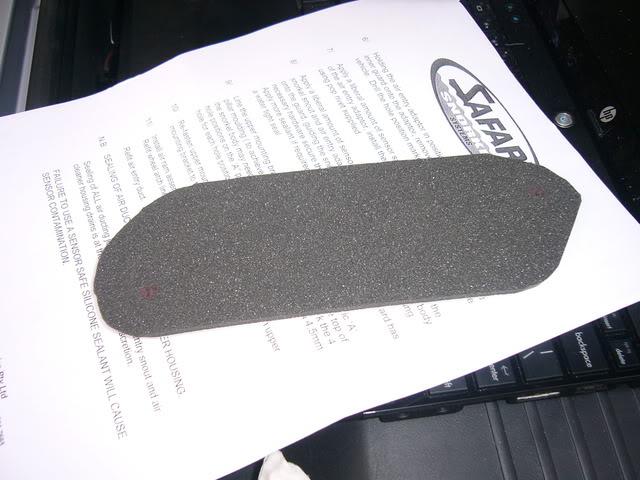
3mm Self adhesive closed cell foam
I already had:
Permanent Marker
Masking Tape
Hole Punch
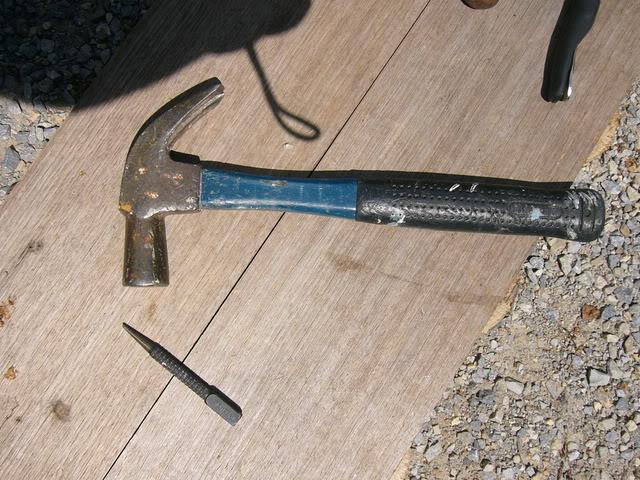
Hammer
Electric Drill
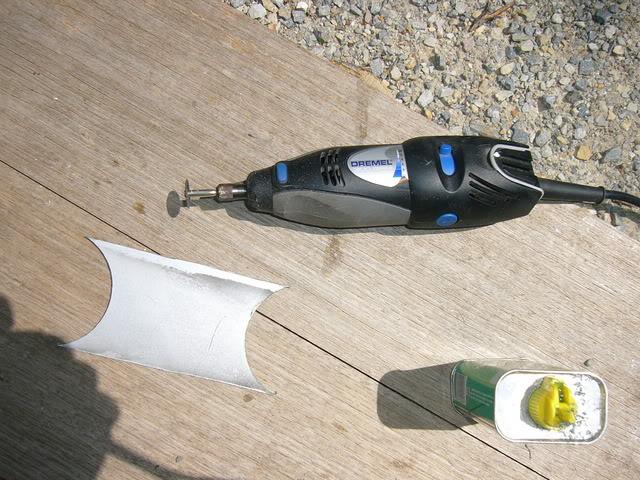
Dremel
Sikaflex 11FC
Caulking Gun
T25 torx bit
Phillips & Flat Head Drivers
Jack & Axle Stand
Carnuba Wax Polish
Rivet Gun
4mm Drill Bit
Acetone
10mm &13mm sockets and spanners
Make sure you check that all the components, and you have the correct template in your box.
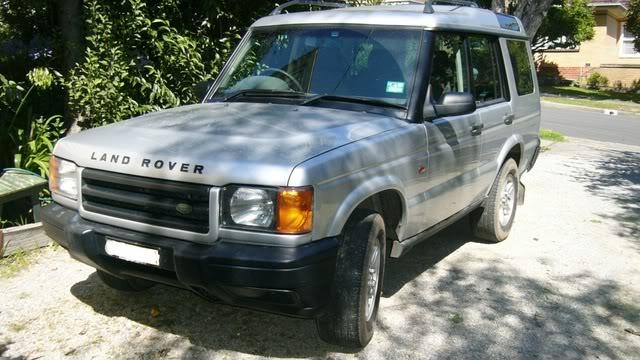
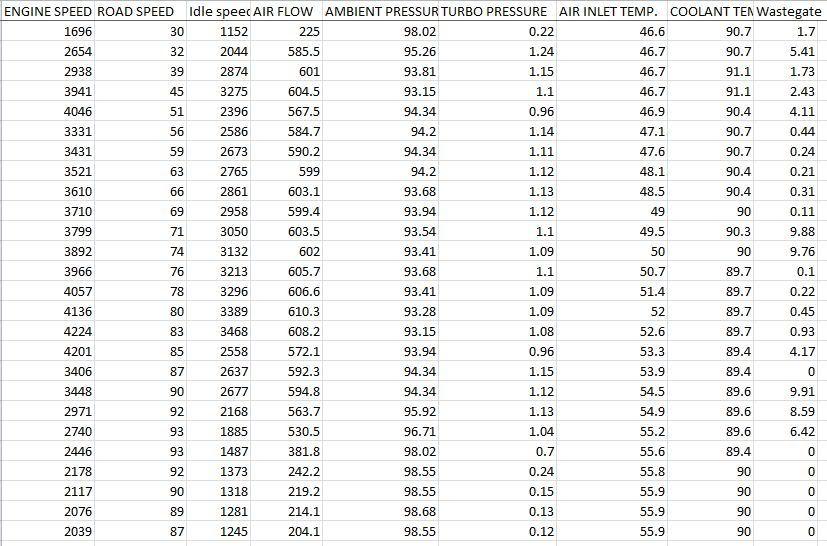
So first up was to take the car for run with the Nanocom Evo set to record the Pre Install TD5 Data
I'll post the Pre and Post numbers at the end of this post.
Here's my D2 Before the install
After the run it was time to start the job.
The first thing today was remove the front left wheel and get the truck onto a axle stand. Pretty straight forward.
Remove the Inner Guard liner you will need the T25 torx a Phillips Head driver and I Flattened a Triple Grip to pry the Plastic clips out. There was one casualty. You also get to see how much dirt is built up in you guard.
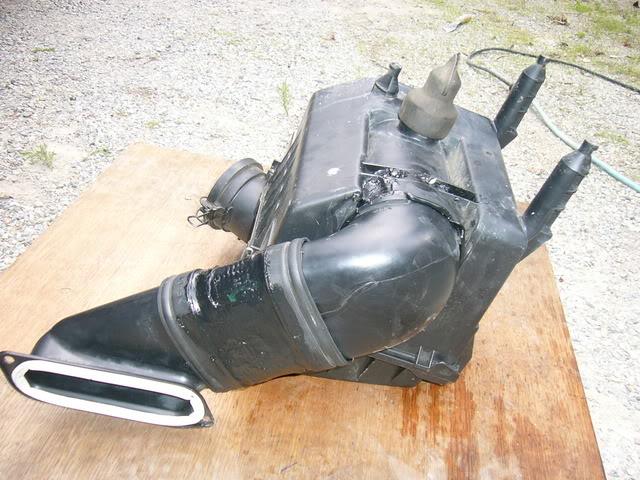
Now remove the airbox
Disconnect the vacuum line, air temp sender (I think that's what it is) and MAF. Pull the box straight up It takes bit of effort.
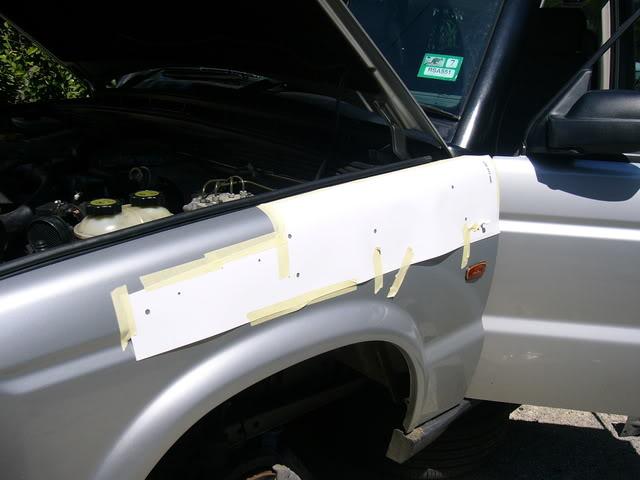
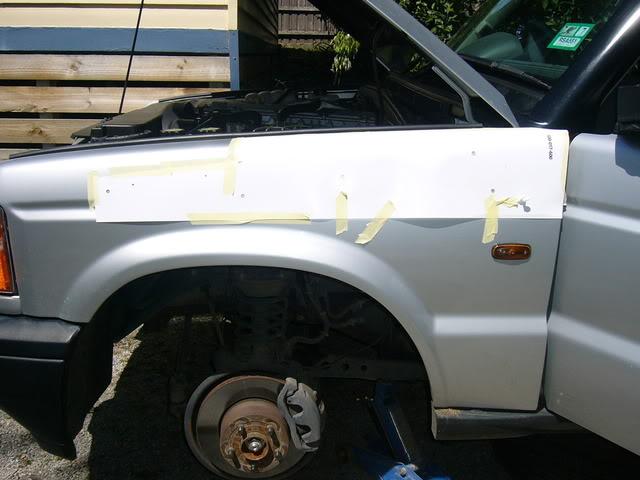
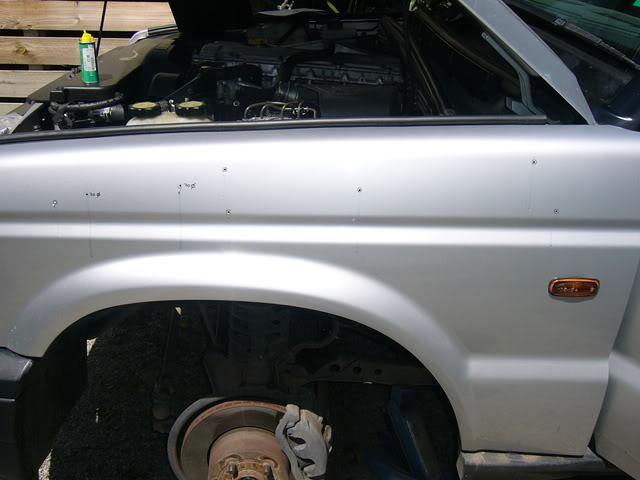
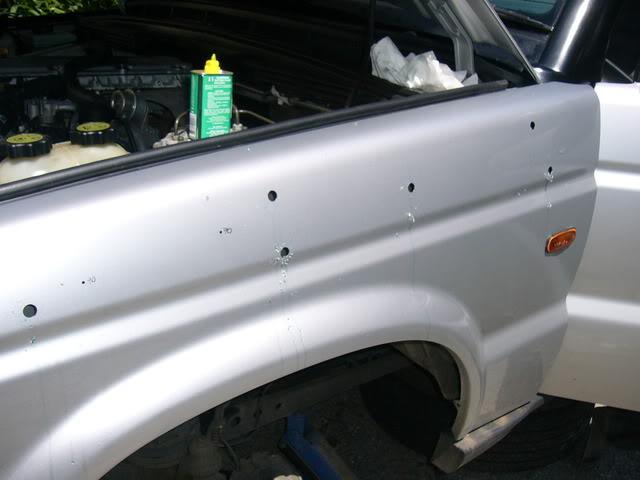
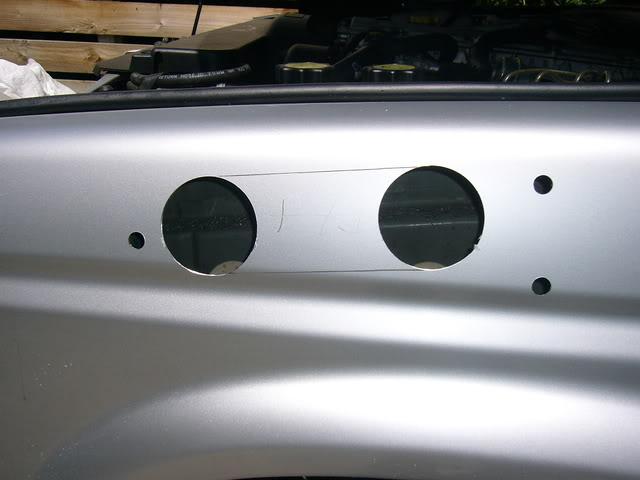
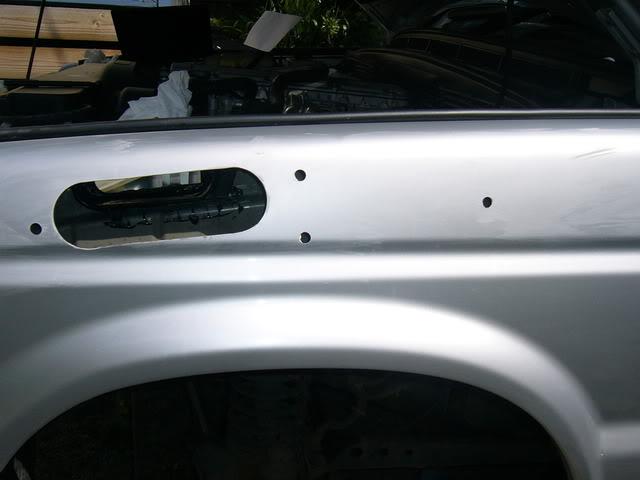
Attach the template to the left front quarter panel with some masking tape, line the top of the template with the top edge of the guard and the right edge with right end of the guard.
I checked and tripled checked that I had placed the template in the correct position. You will also notice that a buckle will form in the template, I just made sure the buckle did not occur where I needed to mark the hole and stud locations.
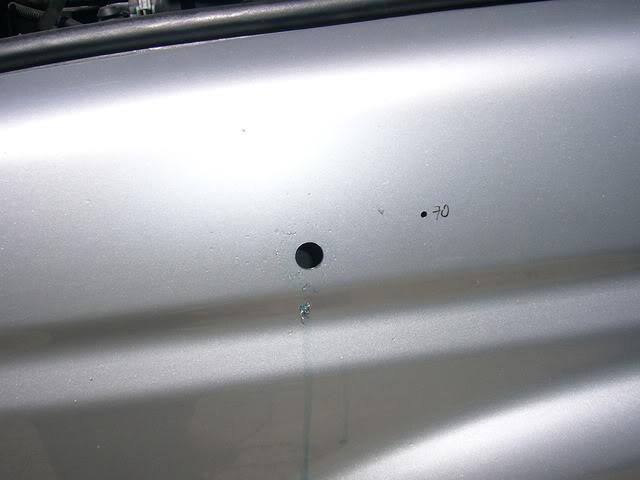
Once your satisfied mark the locations to drill with a permanent marker.
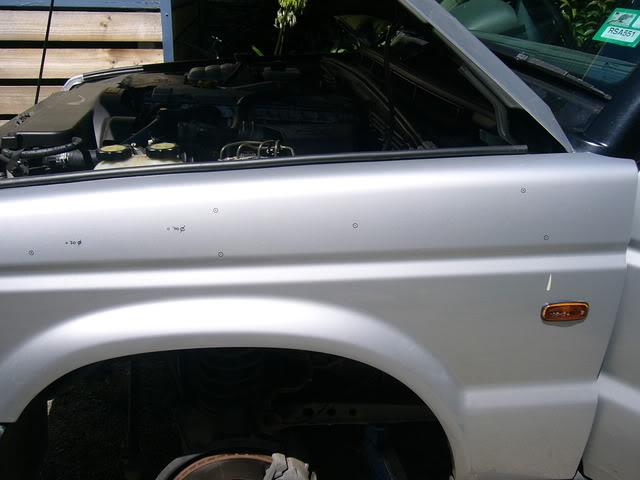
Remove the template but leave in a handy location
Now where about to embark on the point of no return. Grab your hammer and punch set them next to your truck and wait for the butterflies (I took this opportunity to have a cigarette, read the instructions again, consult the internet and offer up that template again to quadruple check that the hole locations on in the correct spot )
Took me a good 10 min before a actually started to mark each drill location with the punch.
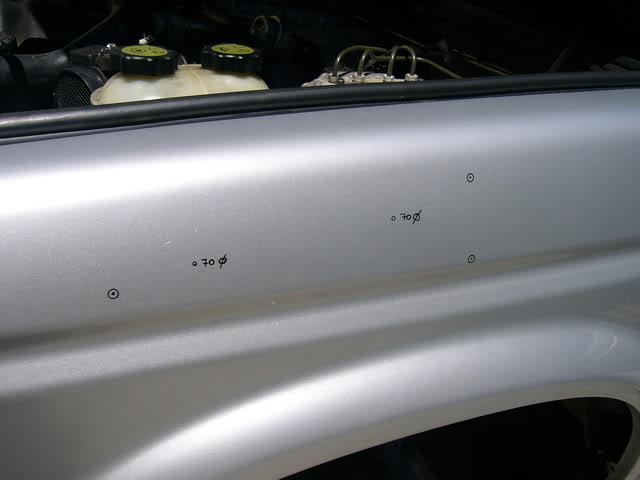
We're now ready to drill our pilot holes I used a 3mm bit for this with a dab of cutting fluid.
Once the pilots are drilled grab the stepped bit (the safari instruction sheet says to open the stud mounting holes to 16mm) after a bit of research, many people had said this was unnecessary. I decided to open the holes up to a 1/2 inch (12mm). Don't be to shy with the cutting fluid.
The butterflies have disappeared now, it's time the use the 70mm hole saw. I recommend a third hand for dripping the cutting fluid while you drill, so I asked my partner to give me a chop out, she was not impressed with the cutting fluid that sprayed onto her top as I drilled. (Be warned)
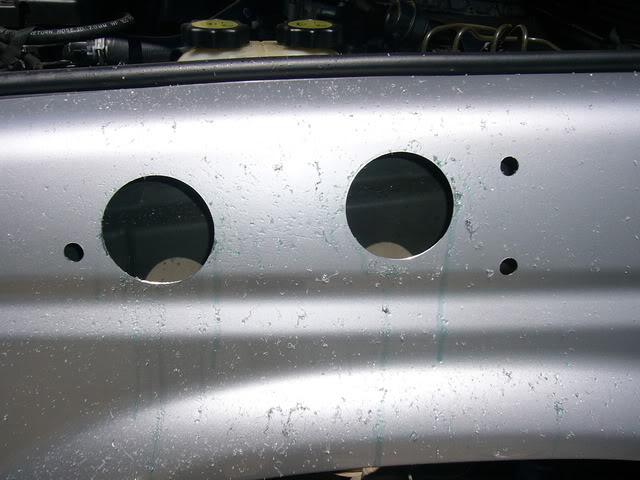
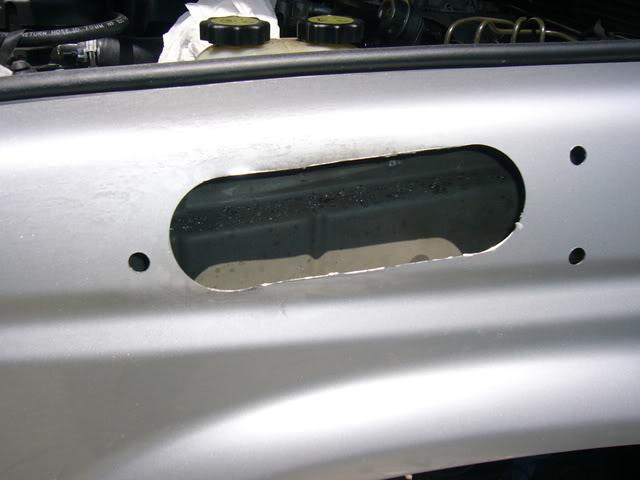
Now Mark between the two 70mm holes with a straight edge grab the dremel and cut to the lines.
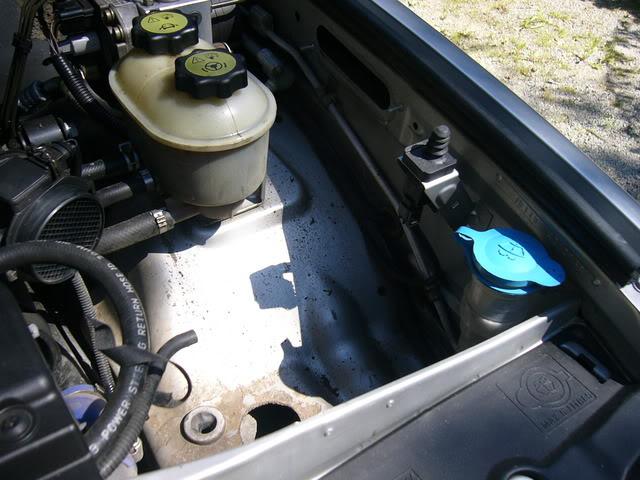
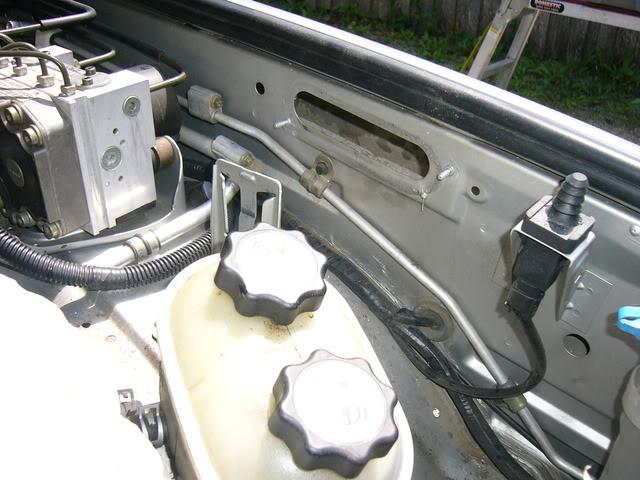
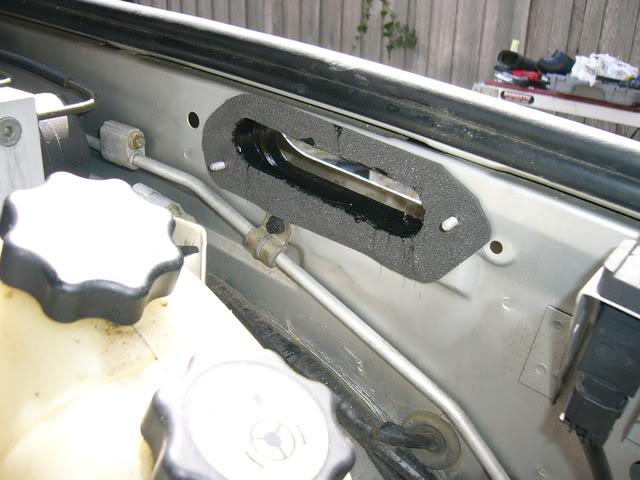
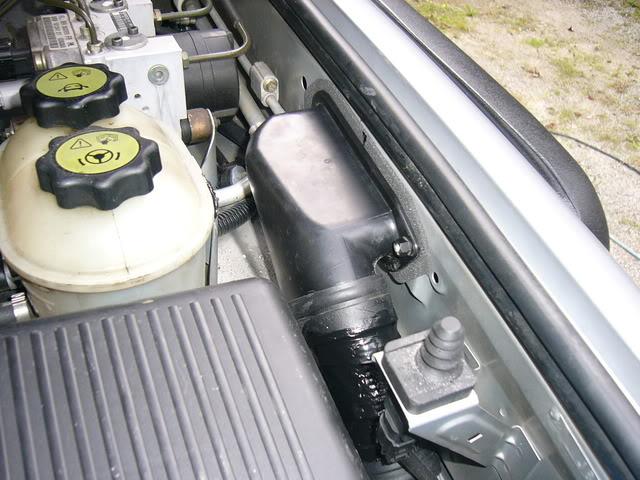
While the power tools are out mark and drill the hole for the Cast metal inlet piece also drill the casting use a 4mm bit (I had to relocate my PAS/Ace reservoir)to get the drill in
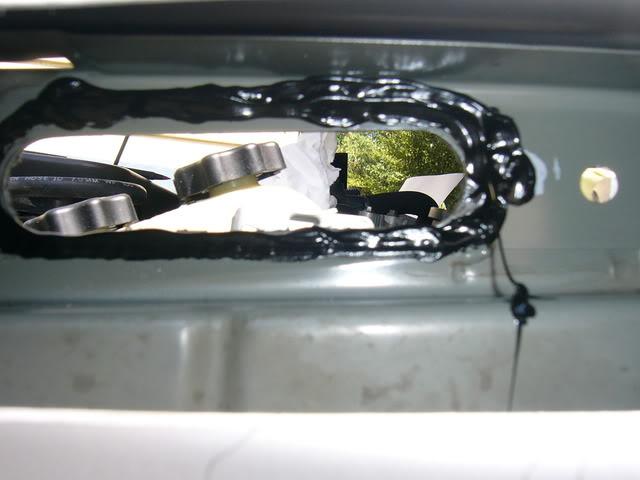
Clean up all edges with a file and dremel, the stepped drill holes will need minimal work. You definitely want the large oval shaped hole to have no sharp edges as we'll be sticking our hands in there later. Also give all exposed metal a coat of paint (I just used what ever I had which was Rust Guard Metal Primmer)
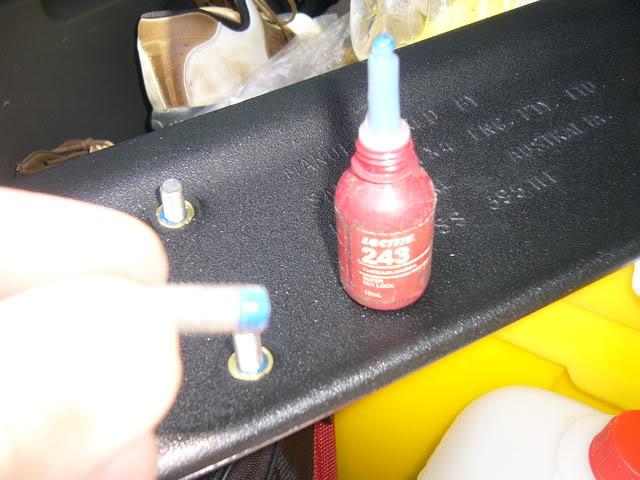
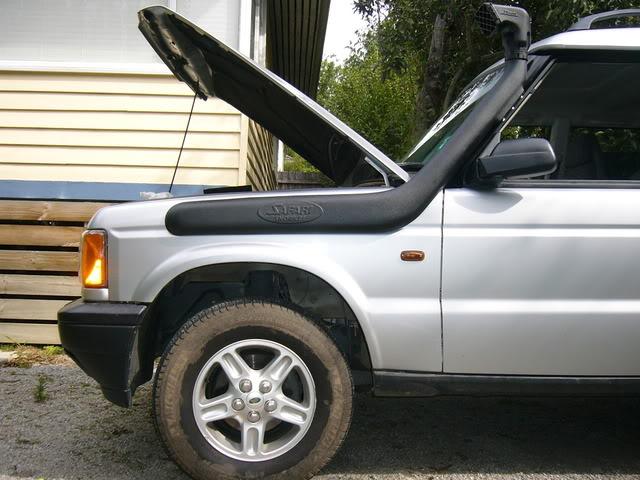
Fix all the studs to the snorkel with loctite.
Now we can test fit the snorkel. Whoo hoo all good.
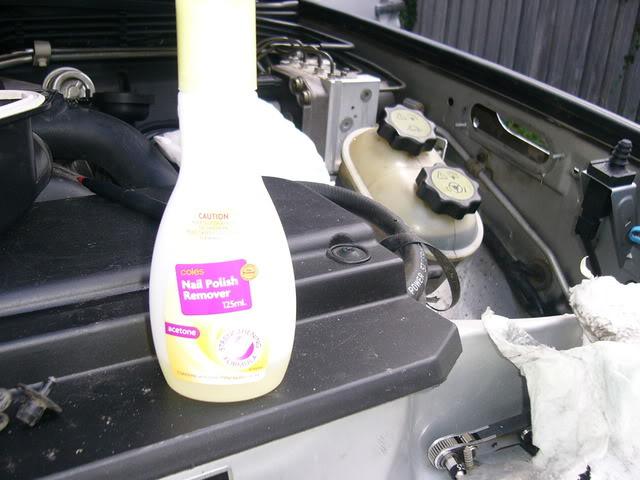
Now borrow your partners nail polish remover (acetone) and clean up all the areas that will need to be sikaflexed
This is also the last chance to get a coat of wax on your duco, because you wont be able to remove the snorkel easily once the sikaflex goes off.
I decided to use 3mm self-adhesive closed cell foam to seal the the airbox inlet to the snorkel on the engine bay side. (not sure how water tight it is yet) But I definitely don't want to sikaflex it yet.
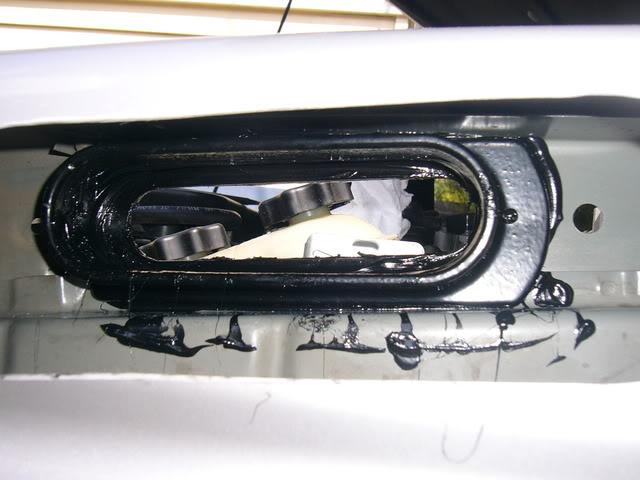
Time to Sikaflex. Fix the cast inner guard bracket with a rivet (Tip from when I did glazing, use morning fresh to skim excess and smooth the finish) I skimmed all excess sika from the inside of the intake housing with my finger (use a latex glove)and watered morning fresh
Now get a good bead of Sikaflex onto the snorkel end. I pre-cleaned this with acetone as well. And bolt the snorkel to the guard but don't torque the nuts up yet.
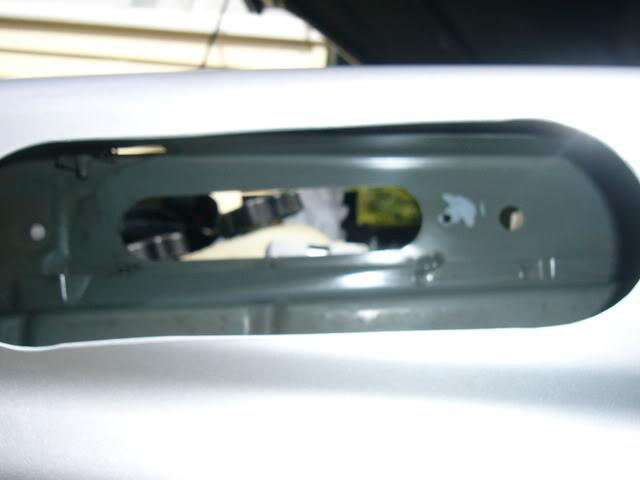
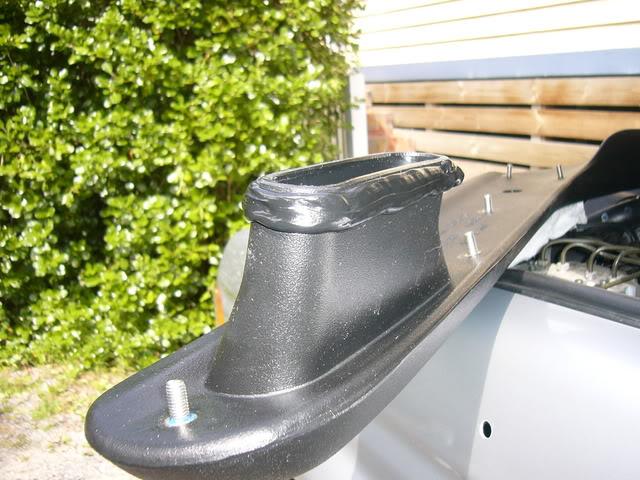
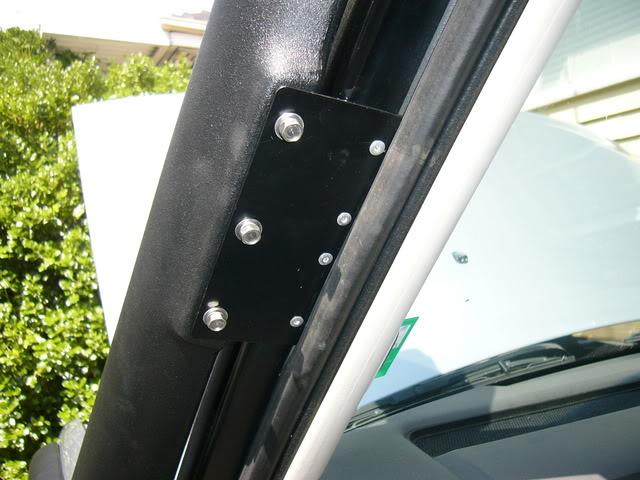
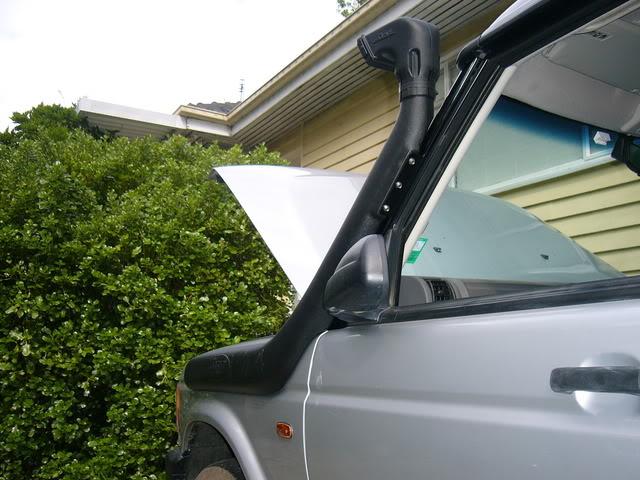
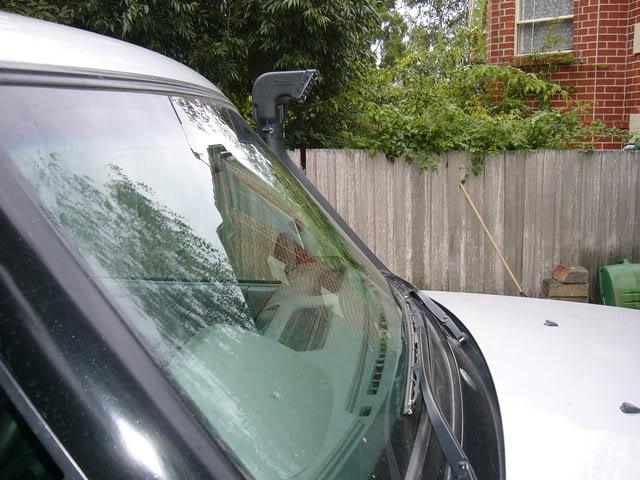
Fit the upper section of the snorkel to the upper front window frame use the bolts supplied to fix the bracket to the snorkel and a 4mm drill bit to rivet the bracket to the frame.
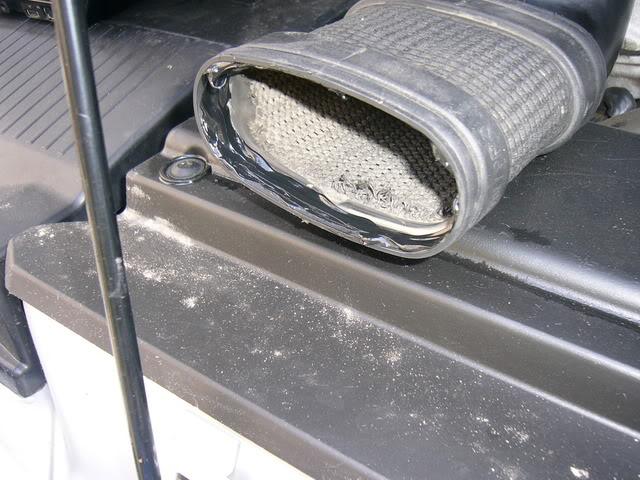
Now we're almost done, time to prepare and reinstall the airbox. Sikaflex any potential water ingress locations, Duckbill, inlet pipe, porous inlet pipe piece.
Air box installation is just a reversal of the removal
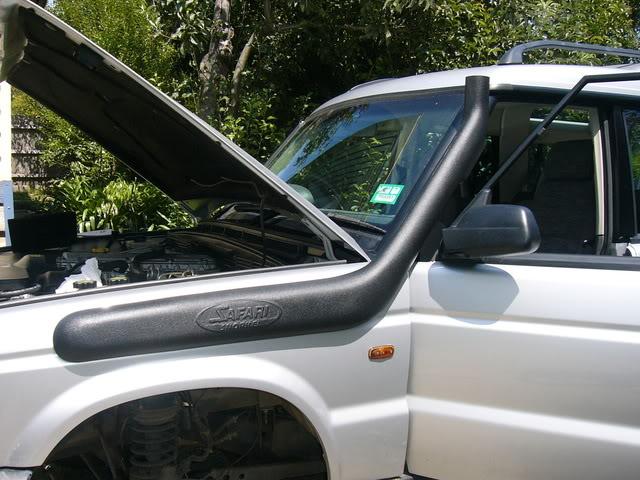
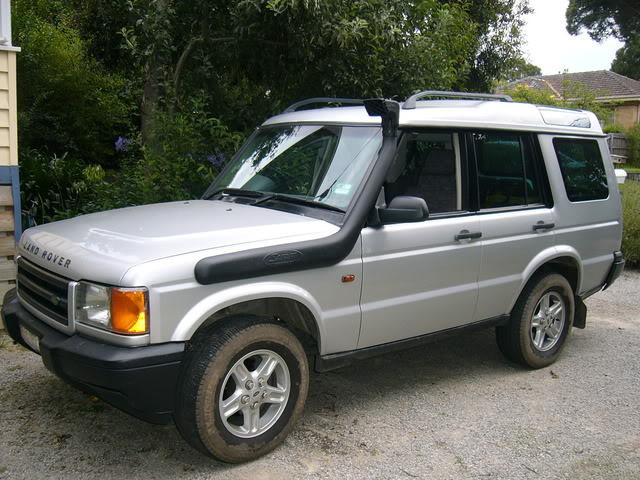
Torque up all nuts and bolts, reinstall the inner guard cover, pack up your tools and admire your work.
I'm stoked at how the installation turned out.
Here's some data after the trucks been warmed up, accelerating up an incline with a heavy foot.
Pre Snorkel Install
Ambient temp 26deg
Post Snorkel Install
Ambient temp 29deg
It took me around 5 hrs to do the install. Now what else do I need.
Template and Instructions Can be found here http://www.aulro.com/afvb/local_link...catid=7&id=170
Please check scale and check against snorkel prior to drilling.
Last edited by 999; 16th April 2016 at 07:17 PM. Reason: Added Template Link
ChatterBox
Well done, professional install and excellent write up.
I note Safari have improved their Disco snorkel with a single piece going between the outer guard and the inner guard, making sealing far more positive.
Erich
Master
Thanks for the comment.Originally Posted by Bundalene

So the new design does away with the cast inner guard adapter yeh?
With the amount I sika I used I think the sealing will be fine. I'll pressure test the seals when I get a chance.
TopicToaster
Is there potential for using retained nuts and csk socket screws on the A pillar attachment?
Master
I don't see any reason why you could not use a rivnut. The Rivets are quite easy to remove though, just drill'em out if you need to remove the bracket.
Fossicker
Nice and usefull for me - have one to mount on my car.
Screws instead rivnuts for holding the upper part of snorkel are a bit better in case of changing of front window. Also the original plastic rivnuts are not the best solution, I'll replace them with screws also.
Master
A very nice neat job. What did the disco feel like from the drivers seat? Did it feel like it revved cleaner and quicker, better on fuel etc? This is one of the jobs on my list in the near future so thanks for putting this up and sharing it. Just a word of warning with the small cut off Dremel discs though, they clog up when used on aluminium and can explode.
Master
I don't notice any difference in how the engines revs. I think the quality of diesel makes the most difference in how my engine performs.
And yes dremel cutoff discs do explode, always wear safety glasses.
Master
Good job!!
I did my V8 Disco 2 a few years back, can't remember what Sika Flex I used though.
I have just ordered a Safari Snorkel for my new Defender TD5, so I will be fitting one again in the next week or two.
Col.
Fossicker
Just fitted my safari using this thread - have to say a big thank you.
 Posting Permissions
| Search AULRO.com ONLY! |
Search All the Web! |
|---|
|
|
|
Bookmarks