


 Reply With Quote
Noice. Now if you just add a flyscreen removeable mesh, you will stop the bugs at night, during plagues etc

 Moderator
Hi folks.
Just a quick write up of how I did my mesh grill on the D2, some costs involved, pointers etc. I realise there are other threads on this, however I found them to be a bit light on some info.
So, first step, open the bonnet, and remove the grill. To do this you have to undo the three screws in the top, and remove the clips they sit in. You'll also need to remove the hockey sticks from underneath the headlights, by undoing the screws in the forward face of the wheel arch. Then you can access the lower screws on each side of the grill.
Next, what I did was clip the ribs between the plastic panels, to make removal easier.
Next I cut the middle section out with a dremel tool. I didn't have one prior to this, however I found a good 200 piece kit at Jaycar for $39. Cheapo I know, but it works fine.
So after cutting out the middle section, I began to tidy up the dags left behind, as well as starting to remove some more of the surrounding plastic.
Next step was removing the slanted face from the lower panel
I taped the edge up and marked it.
I also cut it into sections to make getting a straight edge a bit easier.
So then I was left with this...
Considered leaving the bottom black panel in but decided it would look better without, so out it came.
Next, I wanted to cap the edges so it looked a bit tidier, at least along the paint edged sides as if I got too close to really tidy them up then I'd risk marking the paint, so I slit some fly screen tubing, or spline as it's called, and used that. I'd recommend getting some proper edging, as trying to sikaflex spline onto an edge was a bloody nightmare!
Next I laid the mesh on top to get an idea of where I needed to cut it, which took some back and forth work to get it correct. It's just generic auto mesh from SCA, for about $30
This is with the mesh sitting in before sikaflexing
Next, I sand papered and wire brushed the plastic, as well as giving it a thorough clean with some turps to ensure a good bond and sikaflexed it up.
I then place the mesh in, although I had put it in before to allow me to bend the edges over so they sat flat against the plastic. And by bend I mean bash with the brush handle
Let it set, put it back together and hey presto")
It needs more work, there are quite a few sikaflexy fingerprints that need cleaning, and part of the top section wasn't pressed into the sikaflex enough but it's still remarkably sturdy.
A quick rundown of costs:
Mesh: $30
Dremel tool: $40
Sikaflex and caulk gun: $32
Allow $10 or so for any other odds and ends you might need if you don't already have them.
All in all, a pretty easy and cheap mod that looks much better, and hopefully better airflow.
Cheers
Muppet
The Phantom - Oslo Blue 2001 Td5 SE.
Half dead but will live again!
Nina - Chawton White 2003 Td5 S
Slowly being improved
Originally Posted by Judo

YarnMaster
Noice. Now if you just add a flyscreen removeable mesh, you will stop the bugs at night, during plagues etc
D4 MY16 TDV6 - Cambo towing magic, Traxide Batteries, X Lifter, GAP ID Tool, Snorkel, Mitch Hitch, Clearview Mirrors, F&R Dashcams, CB
RRC MY95 LSE Vogue Softdash "Bessie" with MY99 TD5 and 4HP24 transplants
SADLY SOLD MY04 D2a TD5 auto and MY10 D4 2.7 both with lots of goodies
Wizard
Chrome mirrors and door handles next?.
Moderator
22" chrome spinners.
Bling Bling yo
Gav, any bugs are going to be cut to shreds, sharp stuff
The Phantom - Oslo Blue 2001 Td5 SE.
Half dead but will live again!
Nina - Chawton White 2003 Td5 S
Slowly being improved
Moderator
And with the badge on
Might upgrade to a black one later on
The Phantom - Oslo Blue 2001 Td5 SE.
Half dead but will live again!
Nina - Chawton White 2003 Td5 S
Slowly being improved
Master
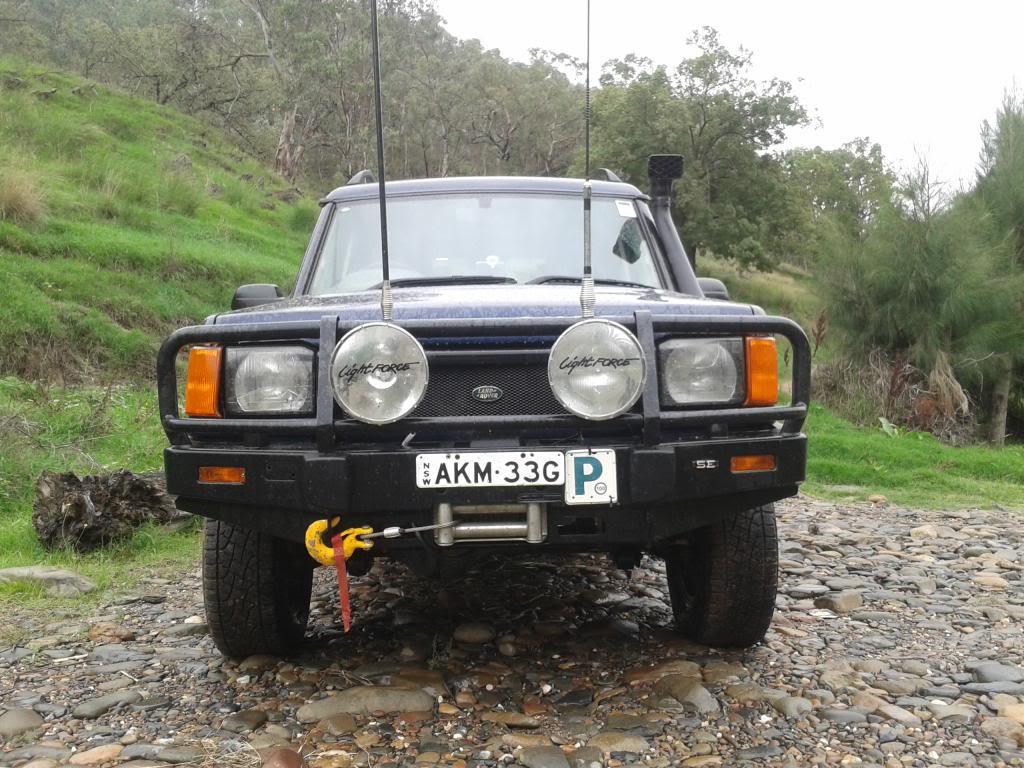
Looks good, I am a fan of a mesh grill. Some daytimes photos would be great.
Moderator
Sure thing.
The Phantom - Oslo Blue 2001 Td5 SE.
Half dead but will live again!
Nina - Chawton White 2003 Td5 S
Slowly being improved
Admin
Mesh looks good, badge looks pants
I'd take the badge off looks like an afterthought. The badges on the grills are usually offset so seeing it in the centre makes it look weird
Our Land Rover does not leak oil! it just marks its territory.......
 Swaggie
The grill looked good Muppet, I was impressed. Well done with it.
Cheers
Slunnie
~ Discovery II Td5 ~ Discovery 3dr V8 ~ Series IIa 6cyl ute ~ Series II V8 ute ~
ChatterBox
Looks good. Some thing I'd do if I had cooling issues.
I might still, just for the cooling benifit.
Happy Days
 Posting Permissions
| Search AULRO.com ONLY! |
Search All the Web! |
|---|
|
|
|


Bookmarks