

 Reply With Quote
x2
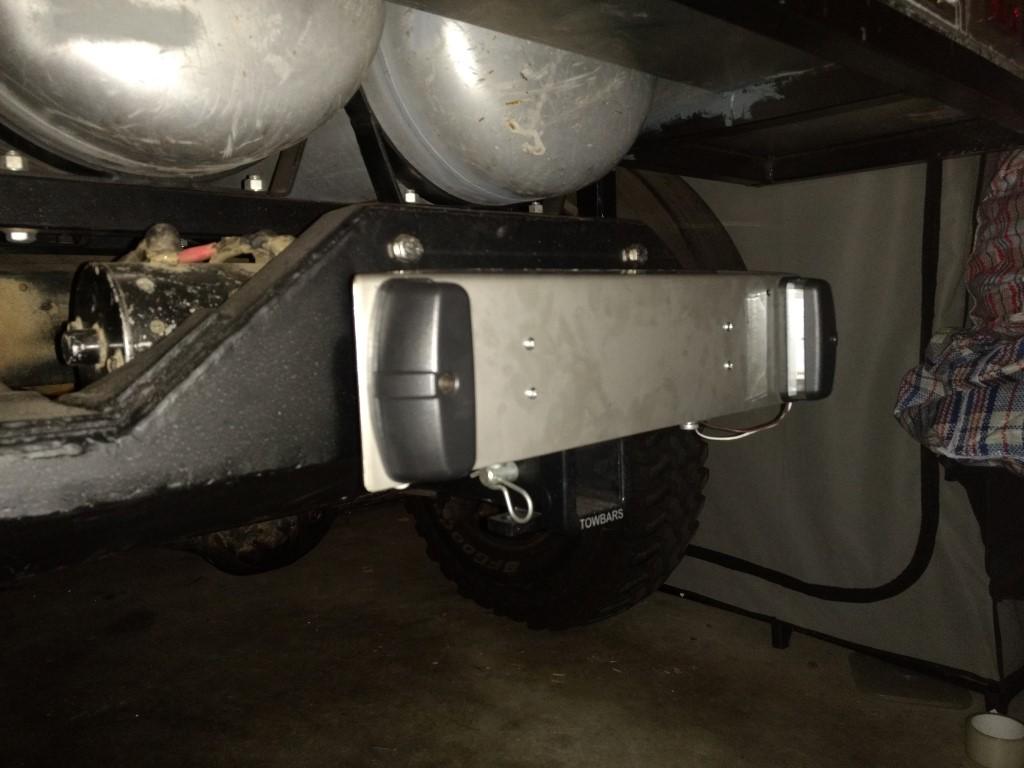
Those maglight clips do break and where do you put it when you want to winch??
Can't you mount it on a hinge so that it lifts up when you need to use the winch?
Just suggestions to make your life harder

 Swaggie
Do you plan on having a safety chain or cable attached to this for off road workOriginally Posted by stirlsilver


Master
Subscriberx2
Those maglight clips do break and where do you put it when you want to winch??
Can't you mount it on a hinge so that it lifts up when you need to use the winch?
Just suggestions to make your life harder
Neale
85 Range Rover Ute (Project in pieces)
89 Range Rover Classic (Black Thunder)
93 200tdi Disco,(OGRE)
96 300tdi Disco, DEAD MOTOR
04 Nissan Patrol with ALL the fruit
09 Cub Daintree Kamperoo
12 VE II Commodore Ute DD
Master
SupporterThe diagram below might answer your question, it's basically what I handed over to have the springs made:
Front is currently at 335mm
Rear is currently at 395mm
Yes, something is needed but I'm not bothering with that just now as I don't need it to get the registered (which is the priority)
I was looking into using a hinge, but then issues came up about a clip or latch which can be used to hold the assembly in the open position. Again since it wasn't critical for registration I just left that for another day. I could mount the whole thing on the back of the tray, but it was more work which I can do later. If the winch needs to be used (which is unlikely in the near future, I can just tuck it away on the chassis while the winch is in use.
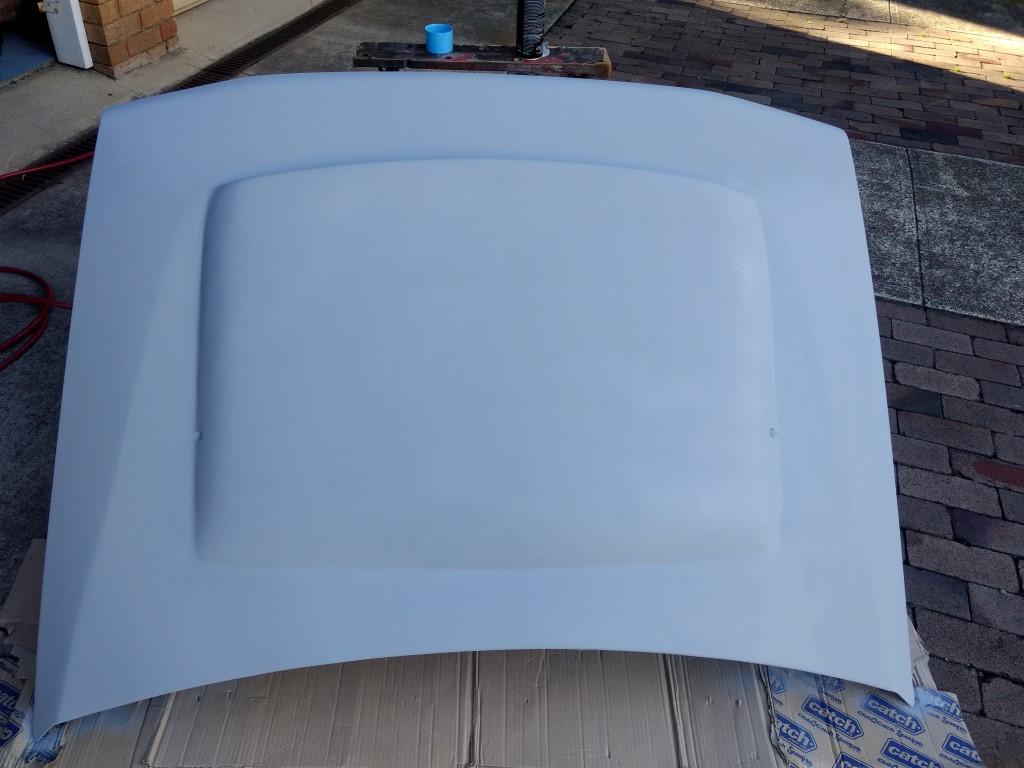
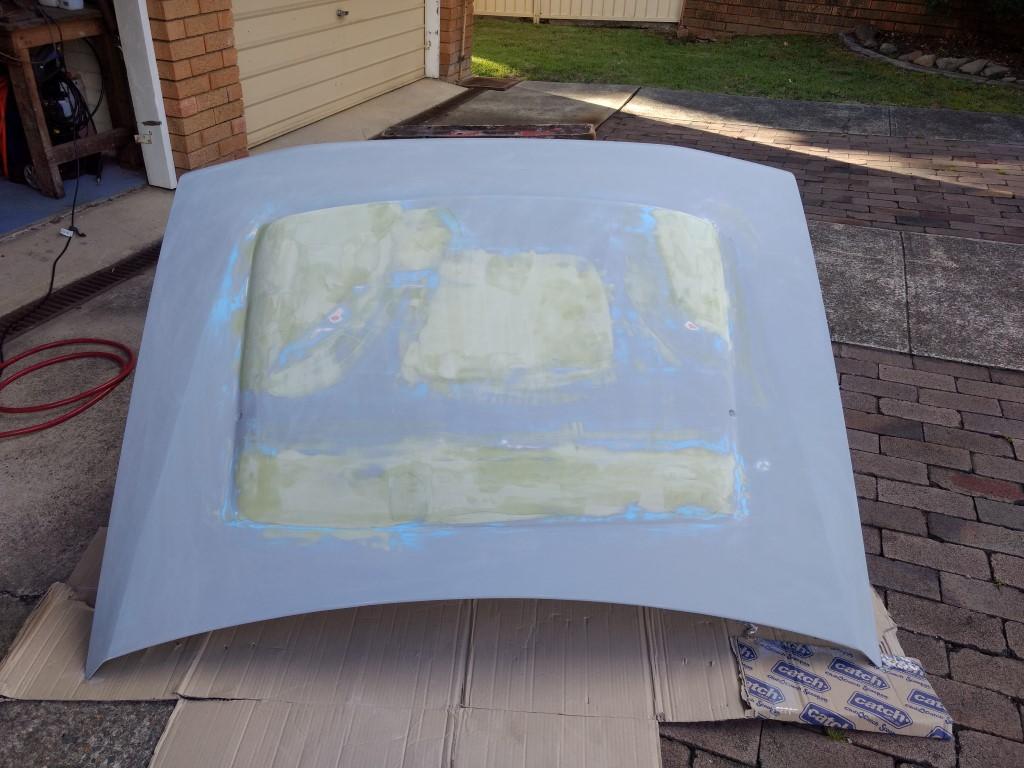
I had some time again to tinker, and focussed on the shrivelled up bonnet scoop. Not as neat as the first time around, but more than good enough given that I have decided to use tray liner as the paint for the car which will hide all sorts of minor imperfections
Stirling
OldBushie
Thats approx 4" lift! Hows your castor?
Master
SupporterI should mention that I had cut and lifted the spring perches by 50mm. So effectively only 2" of lift, in addition to the 2" body lift fitted.
Castor is fine, as I had slotted the holes on the knuckles to correct that.
Stirling
Master
SupporterQuick update on this one everyone amongst all the other happenings at the moment (like getting married!!) - Car went back to Allsprings and got the fronts adjusted to get it to sit about 25mm higher. Looks better now:
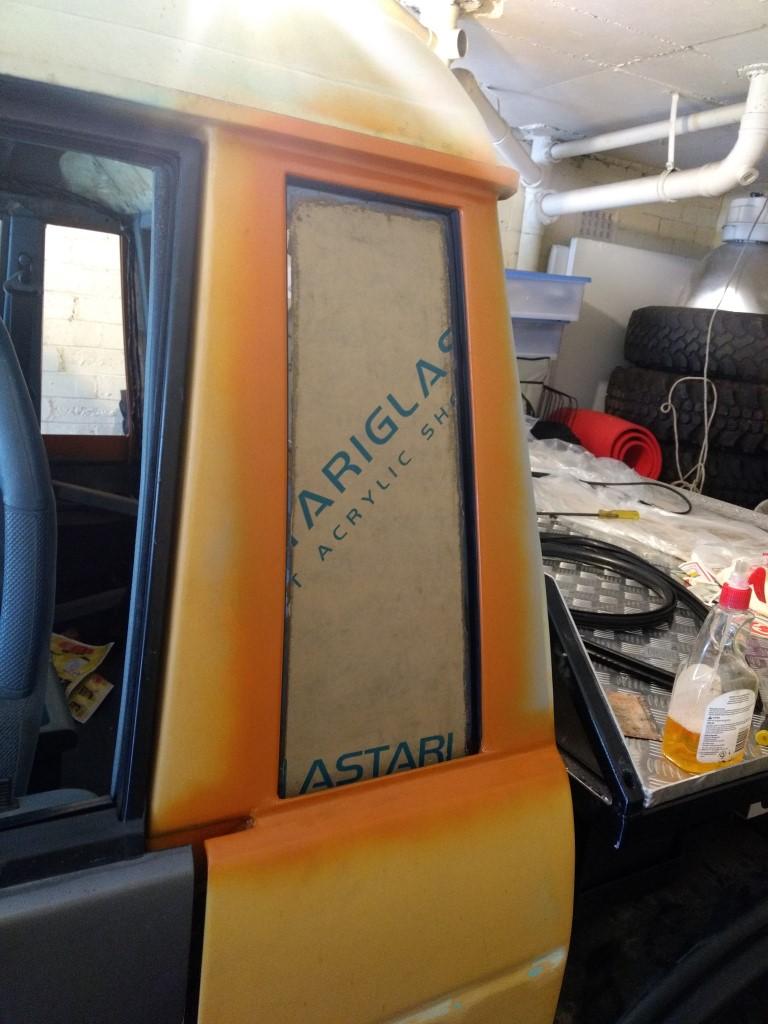
In other areas - rear window is currently being made and I now have the acrylic material for the rear quarter windows now.
So I need to find a way to paint around the window frames before installing the panels and then masking it all up for the bed liner coat over the whole car.
By the way, if anyone has a decent exhaust place to recommend to do the exhaust extension for me, that would be great. The last place I had a look at didn't have a Mandrel bender and didn't TIG weld the pipe. So if I can't find anything decent local, I'll have to drive it all the way to Windsor again which is a long drive...
Till next time!
Stirling
ChatterBox
SubscriberCongratulations Stirling.
Alan
2005 Disco 2 HSE
1983 Series III Stage 1 V8
Master
SupporterNice, really coming along. What are your plans in regards to the interior? I know I'm getting a little bit ahead of time but I am just curious. congrats on the marriage as well mate, if she put up with you building this car then I am sure she is a keeper! haha.
Master
SubscriberCongrats on the marriage
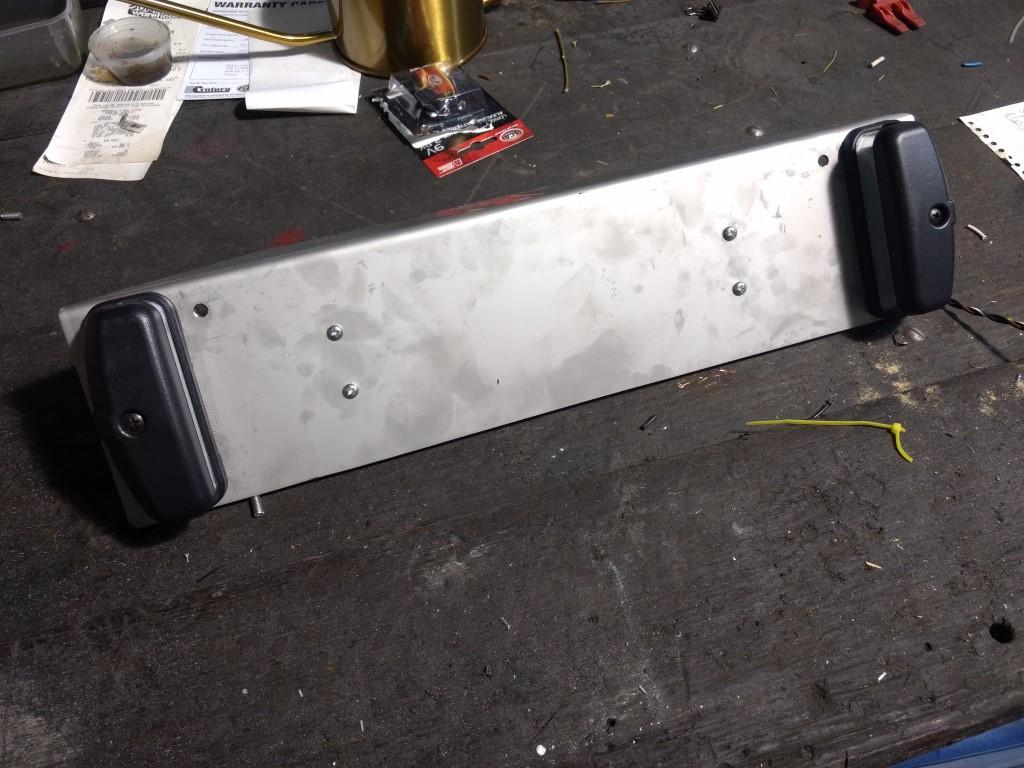
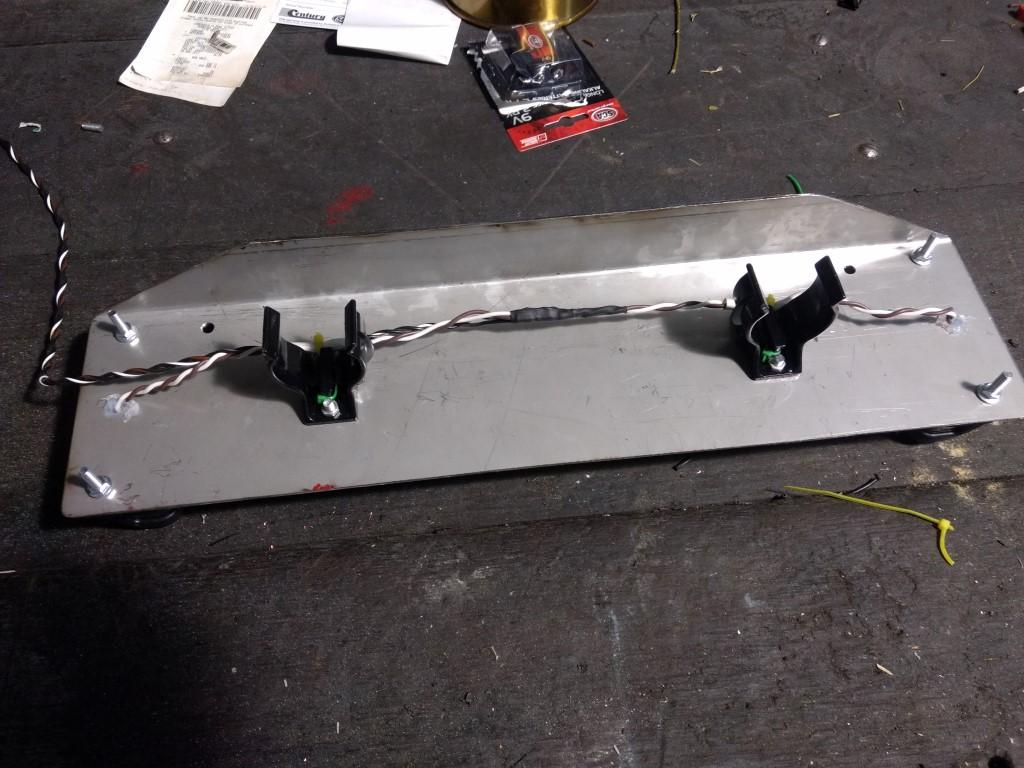
Saw this and thought of your number plate frame, it might give you an idea about what to do with yours.
License Winch Plate Frame Bracket Roller Fairlead Heavy Duty Offroad | eBay
I have no affiliation with this seller except as a very happy customer.
Neale
85 Range Rover Ute (Project in pieces)
89 Range Rover Classic (Black Thunder)
93 200tdi Disco,(OGRE)
96 300tdi Disco, DEAD MOTOR
04 Nissan Patrol with ALL the fruit
09 Cub Daintree Kamperoo
12 VE II Commodore Ute DD
Master
SupporterThank you!
Thanks! You won't believe it but the car got a mention in her vows... Something along the lines of no matter if takes 2 to 3... Decades to finish!! As for the interior, not too sure yet, I need to work out how to re-hook up the hot water to the heater (I suspect it is leaking which is why it is disconnected). Also, I would like to re-instate the air conditioning. I had to cut the fittings off at the fire wall to get the turbo dump pipes past... (Funny how priorities change over time!)
Thanks! And great tip on that product! I'll definitely have a closer look!
So there has been a reasonable amount of progress, and a fair amount of frustration.
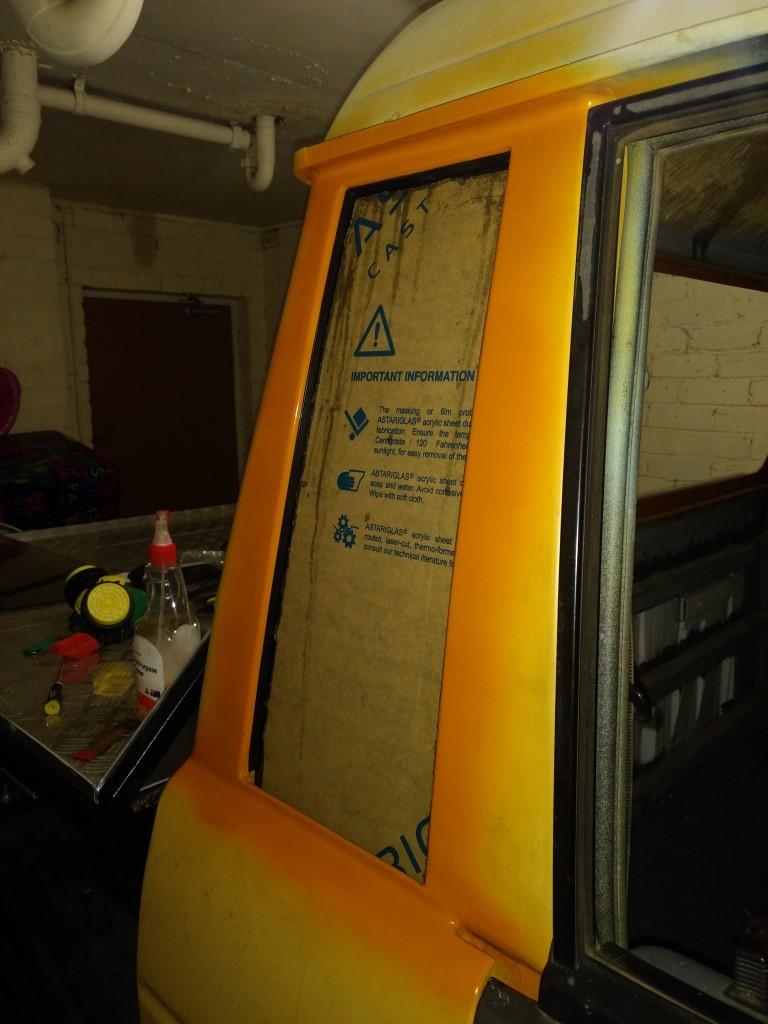
First up, I got a quote for the bed lining of the whole car, which came in at approximately $3,500 which is probably reasonable enough. What I realised though is that all windows need to be fitted and I need to paint these regions to blend the polyeurathane liner near the masking areas. So I went off and bought some mixed Burnt Orange aerosol tins and got to work.
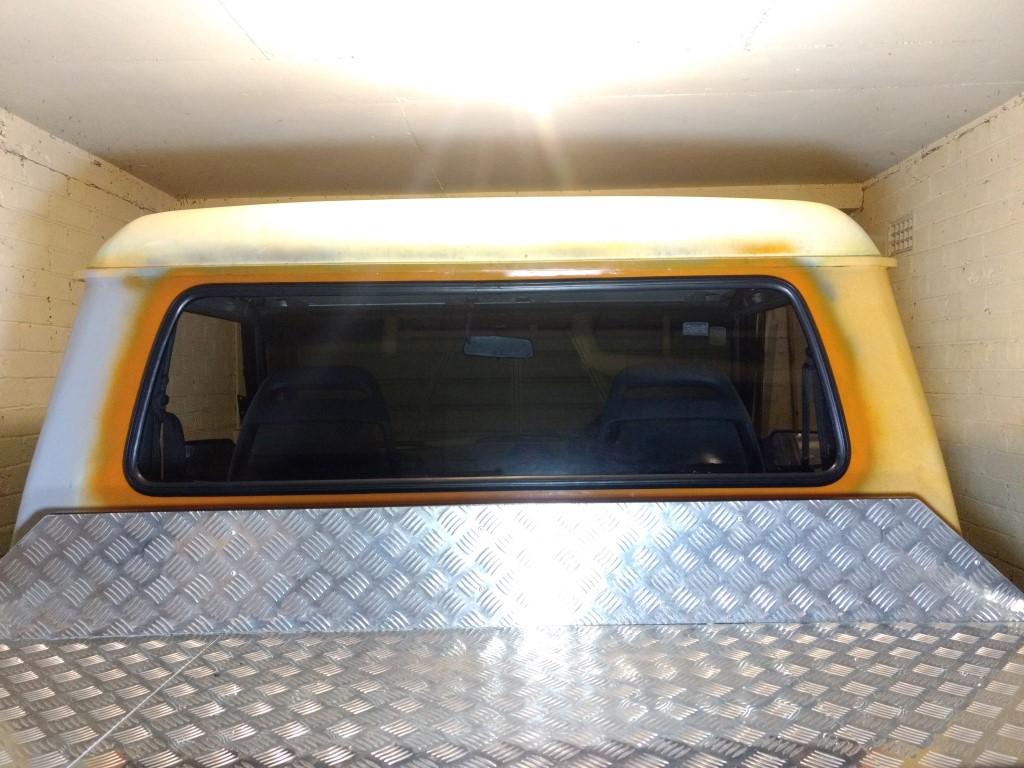
So, then the frustration, I got the rear window made from laminated glass, and after spending hours getting it into the seals, we had the locking strip about 60% and I needed to make an adjustment. Causing the window to pop out, and then in subsequent handling break... Here is the photo before it all went pear shaped.
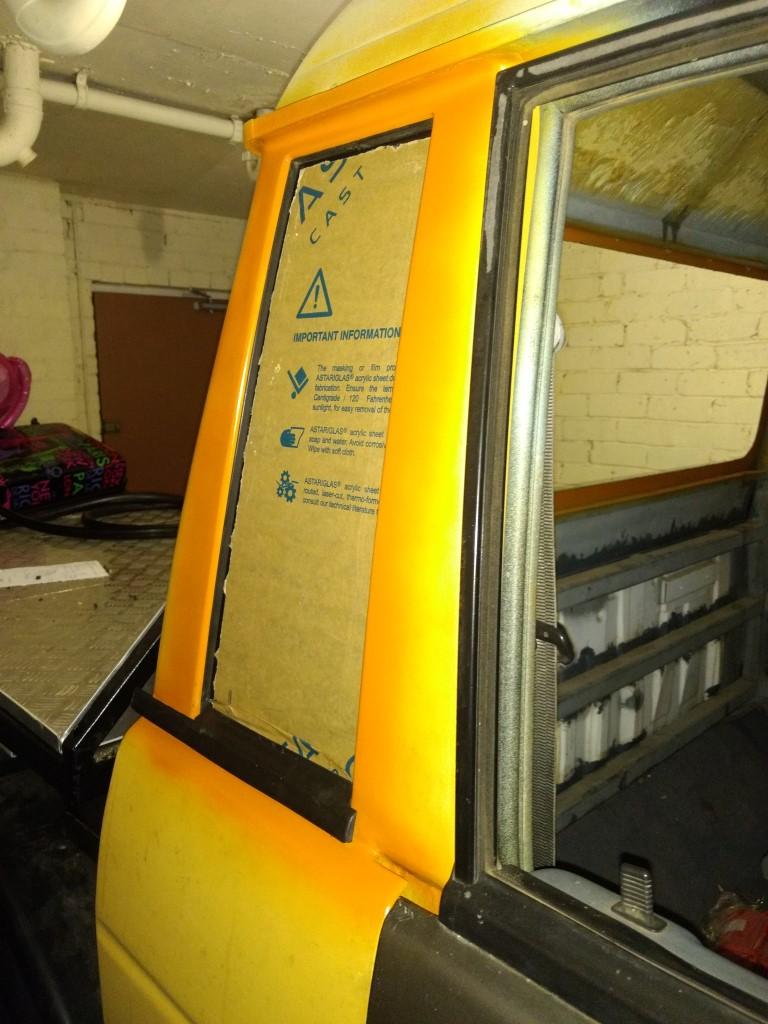
The acrylic windows were cut down and then I had a real tough time pushing the panel into the seals in the frame. With plenty of soapy water it eventually got there!
I then spent some time trimming up the original lower window seal that was fitted to the rear doors, the long strip on the end was eventually trimmed back to make it shorter. Here the strip is temporarily fitted.
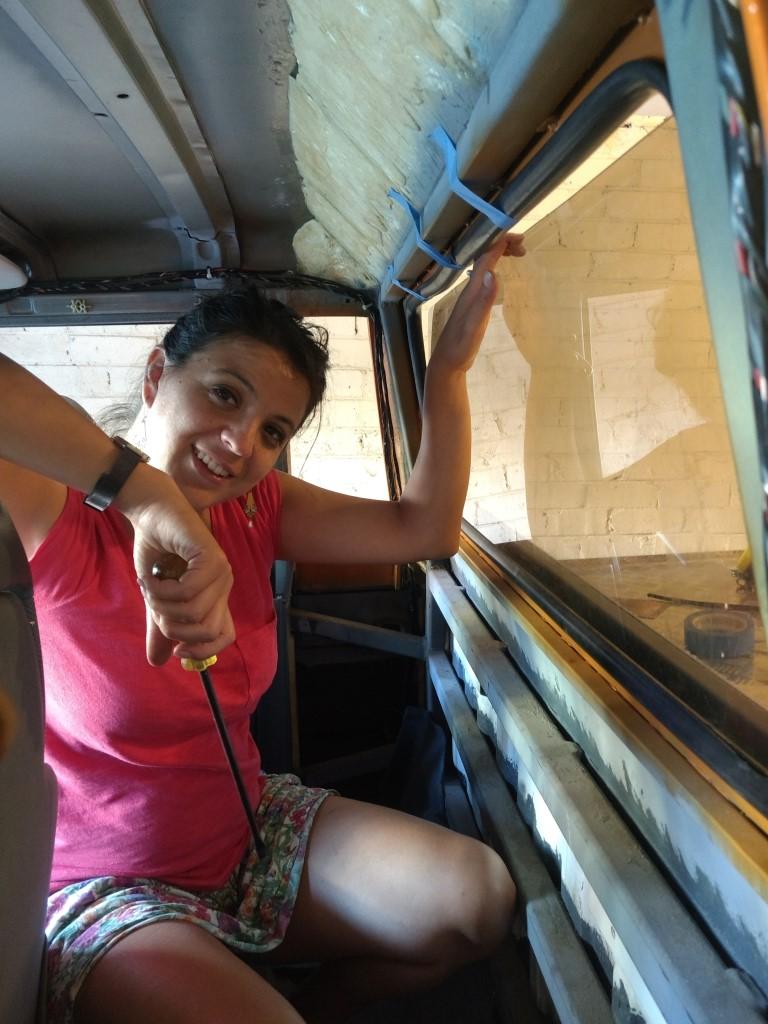
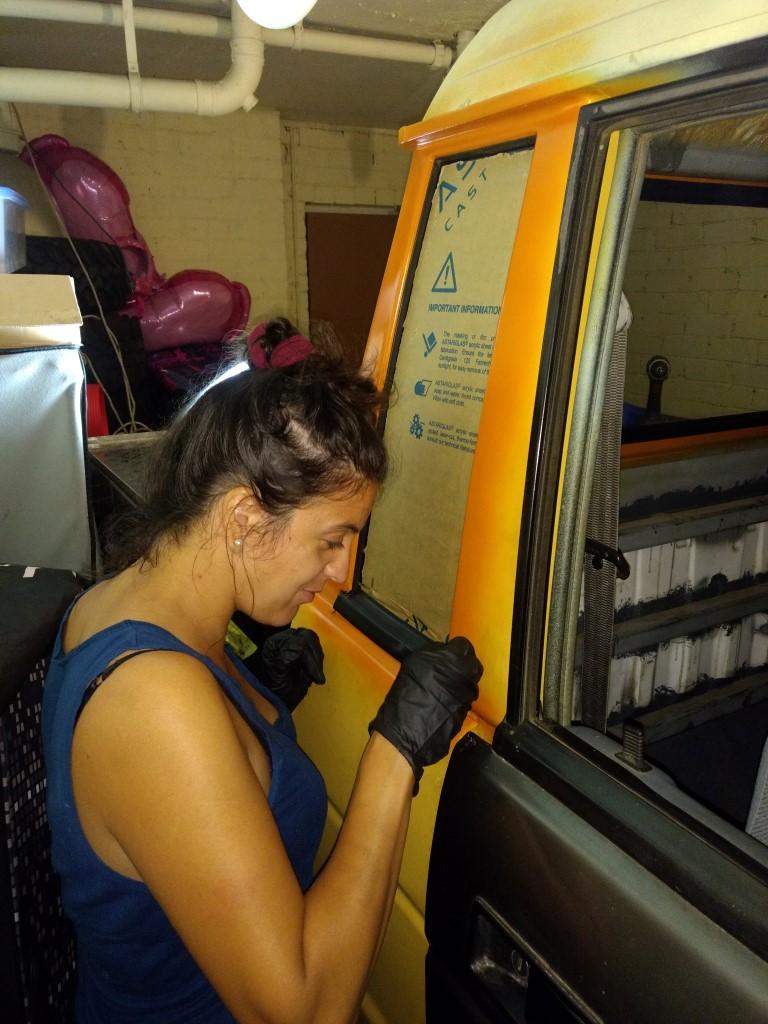
Ana helping me with glueing the ends of the strips down.
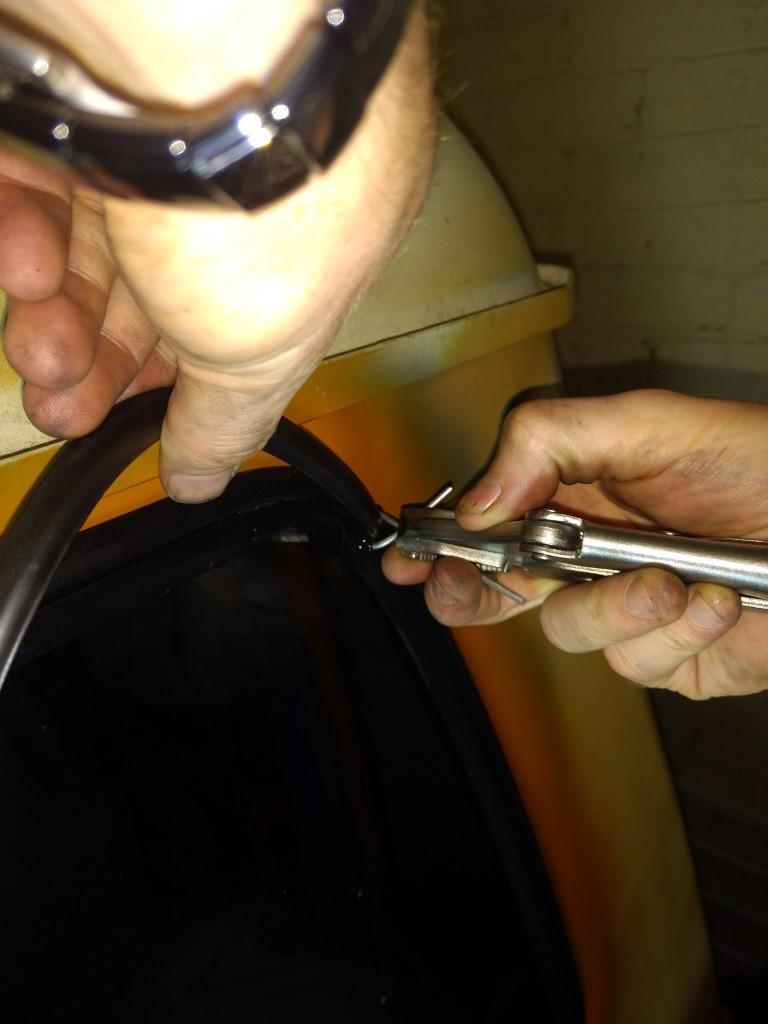
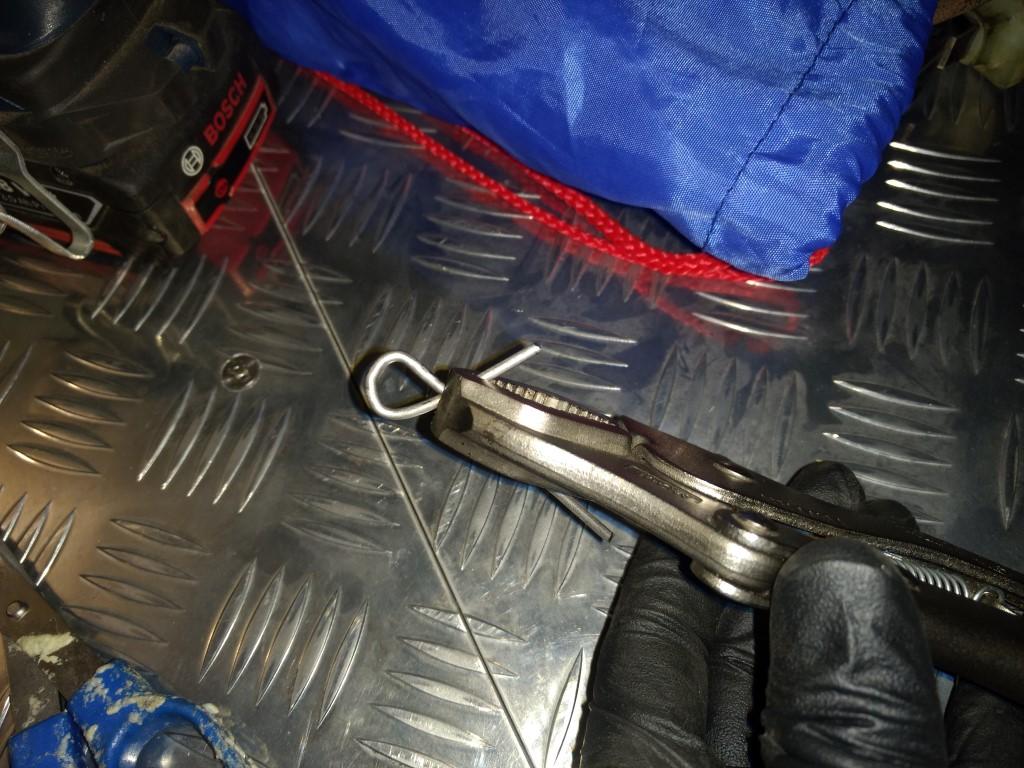
Then, after lots of running around, we got the replacement window in. This time I got it toughened (instead of laminated - which chips easily). It actually went in pretty easy. Here I am using a little tool I made by folding over some SS Tig wire to help insert the locking strip. The bent wire is held by a monkey wrench.
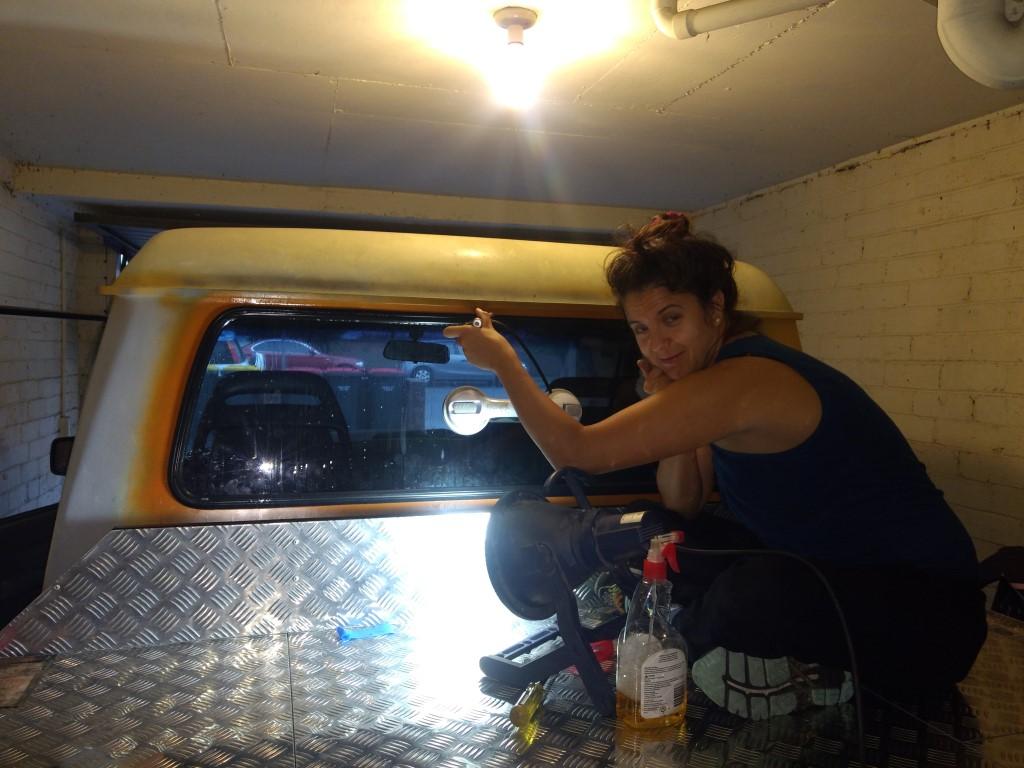
My assistant, not pleased to be doing this all over again.
And it's in!!
Stirling
 Posting Permissions
| Search AULRO.com ONLY! |
Search All the Web! |
|---|
|
|
|


Bookmarks