-
19th May 2010, 04:16 AM
#111
Hey all,
As a surprising number of people have pointed out, I did indeed drop off the radar for a while. Apologies to those following this thread, but due to circumstances beyond my control, I had to leave AU for a while to take care of some personal business. On a brighter note though, I'm back in the country again, and progress on the Defender is being made again ") Thanks to all who have expressed concern at my absence, and thanks also to philco and agrojnr who provided me with their services while I was away.
Thanks to all who have expressed concern at my absence, and thanks also to philco and agrojnr who provided me with their services while I was away.
Anyhow, with the fuel and electrical systems well underway, it was time to focus attention on some of the more basic requirements that I'd have over the course of the trip, water being the most fundamental of all. While yes, I could carry water cans or bottles, having an on-board water tank would mean being able to travel longer distances without having to worry about a clean water supply.
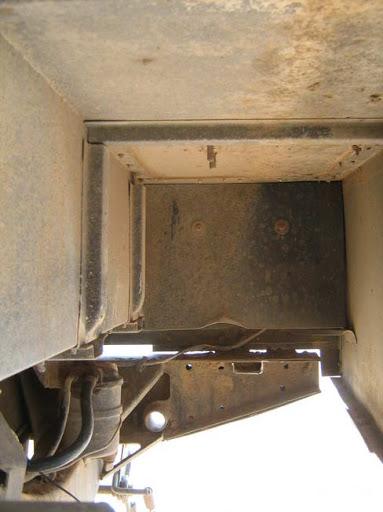
The most obvious location for a tank is under the rear passenger side wheel arch - keep the weight low, and using space outside of the vehicle which would otherwise be wasted.
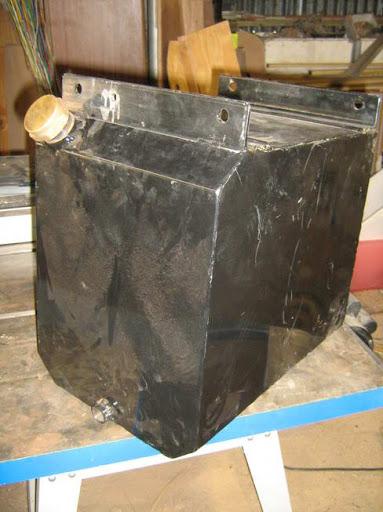
I had looked into a few different off the shelf options, but couldn't really justify forking out hundreds of dollars on what were effectively plastic tanks. I was about to make my own as Bundalene did in this thread, but when I found a suitably sized tank on eBay for $140, I couldn't really justify my time and the cost of materials, not to mention the fact that my welding probably wouldn't have been up to scratch anyways
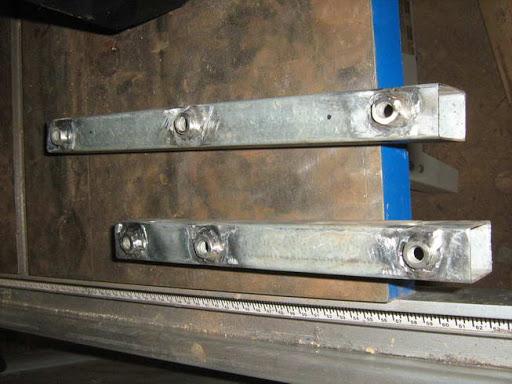
To bolt the tank in place, I made up a couple of brackets that would bolt up under the wheel arch. Welding the nuts to the brackets makes it easier to bolt up the tank from the inside of the vehicle.
Due to the location of the tank, the exhaust had to be relocated slightly. I cut the hanger bracket from the rear cross-member, and will re-weld it in its new position once the tank is in place.
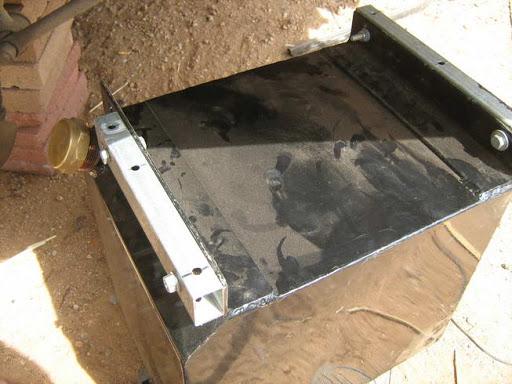
The tank in place. For now it's held in place by six bolts through the wheel arch into the tank brackets. But considering that the tank, fully laden, will weigh 45kg, I'll make up another bracket to straddle the underside of the tank and take the pressure off the bolts.
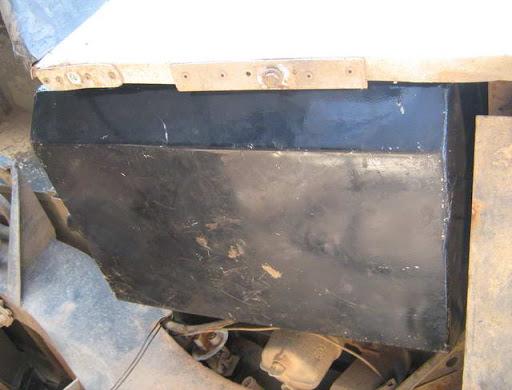
It may not be obvious from the photo, but the tank sits perfectly inside of the wheel arch, and does not protrude. A few modifications to the mudflap bracket, and it's ready to be bolted back in place too.
Rather than welding a filler to the tank, I opted to fill the tank indirectly, using a filler neck from the local boating store. It's neater , in my opinion at least, and gives me a bit of flexibility locating the filler neck, without the worry of drilling holes in the wrong place.
Probably the most unnerving part of this upgrade - drilling a fist sized hole in a perfectly good Defender
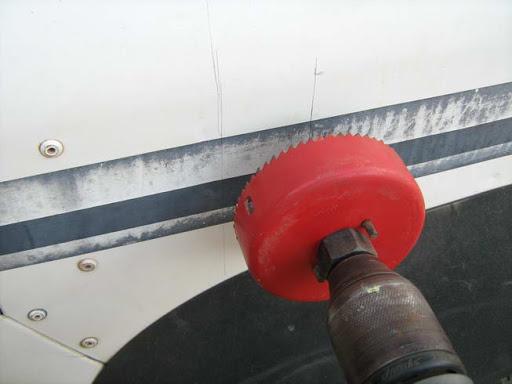
In my case I put the filler neck just off the passenger side rear door - the filler sticks into the car, and down into the wheel arch.

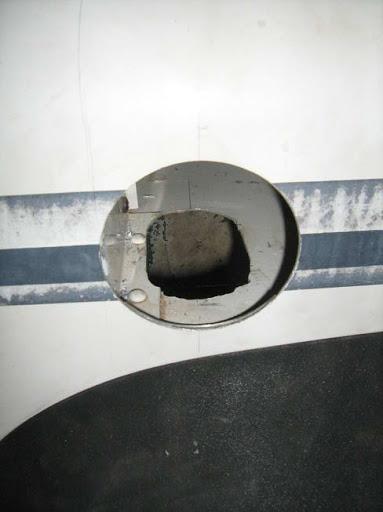
View from the inside of the Defender. This corner will be boxed off later.
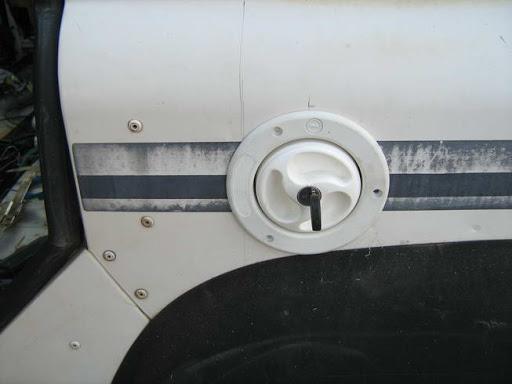
From the outside, with the filler in place - looks just like a bought one
-
19th May 2010, 06:55 AM
#112
very nice
glad to see you're back
-
19th May 2010, 03:47 PM
#113
no worries, hope it fits ok, look forward to seeing it when attached.
-
19th May 2010, 06:09 PM
#114
Good to see ya going again mate bring on the bling
Adam
-
19th May 2010, 09:10 PM
#115
This thread is absolute gold, thanks for documenting your choices and actions so well, very much appreciated!
-
24th May 2010, 07:02 PM
#116
Thanks for all the feedback guys - I consider it high praise from people who post on these forums every day, and for many, who have owned and worked on Land Rovers longer than I have been alive. Philco and agrojnr, I'll be posting detailed photos of your workmanship in the next couple of days - thanks again.
Anyhow, I digress. After a couple of near disasters with my home made chequer plate, I finally got it back, coated and ready to be put on the Defender. It took a few tries though - the heat generated from sandblasting the ali plate severely warped it. I do have to hand it to the guys at Adelaide Powdercoating - they went above and beyond to sort out the problem, and would have been happy to get new plate cut for me, if I were not happy with the results. Thankfully, passing the plate through the roller at the local sheet metal fabricators did the trick, and another layer pf powdercoat had them looking like bought ones. To put it in perspective for anyone thinking of doing their own chequer plate:
Sheet of chequer plate: $100 ($200 if you go for 3mm plate)
All of the major straight cuts: $30
Powdercoating: $60
plus a jigsaw, files, and spare time, that works out at $190. The same off the shelf is in excess of $750, without the satisfaction of making it yourself.
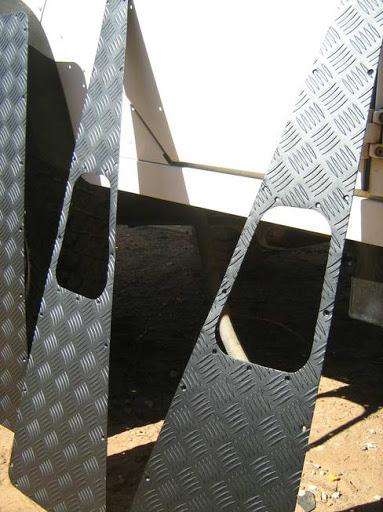
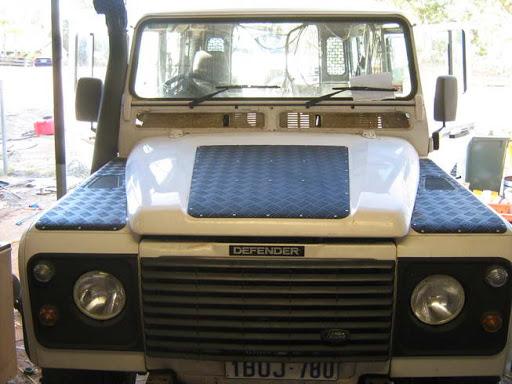
All of my chequer plate powdercoated and (almost) ready to go:

The bonnet plate, with rivet holes drilled out. Some people might think the number of rivets is overkill, but I found it to be just enough.
Same deal with the wing top protectors.
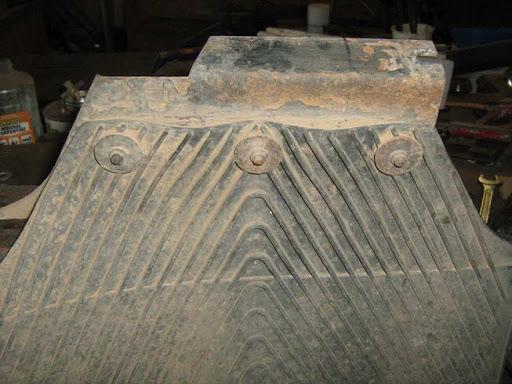
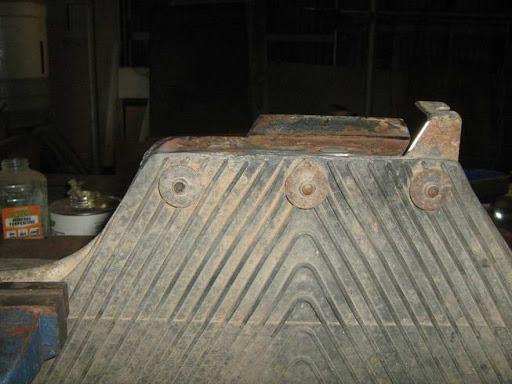
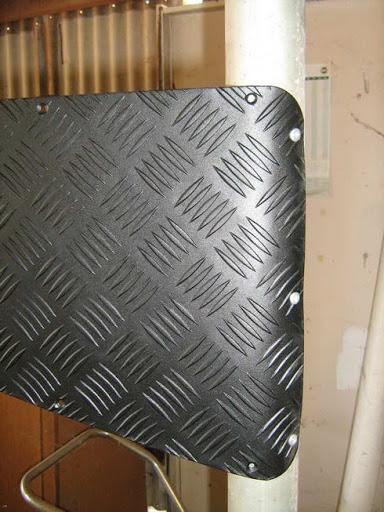
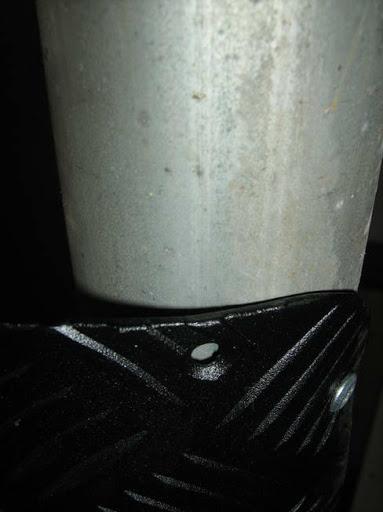
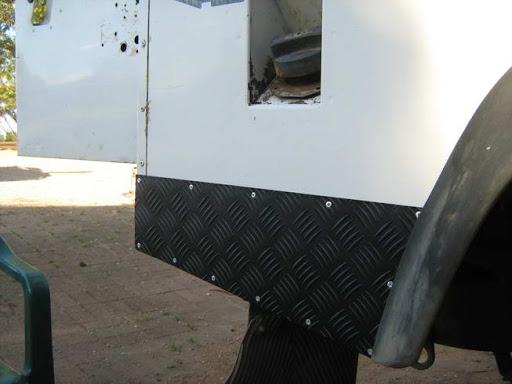
The leading edges of both the bonnet and wing-top protectors need to be bull-nosed, or rounded off, in order to match the profile of the Defender's front end. I've heard of people using various methods, hammering the edge of the sheet over a curbstone or whatnot, but for me, the easiest and most professional looking solution is as follows. Find a galv pole somewhere handy - I used one of the uprights for the shed, and using the rivet holes already drilled in the plate, tek-screw the edge of the plate to the pole. Most of the bending can be done by simply wrapping the sheet around the pole a little, then backing off. Any fine tuning, such as the slight bulge between the lower two screws in the photo below, can be done using a rubber mallet or something similar.
After that, it's just a matter of lining the plates up on the bonnet and wings, drilling out the rivet holes, and riveting. For each plate, start at the end nearest the windscreen, drill out the holes, then rivet. Work down towards the front to the next row of holes, drill, then rivet. Much like laying laminate, this prevents the ali sheet from bubbling up between screw holes, should you drill all of the holes first before riveting. I also ran a bead of silastic between the chequer plate and bonnet - this is optional.
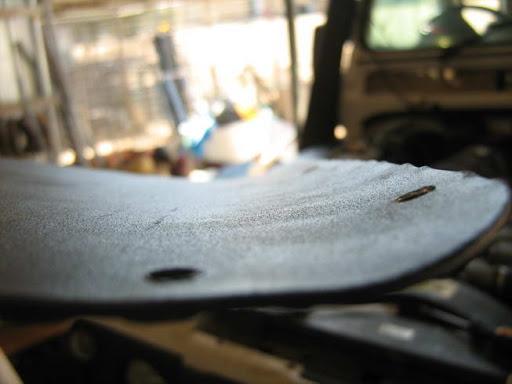
The results, though I say so myself, look quite professional:
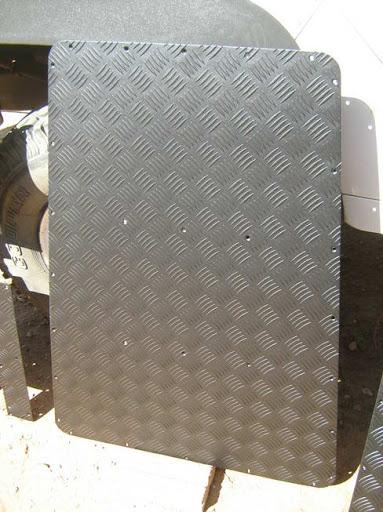
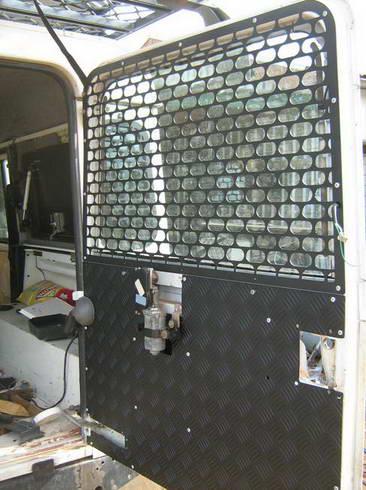
The rear door chequerplate has been screwed in place rather than riveted, to facilitate access in the future.
-
24th May 2010, 11:09 PM
#117
Nice job.
I too find it amazing as to what people will charge/pay for the checker plate. Admittedly not everyone has the ability or time, fortunately some have the money to pay for the stuff and even to get someone else to fit it.
No greater satisfaction than doing something yourself and knowing that it is done well.
-
24th May 2010, 11:25 PM
#118
I'm making use of the abysmal weather here in South Australia tonight to post some long awaited updates.
As I mentioned before, I have been playing around with various biofuels this past while now, and have had the Defender running successfully on straight vegetable oil, and due to the increasing number of people willing to donate waste vegetable oil to me on the upcoming trip, I decided that I would incorporate a twin tank system - the truck to start on diesel from the first tank, and once the oil is hot enough, switch over to the second tank. If oil is not available, the second tank can simply be used as a second diesel tank until oil becomes available again.
The second tank that I had acquired was designed to be filled from overflow from the main tank, and seeing as I wanted to segregate my fuels, this was no longer an option. The simple solution would be to add a second filler for the second tank, but I didnt want to do this for a number of reasons. Putting a filler neck in the cab, for example in the drivers seat box, introduces the potential for constant diesel spillage in the cab, or fuel fumes from the tank itself, neither good when I plan to sleep in the back of the truck. A second filler on the outside of the truck draws attention to the fact that there are two tanks in the Defender. This may not seem like a big issue here, but in many other countries, Ireland included, the customs and excise laws on the use of untaxed fuels is iffy at best, and vehicles have been seized for using fuels that the government don't get their cut of in tax dollars.
My solution, blasphemy to some, was to remove the stock filler, and replace it with a dual tank filler form an 80 Series Landcruiser. Put simply, it's a changeover valve - push in the lever and the main tank is filled, pull out the lever and the auxiliary tank is filled.
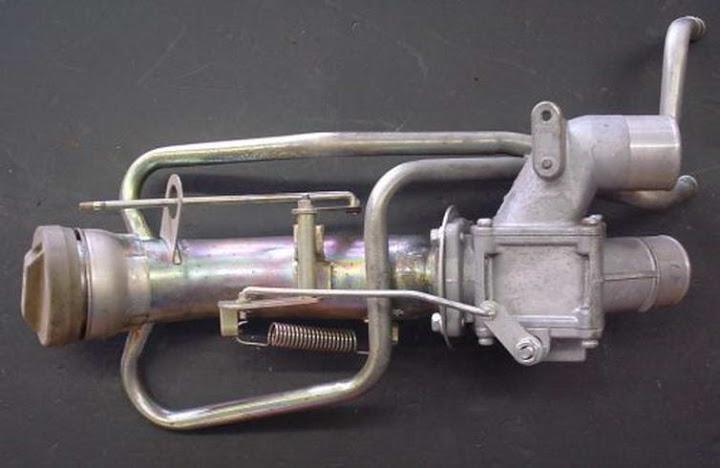
Above is the stock filler from an 80 series Landcruiser. To make it fit the Defender, the neck needed to be shortened by 30mm, and a flange welded to the head of the filler neck so that it could be riveted to the Defender.
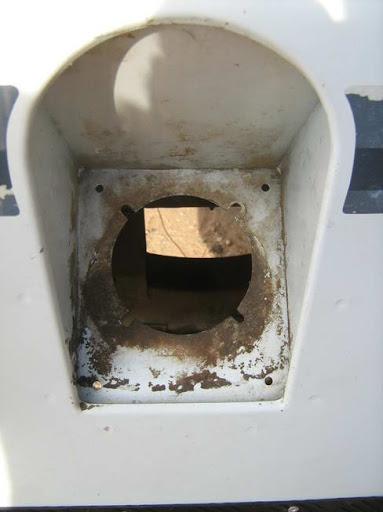
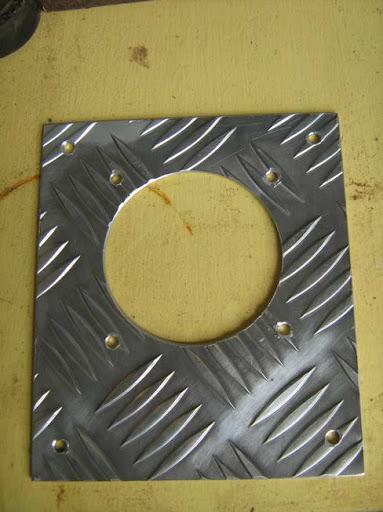
The hole left behind by the stock filler was too large for the Landcruiser filler neck, so I cut a piece of chequer plate to make one fit the other. IF nothing else, it covers up my less than stellar welding.
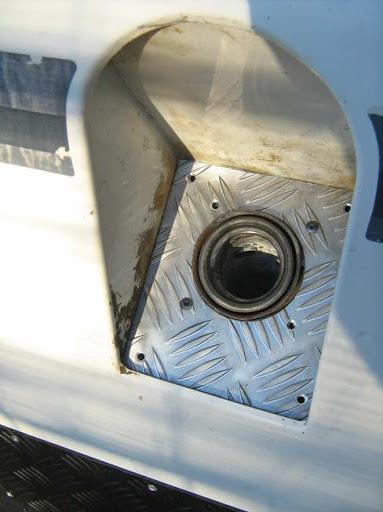
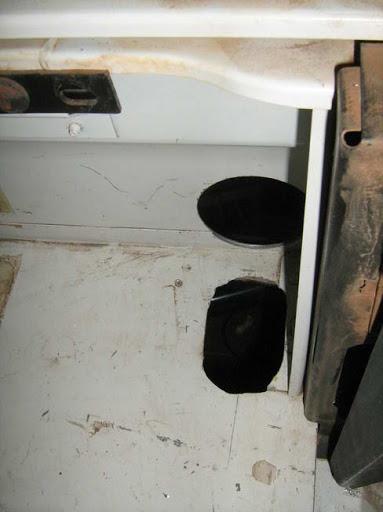
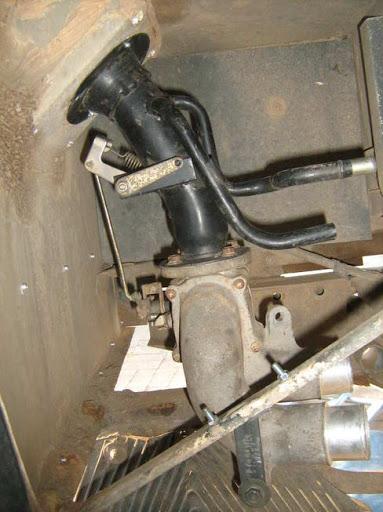
As seen from the underside of the wheel arch; the new fuel filler in place. Fillers for both tanks can be seen at the bottom of the photo, tank breathers for each tank further up on the filler neck. The filler neck has been bracketed to the wing strut for extra support.
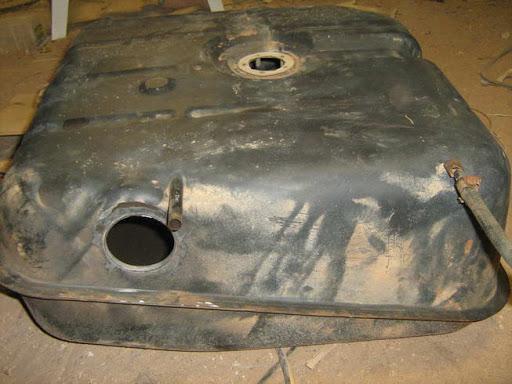
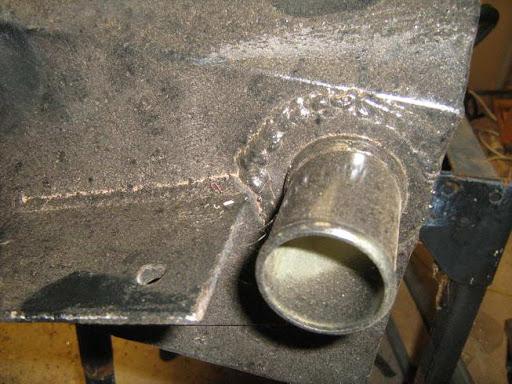
The next problem was connecting the new fuel filler to each tank. Toyota fuel fillers have a 40mm diameter, the filler on the side of the stock Defender tank is 78mm, and the auxiliary tank has a 30mm filler. Stretching a tube from 30mm to 40mm wouldn't have been a problem; however stretching a tube from 40mm to 78mm over such a short distance without cracking the tube wall would be near impossible. Next best thing - weld new 40mm fillers to each of the tanks.
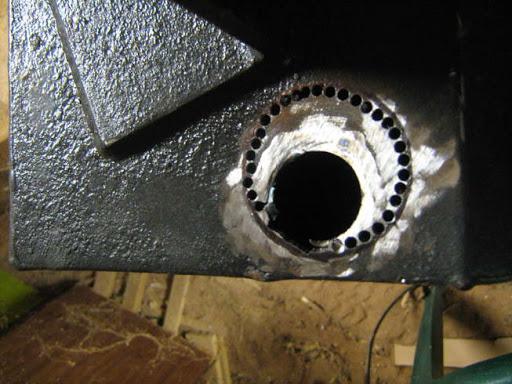
First, remove the stock fillers from both tanks. With the main tank it;s pretty straightforward - simply frind the old filler back to the tank wall. I didn't have a decent hole saw for the auxiliary tank so I drilled it out and smoothed out the cuts.
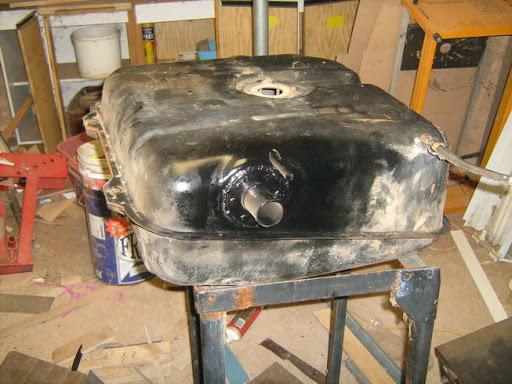
New filler necks welded in place. Two toyota fuel tanks in the local wreckers yard provided the tank fillers that I needed:
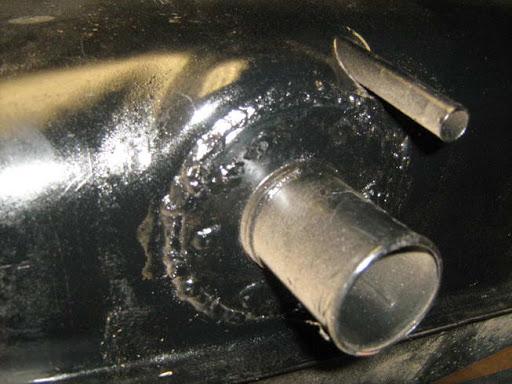

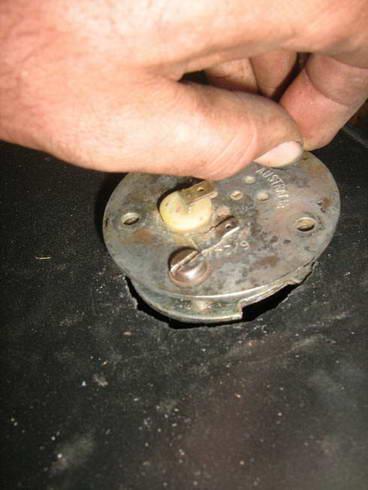
While the auxilairy tank was sitting on the bench, a VDO fuel sender, matched to the new fuel gauge in the cab was added.
-
25th May 2010, 12:56 AM
#119
Now for under the bonnet....
My planning, in all of its glory....
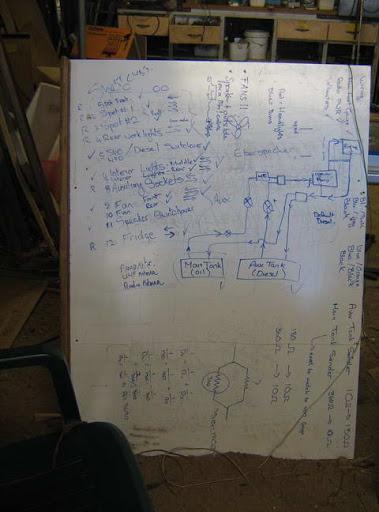
The premise is pretty straightforward. Both the main and auxiliary tanks have a seperate fuel line leading up to the engine bay. Each fuel goes through its own filtering system (the veg oil tank also goes through a heat exchanger), before leading to a switchover valve. The switchover valve is used to select the input - oil or diesel - and feeds into the injector pump. The injector pump return feeds into another switchover valve, which returns unused fuel to the appropriate tank.

The switchover valves are both located between the coolant expansion tank and the brake cylinder. In my setup, the valves default to diesel - should anythign go wrong in the electrical system, I want the engine to switch over to the fuel that it's supposed to be running on.
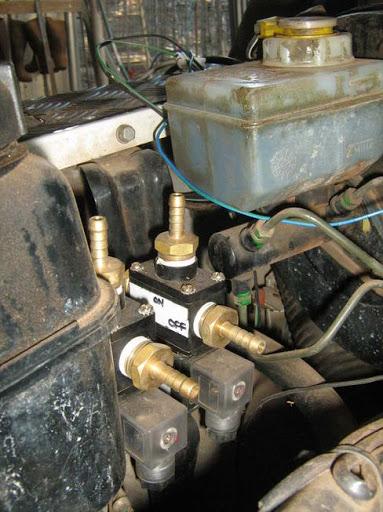
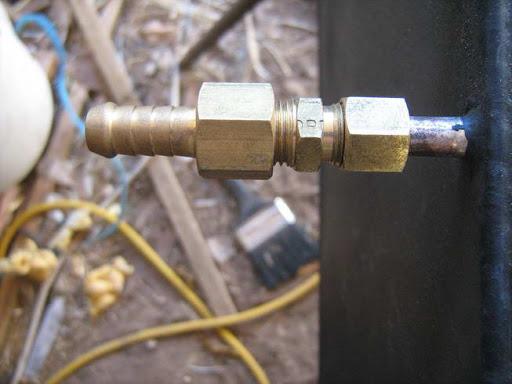
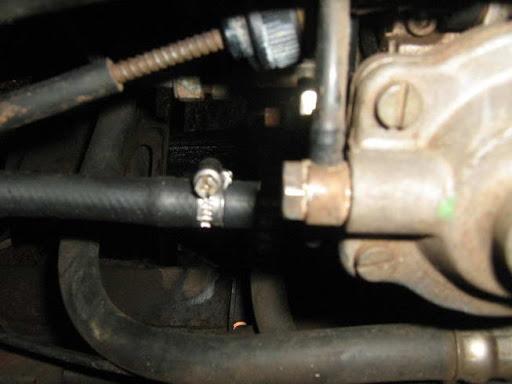
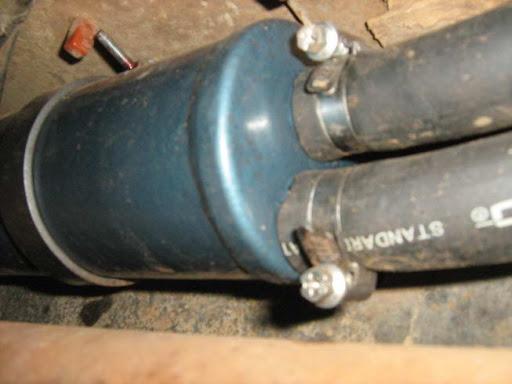
Barbed fittings on the tanks, filters and switchover valves ensure a solid connection for the fuel lines.
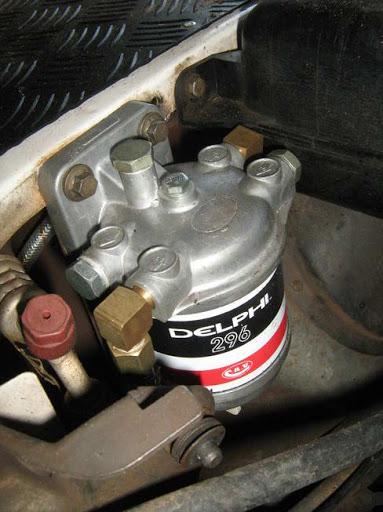
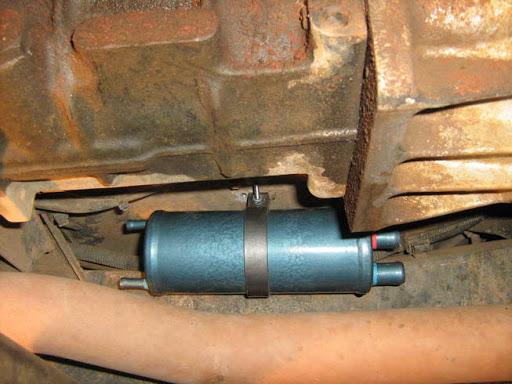
The new diesel filter sits in place of the old one. As mentioned earlier in this thread, CAV filters are far cheaper, more readily available, and I wanted a standard filter for both fuel systems.
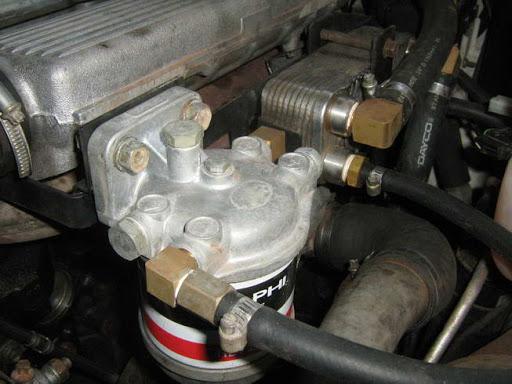
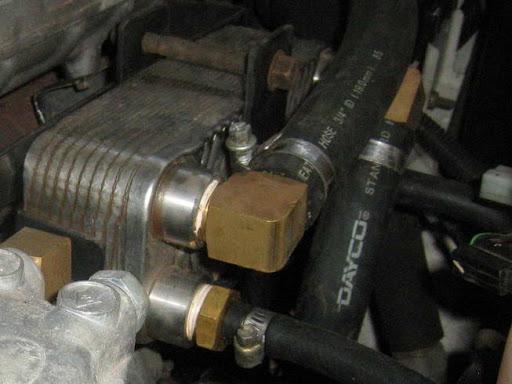
The WVO filter and heat exchanger are located on the manifold side of the engine, where (a) there was more room, and (b) the heat will aid in thinning out the oil.
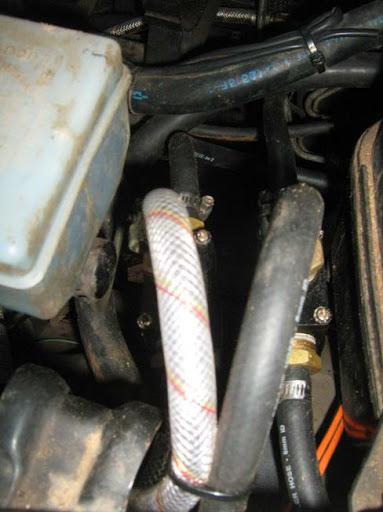
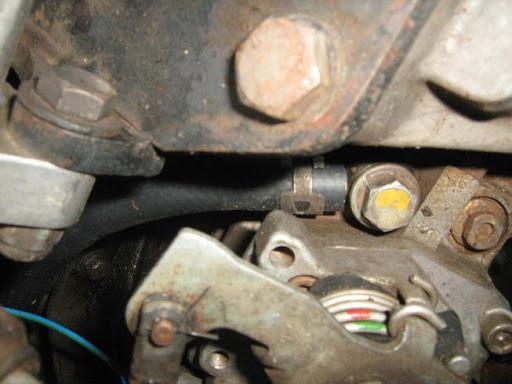
New fuel lines run. The clear fuel line is both oil resistant, and allows me to see the state of the oil passing through the line, as well as air bubbles or blockages from thicker fats.
New 8mm fuel feed and return lines to and from the injector pump. The wider fule line allows the thicker oil to flow more freely - though if the heat exchangers are working correctly then this shouldn't be a problem at this stage.
A second fuel type requires a second fuel pump. The stronger mechanical pump is used to pump the veg oil from the tank to the engine; a Range Rover electric fuel pump mounted just forward of the diesel tank, underneath the driver's footwell.
Hot coolant for the heat exchanger is provided by t-ing off from the heater hoses.
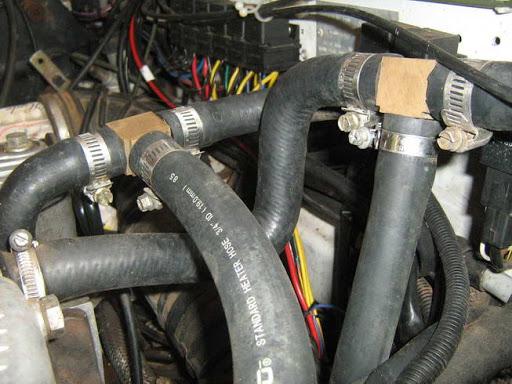
Hot coolant enters the top of the heat exchanger, and flows contra to the fuel, for maximum heat transfer.
The Defender also has a more traditional copper coil heat exchanger mounted underneath the passenger footrest, which provides hot water for showering and washing. While hooking up the heat exchanger for the fuel, it made sense to plumb up the second heat exchanger at the same time.
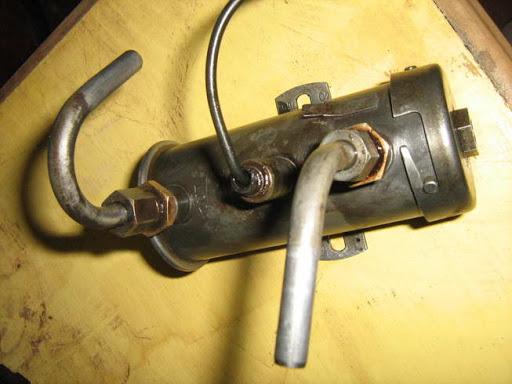
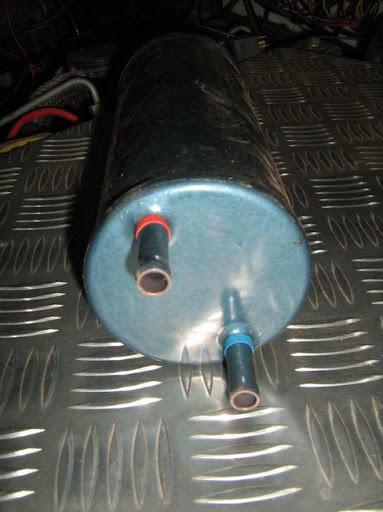
The hot water heat exchanger:
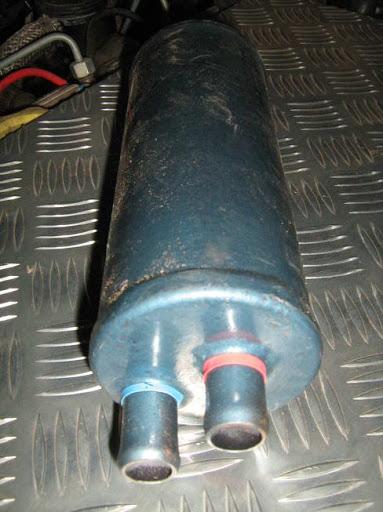
There are a few on the market designed specifically for heating water to around 50 degrees C. The most popular commercial solution is Glind, however I found that the units produced by Helton were more robust (metal vs plastic), were far cheaper, and were available in far more configurations, therefore easy to tailor to any setup. My heat exchanger has coolant input and return at one end, and water input and output at the other. They also soldered on 3/4" fittings for me, which made my life much easier.
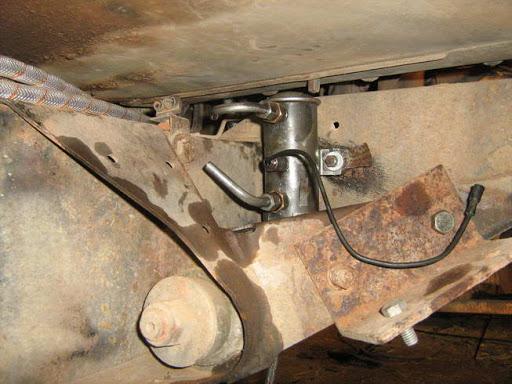
Mounted in place, under the passenger footwell....
...and plumbed up in series with the fuel heat exchanger.

-
25th May 2010, 07:19 AM
#120
Fabulous last post - nice pictures - well done!
 Posting Permissions
- You may not post new threads
- You may not post replies
- You may not post attachments
- You may not edit your posts
-
Forum Rules
Search AULRO.com ONLY!
|
Search All the Web!
|


 Reply With Quote
 Master
Bookmarks