


 ) or suspension. Learn as much about that simple little engine as you can, oil and filter changing and tappet adjustments, timing belt and oils brake fluid and cooling system service before you go, and that should be all you need
")


 Reply With Quote
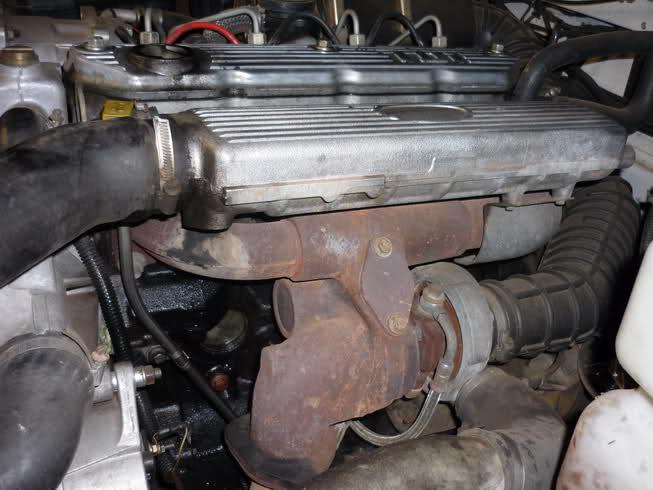
REPLACING THE INDUCTION MANIFOLD
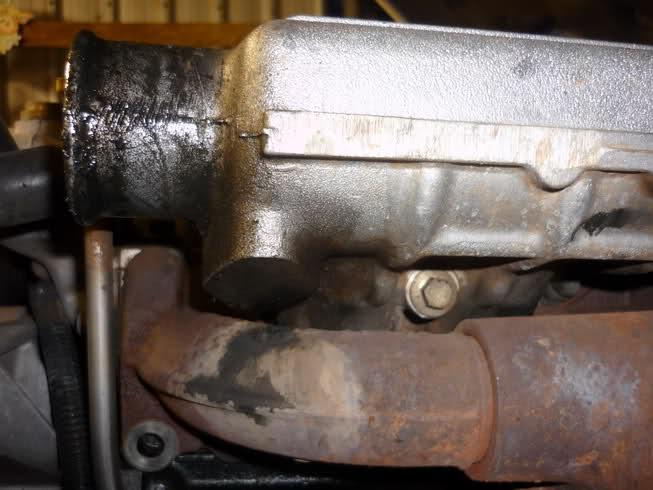
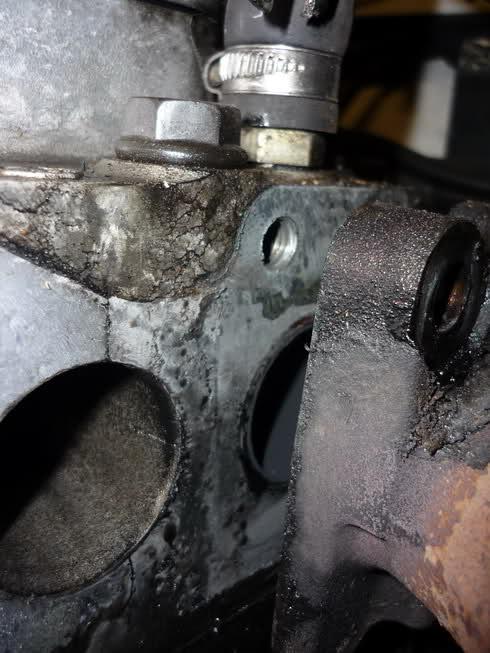
I had noticed a film of oil coating the manifold side of my engine block for the past few months, and while it didn’t seem to be affecting the oil level of the engine in any way, it’s constant presence had me s**tting myself over thoughts of blown head gaskets and shiny, irreplaceable bits of metal flying around inside the engine, but thankfully Justinc and others pointed out that I had a blown manifold gasket, a relatively easy repair. So last night I set about replacing it.
I couldn’t actually find any great instructions online to change it, so it’s here now should it come in handy for anyone else. Much of the steps are blatantly ripped from the Rave CD, but the pictures might help (I certainly wish that I had them at the time).
Steps:
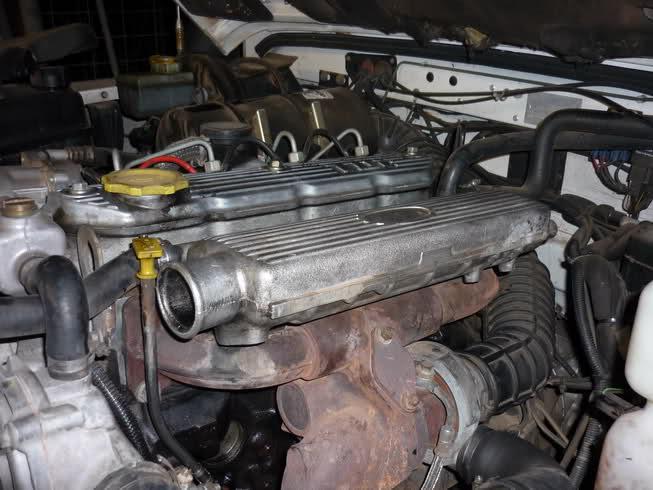
Disconnect battery and remove the rocker cover insulation from the engine. Apparently it’s quite easy to short out the back of the starter motor while working on the manifold, and that as they say, would be a bad thing.
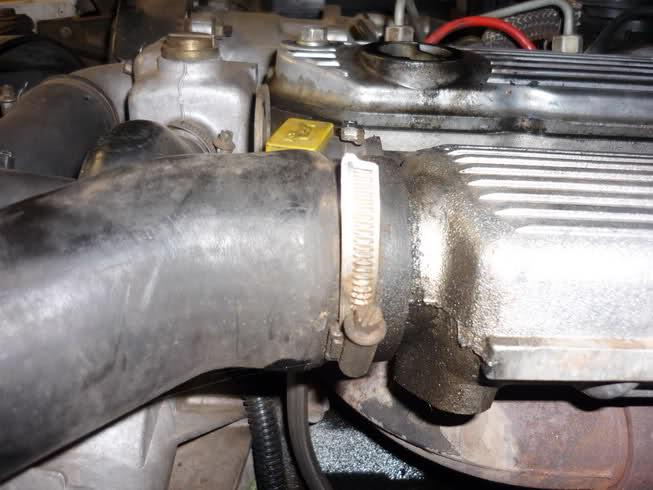
Loosen the two jubilee clips on the intercooler hose and remove it.
Loosen the two small bolts that hold the heat shield in place, and remove it.
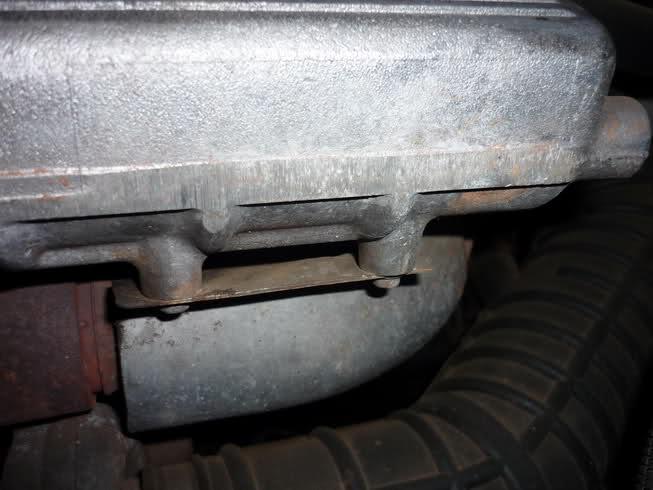
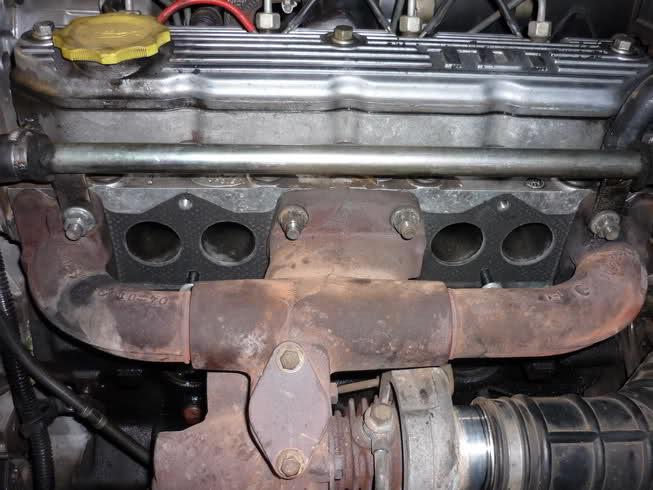
On the underside of the manifold you’ll find two nuts. Loosen them, but it’s not necessary to remove them completely, as the induction manifold simply sits on them.
Remove induction manifold upper securing bolts.
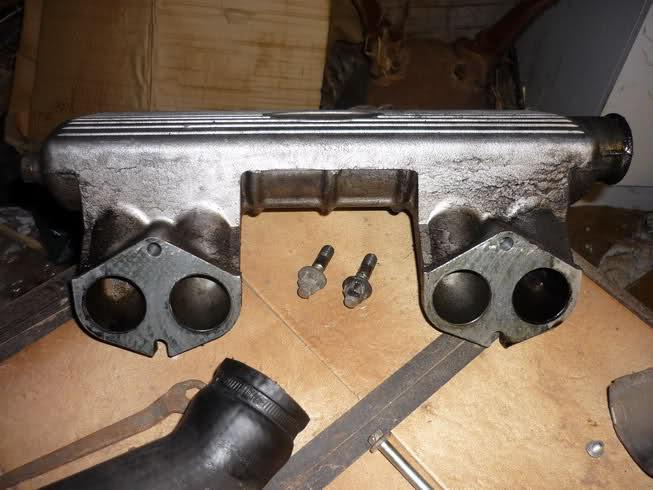
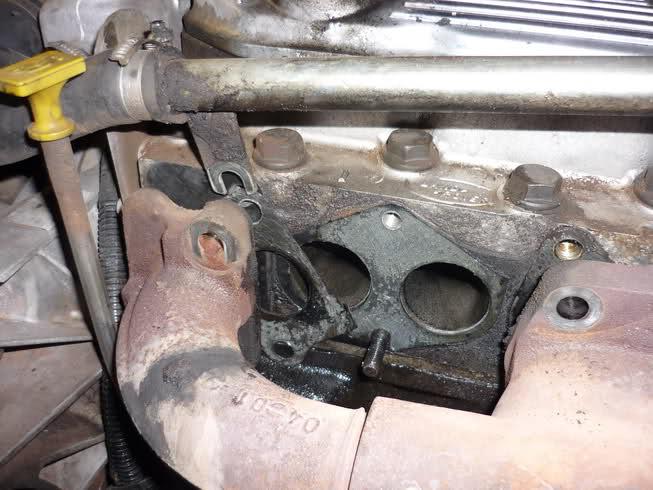
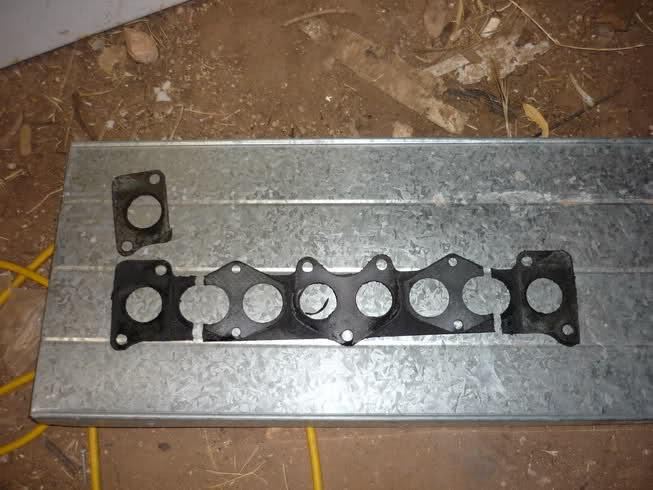
Now, all things going good, you should be able to lift away the induction manifold and set it aside for cleaning. In my case, one look at the gasket was enough to see why it was seeping out oil – it was in a few pieces and was certainly in need of replacement.
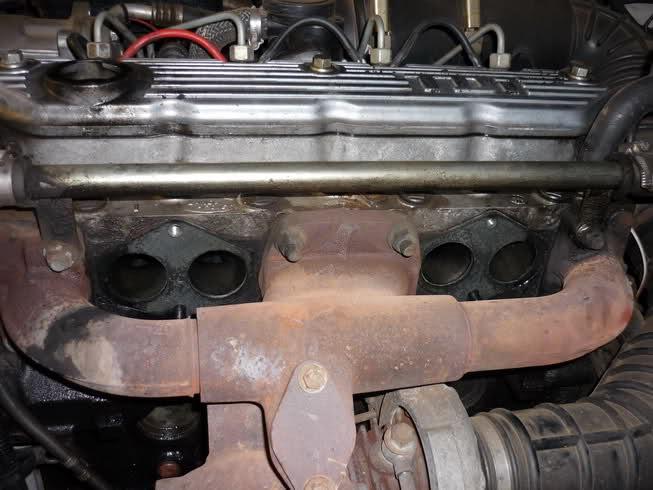
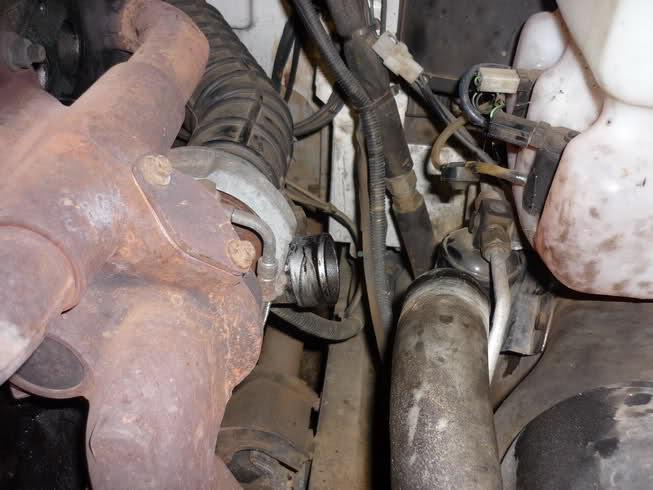
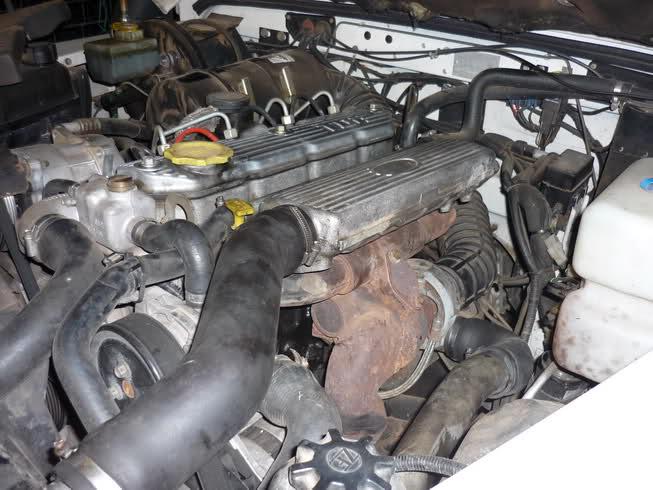
Now to get the exhaust manifold off. First remove the turbocharger outlet hose so that the exhaust manifold can be moved back from the engine block.
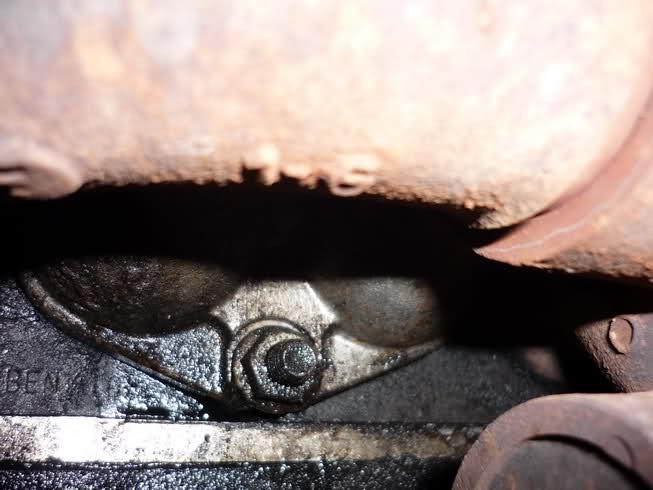
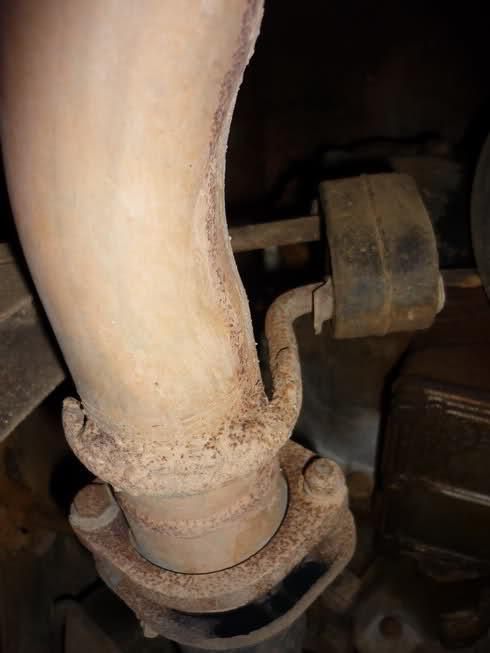
Time to get under the vehicle. Find the flange that joins the front exhaust to the middle silencer. Loosen the flange nuts so that when you do move the exhaust manifold, the exhaust pipe has the freedom to turn.
Now you can remove exhaust manifold securing nuts. Remove the centre lower nut first – it’s well hidden and you’ll need a long socket extension bar to get at it. To get at the bottom nuts, unbolt the dip stick to make things easier. When you remove the top left and right manifold nuts and the heater rail can be moved clear.
With the exhaust manifold and turbocharger still attached to exhaust front pipe, withdraw the manifold from head by turning the front pipe until sufficient access is gained to remove the gasket. They’re heavy, so strap them to a timber laid across the engine or something similar to take the weight.
As mentioned earlier, my gasket was in bits – three bits to be precise – and was well overdue a replacement.
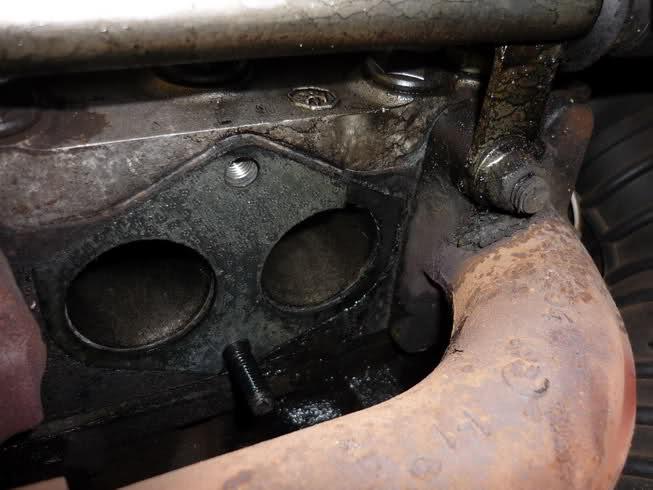
Now it’s time to clean years of accumulated crap from both the engine block face, and both the induction/exhaust manifold faces. What you use is up to you – me, I prefer old fashioned petrol – but it might be a good idea to plug the ports in the cylinder head with a clean rag to prevent any debris falling into the engine.
Once everything is clean, it’s time for reassembly. Either replace or reuse the manifold studs, and fit the gasket over them, making sure that the metal facets face outwards. I’m told it’s a good idea to replace the studs, but I couldn’t get a hold of any at short notice, and there didn’t seem to be anything wrong with them, so a good soak in degreaser and a clean with a wire brush and they were ready to go again.
At this stage it’s pretty much all of the above in reverse order. Mate the exhaust manifold with the engine block, and start doing up the exhaust manifold nuts, making sure to relocate the heater rail to its original position before tightening up. (Recommended torque: 45 Nm (33 lb/ft).
Loosely reattach the induction manifold lower nuts to their studs, and fit the induction manifold to the engine block. Once in place, bolt up the upper induction manifold bolts, and tighten both nuts and bolts up.
From here on in it’s all about the ancillaries. Tighten up the exhaust front pipe flange, replace the turbocharger outlet pipe, bolt the dipstick back on to the block and finally, reconnect the intercooler hose.
And there you go – one manifold gasket replacement. It’s a good idea to clean the block of old oil as best you can – I’ll put hot water through the pressure washer tomorrow. Time will tell if it will still seep, but already it’s looking better and I’m pretty optimistic. One thing I have found though, is that all that misting oil has condensed inside my alternator over the past couple of months, and when I hooked up an ammeter while driving, the charge rate was all over the place. So the next quick job will be to strip it down and clean it.


Bookmarks