Page 6 of 110 FirstFirst ... 456781656106 ... LastLast
Results 51 to 60 of 1094

Thread: Tiny bit excited

  1. #51
    Join Date
    Sep 2007
    Location
    Northern Beaches Sydney NSW
    Posts
    1,133
    Total Downloaded
    0

    primed

    pic1 primed and ready for top coat, though still will need to get behind and underneath to finish off the welding, maybe some more filler is required as well
    Attached Images Attached Images
    Land Rover

  2. #52
    Join Date
    Sep 2007
    Location
    Northern Beaches Sydney NSW
    Posts
    1,133
    Total Downloaded
    0

    some more

    p1-3, p/s had the spare fuel tank and welded up brackets which were removed so now the grinding to remove offending bracket arms. etched primed

    p4 - rear half of LR, chassis rails were cleaned with a small steam cleaner proved to be ineffective, then the water blaster which was better followed by sanding by hand, primed

    p5 - took shocks off front and back, last one on p/s rear broke the nut off, so now need a bottom plate as the bolt is useless

    p6 - as it sits now, tub removed was already unbolted, chassis cleaned primed somewhat, shocks and bump stops all removed, need to find a rear cross member so that i can remove and refit a proper S1 rear cross member.
    Attached Images Attached Images
    Land Rover

  3. #53
    Join Date
    Sep 2007
    Location
    Northern Beaches Sydney NSW
    Posts
    1,133
    Total Downloaded
    0

    update

    p1 working on the rear tub, took one support brace off to clean, pretty filthy as expected

    p2 rear tub with support brace in place, you would not believe this photo is after hours of cleaning

    p3 support brace off, will prob remove all 3 in due time so that i can clean underneath, nice change from welding

    p4 close up of panel after hours of cleaning, finally getting some original green paint, previous owner had applied some sound deadening stuff in places its stuck on real bad others it comes up easily from aging. oh the mess on the floor.

    also did some minor welding on chassis, nothing major, brackets on rear of chassis. was going to leave the tub bracing cleaned up but now thinking to use cold Gal, didn't really want the perfectly painted re build but the aged look so unsure which we to go for the brace.
    Attached Images Attached Images
    Land Rover

  4. #54
    Join Date
    Sep 2007
    Location
    Northern Beaches Sydney NSW
    Posts
    1,133
    Total Downloaded
    0

    update on cleaning

    pic 1-2

    before and after, after many hours of cleaning with a screwdriver seemed to work best, still needs straightening out but hard to know where to stop. Looks heaps better but a long way to go yet. one of the support braces underneath the tub has damage so may need to locate a replacement one if i cant repair current one. its filthy work, tedious but someone has to do it. would love to get some paint underneath the tub when its ready.
    Attached Images Attached Images
    Land Rover

  5. #55
    Join Date
    Apr 2011
    Location
    Wandong,Victoria,Australia
    Posts
    3,379
    Total Downloaded
    0
    Hi shamirj,

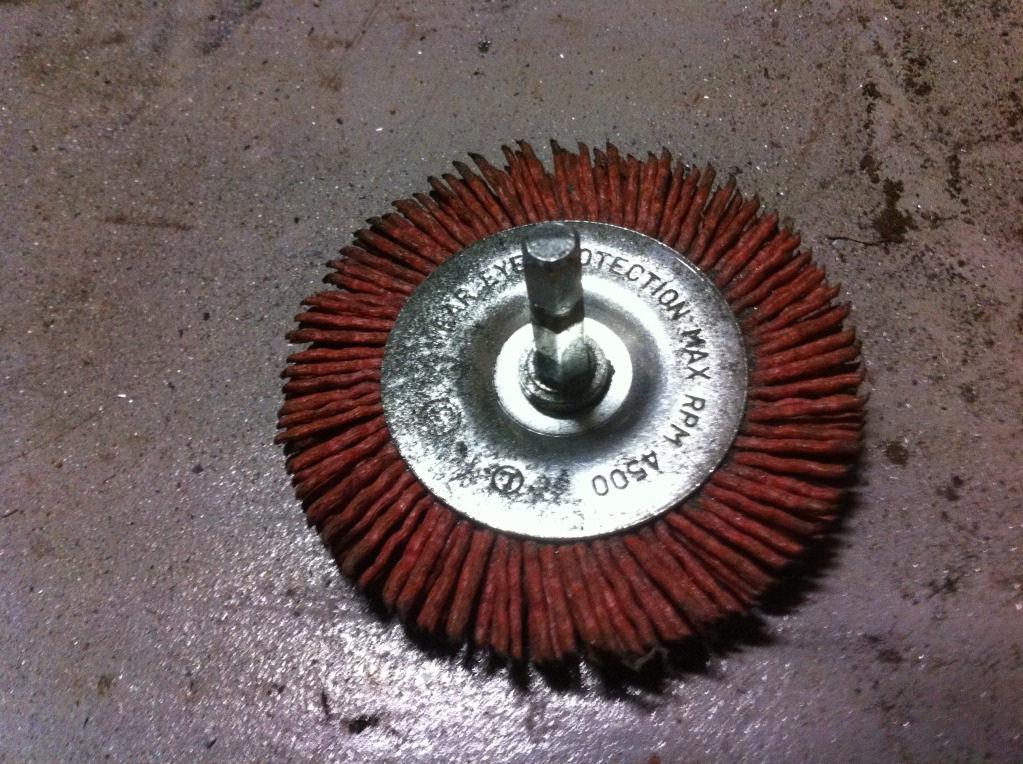
    Have you tried one of these?

    IMG_1336 by Grey Ghost, on Flickr

    You can buy them from Bunnings (or Mitre 10) - they attach to a drill, and are good for getting crap/paint off..

    It will strip right back to the metal if you want, and then you can paint the metal once you've cleaned it.. Typically I use one of these, then wipe down the surface, then (depending on the type of metal) - etch prime, and top coat.

    Anyway - I like these as they are hard enough that they get crap off, but not too soft that nothing happens... I used quite a few (they don't last forever) during the restoration of my Series II.

    Cheers,
    GG.
    88 Perentie FFR - Club Rego
    93 Discovery 1 200 Tdi - Club Rego
    03 130 Td5 Single Cab
    06 Discovery 3 Petrol
    22 Defender 90 - Full rego

  6. #56
    Join Date
    Sep 2007
    Location
    Northern Beaches Sydney NSW
    Posts
    1,133
    Total Downloaded
    0

    more updates

    thx greygost, not used those before, i have used the steel wire brushes which also seem good but prob too aggressive. happy to try them out. i have seen them at bunnings but thought they would not last. worth a try. anything beats the screwdriver.

    p1 light sand of the rear tub outer surface, have taken the capping on one side off so far but need to get more sandpaper

    p2 bent drill bit, have snapped many before but never twisted like this, was using a cordless drill

    p3 the dreaded rivets which seem harder to drill thru. also note have a big hole to hide/fill, thinking a small piece of alum underneath and then bog the hole from top? the alum underneath will need to cover that section so when you look from underneath seems all one piece instead of a small piece which would not look right.
    Attached Images Attached Images
    Land Rover

  7. #57
    Join Date
    Apr 2011
    Location
    Wandong,Victoria,Australia
    Posts
    3,379
    Total Downloaded
    0
    Hi Shamirj,

    In regards to the plastic wheel - they last a while, as long as you don't hit any sharp edges with them.. I know that from experience!


    In relation to your patch - I agree, I did a similar thing with a hole in my firewall. I made a plate from spare aluminium (an old floor panel) - I made sure though that there was plenty of space between the edge of the hole and the patch, as I didn't want to do the fix again.. I used bog on the top side - nobody has ever noticed.. I did think about doing 2 x plates (one on both sides) but worried about dirt/grime/water somehow getting in there, so only plated one side. Naturally I used pop rivets - to complete the Landy Look!
    88 Perentie FFR - Club Rego
    93 Discovery 1 200 Tdi - Club Rego
    03 130 Td5 Single Cab
    06 Discovery 3 Petrol
    22 Defender 90 - Full rego

  8. #58
    Join Date
    Sep 2007
    Location
    Northern Beaches Sydney NSW
    Posts
    1,133
    Total Downloaded
    0

    thx grey gost, chassis differences

    pic1 & pic2

    differences in chassis - first pic has 5 additional bolt holes to either side of centre hole, 2nd pic as fitted to my LR has no additional holes for bolting the capstan winch i think. is the replacement i have welded a S2 or poss S3 as i may have to re do. the spare one can be used if required.
    Attached Images Attached Images
    Land Rover

  9. #59
    Join Date
    Dec 2006
    Location
    Narrogin WA
    Posts
    3,092
    Total Downloaded
    0
    Google "Strip it Disc."

    They are for use on angle grinders and work very well but test it on a piece of a aluminium first, in case it is too aggressive,

    Cheers Charlie

  10. #60
    Join Date
    Sep 2007
    Location
    Northern Beaches Sydney NSW
    Posts
    1,133
    Total Downloaded
    0

    update

    p1 new discs purchased one for the drill and other for angle grinder work very well but very aggressive

    p2 found some alum rods which can be used to weld alum, filled this hole

    p3-p4 before and after shot using alum welding, tedious and slow but fills small holes well

    p5 p/s door removed and started cleaning

    p6 inside door can see top gal section already somewhat cleaned long way to go yet, at least two layers of diff coloured paints on the door
    Attached Images Attached Images
    Land Rover

Page 6 of 110 FirstFirst ... 456781656106 ... LastLast

Tags for this Thread

Bookmarks

Bookmarks

Posting Permissions

  • You may not post new threads
  • You may not post replies
  • You may not post attachments
  • You may not edit your posts
  •  
Search AULRO.com ONLY!
Search All the Web!