

 Reply With Quote
Yes, I was going to try that then I read the small print; Can affect front and rear approach and departure angles and ramp over on some vehicles. Prolonged usage will affect ground clearance in general!Originally Posted by 67hardtop

Cheers Scott

 ChatterBox
Polished the series three with that whizz bang polish today...
I WISH...
Cheers Rod
Sent from my GT-I9507 using AULRO mobile app
Yes, I was going to try that then I read the small print; Can affect front and rear approach and departure angles and ramp over on some vehicles. Prolonged usage will affect ground clearance in general!
Cheers Scott
Lord Jock
Not actually on the Landy but rebuilding another motor to for it!
Cheers, Mick.
1974 S3 88 Holden 186.
1971 S2A 88
1971 S2A 109 6 cyl. tray back.
1964 S2A 88 "Starfire Four" engine!
1972 S3 88 x 2
1959 S2 88 ARN 111-014
1959 S2 88 ARN 111-556
1988 Perentie 110 FFR ARN 48-728 steering now KLR PAS!
REMLR 88
1969 BSA Bantam B175
 LordRover
Subscriber
LordRover
SubscriberAfter much fooling about, I got the timing cover off the 300. Not before time, it seems:
[IMG][/IMG]
[IMG][/IMG]
There are a number of tears around the whole belt. They are all on the front, that is the side that faces you as you look at the installed belt.
I believe that the belt may have ben overtensioned, but the tensioner bearing has a bit of lateral movement in it, so maybe it was that.
Thanks to Blknights tutorial, and a vid on youtube it has all gone well so far, but
I'm a clumsy bugger, so I avoided using prybars to remove the front pulley:
[IMG][/IMG]
So now it's time to put the whole thing back together, including the head. Hope I remember where everything goes.
JayTee
Nullus Anxietus
Cancer is gender blind.
2000 D2 TD5 Auto: Tins
1994 D1 300TDi Manual: Dave
1980 SIII Petrol Tray: Doris
OKApotamus #74
Nanocom, D2 TD5 only.
Wizard
Back to working on the rear diff again now I've cleaned out all the gunk.
Would you believe a 40+yo and today was the first gasket I've ever fitted... it wasn't the most pleasant job, using gasket sealant to hold the gasket on whilst trying to squeeze the cover on and figure out which way it goes at the same time as trying to get the bolts in.
It's a tight squeeze between the long range tank and the rear diff cover. Was thinking this would be a lot easier with a fork lift under the back to lift the body up.. alas, no room under the house for such a thing (no fork lift either!).
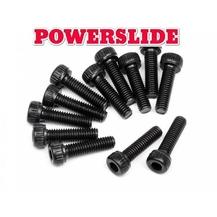
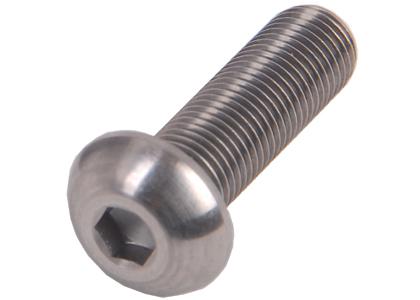
... and the bolts, lovely. It's a new rear diff cover and doesn't use the standard LR bolts, uses some nicer bolts but not the usual hex-head but one requiring a small hex screw thingy.. bolts like these:
So I did my best to get them tightened to approximately 70 ft/lbs (based upon information I read up on here) but buggered if I can hold the torque wrench there long enough without the end slipping off.
Great. Ok, so that was my weekend - not that I'm defensive much but I fully expect to cop some flack but to be honest I'd be happy enough if it just held oil long enough to get it to a workshop to re-torque the bolts.
AT REST
SubscriberWashed the Defender after a dusty day in the bush yesterday.
And I replaced the trackrod that I bent while negotiating a rocky track with the one that I had reinforced only three weeks ago. I found that the old TV aerial support tubing was exactly the correct ID to fit over the trackrod.
Roger
Master
I finally got the new Intensity LED's wired up this afternoon. It ended up being a much larger job than I had anticipated due to the fact that I was determined to use the proper Defender/Disco driving light switch.
I was also determined to do a proper job and wire it up so that it is backlit with the other dash lights and shines the LED indicator when the driving lights are on. Apart from that the Intensities are just hooked up to the high beam and the switch as usual.
I ended up with the instrument cluster sitting on the back seat and still had a challenge poking the wiring through the bulkhead with some welding wire. After a long clean up it is a job that I'm really happy with. All wiring is housed in spirap and all connectors are soldered. I'm kind of keen for it to get dark now!
Moderator
70lb/ft !!??
Try 30Nm-22lb/ft for the old tin cover.
And those are button socket head cap screws.
These are socket head cap screws.
Master
Here is an awesome thread from the tech department giving the details of using the Defender/Disco switch. It saved me a lot of time googling.
http://www.aulro.com/afvb/showthread...69#post2496069
Moderator
Popped the drivers floor out so I could get to the grease nipple for the centring bearing in the TW DC shaft.
I think I'll make a small access panel with some dzus fasteners.
 Posting Permissions
| Search AULRO.com ONLY! |
Search All the Web! |
|---|
|
|
|


Bookmarks