Page 5 of 10 FirstFirst ... 34567 ... LastLast
Results 41 to 50 of 96

Thread: Offroad Trailer Build

  1. #41
    3landerblue Guest
    What a great thread and a great looking trailer, can't wait to see it finished. You mentioned (jokingly) that you would charge about $20k if you sold them.

    But out of interest how much do you reckon that you would have spent on it by the time that it is finished?

    I only ask because I am after a trailer tent and especially the Adventure ones, their top of the range is now $39,000 and their entry model without a tent $17,000.

    They do seem expensive but I guess you get what you pay for, quality?
    I reckon at this rate it would be cheaper to buy a secondhand Oka 4wd and fit it out?

  2. #42
    Join Date
    Jan 1970
    Location
    Melbourne
    Posts
    1,937
    Total Downloaded
    0
    Ok, Seriously.

    The trailer will end up costing me about $5k to build. Then you have another $3k for the rooftop tent which I already have.

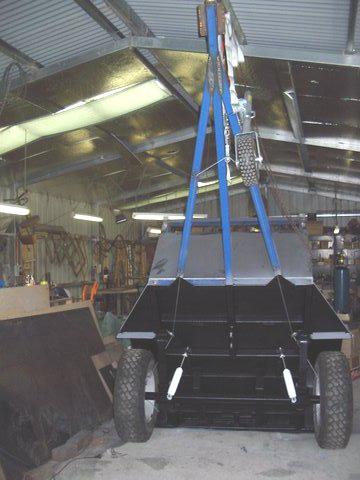
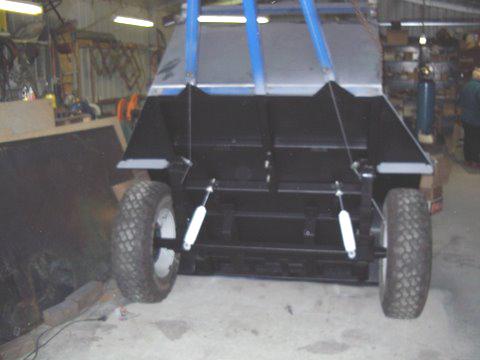
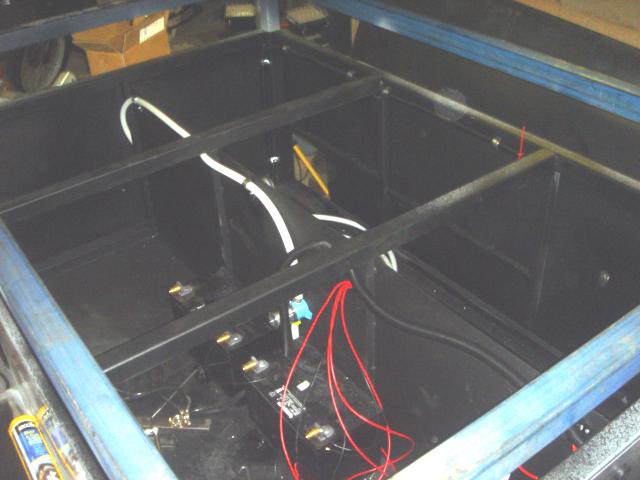
    I reckon there is about $7k worth of labour in the build...so around $15k including labour if you were to have it built. But that will include a lot of stuff you only get in the top campers like a stainless steel kitchen with flush mounted staibless 2 burner stove and stainless sink, pull out awning, 2 100A/h AGM batteries, 3 lights, 240v power when available, electric brakes, D2 hubs etc etc.

  3. #43
    Join Date
    Jan 1970
    Location
    Melbourne
    Posts
    1,937
    Total Downloaded
    0
    Quote Originally Posted by discowhite
    whats the specs for the axle?? part number, length ect..

    cheers phil
    I have no idea. Dad's mate runs Alko in Victoria so he got it all made up for me. All I know is that it is a 50mm axle, D2 hubs, Ford bearings, and has exactly the same track as the Disco. I think the axle measures 1685mm from memory. I don't think there is any standard length for the axles, you just tell them what you want and they make it.

  4. #44
    Join Date
    Jan 1970
    Location
    Melbourne
    Posts
    1,937
    Total Downloaded
    0
    Update on trailer.

    I haven't really gor much to show you. I have been mucking about on a few fiddly bits which don't look much but take a bit of time. I have made up some front stabalizer legs and a lift up bracker for the rear awning. All of these have been zinc plated for Bling!

    I have also painted underneith and inside the trailer. I painted both with etch primer first. Underneith is painted with an underbody deadener which is a sticky tar based paint which you blow in with an air gun. It would have been easier to use the same stuff inside but I was worried the tar might get sticky on hot days so inside I have used a paint made for the lining tray of utes.

    I have also mounted the shocks.


  5. #45
    mr_sav Guest
    Hi Piddler

    I am having my trailer reworked. I am not as gifted as the likes of Walker and Spudboy, so I have outsourced it.

    Regarding your query axle above or below springs; I have spoken to a few Trailer Manufacturers and engineers, whom I have had a working relationship with. They are categorical there is no benefit or disadvantage either way. In fact, I had my axle inside the springs, and they are now outside - and I am having my work done privately, but by a Contractor for Treg Trailers, whom many would be aware of if not only for the Treg Hitches.

    Worse case scenario, if you did lose your axle, just walk back a few hundred metres and pick it up. My axle and hubs are rated to 3.5t and would probally survive a head on with most other vehicles, if I lost it behind me. The trailer obviously wont go far, still attached to the vehicle. A land version of a storm anchor.

  6. #46
    mr_sav Guest

    Drawbar Length

    Quote Originally Posted by walker
    Yes, I thought about a long drawbar.......then I made it even longer.

    No, really, I had a look around and some of the top price campers have drawbars around 2.4m!!! . I thought this was a bit too long so I comprimised and went for 2m. Once the box and gas bottles and stone protector all go on the drawbar it will not look so long.
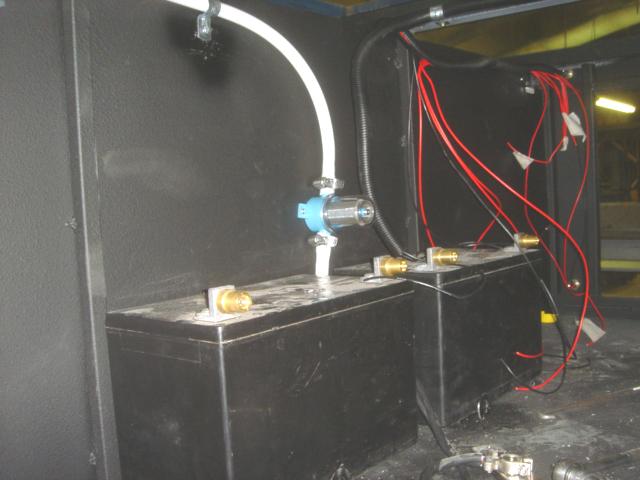
    I have made the spare wheel to go under the front section of the trailer while the water tank is under the rear section. If I end up having room on the drawbar I might put the spare wheel here as I don't like having it under the trailer. I did not want to have to have a swing away carrier at the rear.
    Regarding the Drawbar, A good blueprint for a drawbar is distance between axle and hitch = distance of wheel base of towing vehicle (Centre Front Axle to Centre Rear Axle of Towing Vehicle).

    Regards.

  7. #47
    mr_sav Guest
    The Trailer is looking fantastic. Is the axle width equal of that to the D2.

    If I had made my trailer from the Ground up - I would have matched it to my 110. However, given I am working with my old (but trusty) trailer I was not going to cut into the frame to reduce width between the tyres.

    Anyway I should have had her back by now, but the guy working on it is dragging the chain a bit. Out of hours, on the side.

    I will post pictures when I get her back.

    Basically she has had new Axle and Hubs with Electric Brakes, extended Draw Bar and some more bracing. I am getting flanges welded in So A frame for the Rooftop tent can be mounted. I am still trying to keep my fold up/slide of lid, as this makes a good table top when camping for lengthy periods.

    Anyway, You have done a great job, I can only imagine the pride and satisfaction you would have from building your own trailer. I am envious.

    Regards.

  8. #48
    Join Date
    Jan 1970
    Location
    Melbourne - Eastern sector
    Posts
    963
    Total Downloaded
    0
    Quote Originally Posted by walker
    I have also painted underneith and inside the trailer. I painted both with etch primer first. Underneith is painted with an underbody deadener which is a sticky tar based paint which you blow in with an air gun. It would have been easier to use the same stuff inside but I was worried the tar might get sticky on hot days so inside I have used a paint made for the lining tray of utes.
    The Ute liner stuff is fantastic but for future reference if u use the tar based deadener the trick is to spray over it once it had set with an enamel spray paint.... this will give it a solid feel and wont go soft.... my 2 cents..

    looking good walker!!


    more pics....

  9. #49
    Join Date
    Jan 1970
    Location
    Melbourne
    Posts
    1,937
    Total Downloaded
    0
    Update:

    Started the electrics today.

    It will have :
    2- 100a/h AGM batteries
    1- Hardwired light in cargo area of trailer
    4- Merit sockets (2 for lights, 1 for fridge , 1 for 12v shower)
    1- 12v water pump
    1- 3 stage 15A smart Charger
    1- 240v input which will be hard wired to the battery charger and 1 double GPO

    Have I forgotten anything?

    The charger looks very good (on paper as I don't have it yet) and can act as a power supply when hooked up to 240v.

    The fridge will be mounted in the Disco so the fridge plug is only for if we are stopping somewhere for a few days and we will keep the fridge near the kitchen for easy access.


    I have also put down marine carpet on the floor which should protect the floor and stop stuff sliding around.


  10. #50
    dmdigital's Avatar
    dmdigital is offline OldBushie Vendor

    Gold Subscriber
    Join Date
    Jun 2006
    Location
    Arnhem Land, NT
    Posts
    8,492
    Total Downloaded
    0
    Adam,
    I'm surprised you centred the batteries like that. What was the reasoning? Did you just want them over the axle?
    MY15 Discovery 4 SE SDV6

    Past: 97 D1 Tdi, 03 D2a Td5, 08 Kimberley Kamper, 08 Defender 110 TDCi, 99 Defender 110 300Tdi[/SIZE]

Page 5 of 10 FirstFirst ... 34567 ... LastLast

Bookmarks

Bookmarks

Posting Permissions

  • You may not post new threads
  • You may not post replies
  • You may not post attachments
  • You may not edit your posts
  •  
Search AULRO.com ONLY!
Search All the Web!