

 Reply With Quote
'Damages the finishes', 'fancy talk', I don't know what to do! 🙃 If fancy is having a back seat to put my tools under I guess my Landy is a fancy bush truck then 👍 ...PS: No such thing as damaged finishes on a Landy, only patina 😎

 Loud Mouthed Rat Bag
I've been doing that but it damages the finishs inside.Originally Posted by MrLandy


Cheers, Billy.
Keeping it simple is complicated.
'Damages the finishes', 'fancy talk', I don't know what to do! 🙃 If fancy is having a back seat to put my tools under I guess my Landy is a fancy bush truck then 👍 ...PS: No such thing as damaged finishes on a Landy, only patina 😎
TopicToaster
SubscriberGood thinking chaps!
Just got back from an overnighter- same place I was last weekend.
Had a nice camp oven stew for tea, a few bevvies with mates... until a pack of blokes rocked up in the late evening and asked me to move my 'jeep' out of my camp spot because there were 'lots of them' and 'they always camp there'.
I think some people didn't get the memo about the bro-code of the bush- namely dount be a douche-bag and annoy others who go to the bush to relax and get some peace and quiet.
On a different note, went for a stroll along the Namoi river (upstream from Warrabah), spotted a heap of wildlife, including skinks, bearded dragons, wallabies, wild goats, carp, yellow belly, and a red belly black snake (which I almost stepped on 2.5km away from camp).
-Mitch
'El Burro' 2012 Defender 90.
'Campsite ownership' is very uncool.
Loud Mouthed Rat Bag
I hope you stayed put Mitch.
Cheers, Billy.
Cheers, Billy.
Loud Mouthed Rat Bag
I knew I'd cop that.
Cheers, Billy.
He he glad you liked it
TopicToaster
SubscriberHad a bit of a run-about day today. But I did get to spend some quality time with the Landy. It was one of those days that started with an idea, and progressed into a wild goose-chase finding what I thought I needed, and finding it after a protracted trip around town.
Picked up an ammo box from the disposal store. I've been looking for something to hold some tools in the rear of the vehicle, and this will work nicely. Previously the tools I had in the vehicle were under the driver's seat, but this was getting cramped, and I found most stuff was just being stored in the load space, as I was too lazy to pack it all away correctly once I had finished with it. Removed the stickers with a heat gun, gave it a scrub and wiped over with some wd40 to get the rest of the sticky crap off. I was pleasantly surprised with how well it scrubbed up.
This will fit nicely behind the passenger seat in the channel below the cross brace bar, and between the wheel arch, and the seat back. It is easily held in place with the seat back.
Finally mounted the hi-lift / shovel holder, after giving the parts that got the die-grinder treatment a lick of cold gal paint and some Orkney grey from a touch up paint bottle I had. The paint is not a perfect match to the Kaymar bracket colour, but for a bloke of my artistic persuasion, it's close enough, and I'm not too bothered
Took a second trip to bunnings to get a padlock for the jack. I know they are cheap and not really a huge target for theft, and I'm probably just being paranoid, but I'd rather be certain that it's secure, and not used to bust thru the windscreen when I'm not around. Bonus points for more matching grey parts!
There is a bit of buggerizing about to get the lock on (involves removing the handle to lift the bar up enought to get the lock in), but looks good enough IMO. With a few strategically placed cable ties, it's almost rattle free! I'll also consider a neoprene sleeve for it some time down the track, as a seized/rusty Hi-lift is more of a death trap than a good one... which is still pretty dangerous!
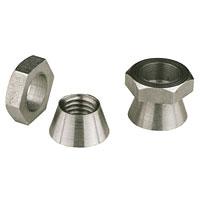
I am also looking to order some shear nuts for the U bolts that attach the bracket to the roof rack. This will mean that I'll need to cut the U bolts to get the bracket off, as would anyone else
I also made a contraption for helping to secure a tarp to the roof rack as a makeshift awning.
I'll get around to a proper awning one day, but until then, a tarp and some guy lines will be more than suitable.
Just a caribiner clip and some paracord- can be clipped on, or looped thru, the tarp, and tied off to achieve whatever crazy tarp contraption I come up with.
Paired with these,
I'll be able to cobble together some interesting setups, which should be good over the coming months. I'll get some pics of it all set up some time.
Going to Bretti Reserve near Gloucester this weekend, so will get to put it to the test, and report back!
-Mitch
'El Burro' 2012 Defender 90.
TopicToaster
G'Day Mitch, Just read your thread from start to finish,...Very interesting indeed, and you are a very clever man!
The "Melting Mudflap"!!!.....Your "fabrication looks EXCELLENT. I was wondering that if any part of these were in the path of the hot exhaust gases, then they would heat up & melt the rubber?....So, did you ever fit them, and if you did, how did you attach them?
Thanks, Pickles.
TopicToaster
SubscriberHi Pickles,
The saying goies- "a grinder and paint, makes me the welder I ain't".
The theory is that the steel will be a buffer layer for the rubber, and have some thermal mass to keep the overall temps low. I do plan to pack the gap with fibreglass cloth like a fire blanket type material to stop the heat transfer by conduction from one material to the other.
There would only be a small section of the metal that is in the exhaust path at full flex of the flap, and the wind would theoretically cool the remainder of the metal and reduce the overall temps, but to be honest, it's still just a thought exercise as I have not fitted it yet! I was doing some clean-up of the part and put a big crack in it where the metal was a bit thin. So back to the welder when I can be bothered to fill the crack in and get it fitted.
I'll probably use a small screw or something from behind, and try to keep it as subtle as possible.
I really do like the flat plate idea that Shatkins had in this post.
Shatkin Spec bracket
This is probably a more suitable solution to my problem, because a) I ultimately want a mudflap I can remove when off-roading, and b), melted flaps are not cool, and the problem is do to the materials used in the mudflap, and the flex that this material has.
My Mudflap death count is 2 torn off while offroad, and 1 melted rear flap, so it's becoming an expensive problem to have, at $300 per replacement set.
-Mitch
'El Burro' 2012 Defender 90.
 Posting Permissions
| Search AULRO.com ONLY! |
Search All the Web! |
|---|
|
|
|


Bookmarks