


 Reply With Quote
Whack one of these in and save yourself $600.")

 Moderator
Hmm, I think I will probably just go for a rubber mat.
Might velcro it for now until I can get one in. I'll have to take it out again when I put my CDL in anyway.
The Phantom - Oslo Blue 2001 Td5 SE.
Half dead but will live again!
Nina - Chawton White 2003 Td5 S
Slowly being improved
Originally Posted by Judo

Wizard
SubscriberWhack one of these in and save yourself $600.
2002 D2 4.6L V8 Auto SLS+2" ACE CDL Truetrac(F) Nanocom(V8 only)
Moderator
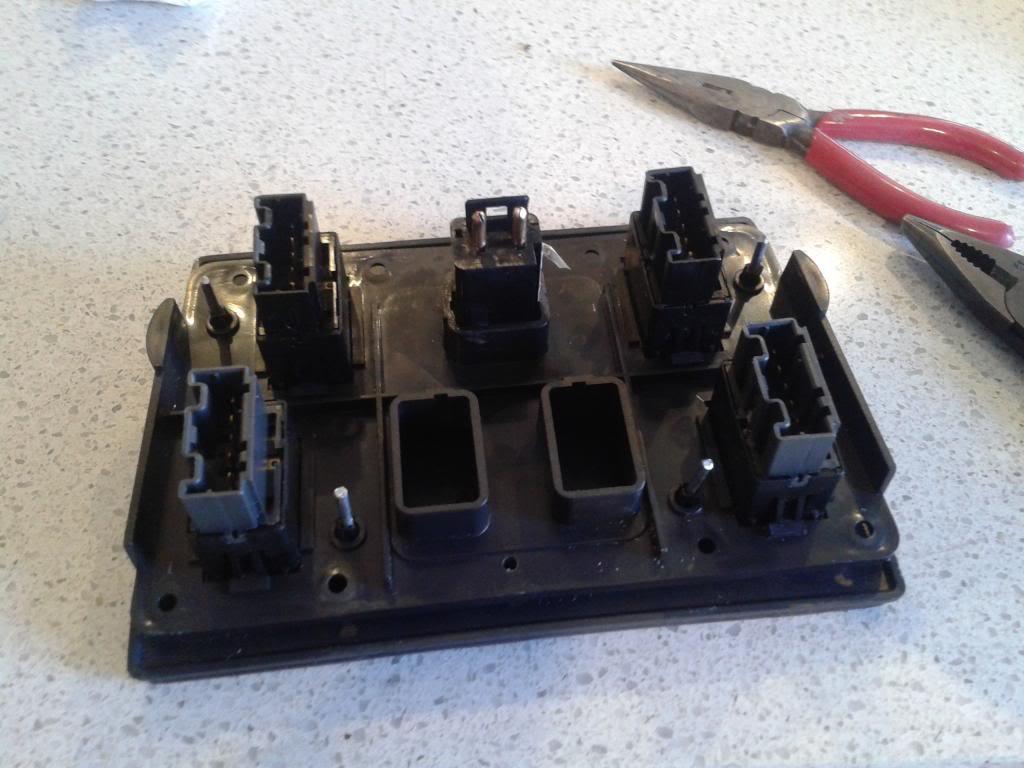
Well I finally got around to putting it back together.
I just flattened out some of the bend in the panel and laid it flat, put the shifter housing over the top and it secures it just fine.
No screws, no glues, not nuffink.
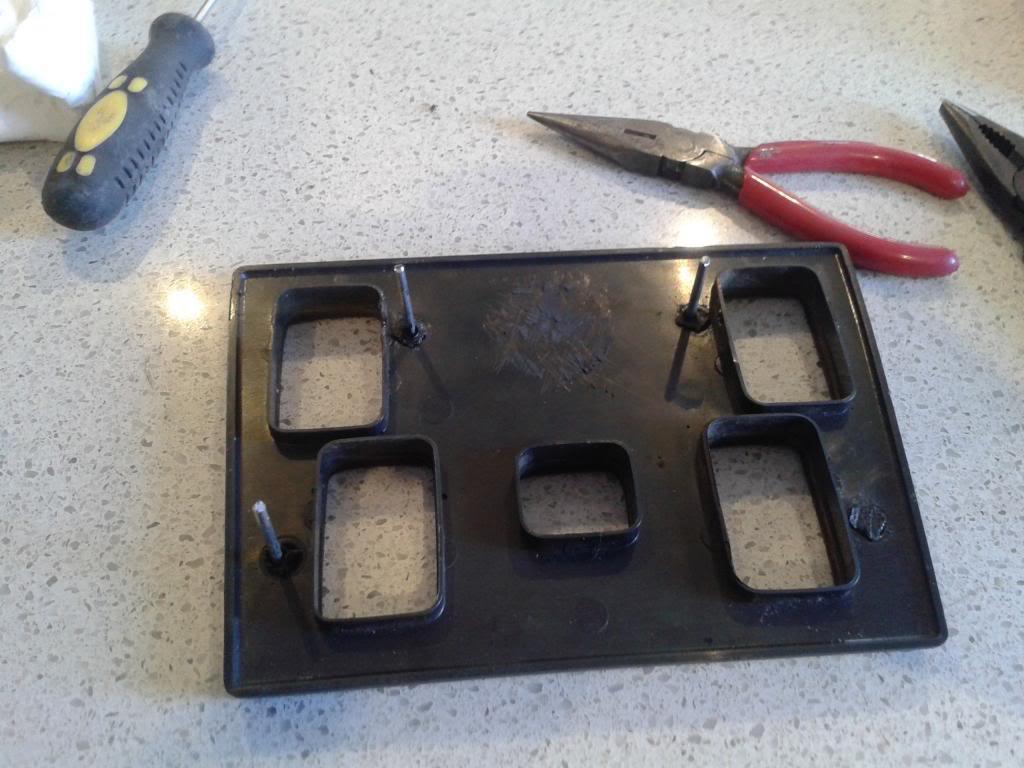
Also did another Muppet spec fix for my rattly window switch panel.
Turns out the plastic pegs had all snapped off, so...
Why not just melt some metal pegs in their place?
It works, and it's more secure than it's ever been
P.S the big scratchy blob you see in the first pic is the size and location of the giant dob of sikaflex they used to secure it in place
The Phantom - Oslo Blue 2001 Td5 SE.
Half dead but will live again!
Nina - Chawton White 2003 Td5 S
Slowly being improved
TopicToaster
What were the metal pins from? Only I need to do this as well as fab new brackets to screw the switch panel to. It got trodden on. Don't ask.
Moderator
Honestly.....
4 bits of coat hanger....
I also need to make up a new lower bracket to screw the switch panel, the screws on mine had torn through the plastic, so I just cut it off for the time being.
I heated the tip of a large flat bladed screwdriver and flattened out the star shaped bases so there was a more solid area, then heated the tips and drove them in as far as they would go.
It's not exactly pretty, but it works.
The Phantom - Oslo Blue 2001 Td5 SE.
Half dead but will live again!
Nina - Chawton White 2003 Td5 S
Slowly being improved
I think you need to get your name changed from Disco Muppet to Disco Macgyver
Moderator
I originally wanted to use nails as they had a bit more purchase and were dead straight, but they were way too long and I didn't have the tools or inclination to cut them to size.
Had the coat hanger lengths lying around as I used them to remove the factory radio, cut them to size and in they went
The Phantom - Oslo Blue 2001 Td5 SE.
Half dead but will live again!
Nina - Chawton White 2003 Td5 S
Slowly being improved
TopicToaster
Get some 20x20 alloy angle cut to about 20mm long, open up to the right angle and cut a slot for the screw clip things to fit over. Drill and pop river to the base of the consul. The mat/wood fits over the top and you can't see the rivets.
At least thats the theory. My pieces of anle have been ready for 4 months now. They are ageing nicely.
Moderator
Bit of an update on this.
In my mad, OffTrack inspired De-wooding, as this thread explains I pierced the front plate of the window switch plate with my metal pins.
I've finally managed to cut the wood off, which is still in surprisingly decent shape if anyone wants it.
As such, I needed some new pins, and a way of filling in the holes.
So, tonight I've started that process.
I've cut up some pieces of plastic from a Titanic model, which is a tad thicker than the holes. Some careful filing and it fits, with some gentle persuasion.
Only issue is it's white, but some careful colouring should solve that.
This is generally where I'm at:
The two halves separated
One pin in
The plastic pieces
Who used this much tape! SERIOUSLY!
The wood face, seriously if you want it, it's yours for $20
Then I just need to do as below
Cheers
Muppet
The Phantom - Oslo Blue 2001 Td5 SE.
Half dead but will live again!
Nina - Chawton White 2003 Td5 S
Slowly being improved
I recall reading reviews of the range rover interior way back in '80s and they commented on the wood trim that while it gave an ambiance whilst new it tended to become very second hand fast!Looks like nothing has changed!
 Posting Permissions
| Search AULRO.com ONLY! |
Search All the Web! |
|---|
|
|
|


Bookmarks