Page 8 of 10 FirstFirst ... 678910 LastLast
Results 71 to 80 of 96

Thread: Bella's new start

  1. #71
    Join Date
    Aug 2012
    Location
    Adelaide
    Posts
    2,757
    Total Downloaded
    0
    Quote Originally Posted by wrinklearthur View Post


    Hi Marty

    Most of those clamps are just folded over and with more weight on the springs, the steering should then clear.
    Watch for rubbing when the axle articulates.
    .
    I've noticed that my steering arms rub on what I think is full articulation... but as far as I know I'm fully stock on springs etc. Is this correct? should I be worried?

    Nice job btw.

  2. #72
    Join Date
    Dec 2006
    Location
    Narrogin WA
    Posts
    3,092
    Total Downloaded
    0
    Quote Originally Posted by debruiser View Post
    I've noticed that my steering arms rub on what I think is full articulation... but as far as I know I'm fully stock on springs etc. Is this correct? should I be worried?
    Two things that would help are:
    1. Have the springs hot-reset, which would lift the chassis, probably enough for the steering rod to clear the spring.

    2. Do what I did and cut the spring clamp off level with the top of the springs. This may cause more rebound of the spring on that side but the benefit is that the axle can articulate more on the downward drop, which is good for off-roading.

    Some people advocate removing the bolt in your setup and bending the clamp ends over the spring. This will work as well, but it makes pulling the spring pack apart, a pain.

    If your steering rod is jamming on the clamp, then you really should get it sorted out, as steering is a safety item,

    Cheers Charlie

  3. #73
    Join Date
    Feb 2011
    Location
    Old Junee
    Posts
    169
    Total Downloaded
    0
    Quote Originally Posted by chazza View Post

    2. Do what I did and cut the spring clamp off level with the top of the springs. This may cause more rebound of the spring on that side but the benefit is that the axle can articulate more on the downward drop, which is good for off-roading.


    Cheers Charlie
    So Charlie, are you saying that you have nothing across the tops of the spring pack and only horizontal control of the leaves?

  4. #74
    Join Date
    Dec 2006
    Location
    Narrogin WA
    Posts
    3,092
    Total Downloaded
    0
    Quote Originally Posted by '76swb View Post
    So Charlie, are you saying that you have nothing across the tops of the spring pack and only horizontal control of the leaves?
    Only on the front left corner, where the steering rod fouls-the-footpath.

    Isuzurover has removed most of his I think, to get some seriously good articulation off-road. I will take the bolts out of mine once it is licenced

    Cheers Charlie

  5. #75
    Join Date
    Feb 2011
    Location
    Old Junee
    Posts
    169
    Total Downloaded
    0
    Yaaay, look what arrived from Autosparks today!

    How many hours of hell errr..... fun have I got ahead of me?


    They look so sweet and innocent, neatly curled up and free of 37 years of living in a Land Rover, compared to the shambles in the shed.

    For anyone who wants/needs to know, I ordered the harnesses 23-04-13 and they arrived 27-05 13 (in case you didn't know). I went with what they call the main harness, the engine harness and the chassis harness. It ended up being about $440 delivered.

    Regards,

    Marty.

  6. #76
    Lostkiwi Guest
    You wont regret that purchase. I bought the same for my S2a when i rebuilt that...was so easy plugging it all together with all new light assembles etc.
    Going save a lot of time than chasing wiring gremlins in 37 year old wiring

    Quote Originally Posted by '76swb View Post
    Yaaay, look what arrived from Autosparks today!

    How many hours of hell errr..... fun have I got ahead of me?

    <a href="http://" target="_blank">

    They look so sweet and innocent, neatly curled up and free of 37 years of living in a Land Rover, compared to the shambles in the shed.

    For anyone who wants/needs to know, I ordered the harnesses 23-04-13 and they arrived 27-05 13 (in case you didn't know). I went with what they call the main harness, the engine harness and the chassis harness. It ended up being about $440 delivered.

    Regards,

    Marty.
    Last edited by Lostkiwi; 28th May 2013 at 06:55 PM. Reason: Cant spell:)

  7. #77
    Join Date
    Feb 2011
    Location
    Old Junee
    Posts
    169
    Total Downloaded
    0
    Quote Originally Posted by Lostkiwi View Post
    You wont regret that purchase. I bought the same for my S2a when i rebuilt that...was so easy plugging it all together with all new light assembles etc.
    Going save a lot of time than chasing wiring gremlins in 37 year old wiring
    You bettcha! I made the decision pretty early on during the dismantling process. The wiring near the headlights looked like they'd had ten different driving light hook ups! The wiring through the chassis to the tail lights etc was actually burnt out.

    About the only thing I'd like to do that's not totally original would be to use a fuse box that holds those modern fuses (you know, the pretty coloured ones). I'm pretty sure it shouldn't be too hard to set up.

    Cheers for now,

    Marty.

  8. #78
    Join Date
    Feb 2011
    Location
    Old Junee
    Posts
    169
    Total Downloaded
    0
    G'day All,

    I've been making a little bit of progress although very slowly it seems.

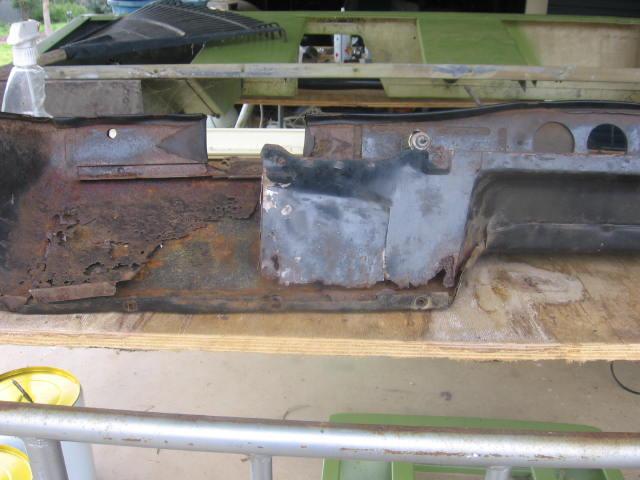
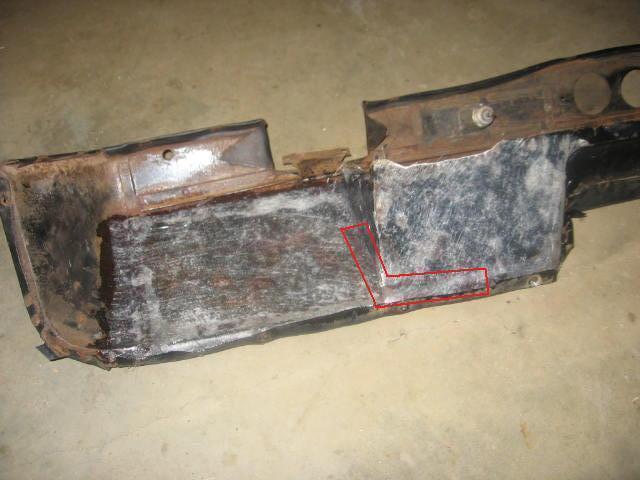
    My lower facia panel was quite sad at both ends so I decided to try fibreglass as a fix.


    First I cut/ground/wire brushed as much of the dead metal out. Measure out the pieces to go in.


    Then paint a bit of resin on first to aid sticking, lay the mat down and paint the resin till it all looks wet. The brush I used was quite stiff which aided in getting resin into tighter spots.


    The highlighted area where there was no metal left, also copped a good "glassing" on the inside of the air box as well.

    The wiper motor end received the same treatment.


    The circled bit I had to build up a bit more as there was nothing left after the rust came away and it's right where one of the fixing screws go.

    The matting I used was 450g/m but it was possible to split it and lay it down twice, which made it a lot easier to shape.

    I also dug the rear tub out of the back shed and started to do a bit of work to it.


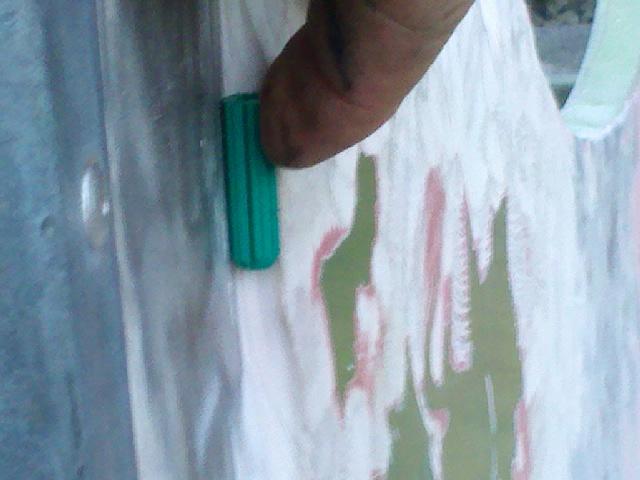
    I found a deep (the picture isn't as clear as I'd hoped but that is a green wall plug!) patch of bog I hadn't noticed under the dirt, so I'll see if I can beat the panel out a bit more than it has been.

    Cheers for now,

    Marty.

  9. #79
    Join Date
    Apr 2007
    Location
    Gold Coast
    Posts
    696
    Total Downloaded
    0
    Looking good just been through a lot of the same process myself. Engine to go in soon. Certainly a good feeling when it's going back together.
    Shepp

  10. #80
    Join Date
    Jan 1970
    Location
    Alex Heads
    Posts
    2,932
    Total Downloaded
    0
    Great project, and great work too mate!
    Very inspiring.

Page 8 of 10 FirstFirst ... 678910 LastLast

Bookmarks

Bookmarks

Posting Permissions

  • You may not post new threads
  • You may not post replies
  • You may not post attachments
  • You may not edit your posts
  •  
Search AULRO.com ONLY!
Search All the Web!