
Originally Posted by
The Mutt

Thanks John
At the moment we are having a problem getting charge out of both alternators, one is a Nippon Denso 12v 40 amp unit from the donor vehicle, the other is a Denso A127-65 originally on the Range V8 donk, we must be missing something! GRRRRRRRRRR
Glenn
The donor one should be a external reg type, the original one internal regulator. I would be getting hold of a replacement internal reg type 120A alt to suit a 4BD1. I got one after having no end of trouble with the original 40A one not charging enough etc to run driving lamps and fridge etc. If you need the part number, I'll dig it out again?
JC
The Isuzu 110. Solid and as dependable as a rock, coming soon with auto box😊
The Range Rover L322 4.4.TTDV8 ....probably won't bother with the remap..😈


 Reply With Quote
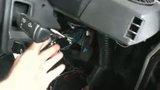
")

Bookmarks