Page 7 of 25 FirstFirst ... 5678917 ... LastLast
Results 61 to 70 of 244

Thread: Building the Ultimate touring 130 with slide on - my version...

  1. #61
    Join Date
    Jun 2012
    Location
    Beechworth
    Posts
    520
    Total Downloaded
    0
    Ok, decided to jump ahead a few steps and start building the slide on camper so we can give it plenty of test runs before the big trip. And so I feel like I'm getting somewhere! I've researched a few different building materials and have settled on using ACP (ally composite panel) with a folded ally frame (not RHS or SHS) on a reinforced plywood floor. I was keen on the 30mm fiberglass composite panels as you don't need a frame, but it would've been alot more dollars. Never used the ACP so here's hoping it will work out! Should be good as it is very rigid and fairly light and it comes in a choice of colours so no need to paint. For a weight comparison between 4mm ACP and 2.5mm ally sheet in a 1500 X 3600 sheet size, the ACP is 10kg lighter, and a lot more rigid.

    Have collected most of the bits now, just need a bucket load of rivets!


    Hopefully will get started in the next couple of weeks.

    Andrew.

  2. #62
    Join Date
    Jun 2012
    Location
    Beechworth
    Posts
    520
    Total Downloaded
    0
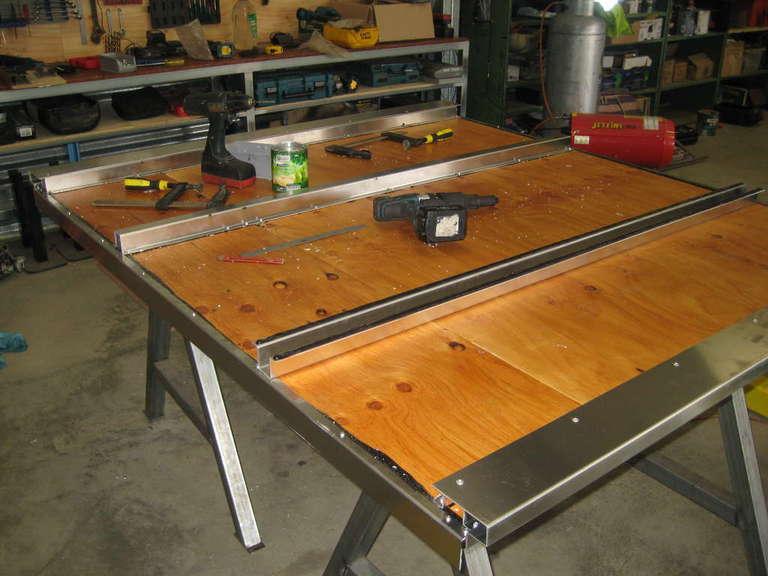
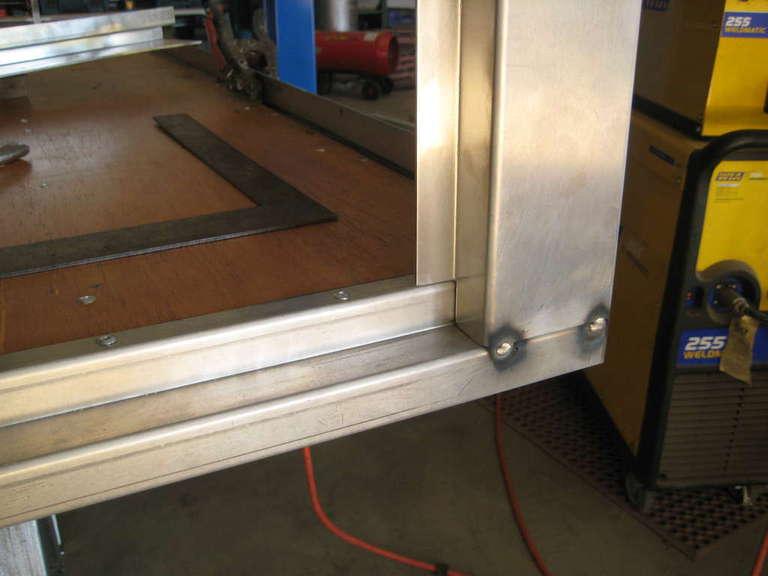
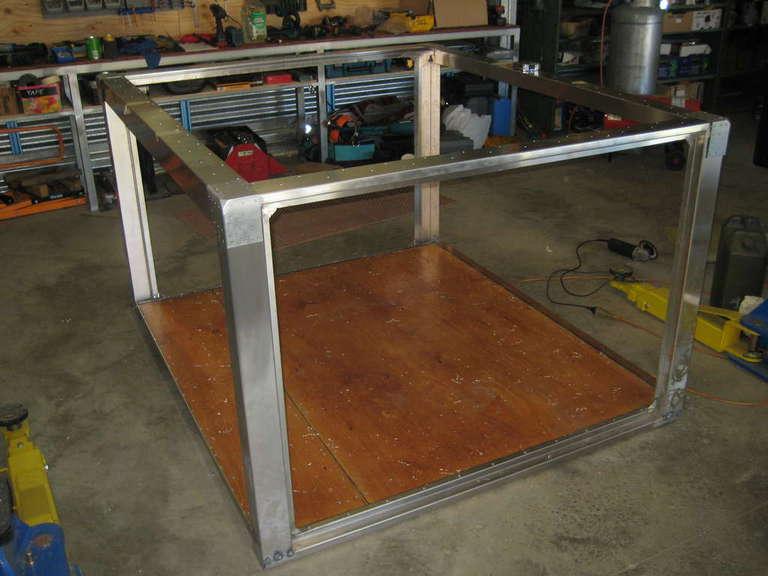
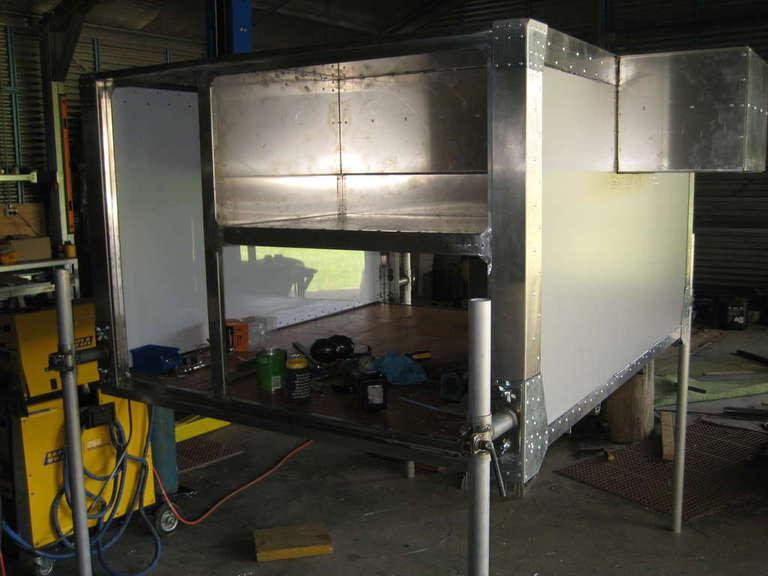
    Have made a bit of a start. Firstly made up the base, which is 12mm ply painted with a good varnish surrounded with folded 2.5mm ally, and some folded top hat sections underneath to give it plenty of strength.


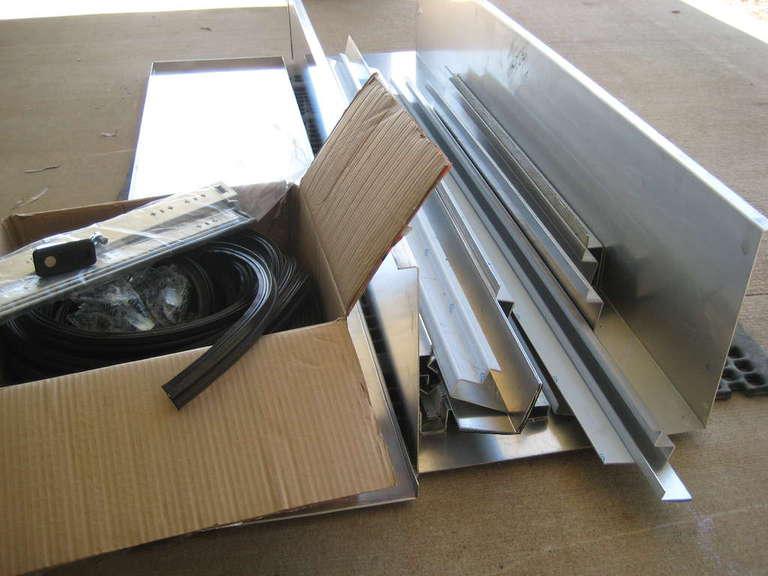
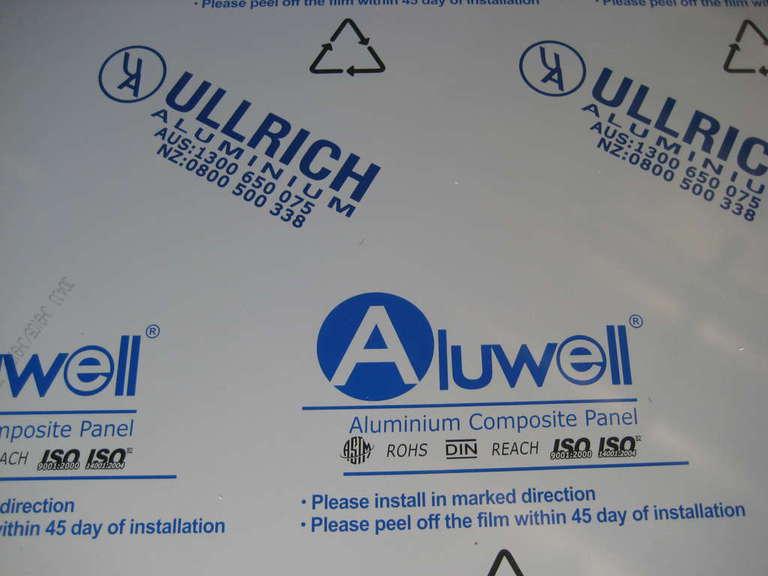
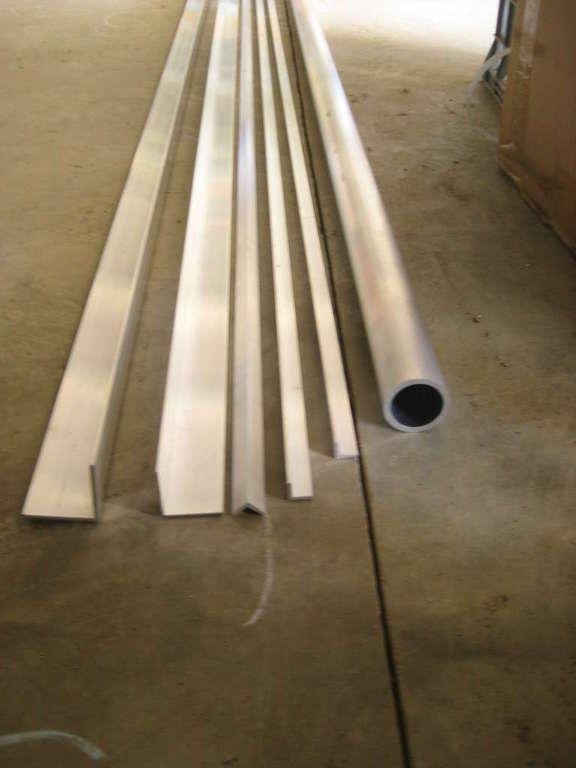
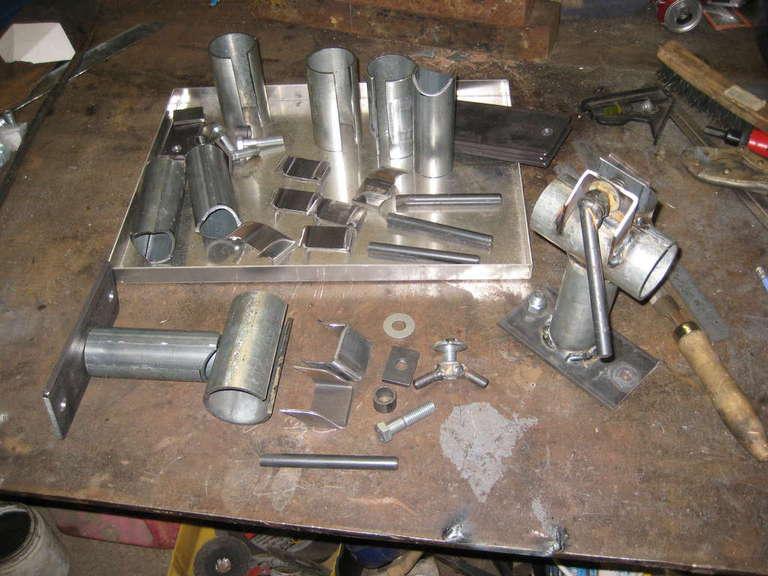
    The frame is 2.5mm ally folded into sections with a recess for the doors and I will pop rivet the alluminium composite panel (ACP) to it. I've decided to pop rivet the whole thing together as I believe it will be stronger than welding which can crack when exposed to lots of abuse/corrugations etc. Being welded might be ok but I'm sure the rivets will be better, its good enough for aeroplanes. To make it easier to build I just tack welded it together to hold it in place before riveting together.


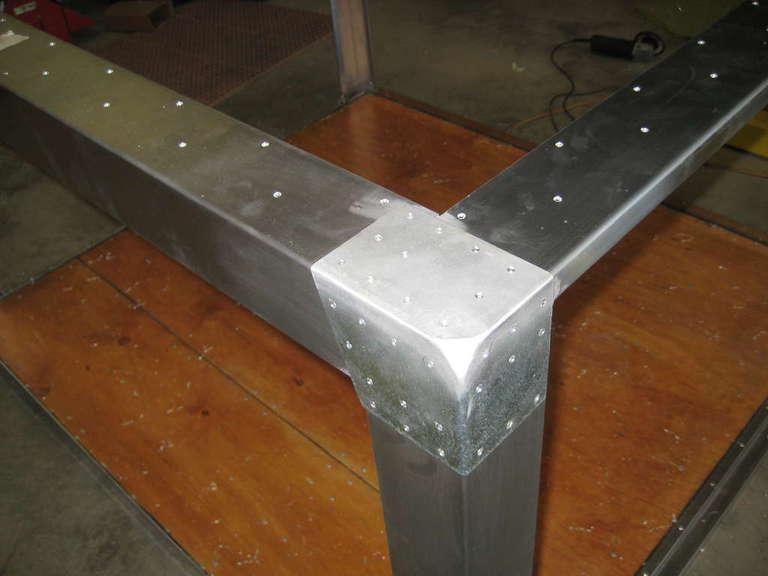
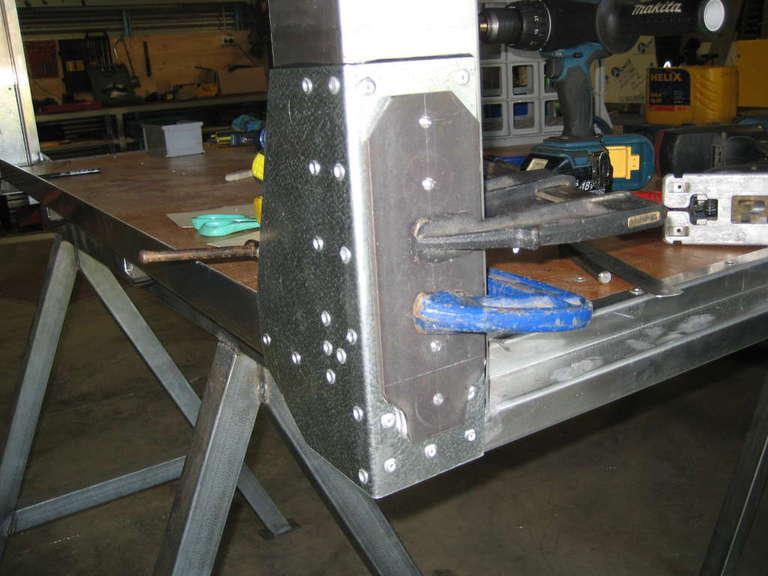
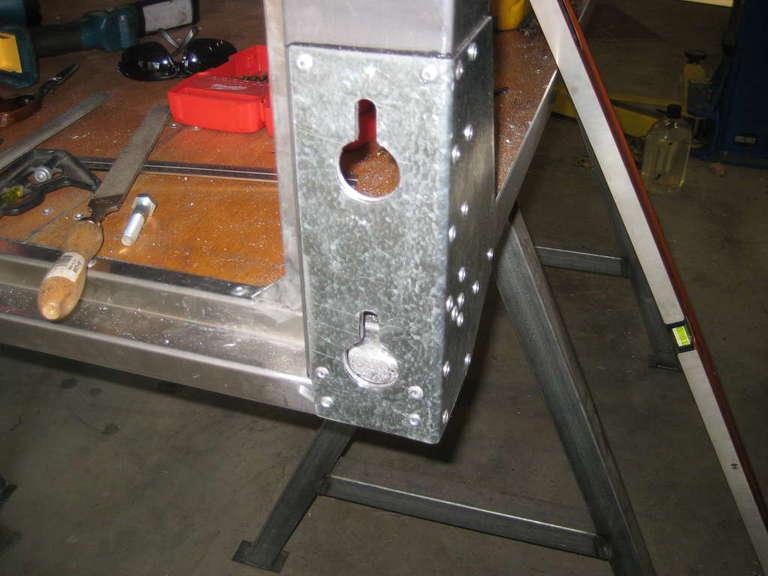
    To tie the corners together I made up some three sided caps out of gal sheet.


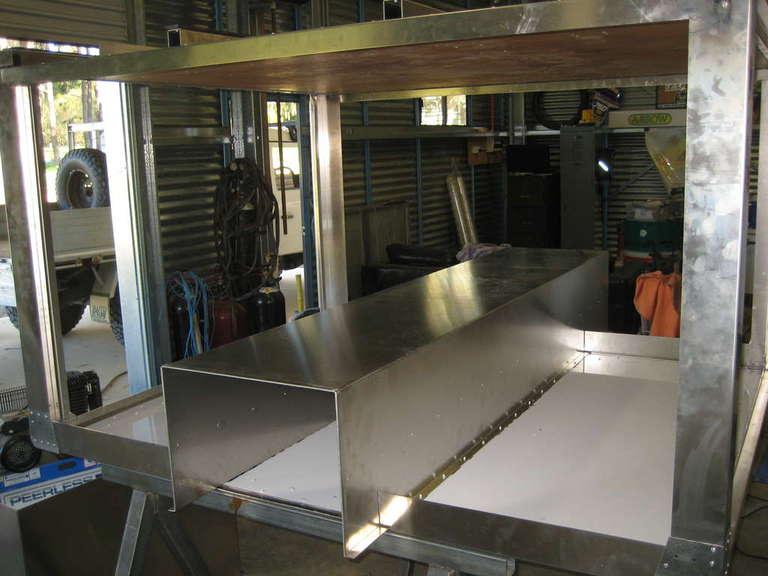
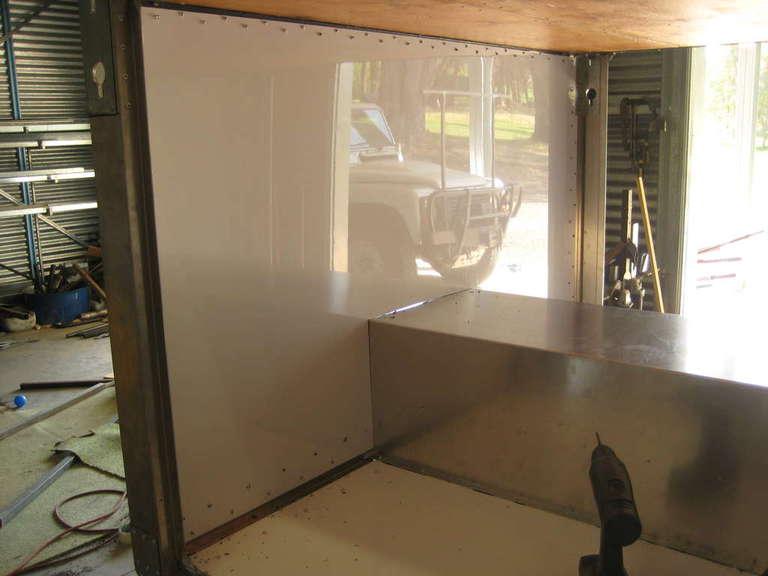
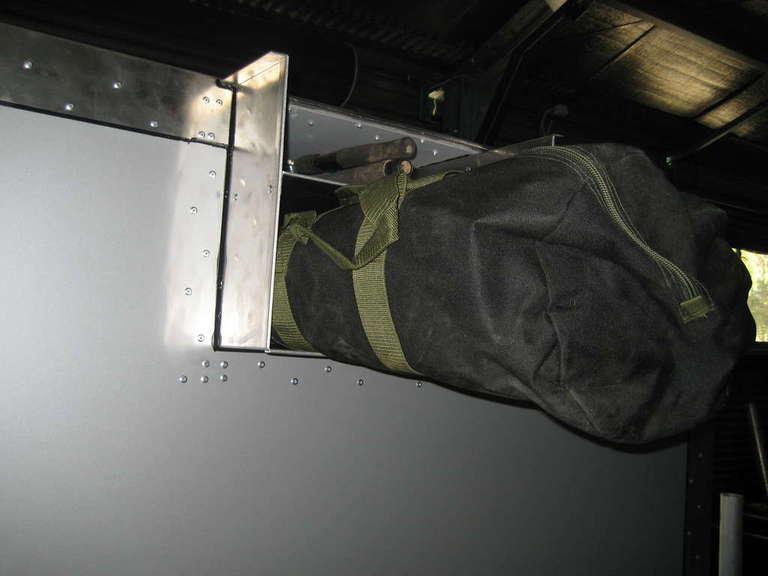
    Here it's upside down, ACP roof in, and the chute for the oztent in.


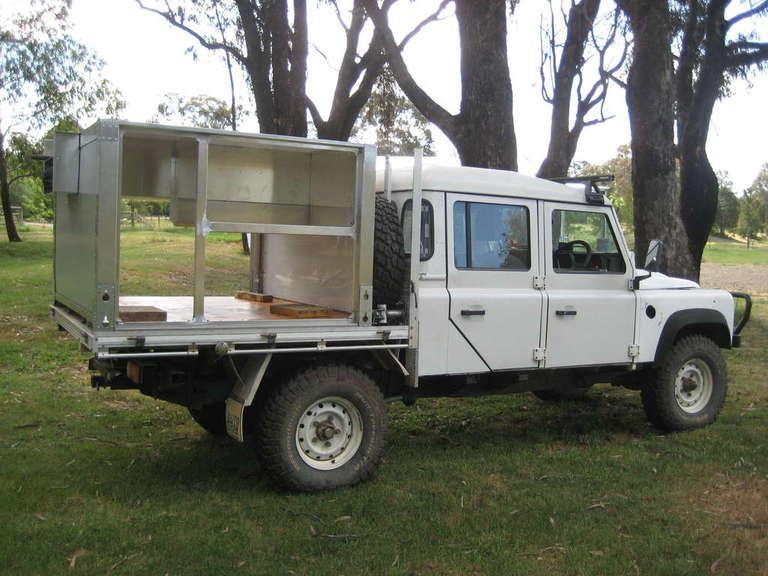
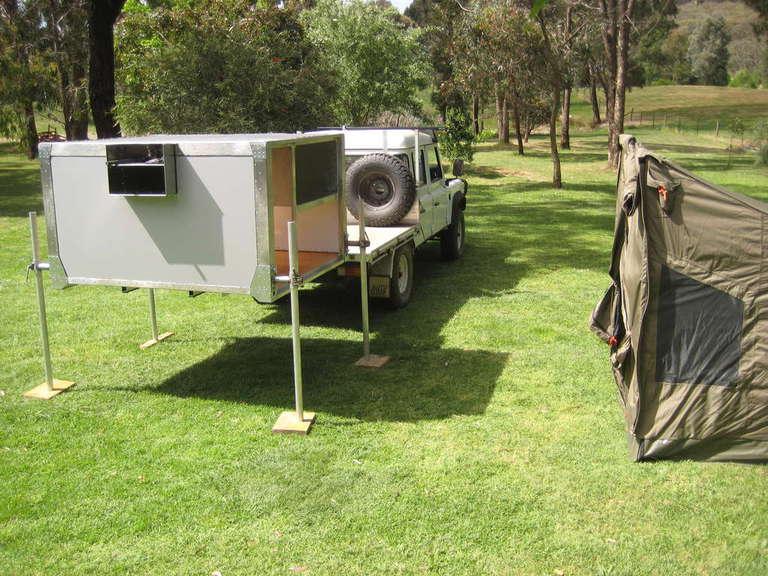
    Are now working on my quick release leg design before I can do much more.

  3. #63
    TonyC is online now Wizard Silver Subscriber
    Join Date
    Sep 2007
    Location
    NE Victoria
    Posts
    1,413
    Total Downloaded
    32.83 MB
    Looks good Andrew,
    I was up your way on Sunday, if it hadn't been so late I would have dropped by to see how it was going.

    Tony.

  4. #64
    Join Date
    Jun 2012
    Location
    Beechworth
    Posts
    520
    Total Downloaded
    0
    Quote Originally Posted by TonyC View Post
    Looks good Andrew,
    I was up your way on Sunday, if it hadn't been so late I would have dropped by to see how it was going.

    Tony.
    No worries Just let me know if you want a look.

    Andrew.

  5. #65
    Join Date
    Jan 1970
    Location
    Free Again Thanks Dan
    Posts
    10,150
    Total Downloaded
    0
    Rivets have also stood the time on series , Countys ,Defenders
    Good work very nice

  6. #66
    Join Date
    Jun 2012
    Location
    Beechworth
    Posts
    520
    Total Downloaded
    0
    Quote Originally Posted by rangieman View Post
    Rivets have also stood the time on series , Countys ,Defenders
    Good work very nice
    Must admit I did get some inspiration from looking how my 130 is made

  7. #67
    Join Date
    Jun 2012
    Location
    Beechworth
    Posts
    520
    Total Downloaded
    0
    Made a start on the legs. The longest part was deciding what method to use for attaching the legs to the camper. I made a prototype of an idea I had for a no tool quick release system, but I wasn't convinced it would be rigid enough. From looking at many other slide on camper units over the years I know many of them are wobbly when on their legs and often require braces/cross cables etc to help steady the unit. I'm determined to hopefully make it sturdy and quick to set up without needing the said braces or cross cables. I've settled on a version of my first idea which uses two big key holes for each leg.

    All the bits cut out and a prototype to test it works.


    I made a template to ensure all holes are the same so any leg will fit any corner. Also note I've fitted the gal corners to tie it all together, there is also a gal channel inside, all riveted together, makes a good strong mount for the legs.


    I drilled the big hole with a hole saw, cut the slot with a jigsaw and cleaned up with a burr grinder and file.

  8. #68
    Join Date
    Jun 2012
    Location
    Beechworth
    Posts
    520
    Total Downloaded
    0
    Sorry haven't updated for a while, is hard enough to find time to actually work on the camper! Been chipping away, got the legs finished and the main shell done. With the camper fliped upside down I glued and riveted the oztent chute and end walls in.

    Where I didn't want the rivets to stick into the tent chute I drilled 12mm holes and plug welded with ally in my mig. Worked well.

    The oztent chute works well. I put a divider in so other long things like fishing rods and tent poles can be stored too. I'm yet to make the lid.

    Standing on it's legs. I'm happy with my leg attaching system, is no wobble or play at all, but the whole thing will still wobble a bit just from the legs flexing. I used proper ally scafold tube 4.5mm thick which I thought would have been a bit more rigid, but it's still alot better than others I've looked at. Will see how it is all loaded up, worst case will need cross bracing. I'm also wondering if I splay the legs out slightly if it will help?
    You can now get the gist of my set up. You can see the oztent chute protudes forwards about 300mm, and out the back about 100mm. It's like this because the oztent is 2000mm long, tray is only 1800mm long and I'm putting the two spare wheels on the head board, so they will stay with the vehicle when the camper is removed. I could have put the wheels under the tray but I wanted to keep the tray as low as possible for my short wife, and I'm keen to build a big slide out drawer at the rear under the tray to store tools, parts, and stuff that needs to stay with the 130. The chute will just fit nicely between the wheels and uses otherwise hard to use or dead space up high and in the center of the camper. It will also make deploying the tent quicker, simply open the rear hatch, no messing around with rachet straps etc and It's out of the elements when travelling.

    You can also see the frame work for my idea to solve one of the other complaints people have with a RTT, that being the skinny little ladder can be awkward climbing in and out of the RTT. I'm bascially making a big slide out drawer with the side open. You will simply swing your legs out of the RTT onto a solid platform, then down a step ladder with wide treads. The drawer will obviously need to be empty, so I will be storing all the camp chairs inside which you need out anyway. Next step is to make the said drawer/platform and all the doors.

  9. #69
    Join Date
    Jun 2012
    Location
    Beechworth
    Posts
    520
    Total Downloaded
    0
    Did a trial fit yesterday, all works well, and was great to see it fits and looks like I'm getting somewhere. The air suspension really does make it easy to take on/off, was great to see it actually works as planned! Took about 2 mins from time you stop, level, set legs up, drive forward. Is fairly easy to back under also. If you had to mess around with jack legs would take way longer.

    Cheers,
    Andrew.


  10. #70
    Join Date
    Jun 2012
    Location
    Beechworth
    Posts
    520
    Total Downloaded
    0
    Starting to think about setting up the kitchen, fridge slide, drawers etc. I have a bit of an idea but are open to suggestions on a good set up for all the cooking gear, food etc.
    Cheers,
    Andrew.

Page 7 of 25 FirstFirst ... 5678917 ... LastLast

Bookmarks

Bookmarks

Posting Permissions

  • You may not post new threads
  • You may not post replies
  • You may not post attachments
  • You may not edit your posts
  •  
Search AULRO.com ONLY!
Search All the Web!