Page 16 of 51 FirstFirst ... 6141516171826 ... LastLast
Results 151 to 160 of 510

Thread: My 88" Series 3

  1. #151
    Join Date
    Mar 2008
    Location
    Perth, WA
    Posts
    1,947
    Total Downloaded
    0
    Quick question about the hub bearings, with them being oil lubricated do you still pack them with grease? The book says to pack the hub, but makes no mention of the bearings themselves?

    Cheers,

  2. #152
    Join Date
    Mar 2008
    Location
    Perth, WA
    Posts
    1,947
    Total Downloaded
    0
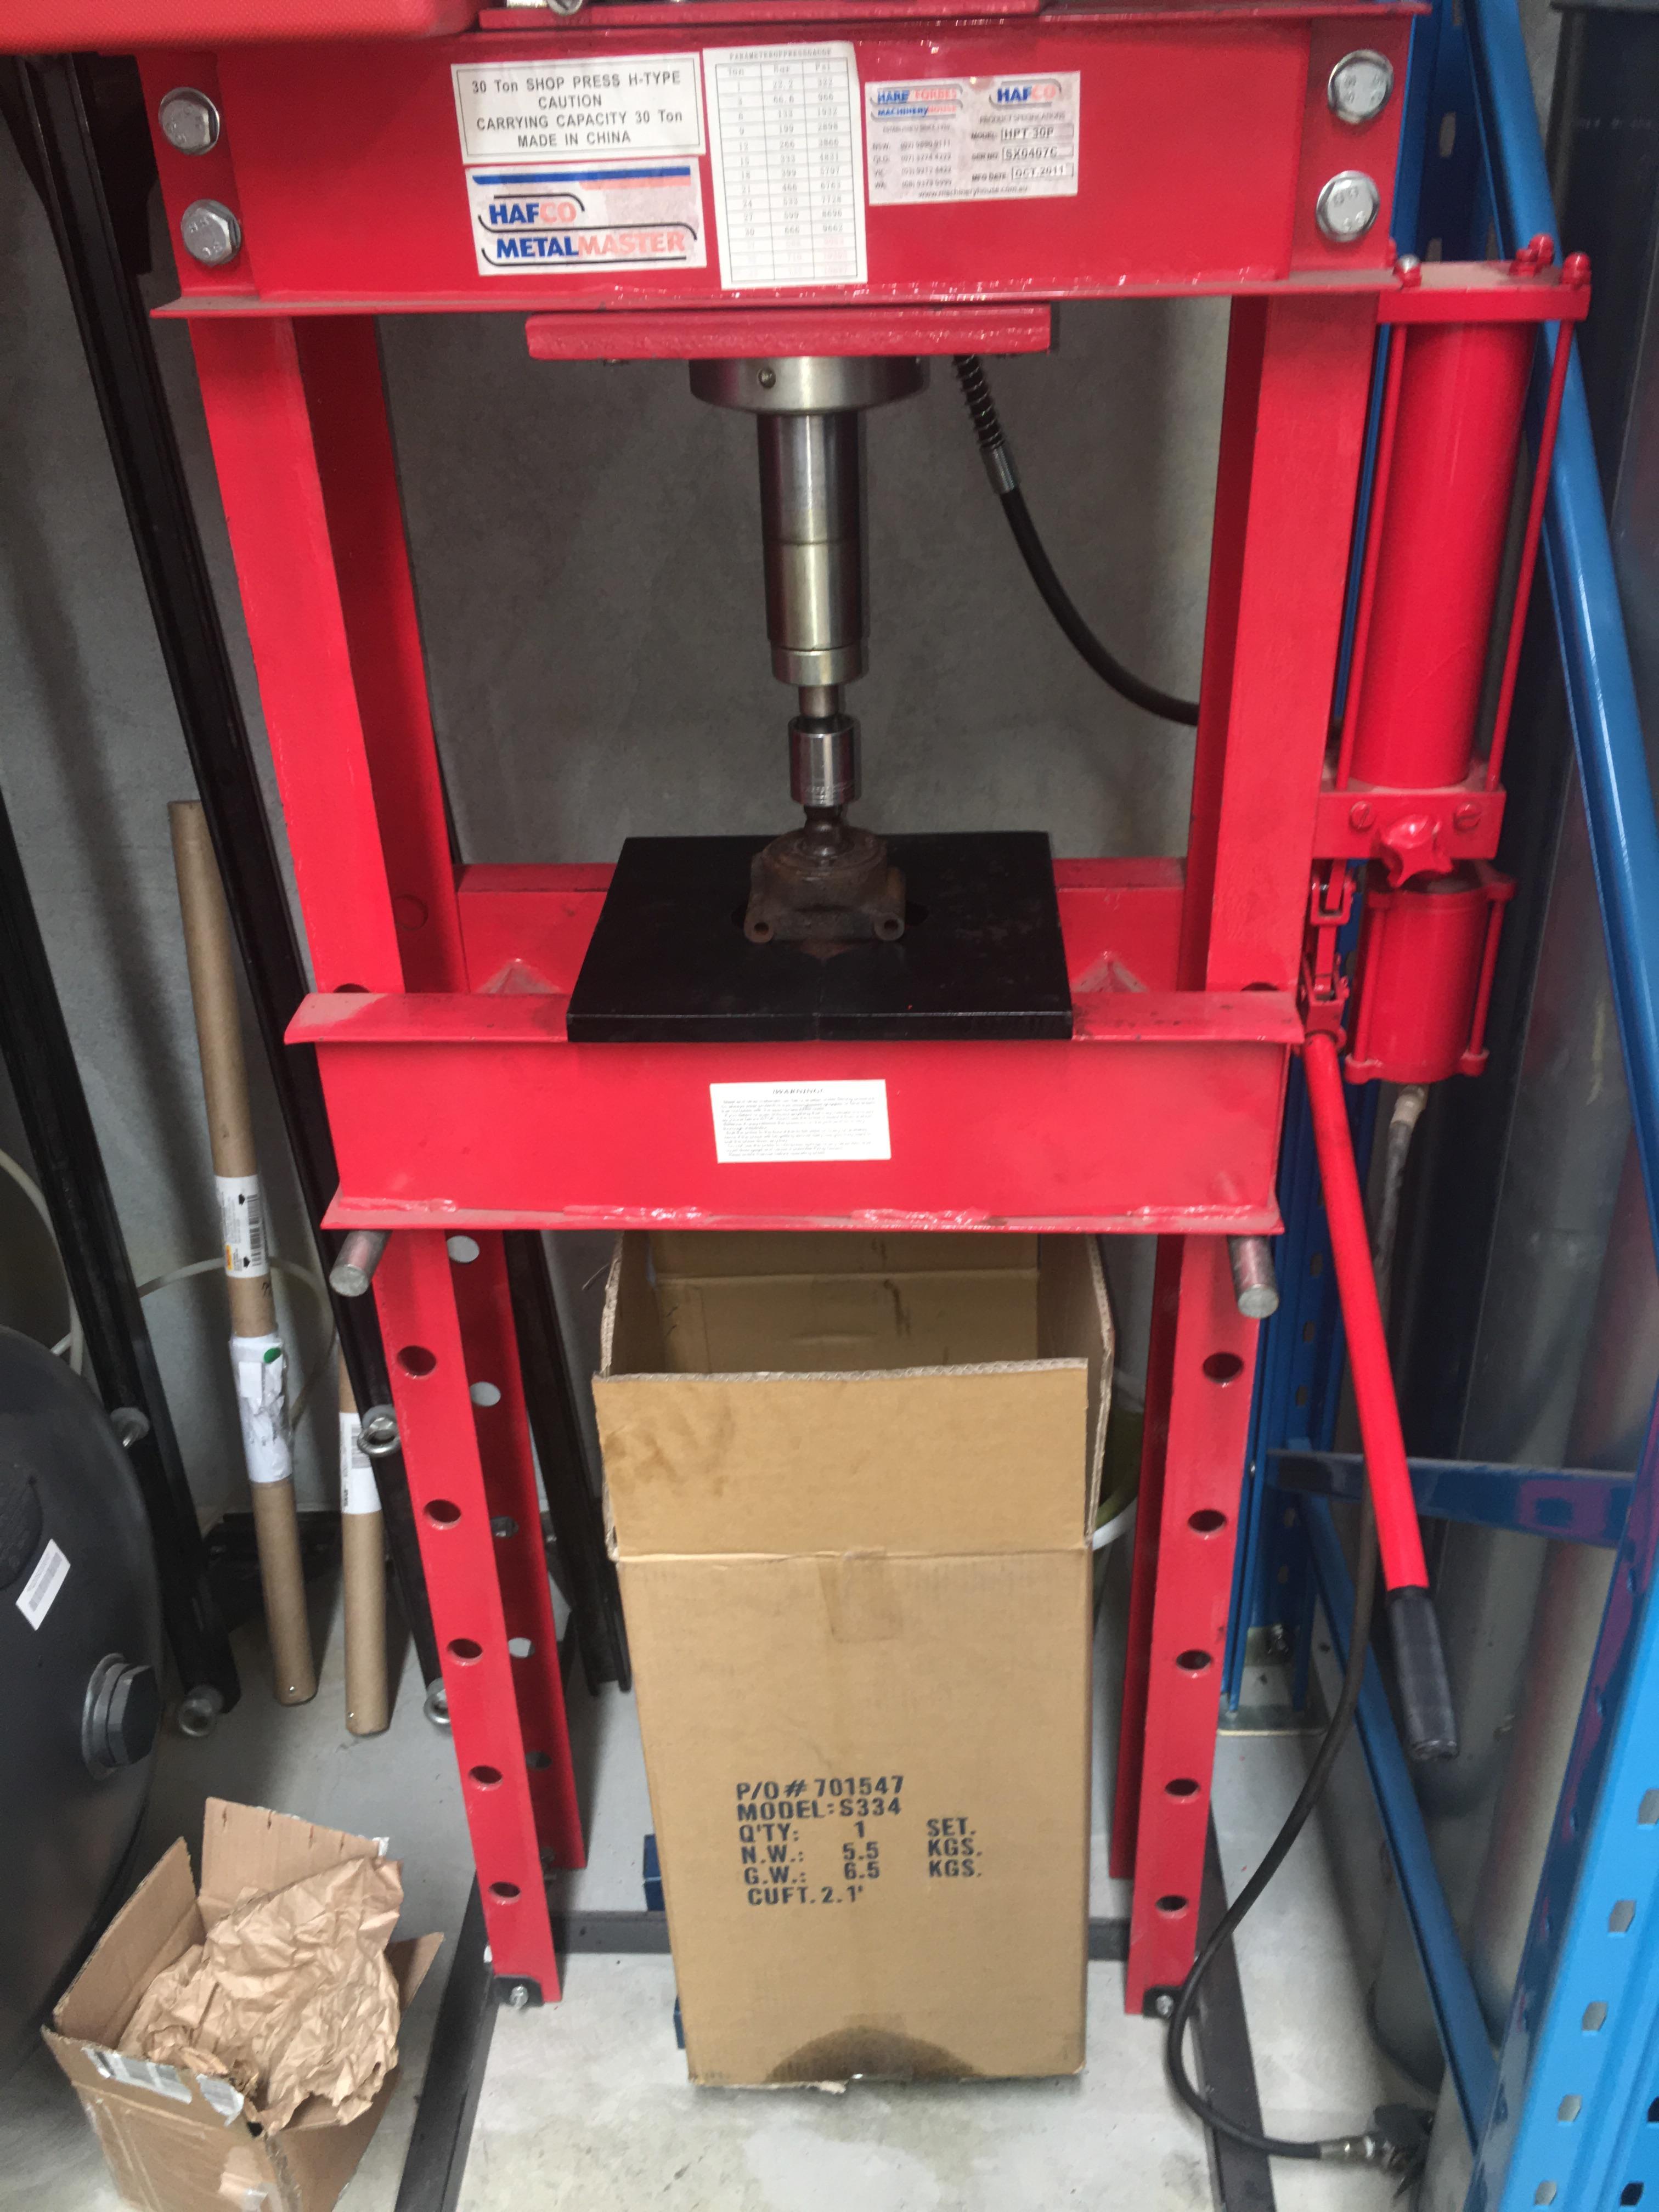
    Bit more progress, got the steering relay stripped. From all the warnings, stories, etc I was terrified of doing this! So into the press, with a tall box filled with bubble wrap under it, full face mask on, and back turned to it, various things clenched, apart it came
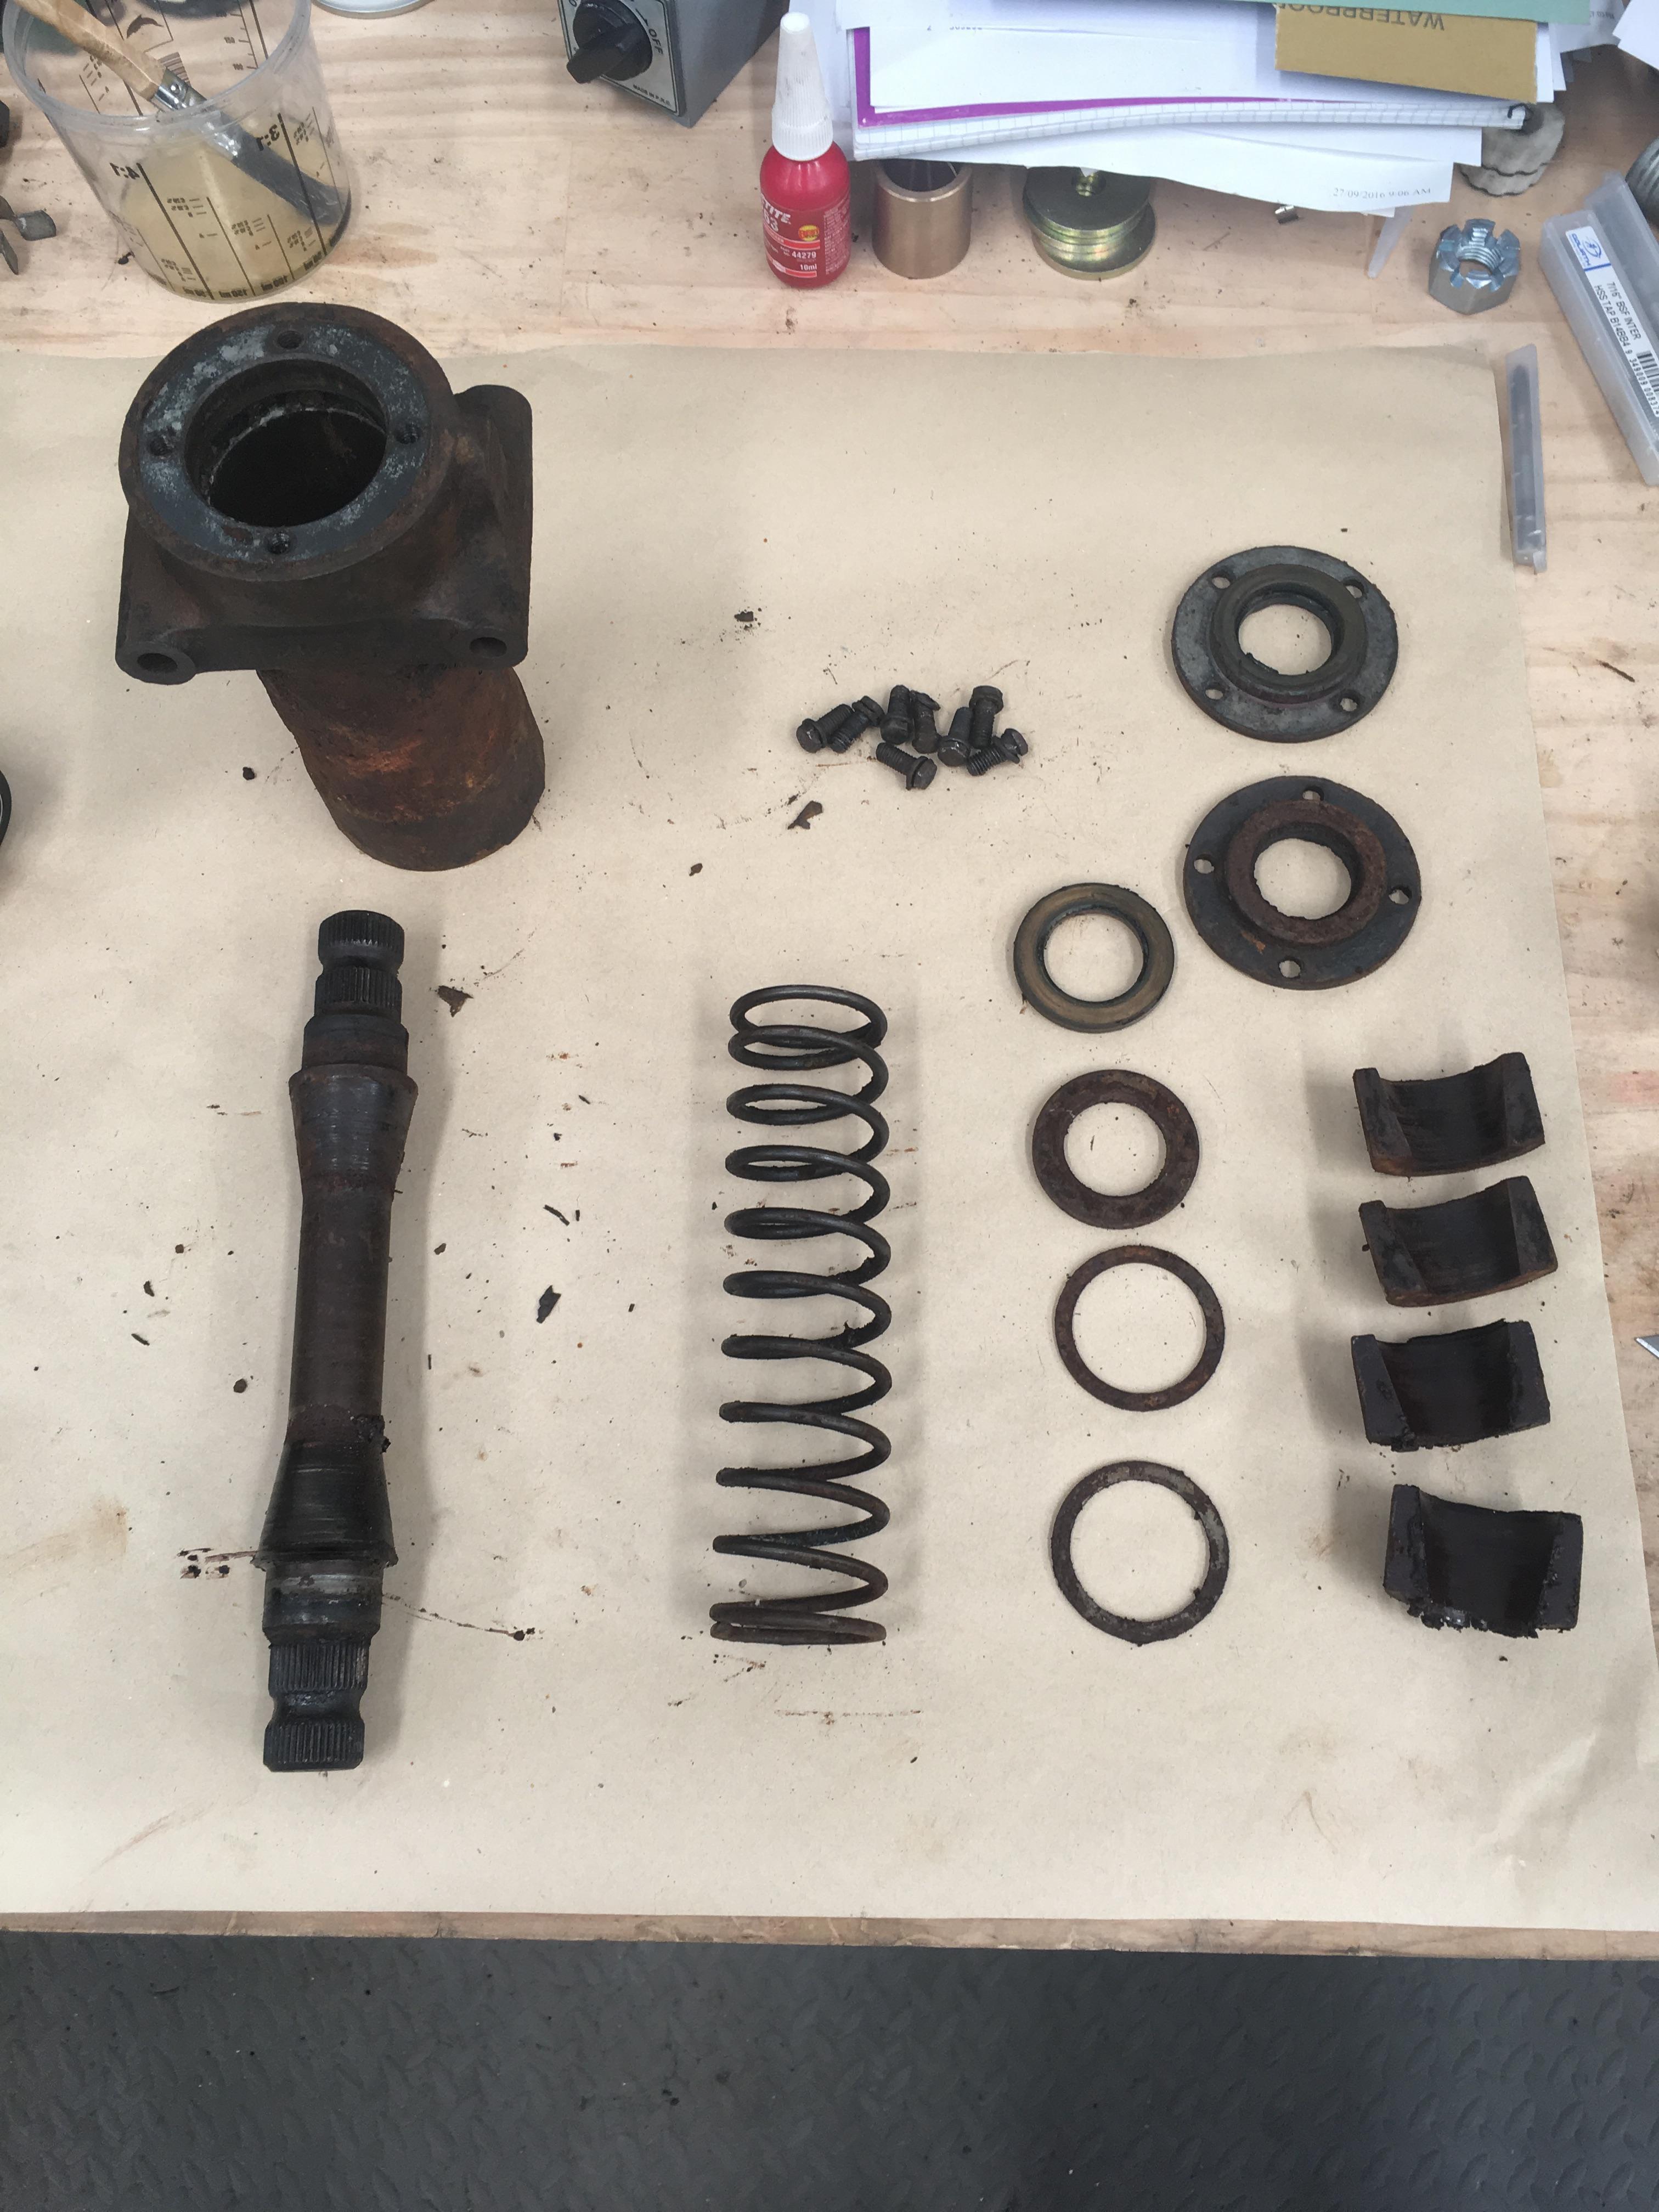


    All the bits


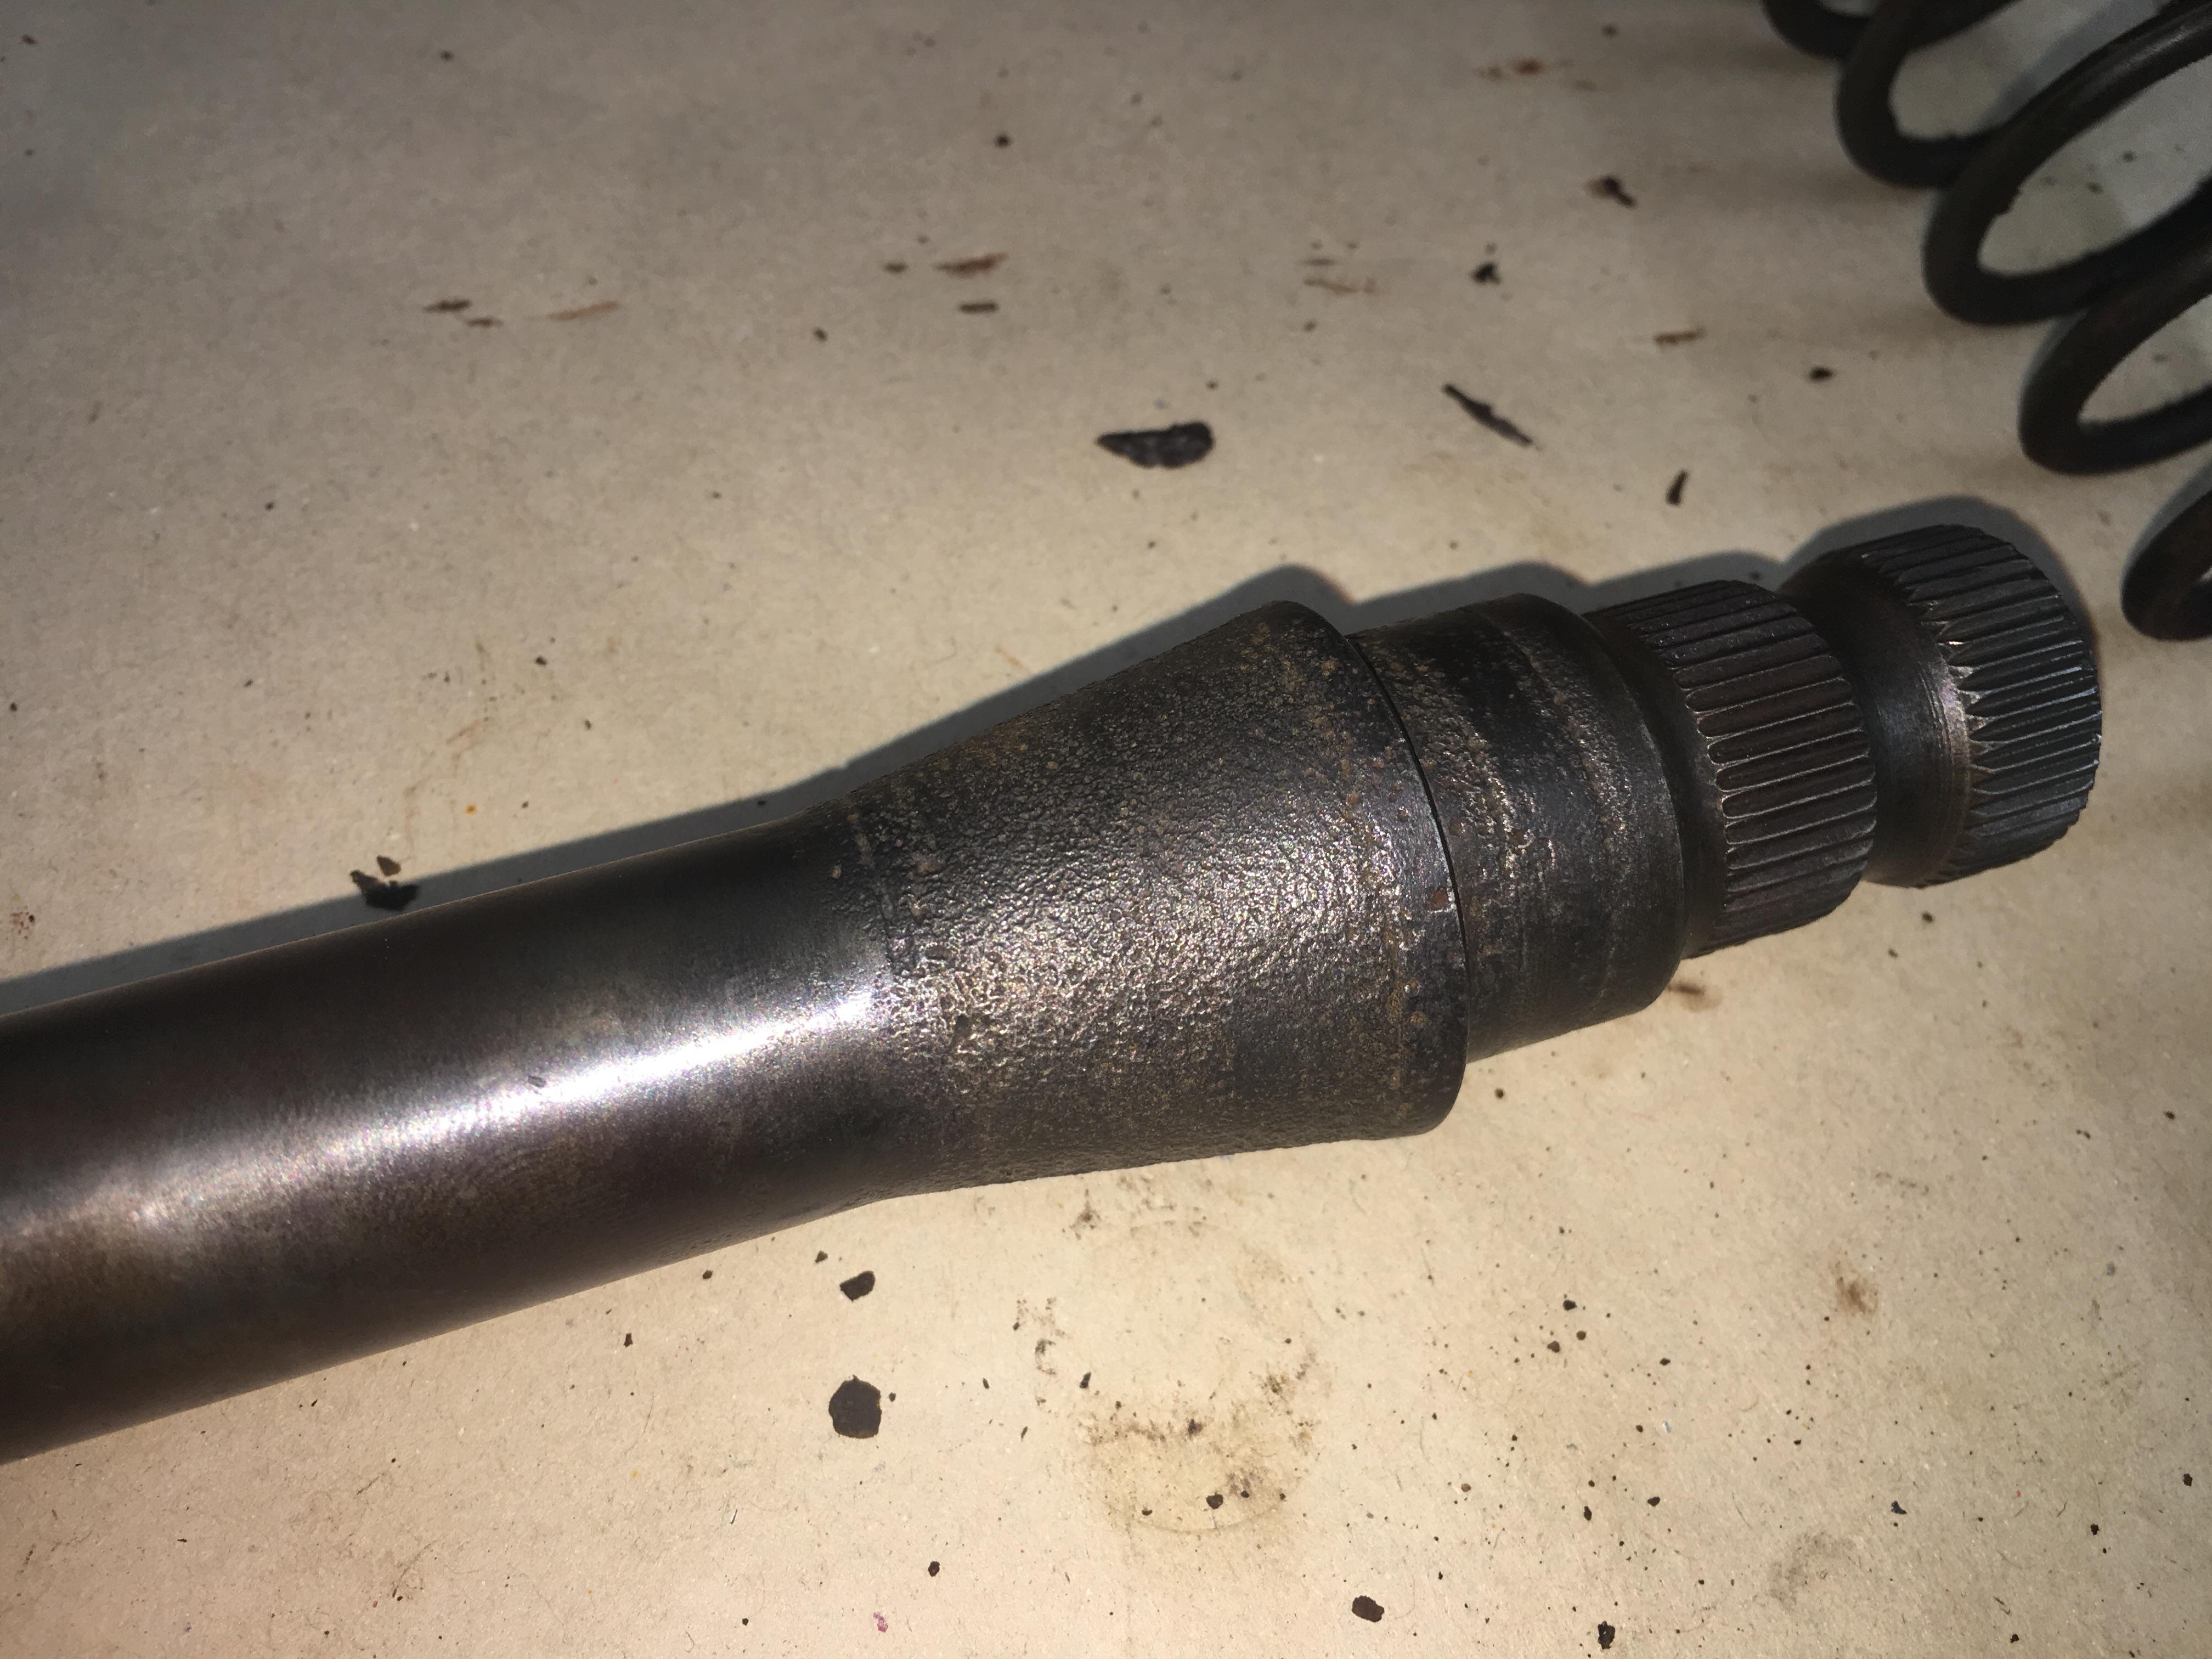
    The shaft is pretty stuffed, it's really badly pitted. A genuine new shaft seems to be NLA, so I'll be getting a new (genuine) relay. There are aftermarket ones available, but there is some hearsay on the interweb about them failing, so for the extre $120ish I'll be getting a new one.
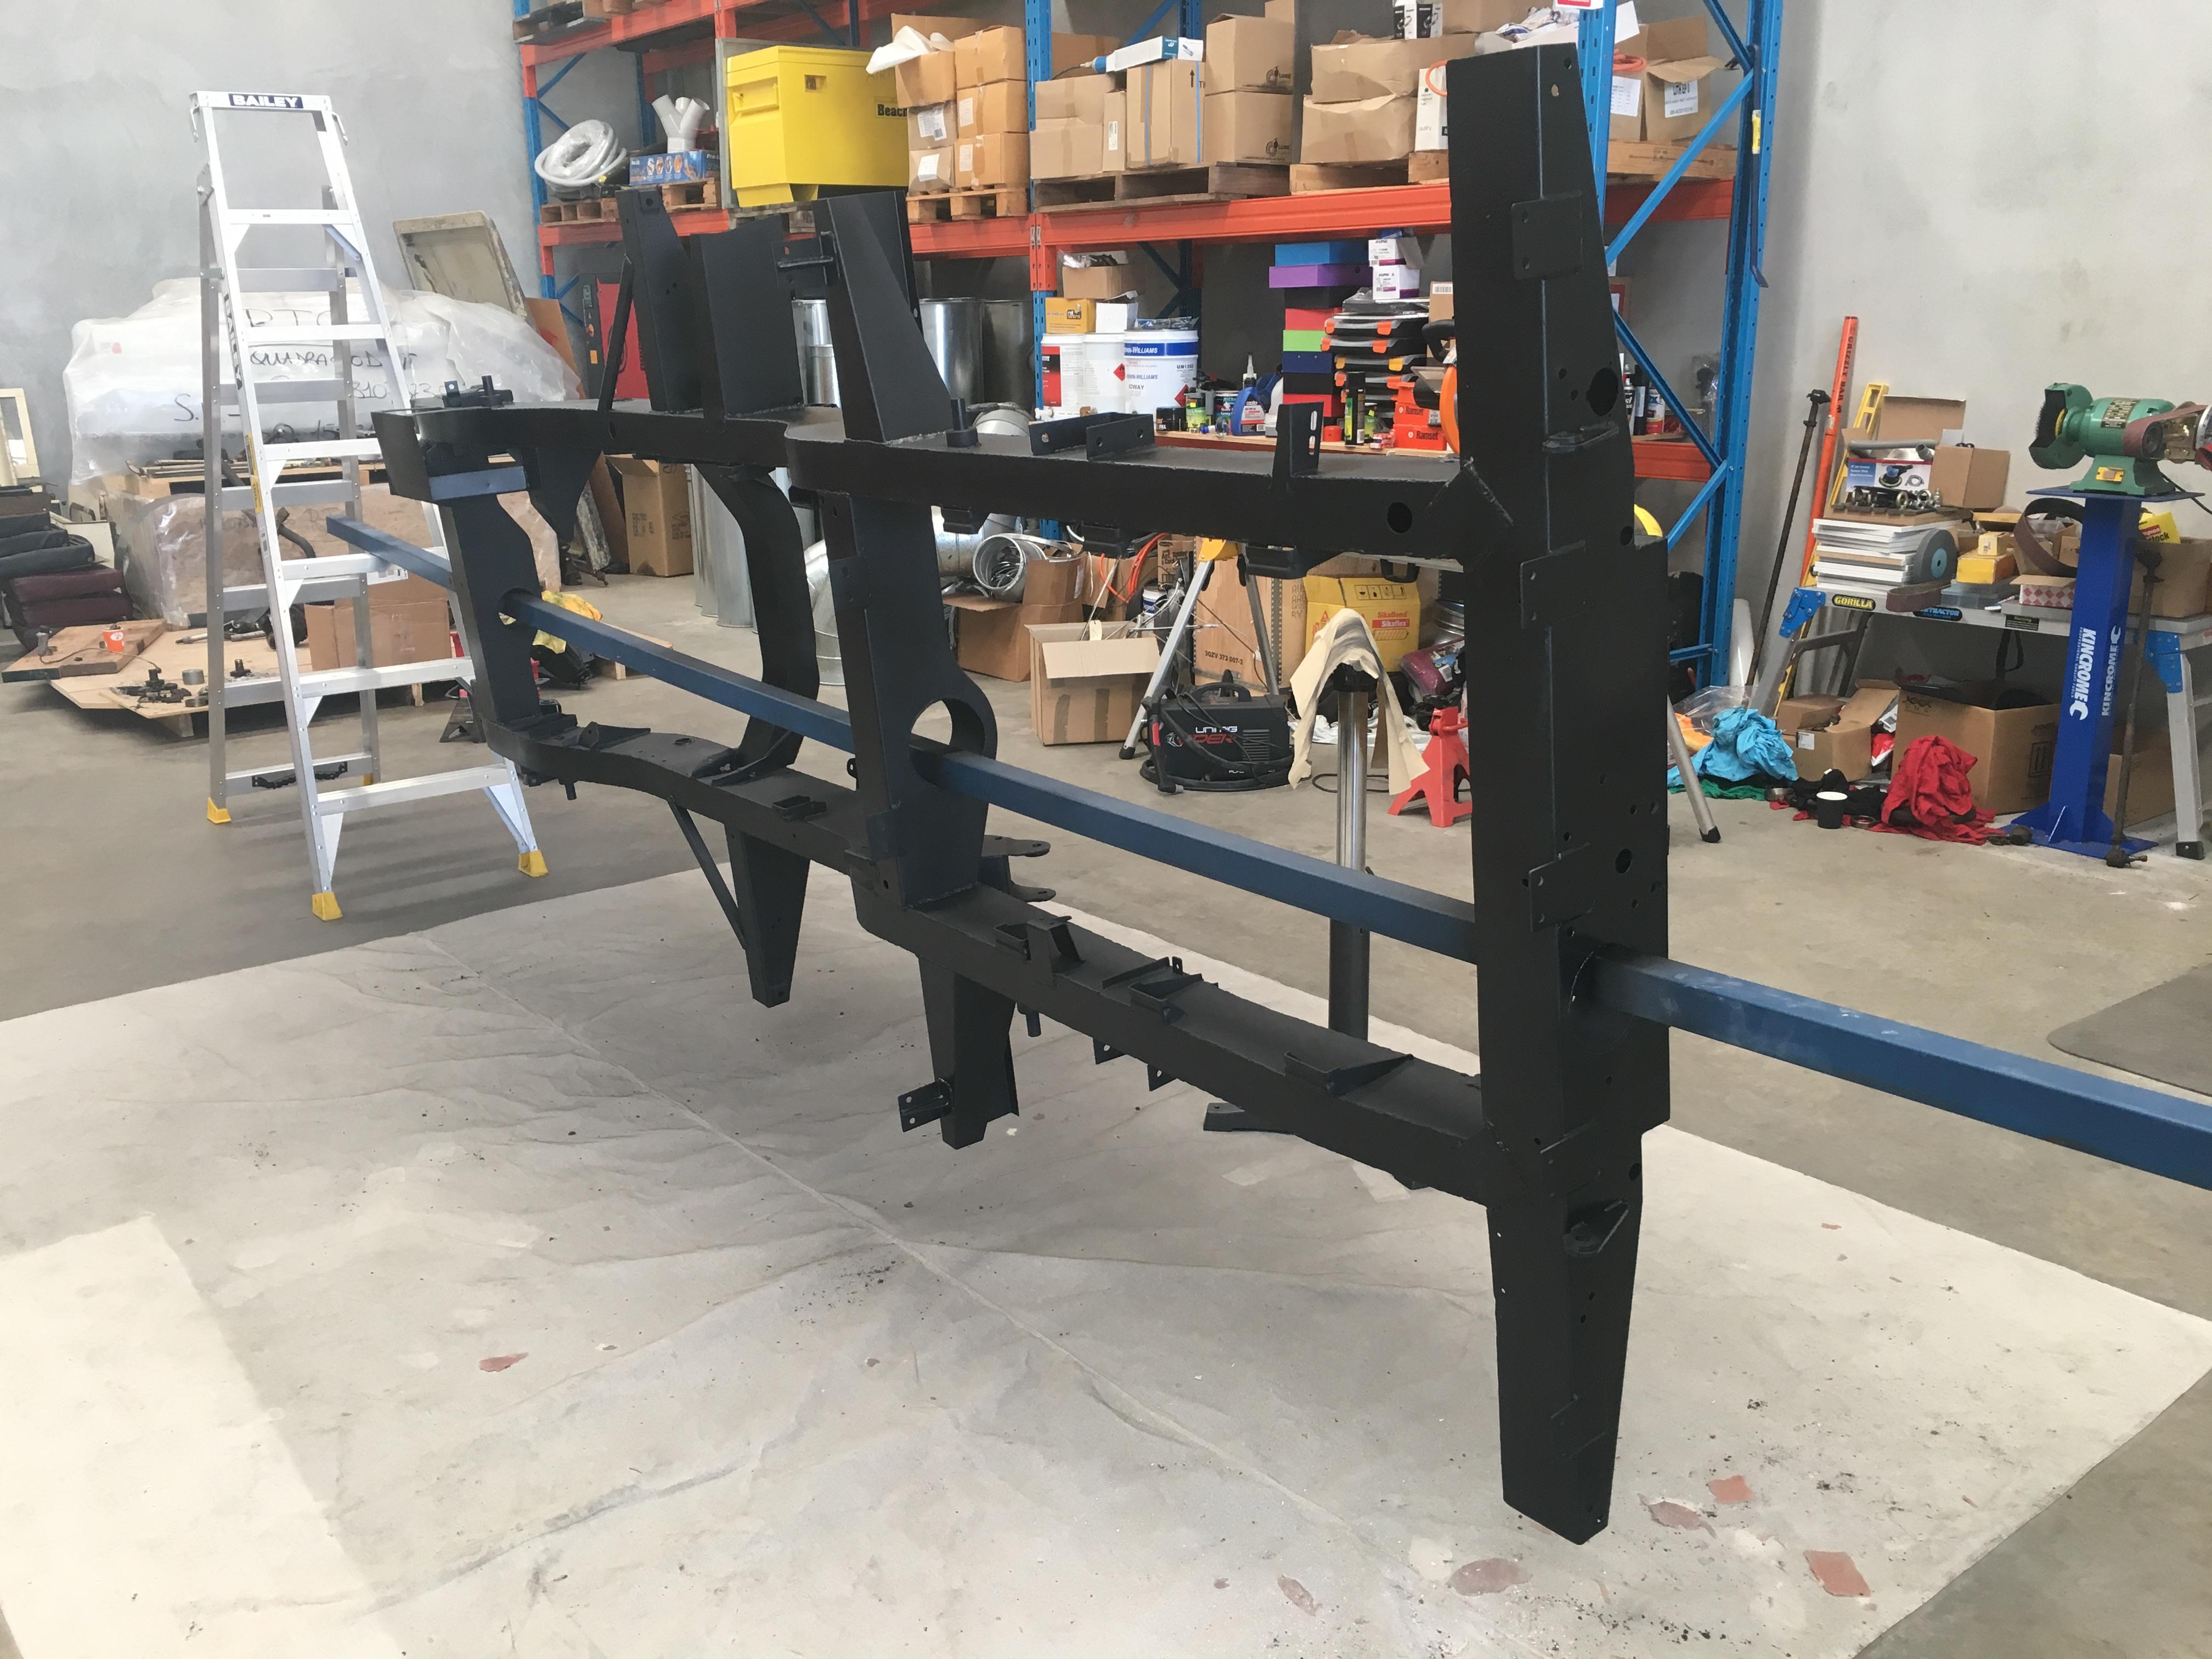
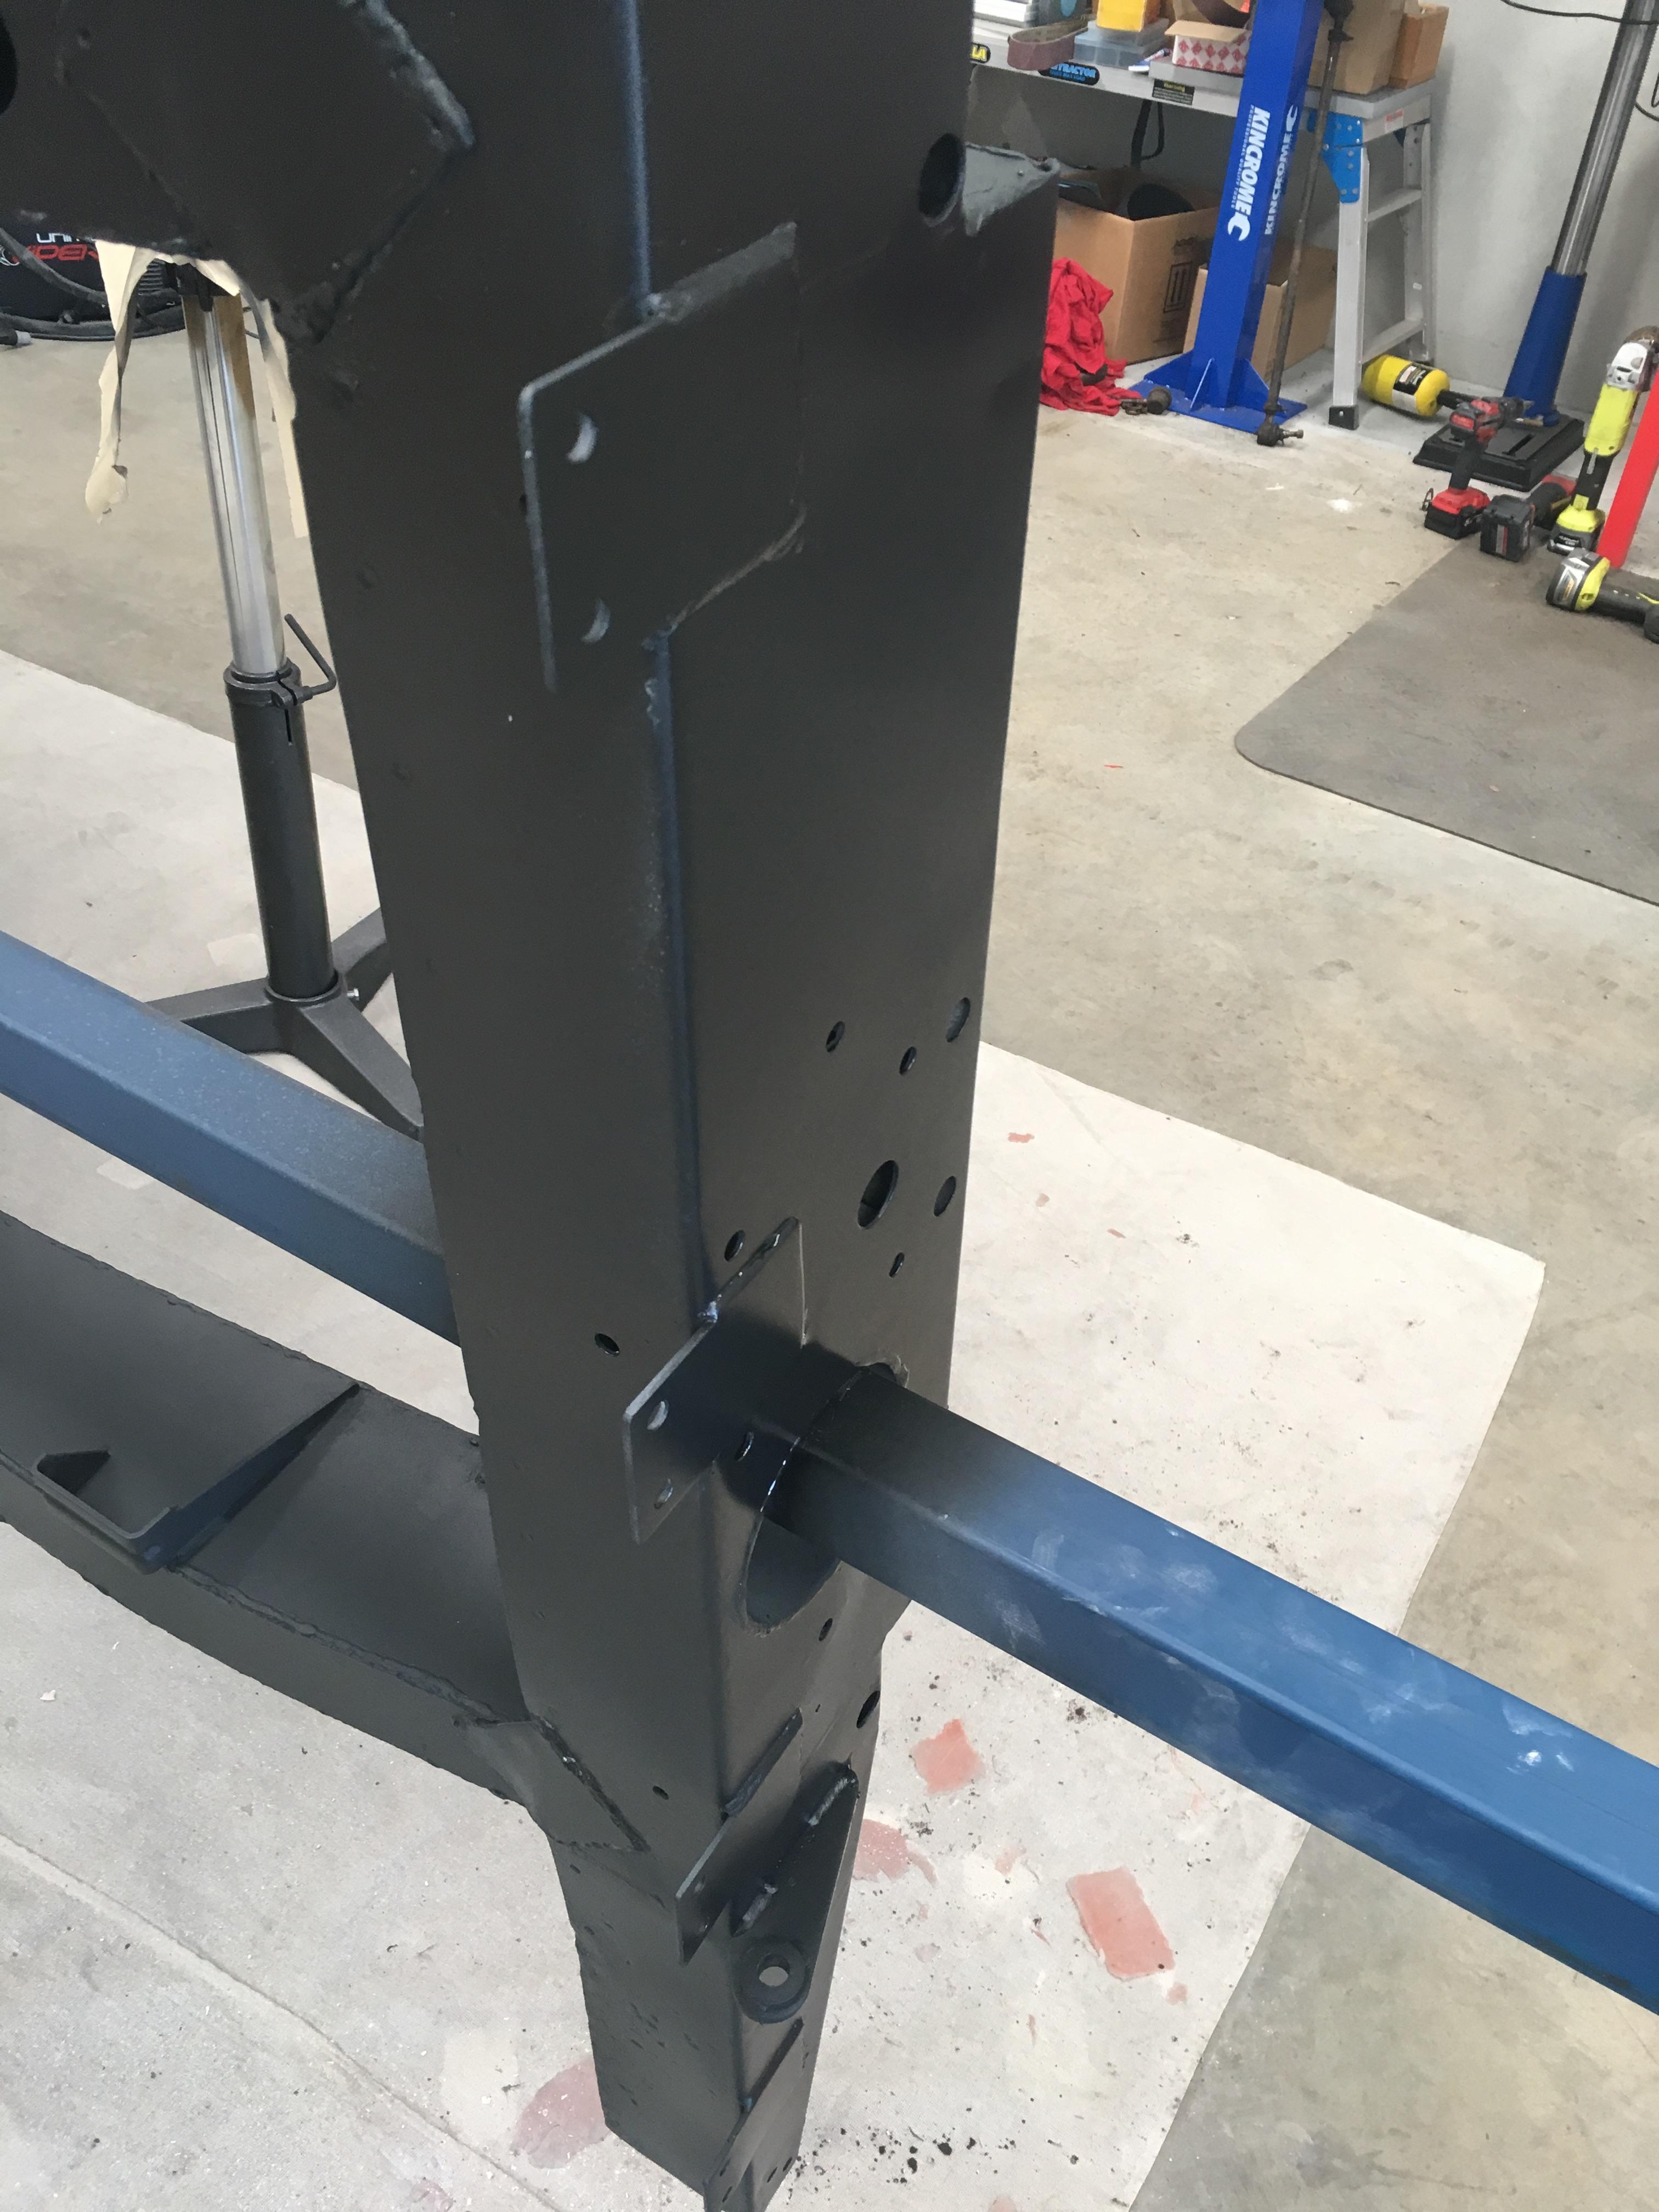
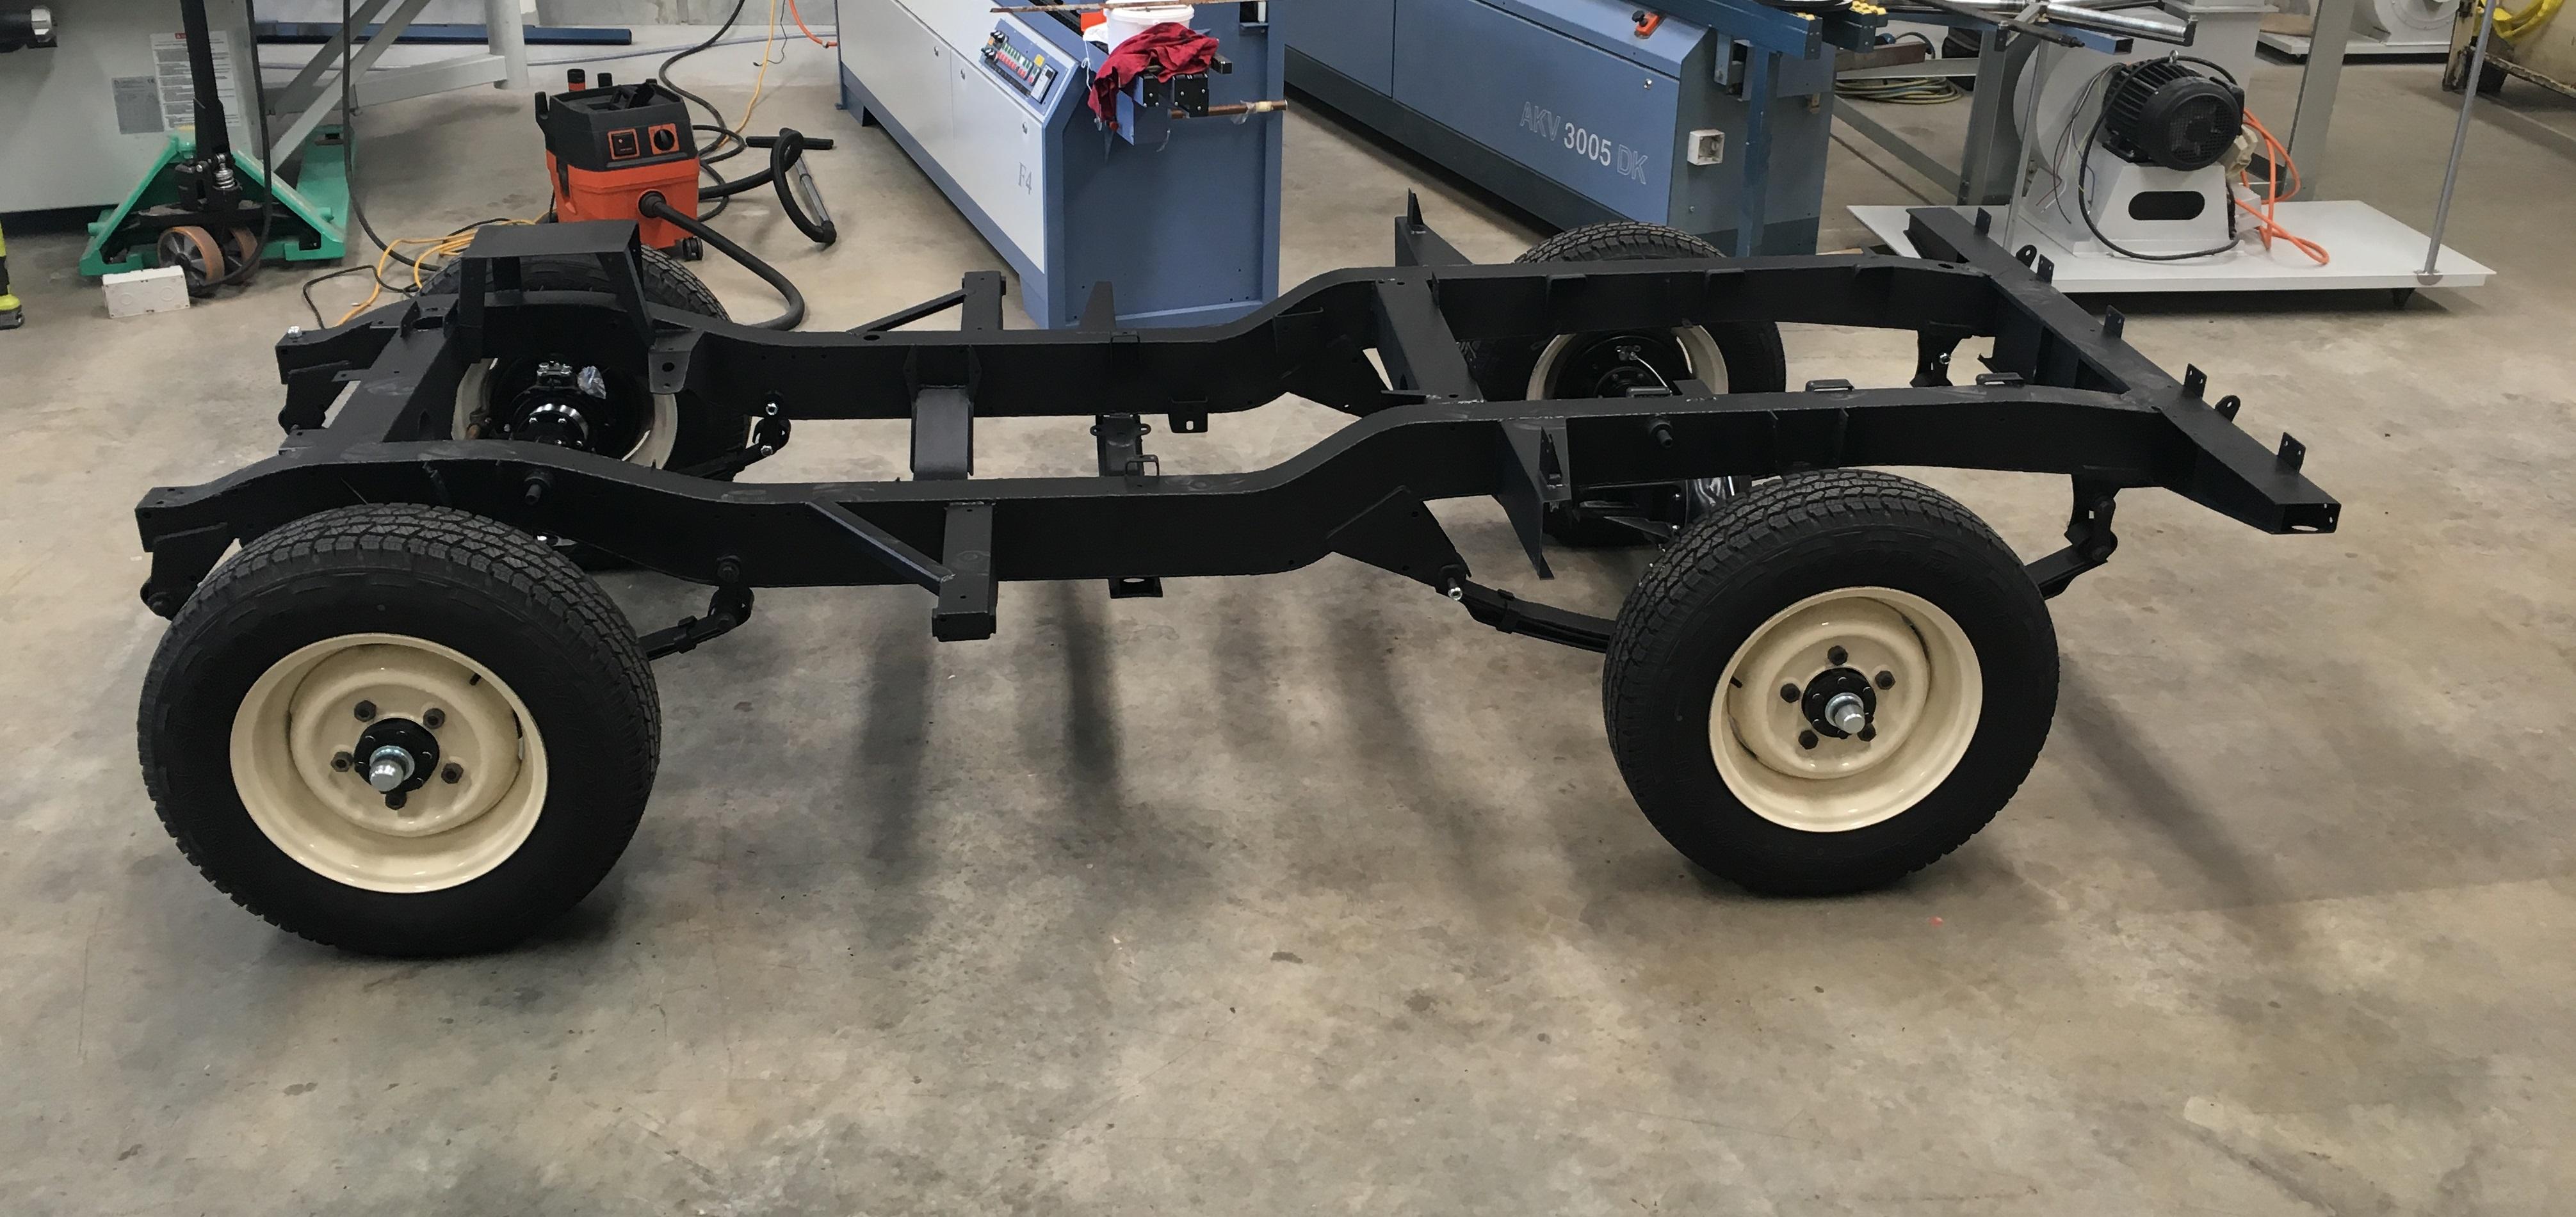
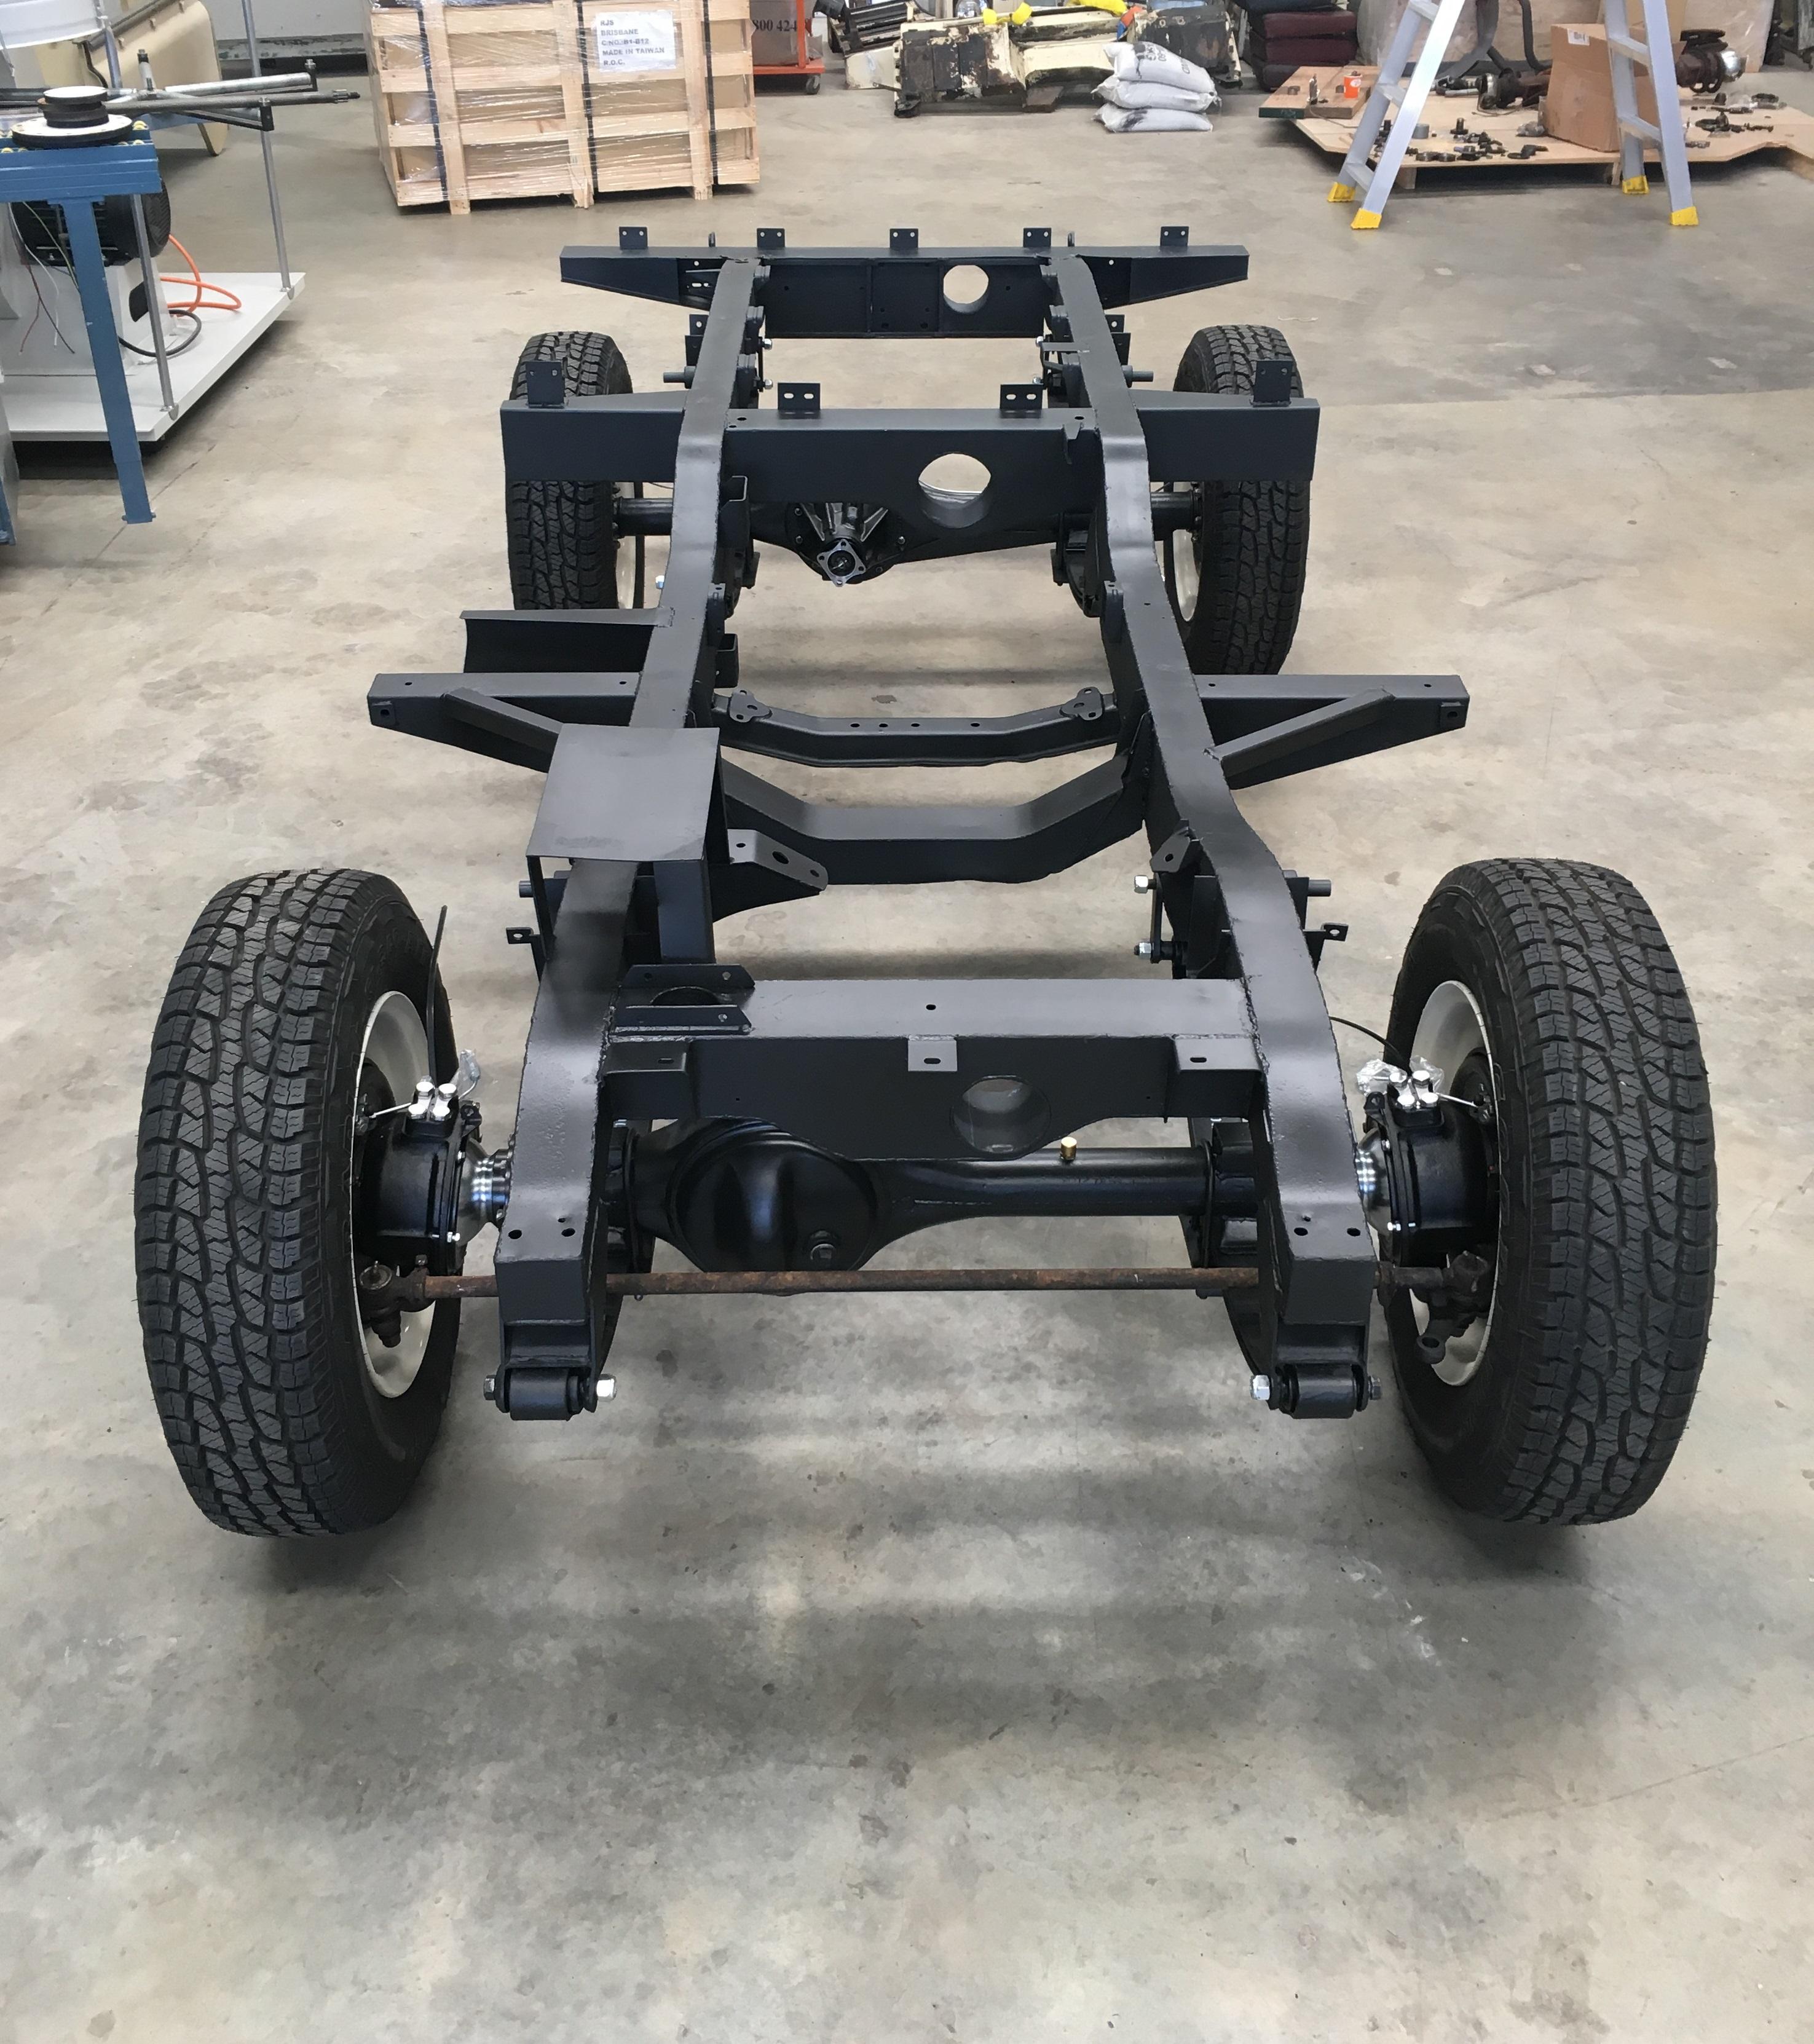


    Also finished painting the chassis Ended up topcoating it with 2 pack black, was a bit more matte than I wanted, but I actually prefer how it looks.


    Rear cross member came up good, can't see the repairs, (unless you know where they are)


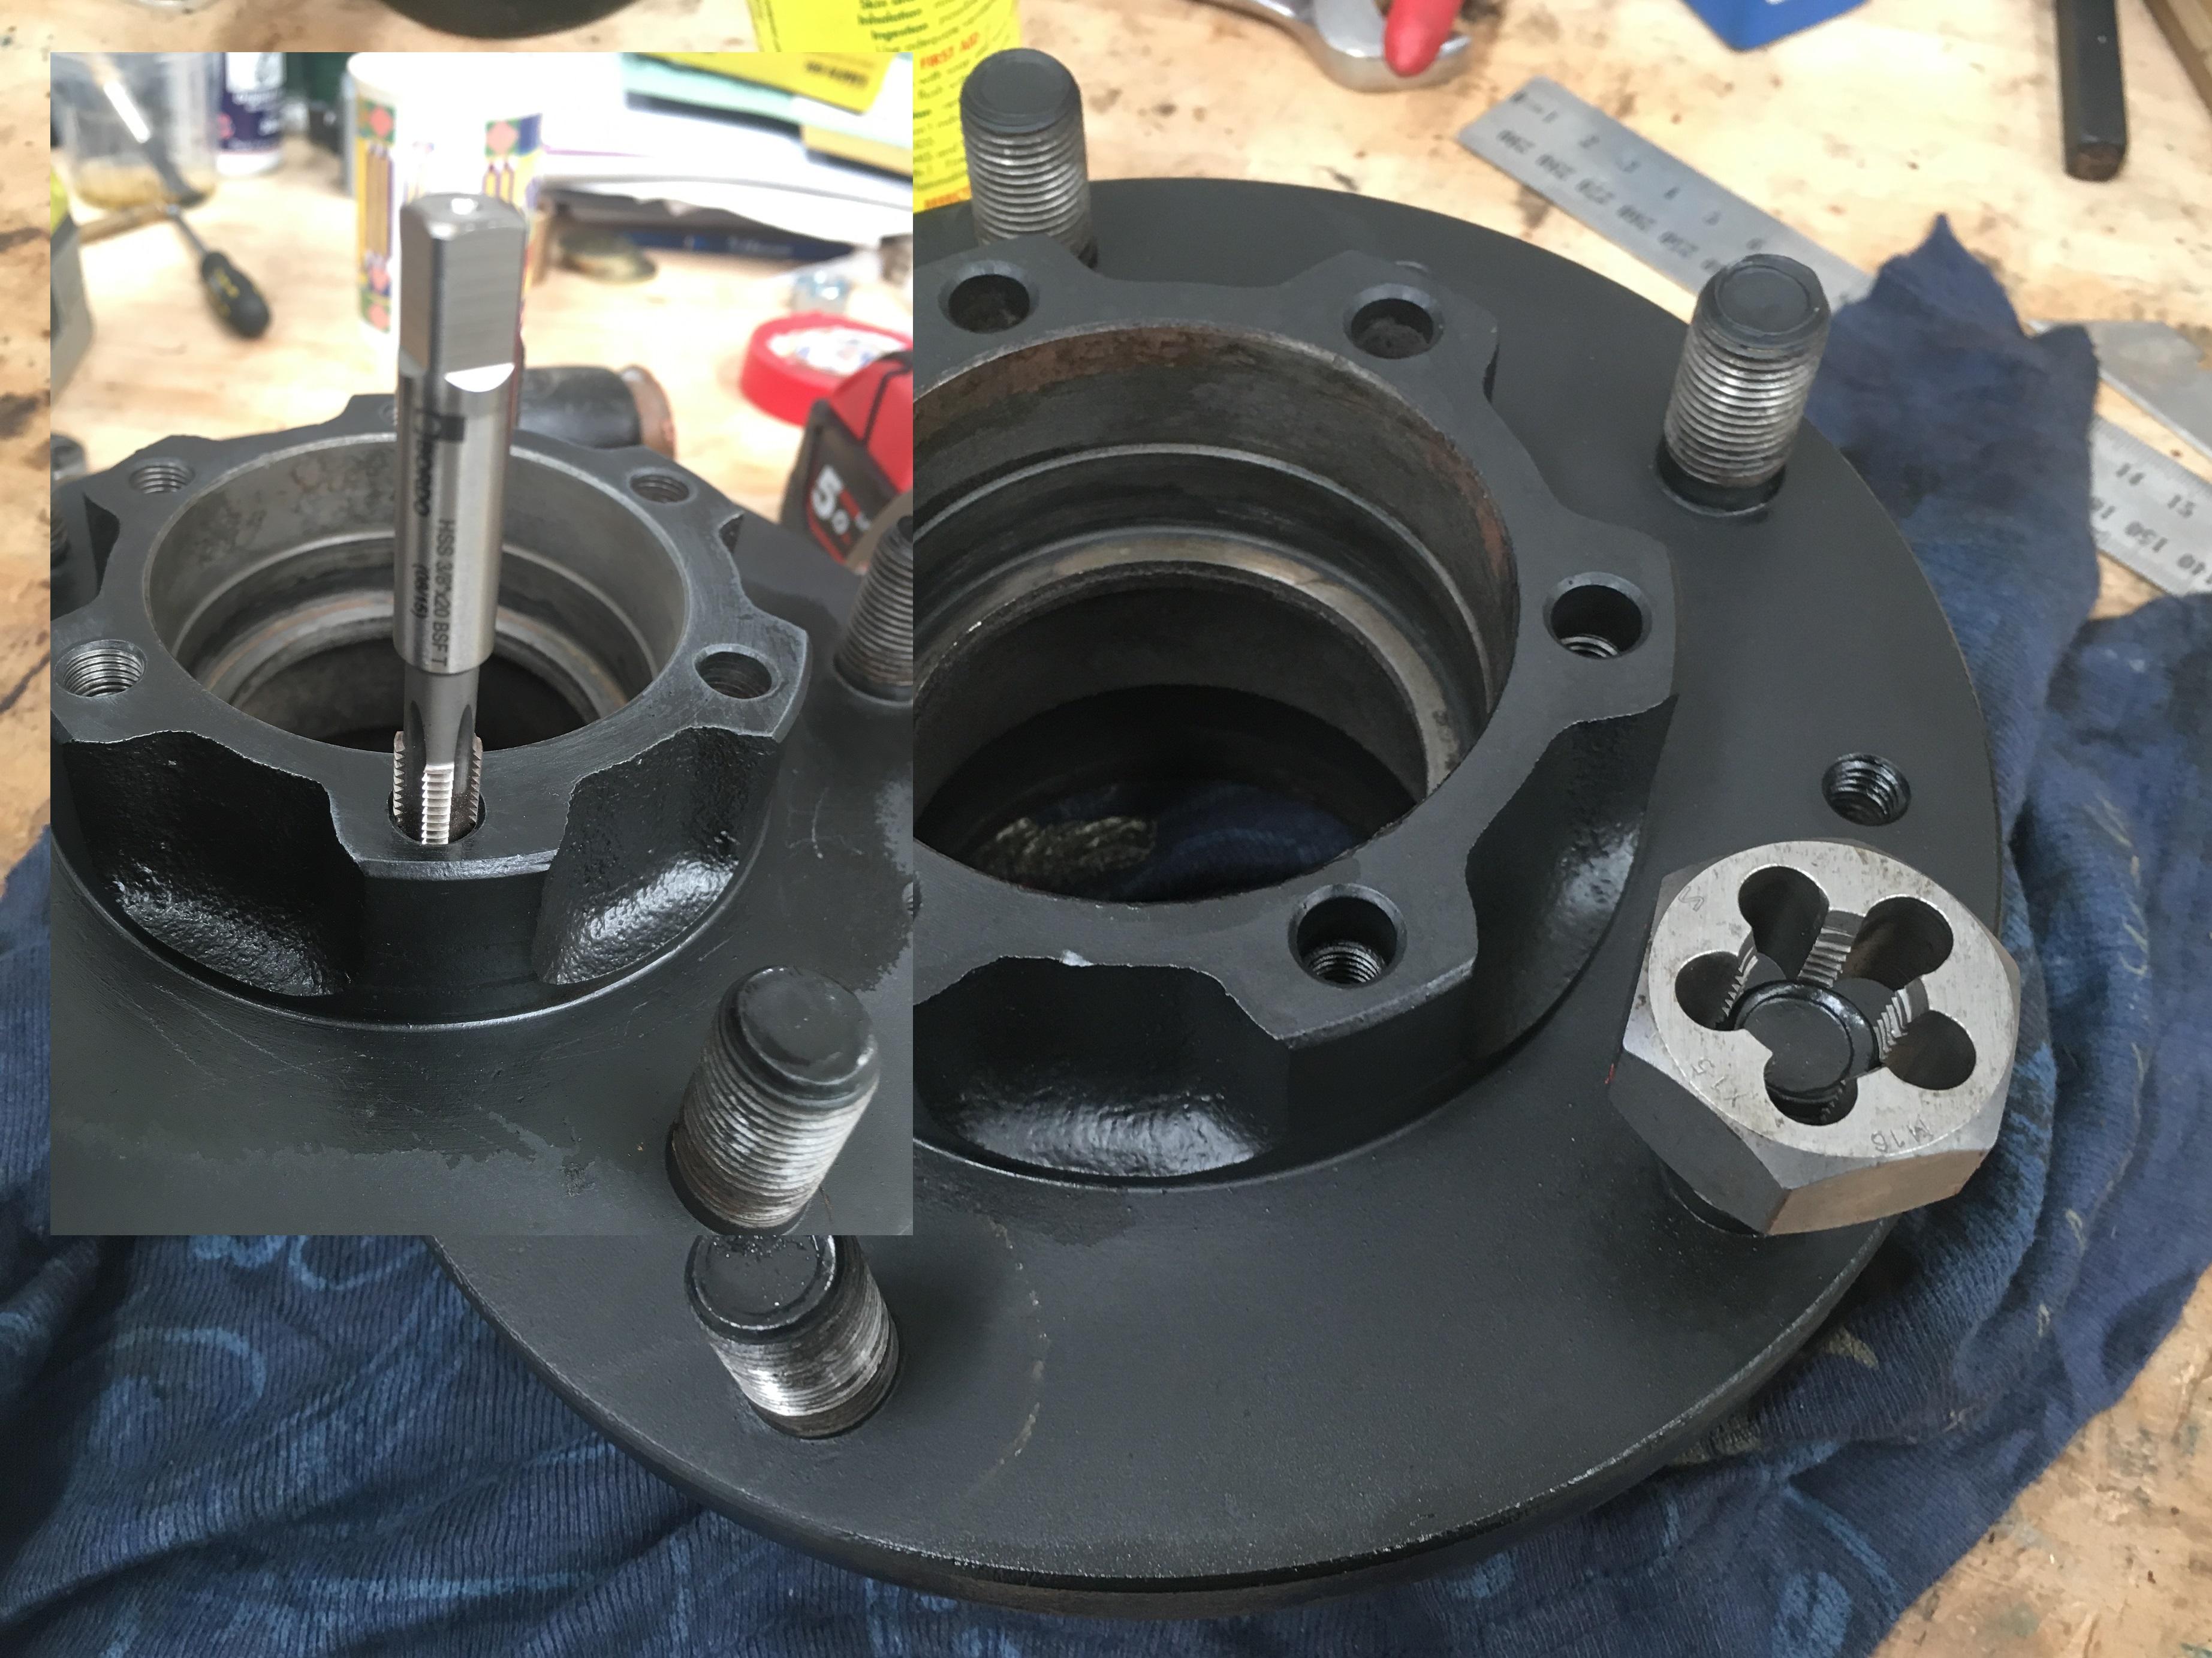
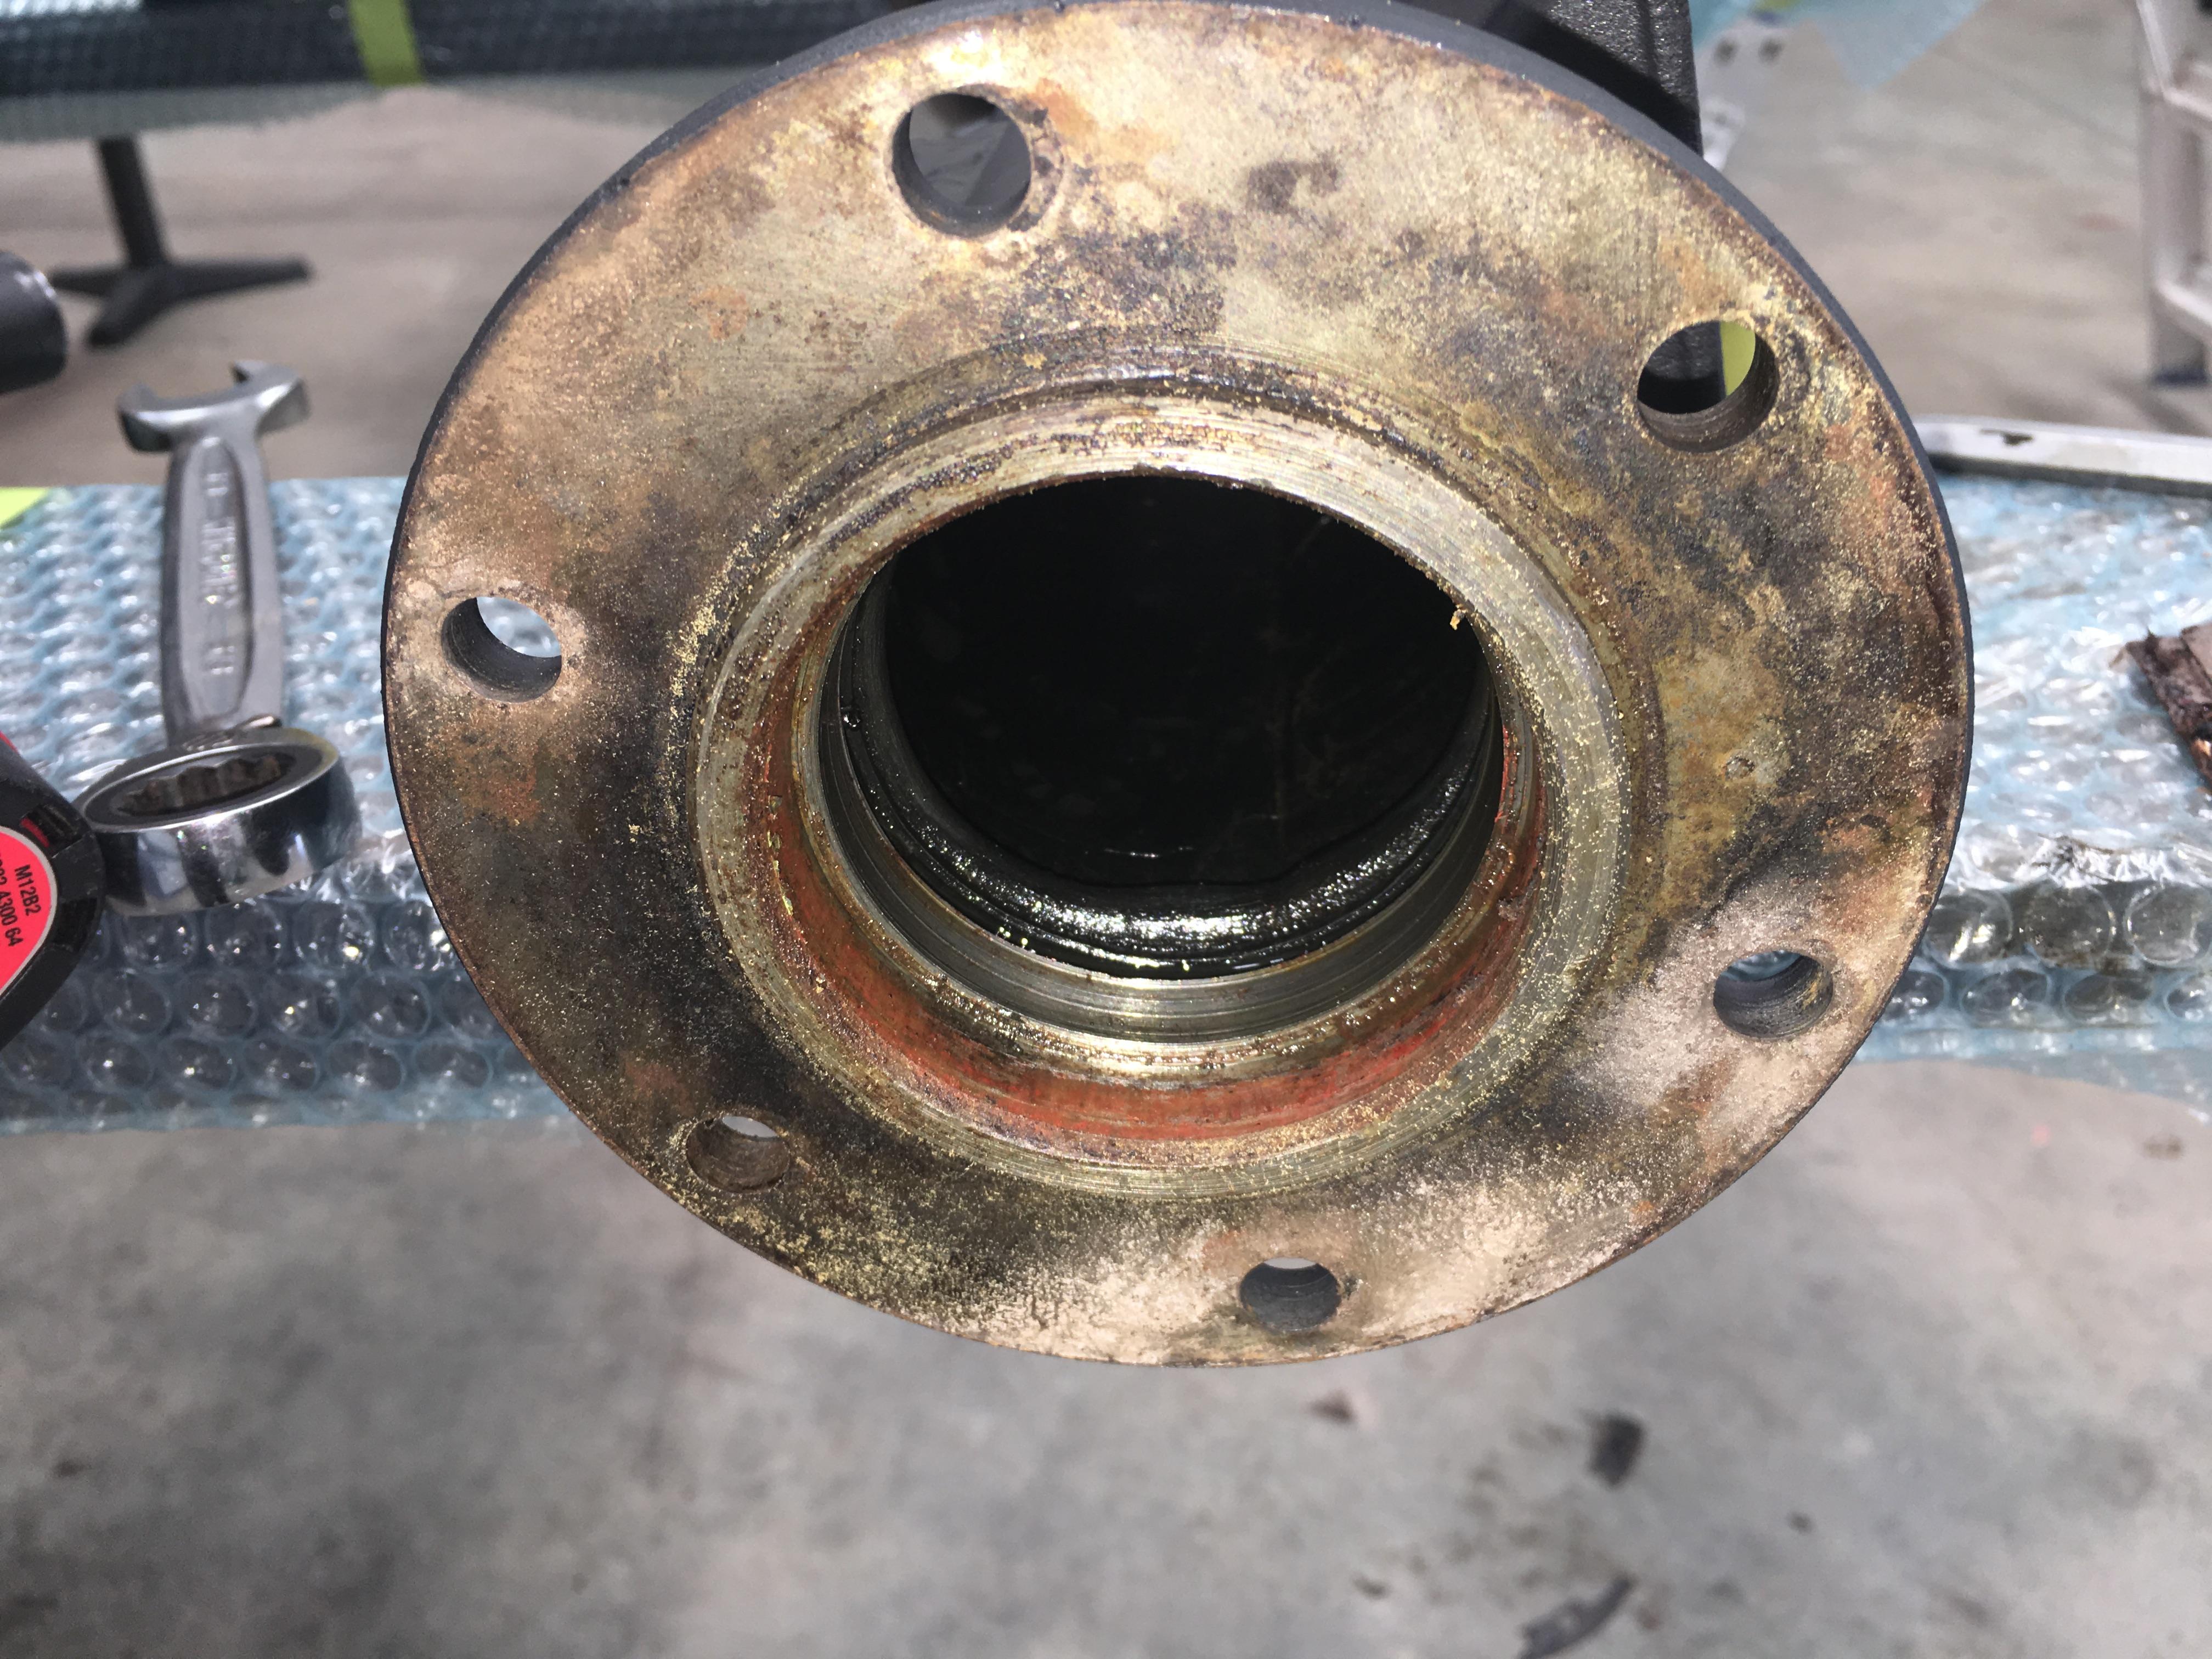
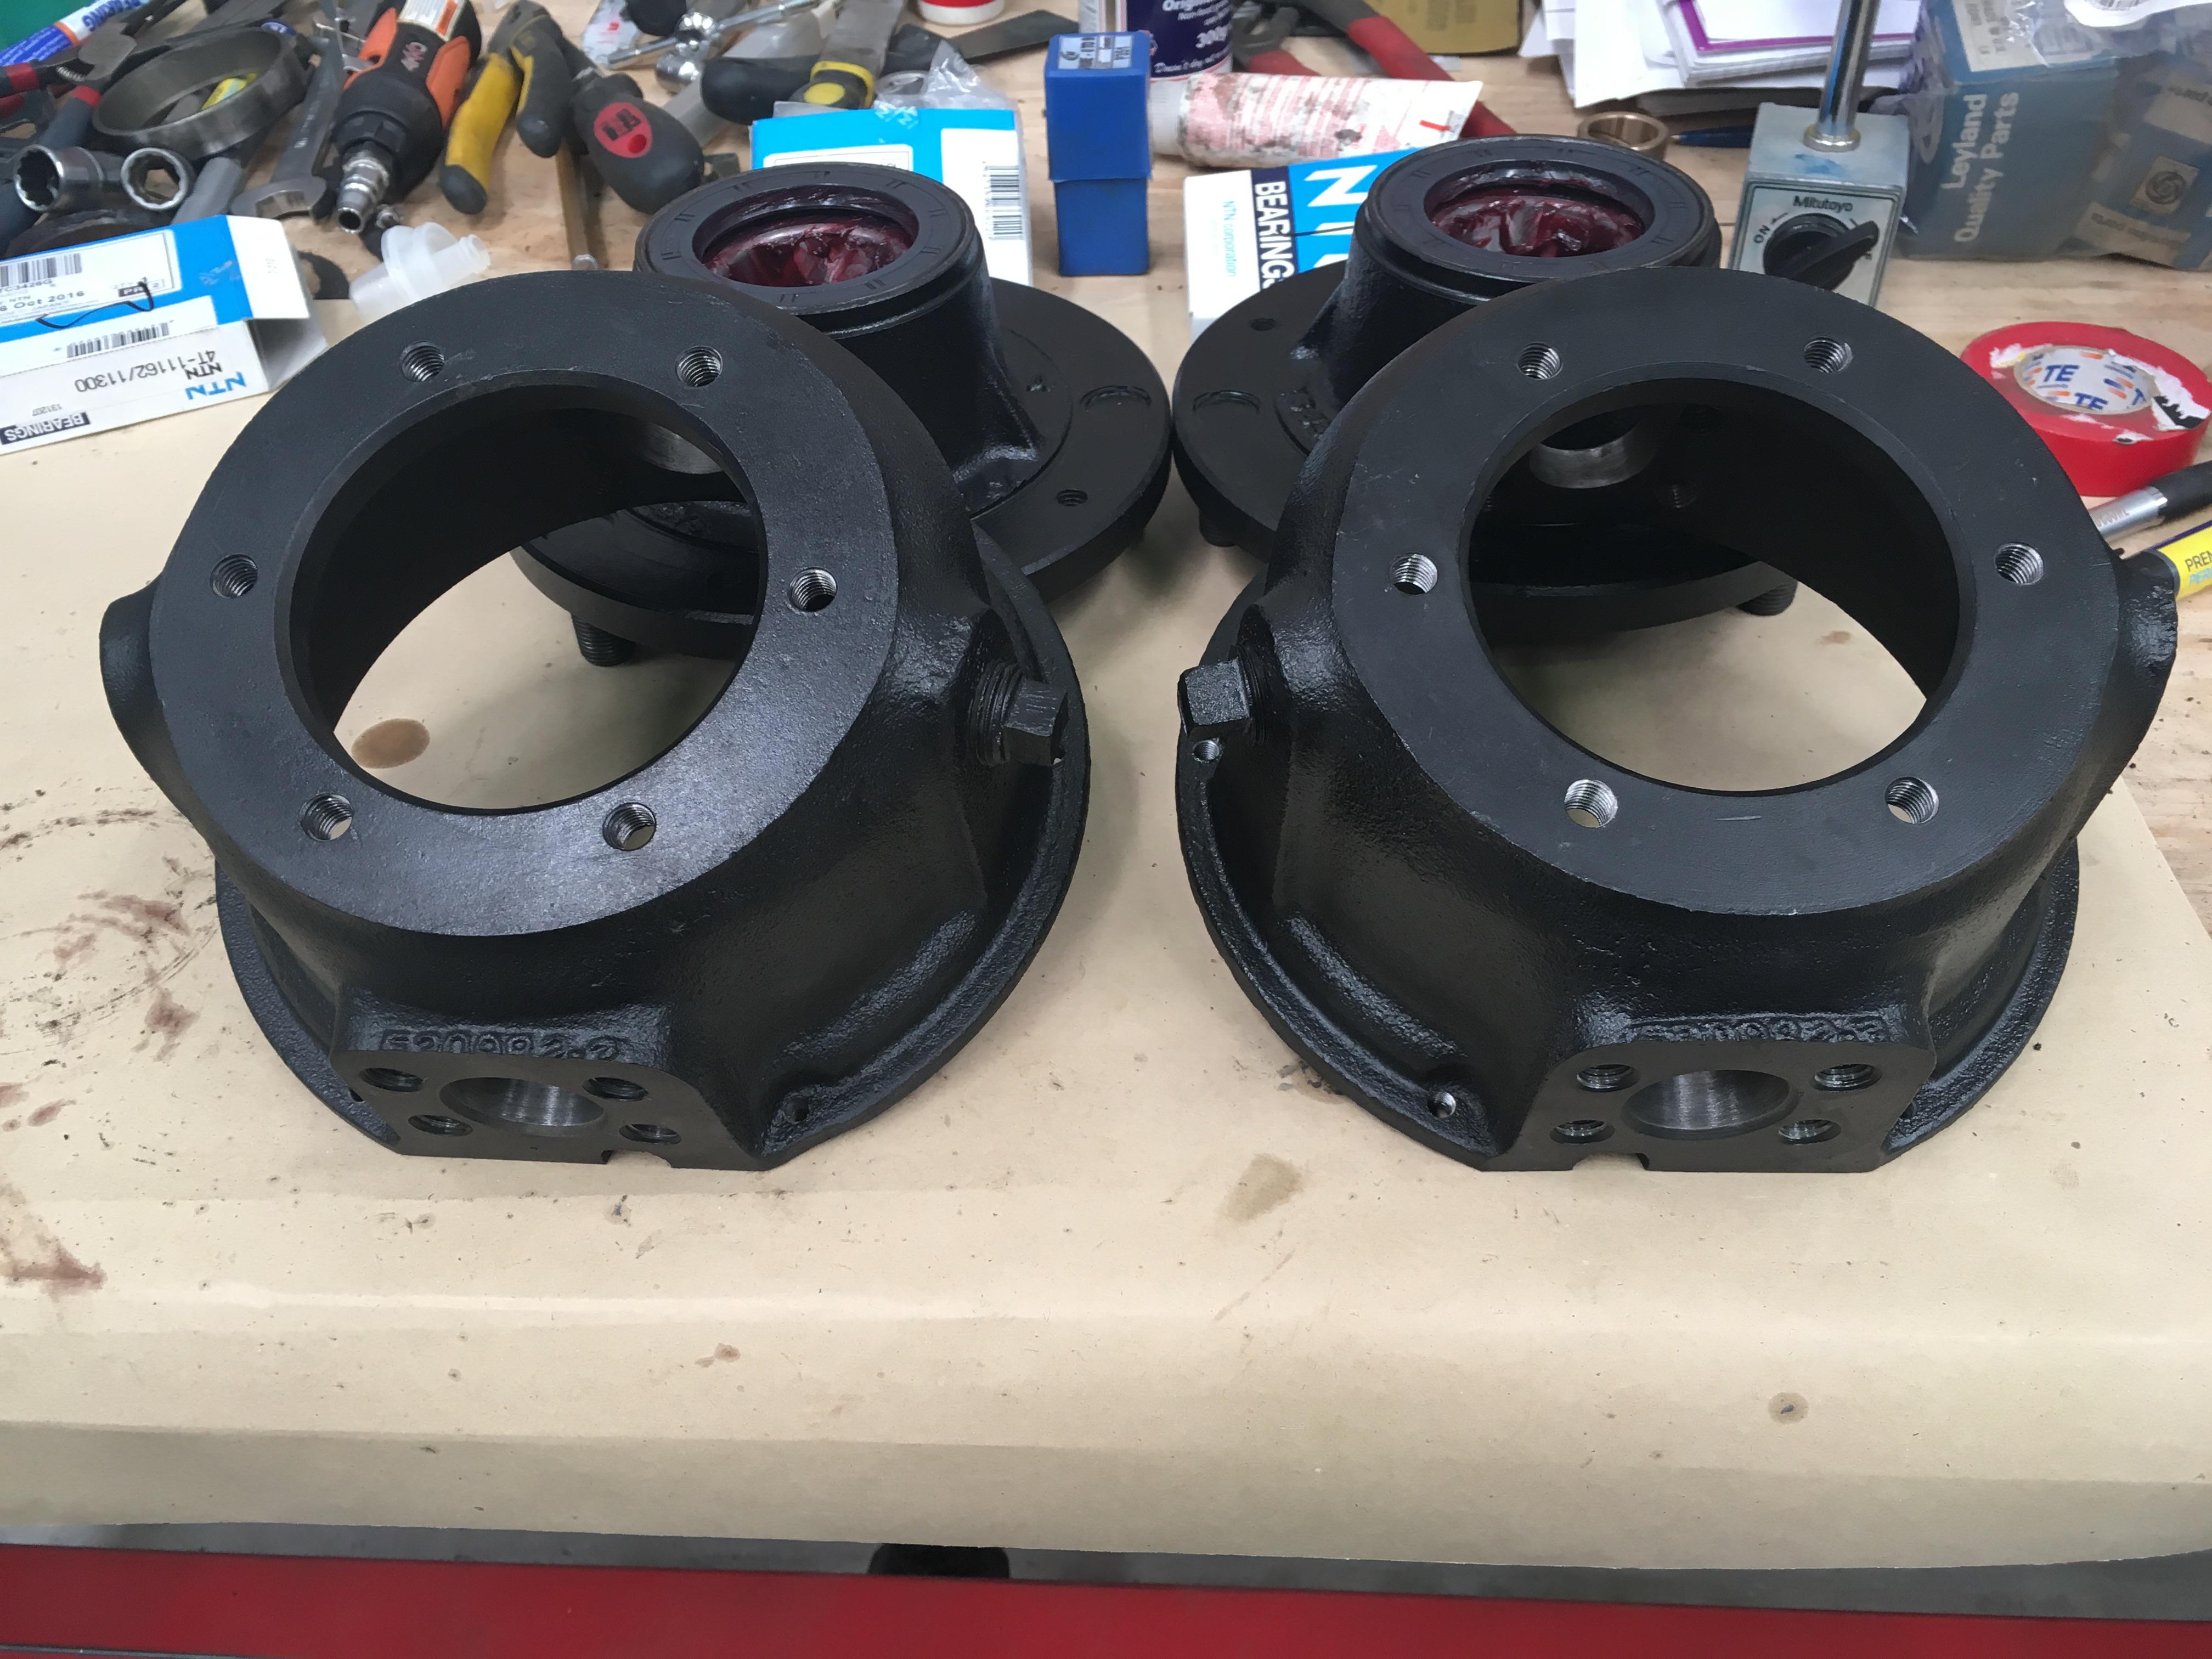
    Onto the hubs next, the diff inner pinion bearing shell is the gift that keeps on giving, it's the perfect size for pressing out the smaller bearing in the hubs, so less hammering


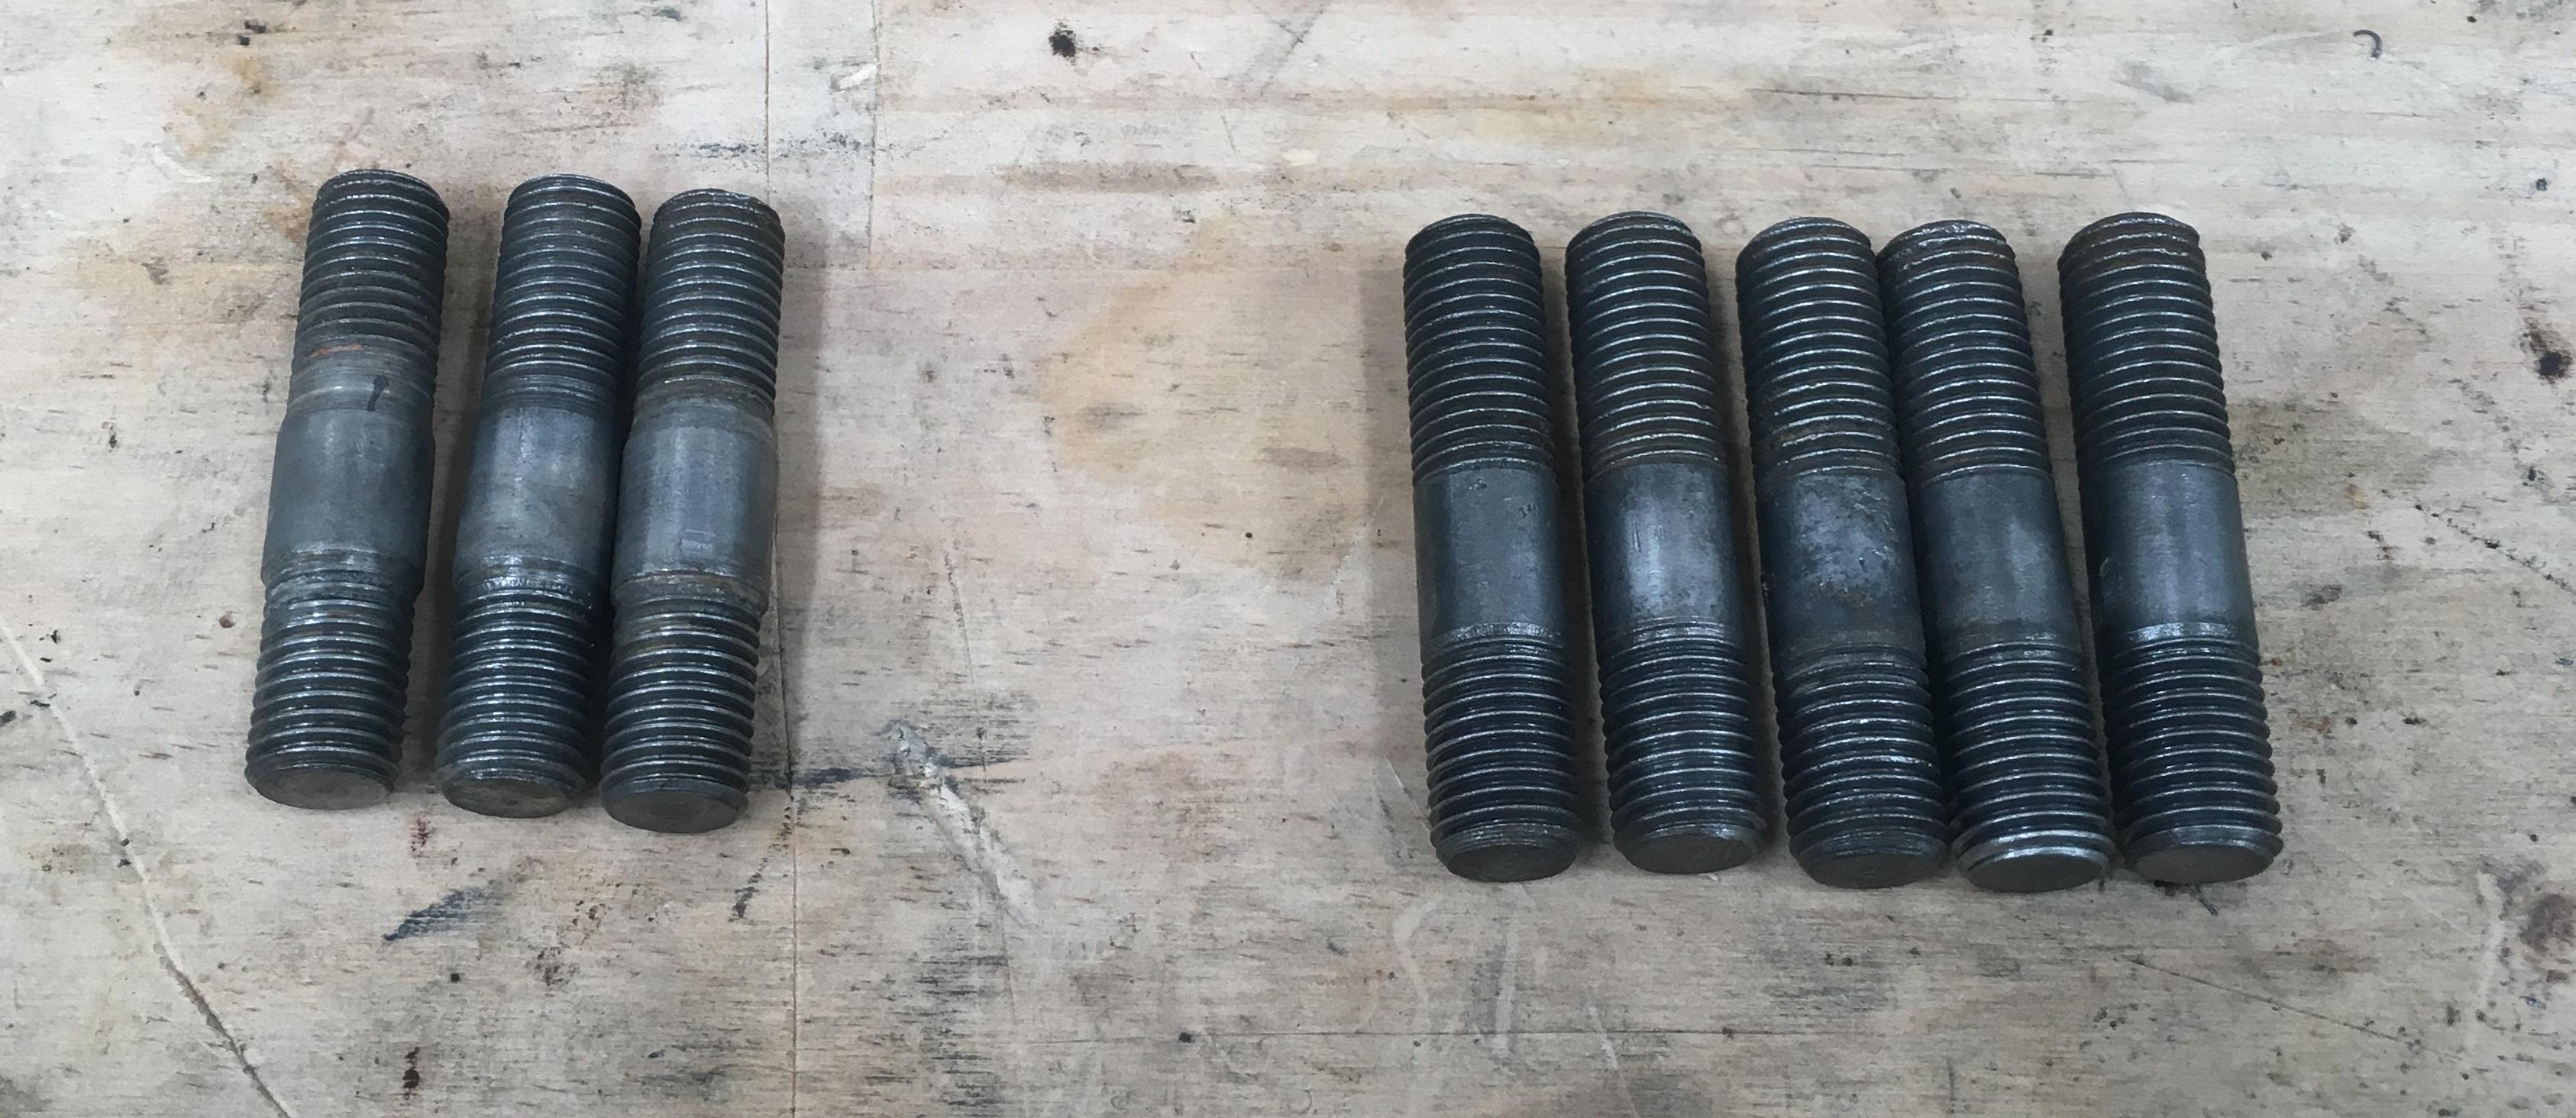
    All the old shells pressed out, and time to give the threads a clean up, (M16 for the studs, and 3/8" BSF for the drive flange mounting threads.


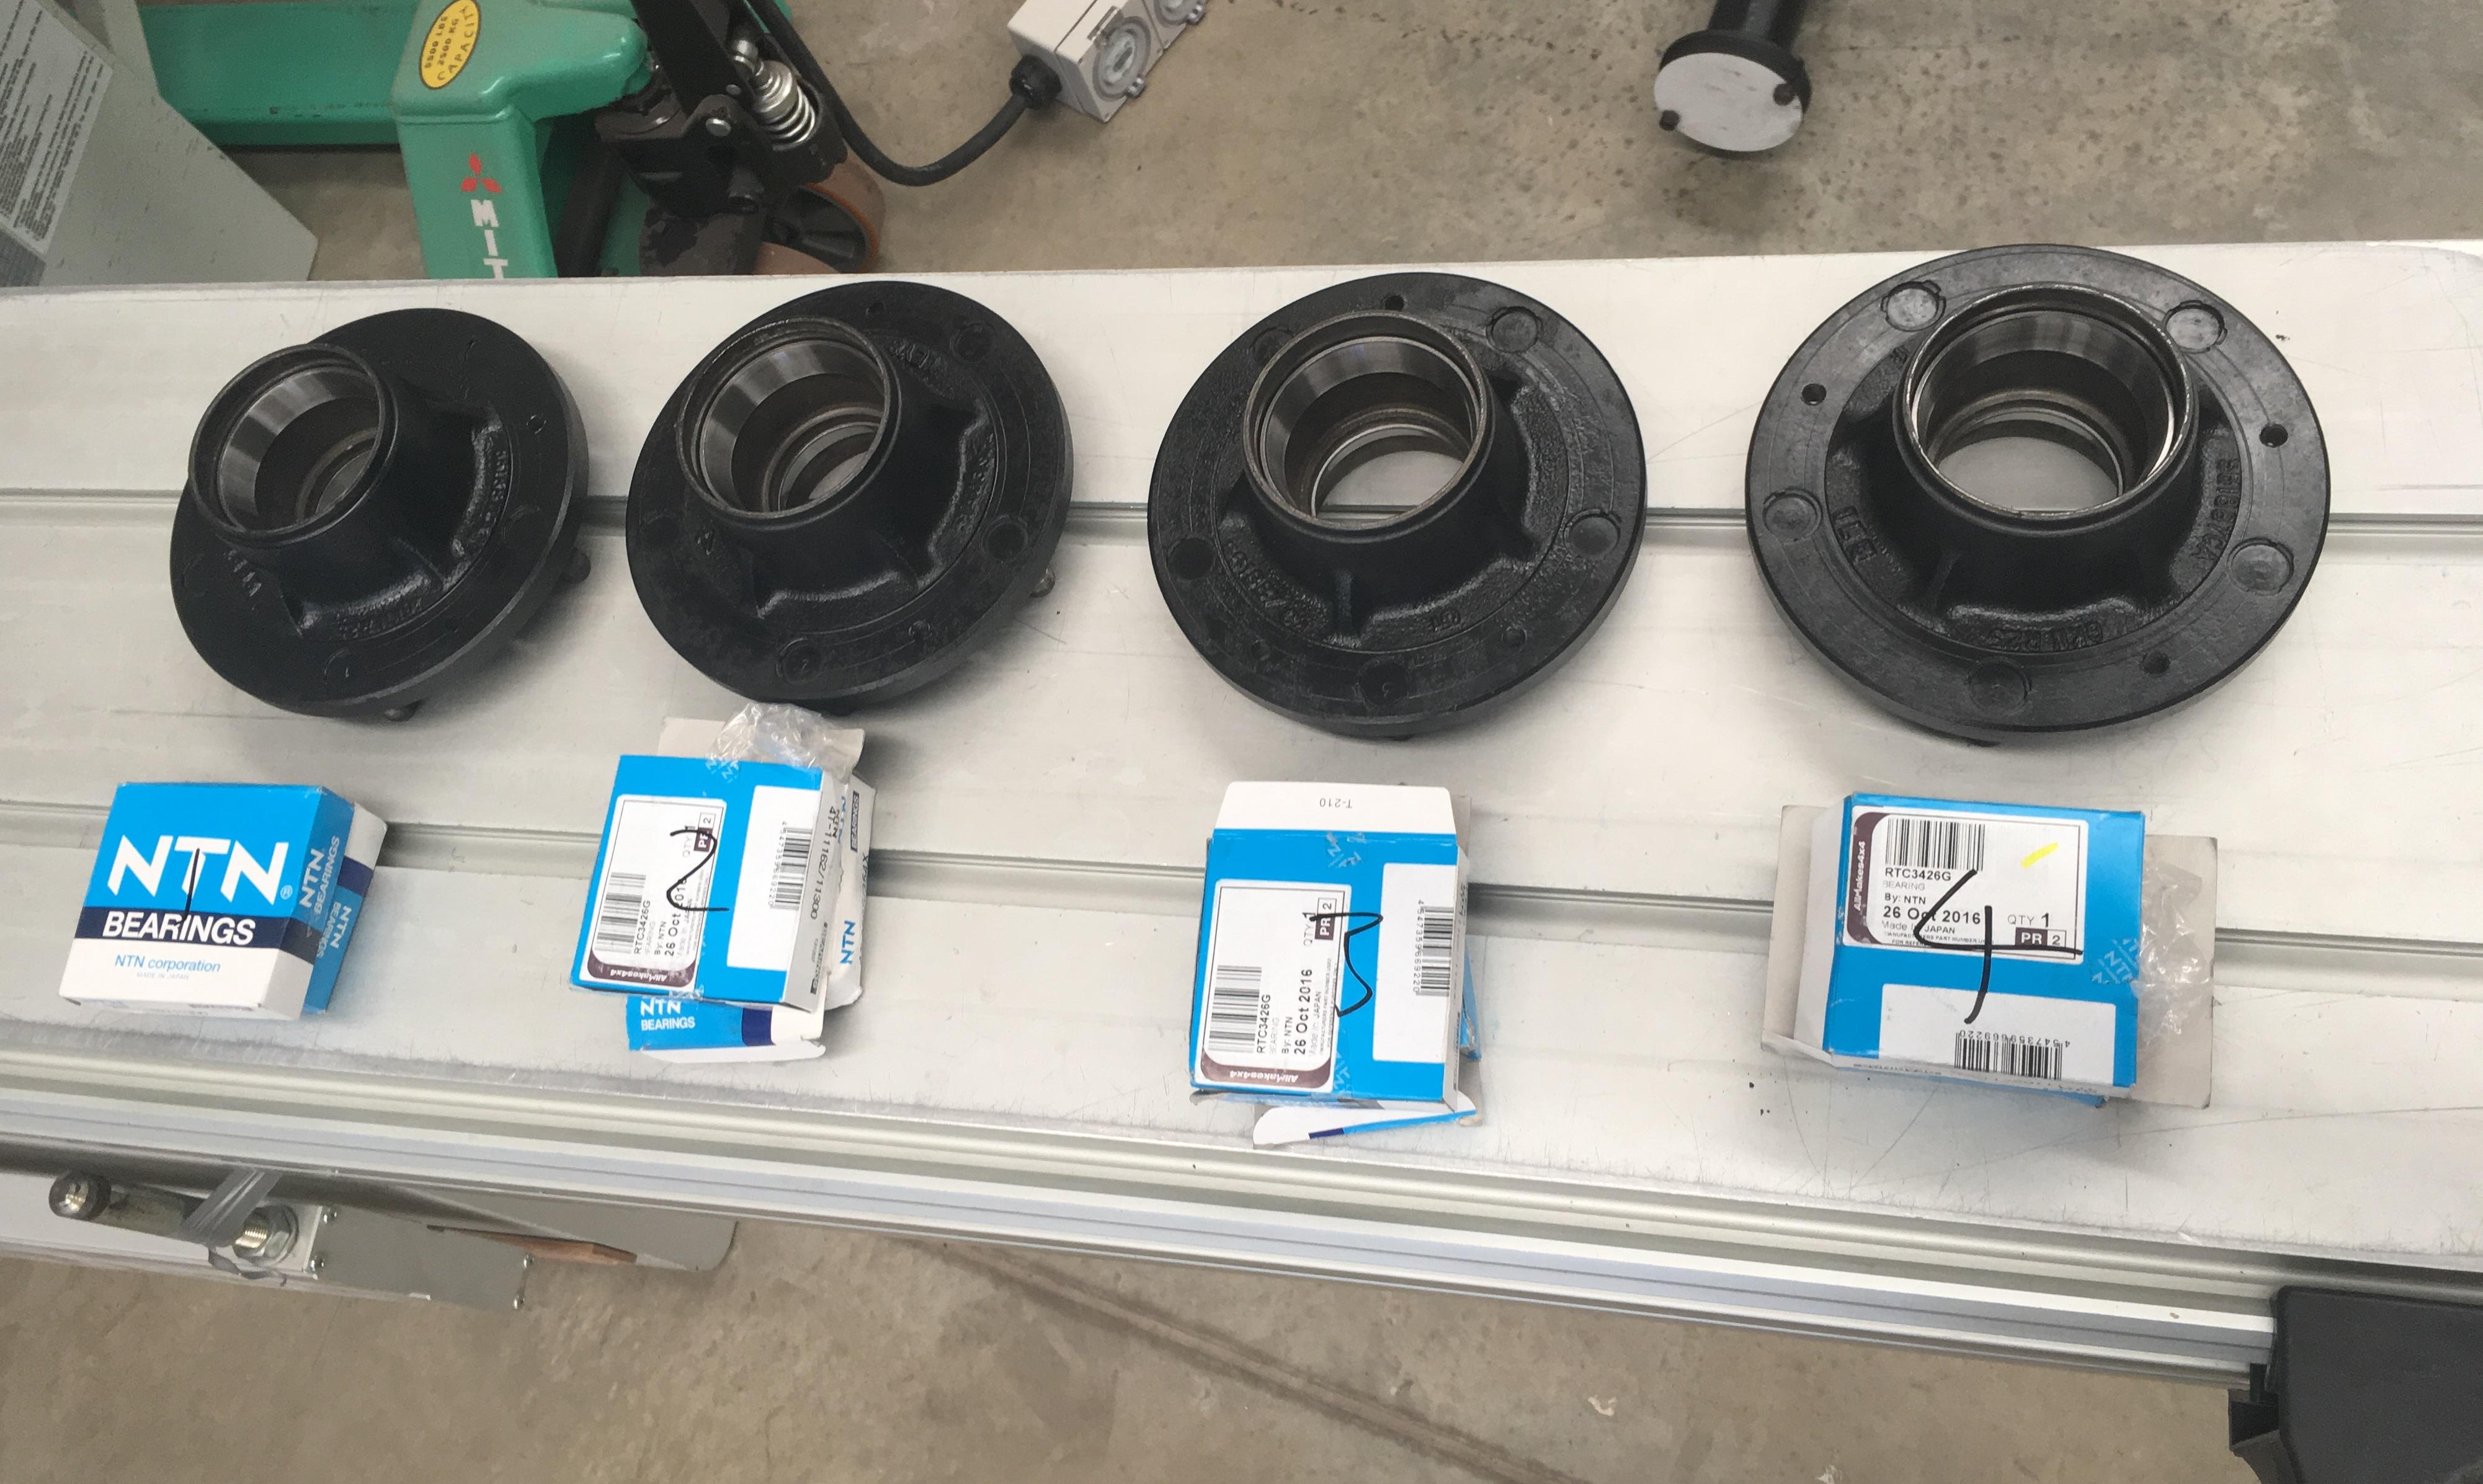
    All the shells pressed in and ready for fitting to the axles


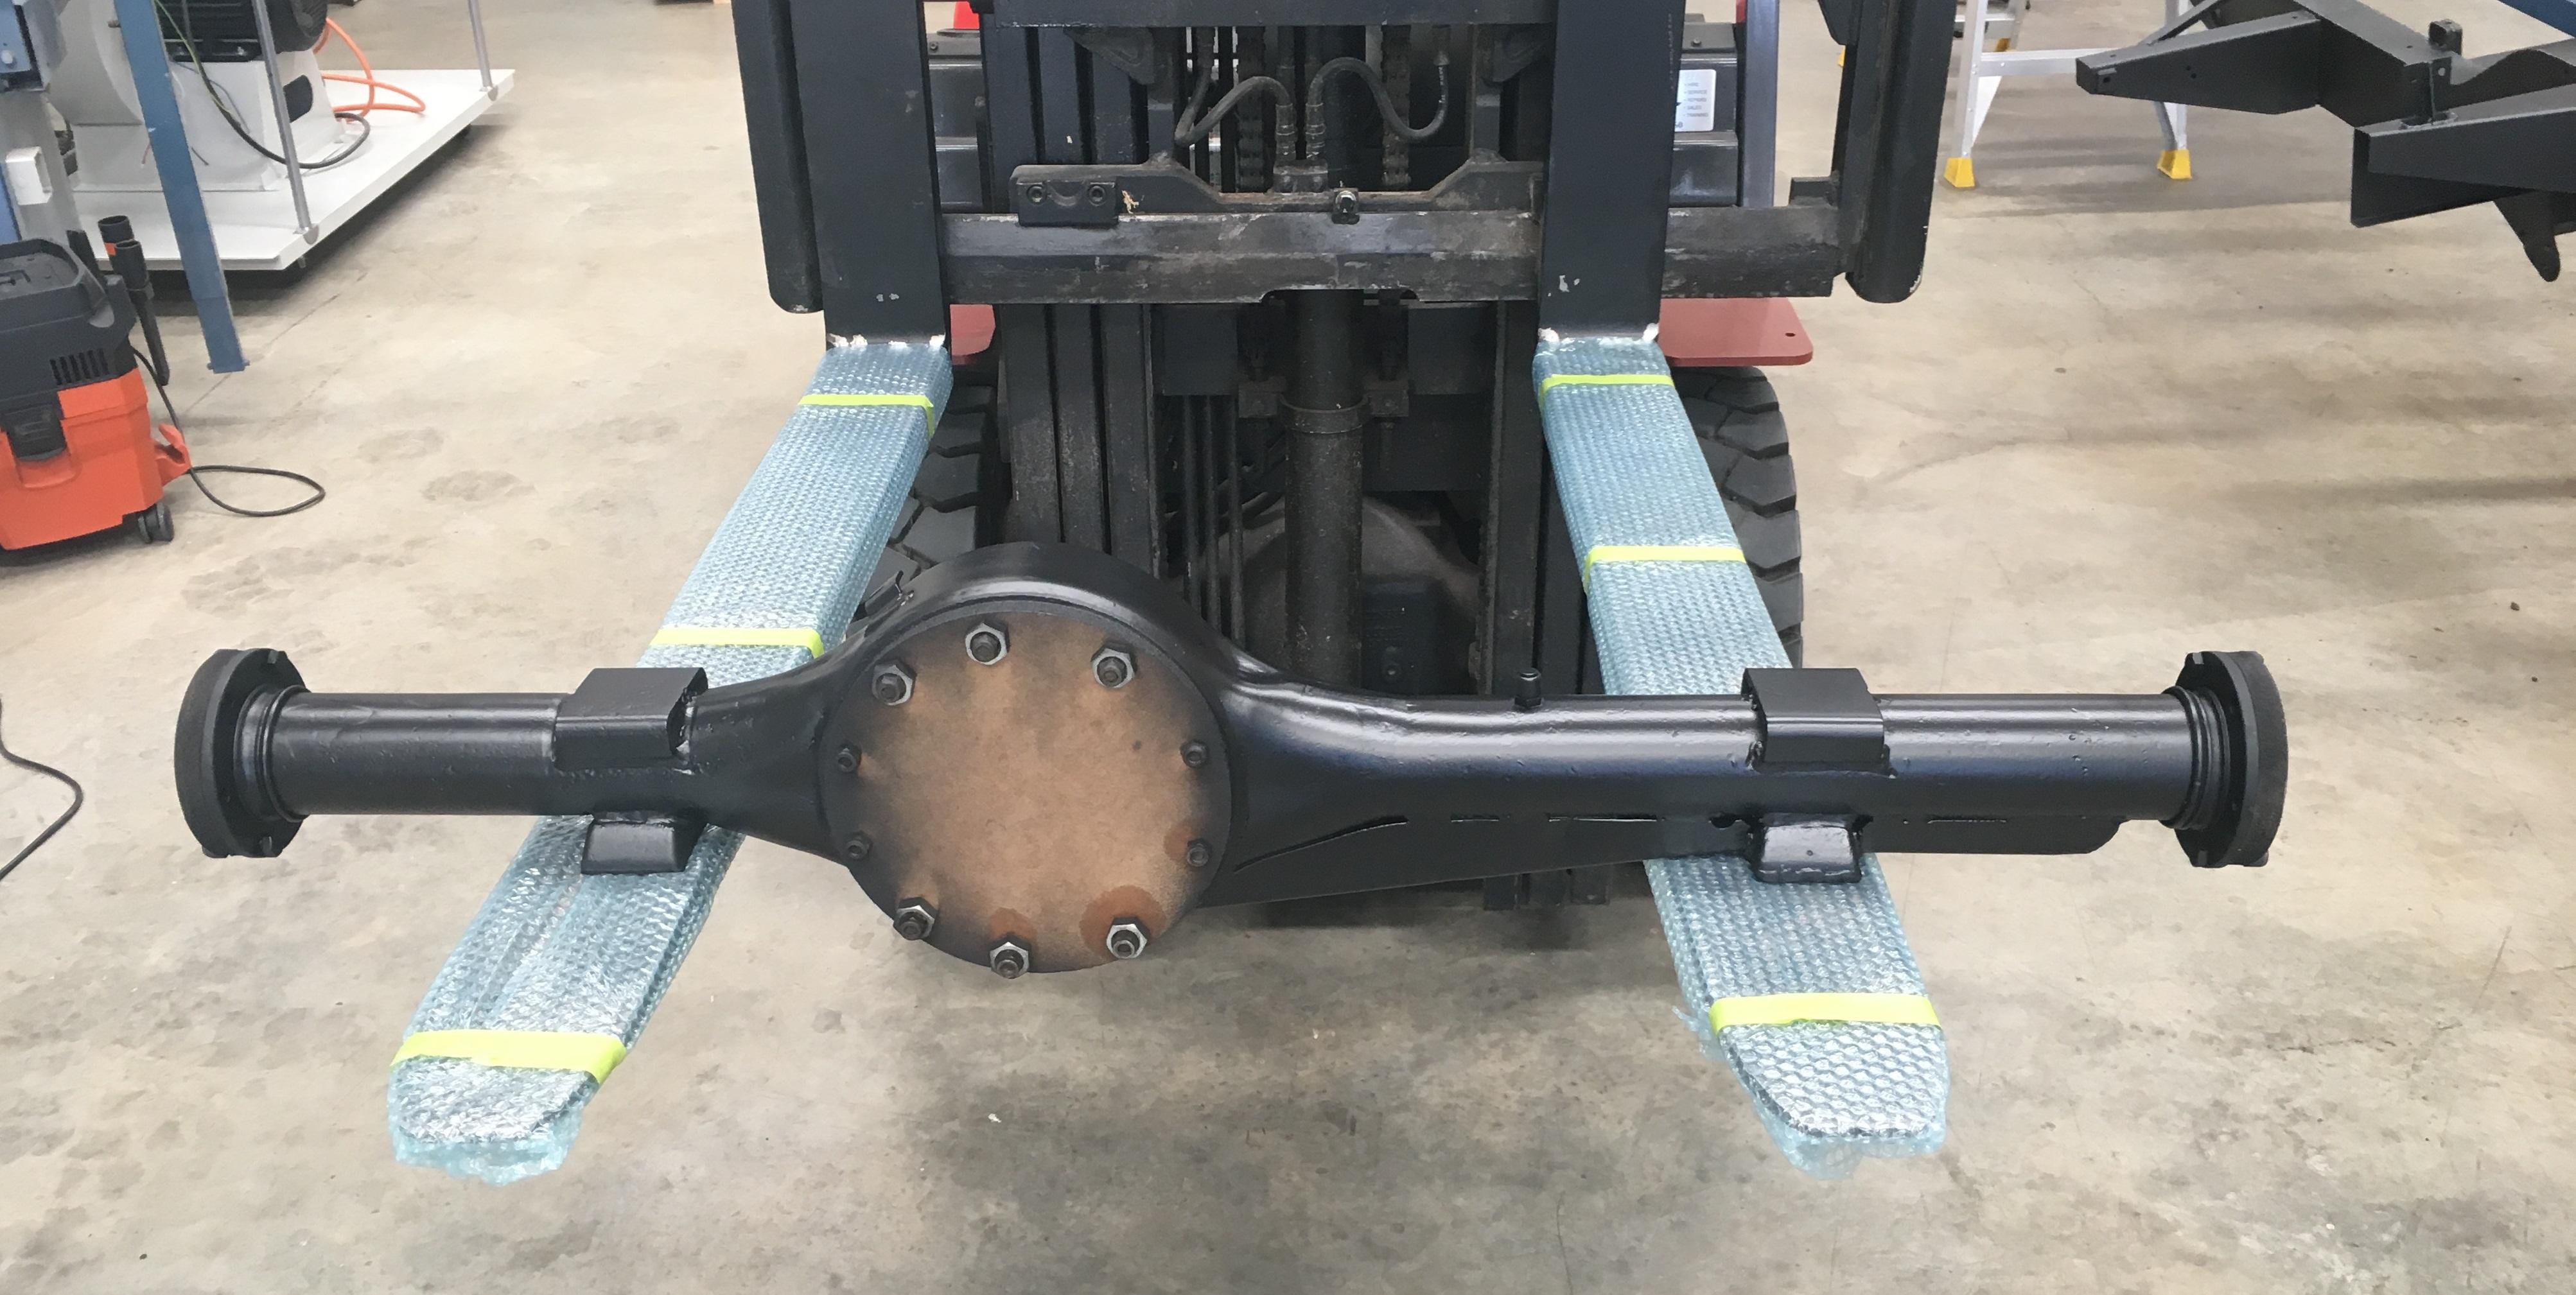
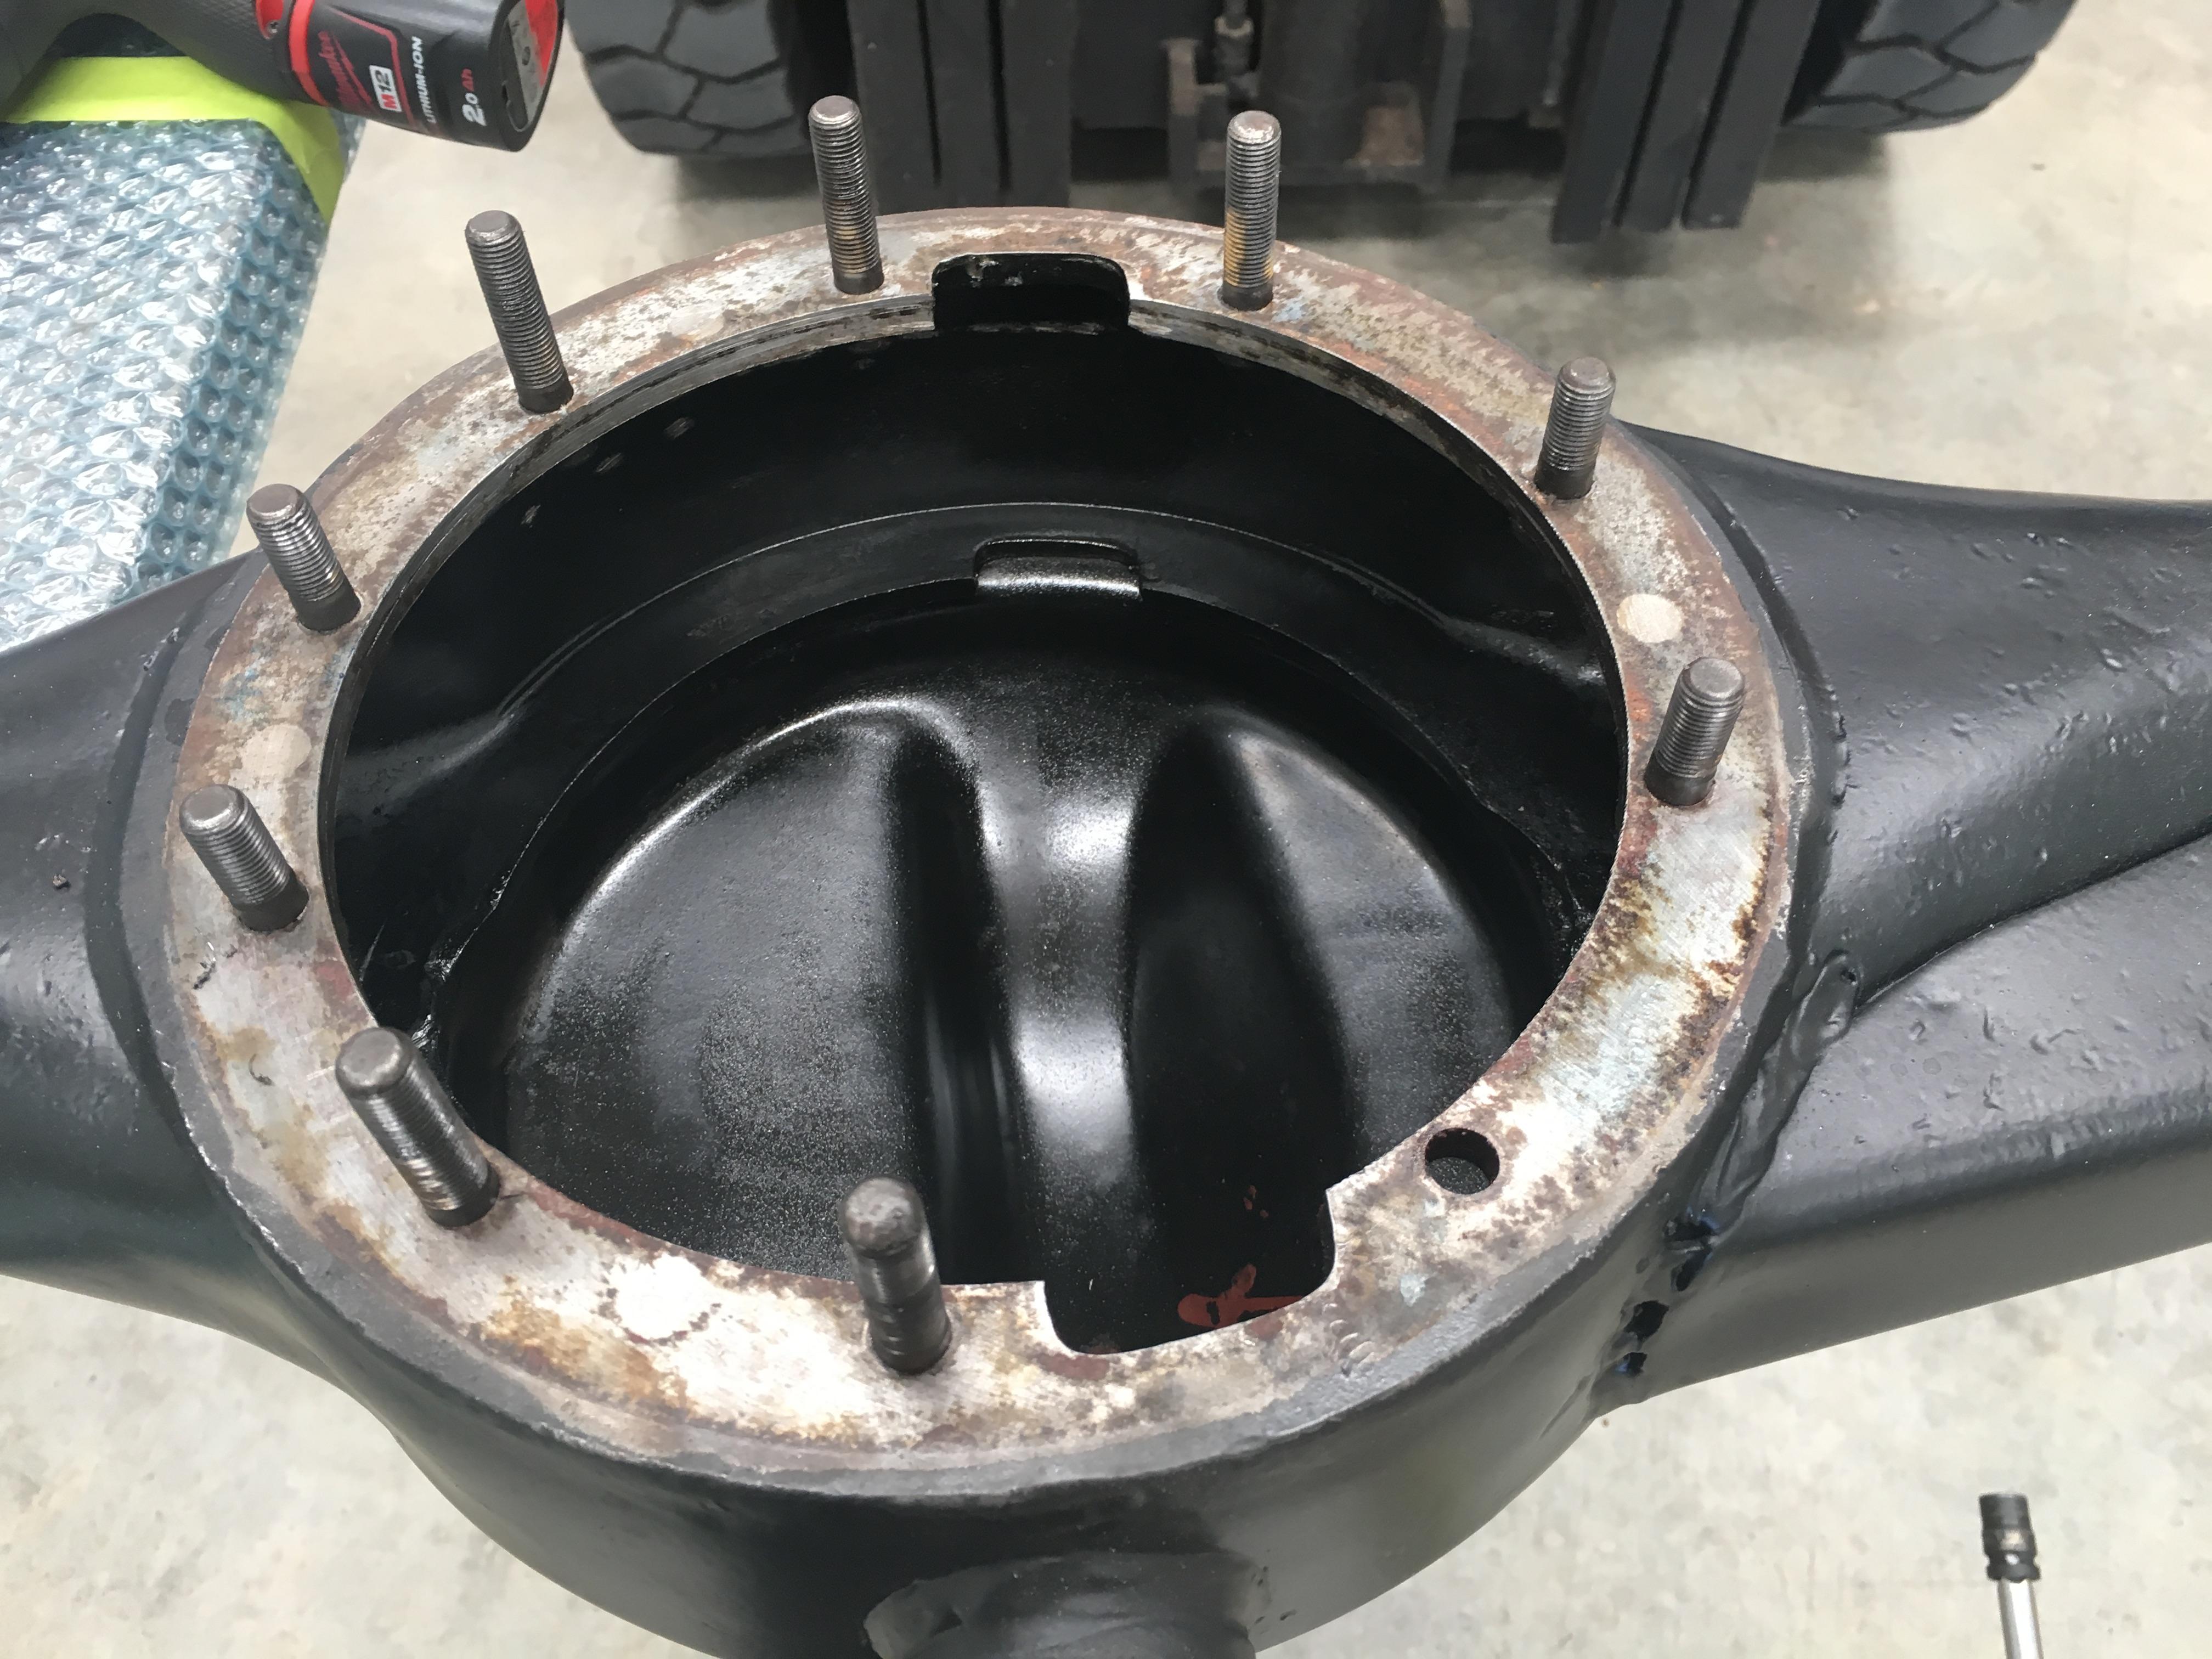
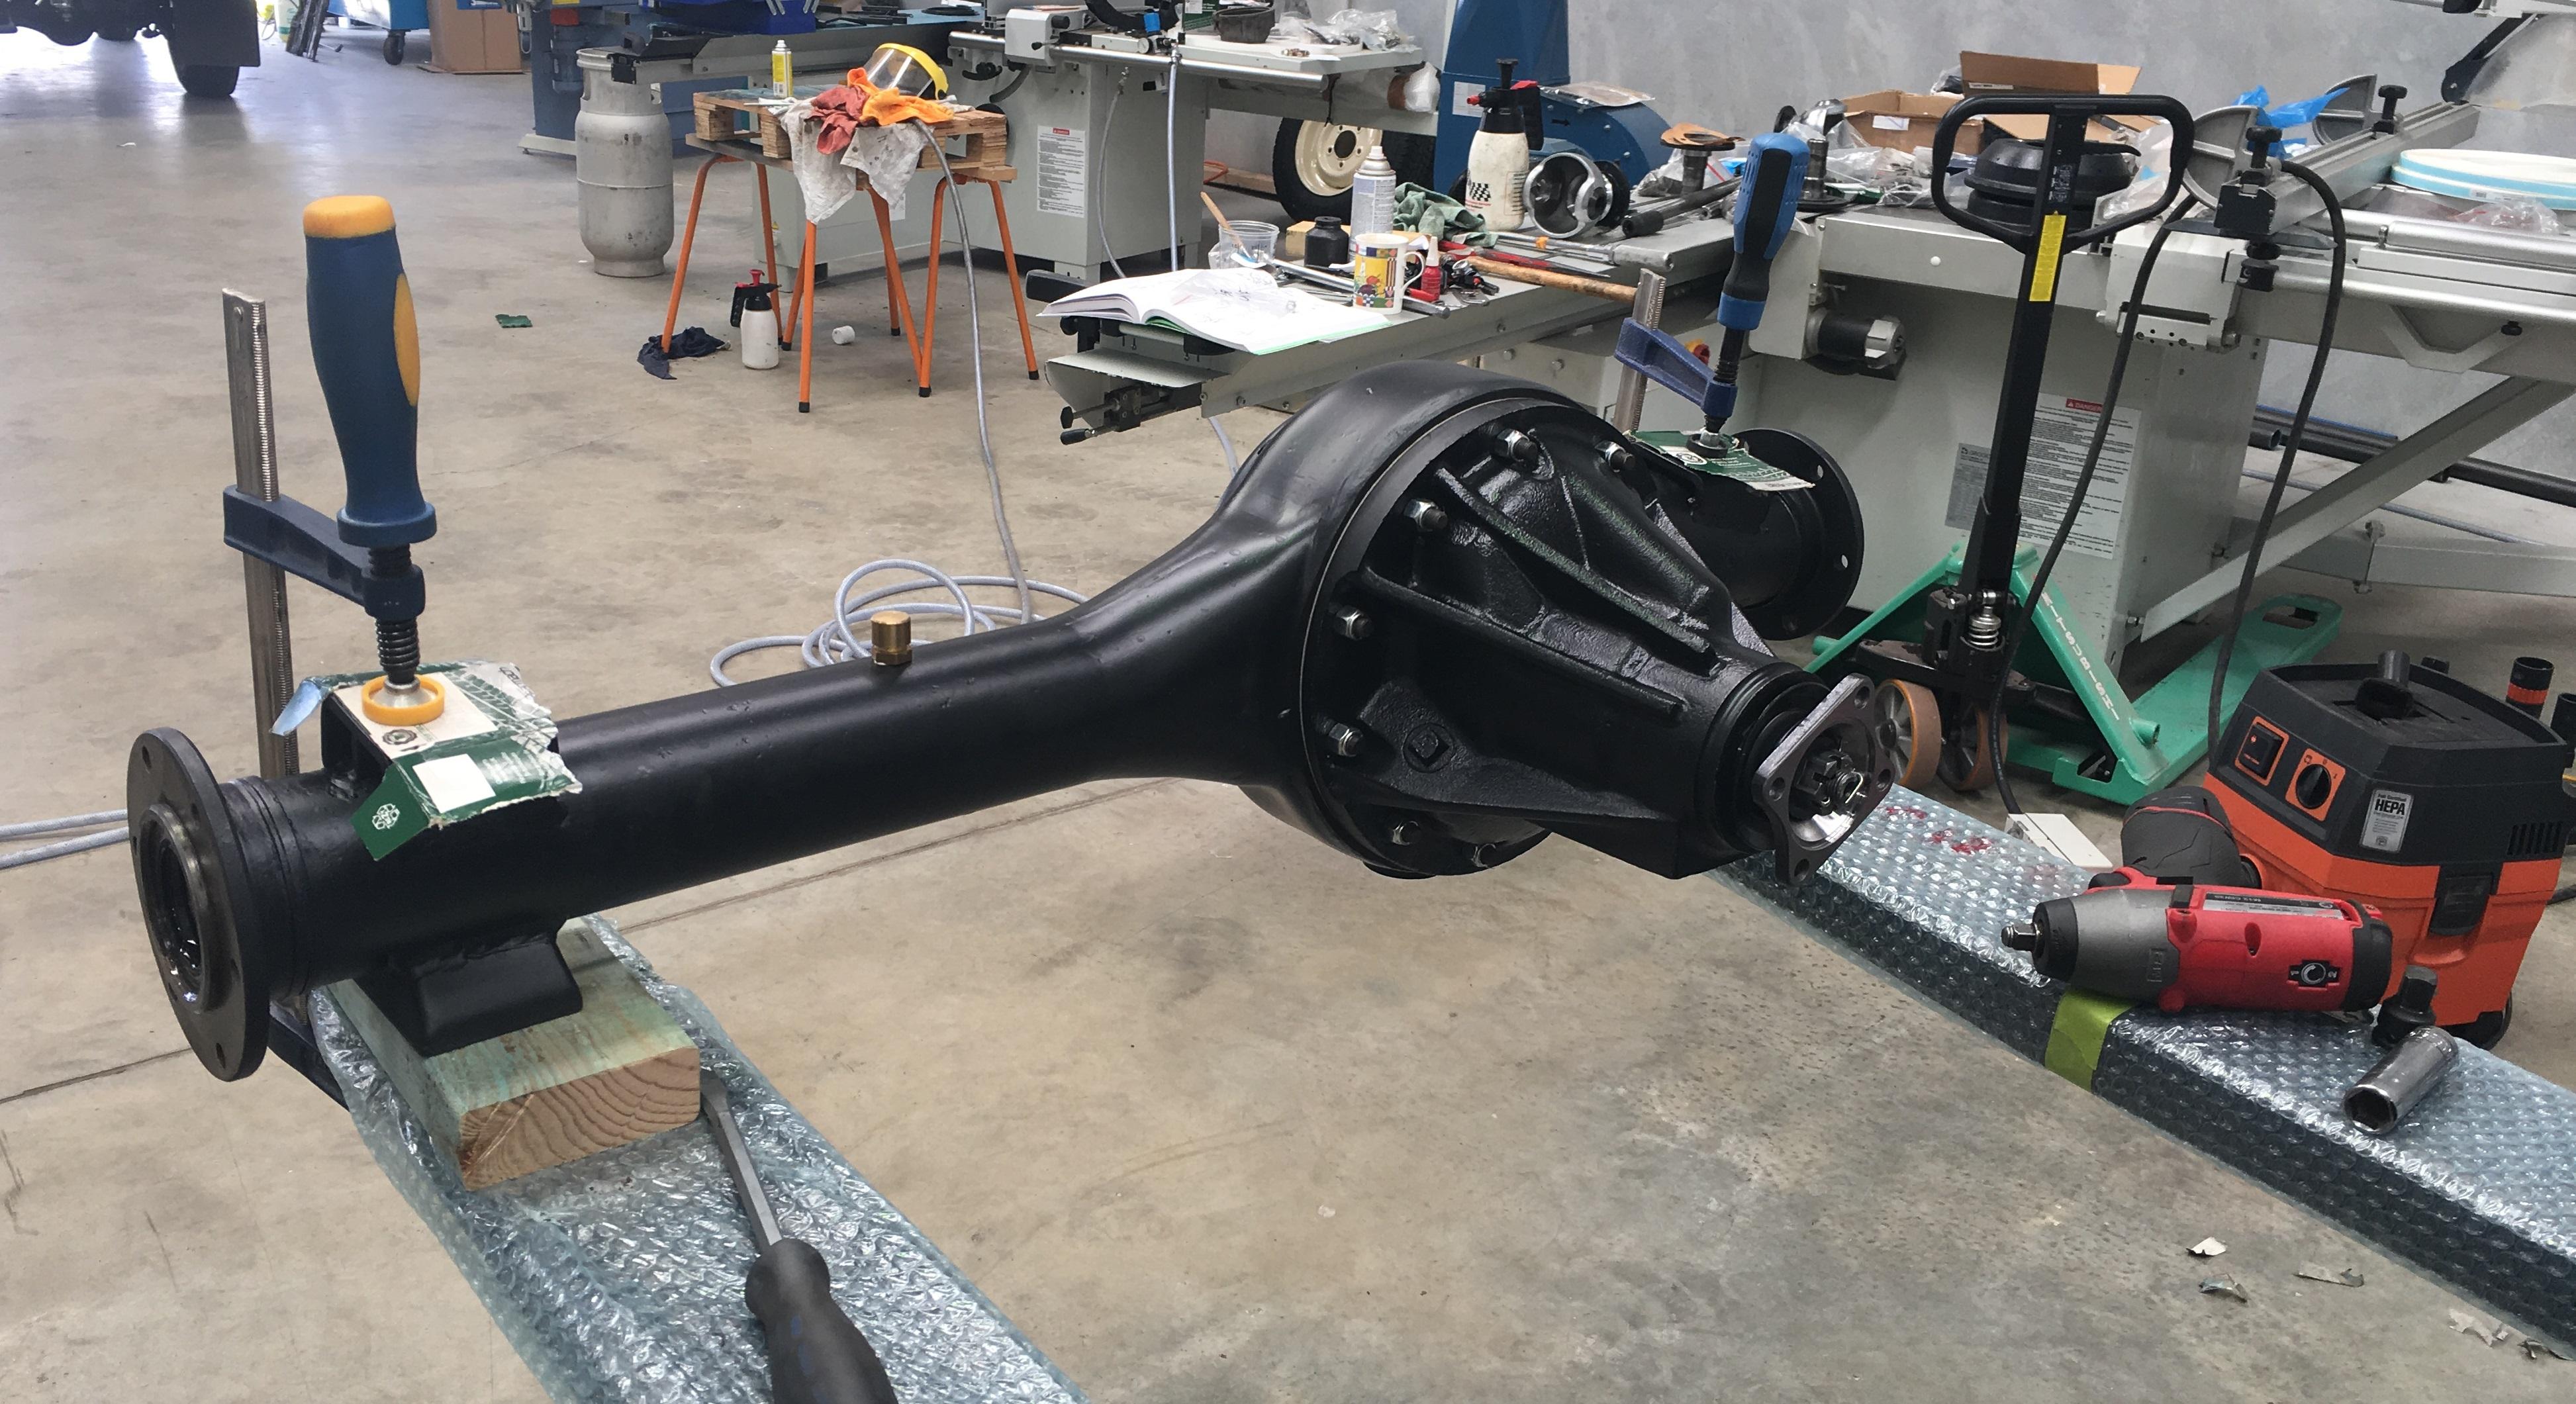
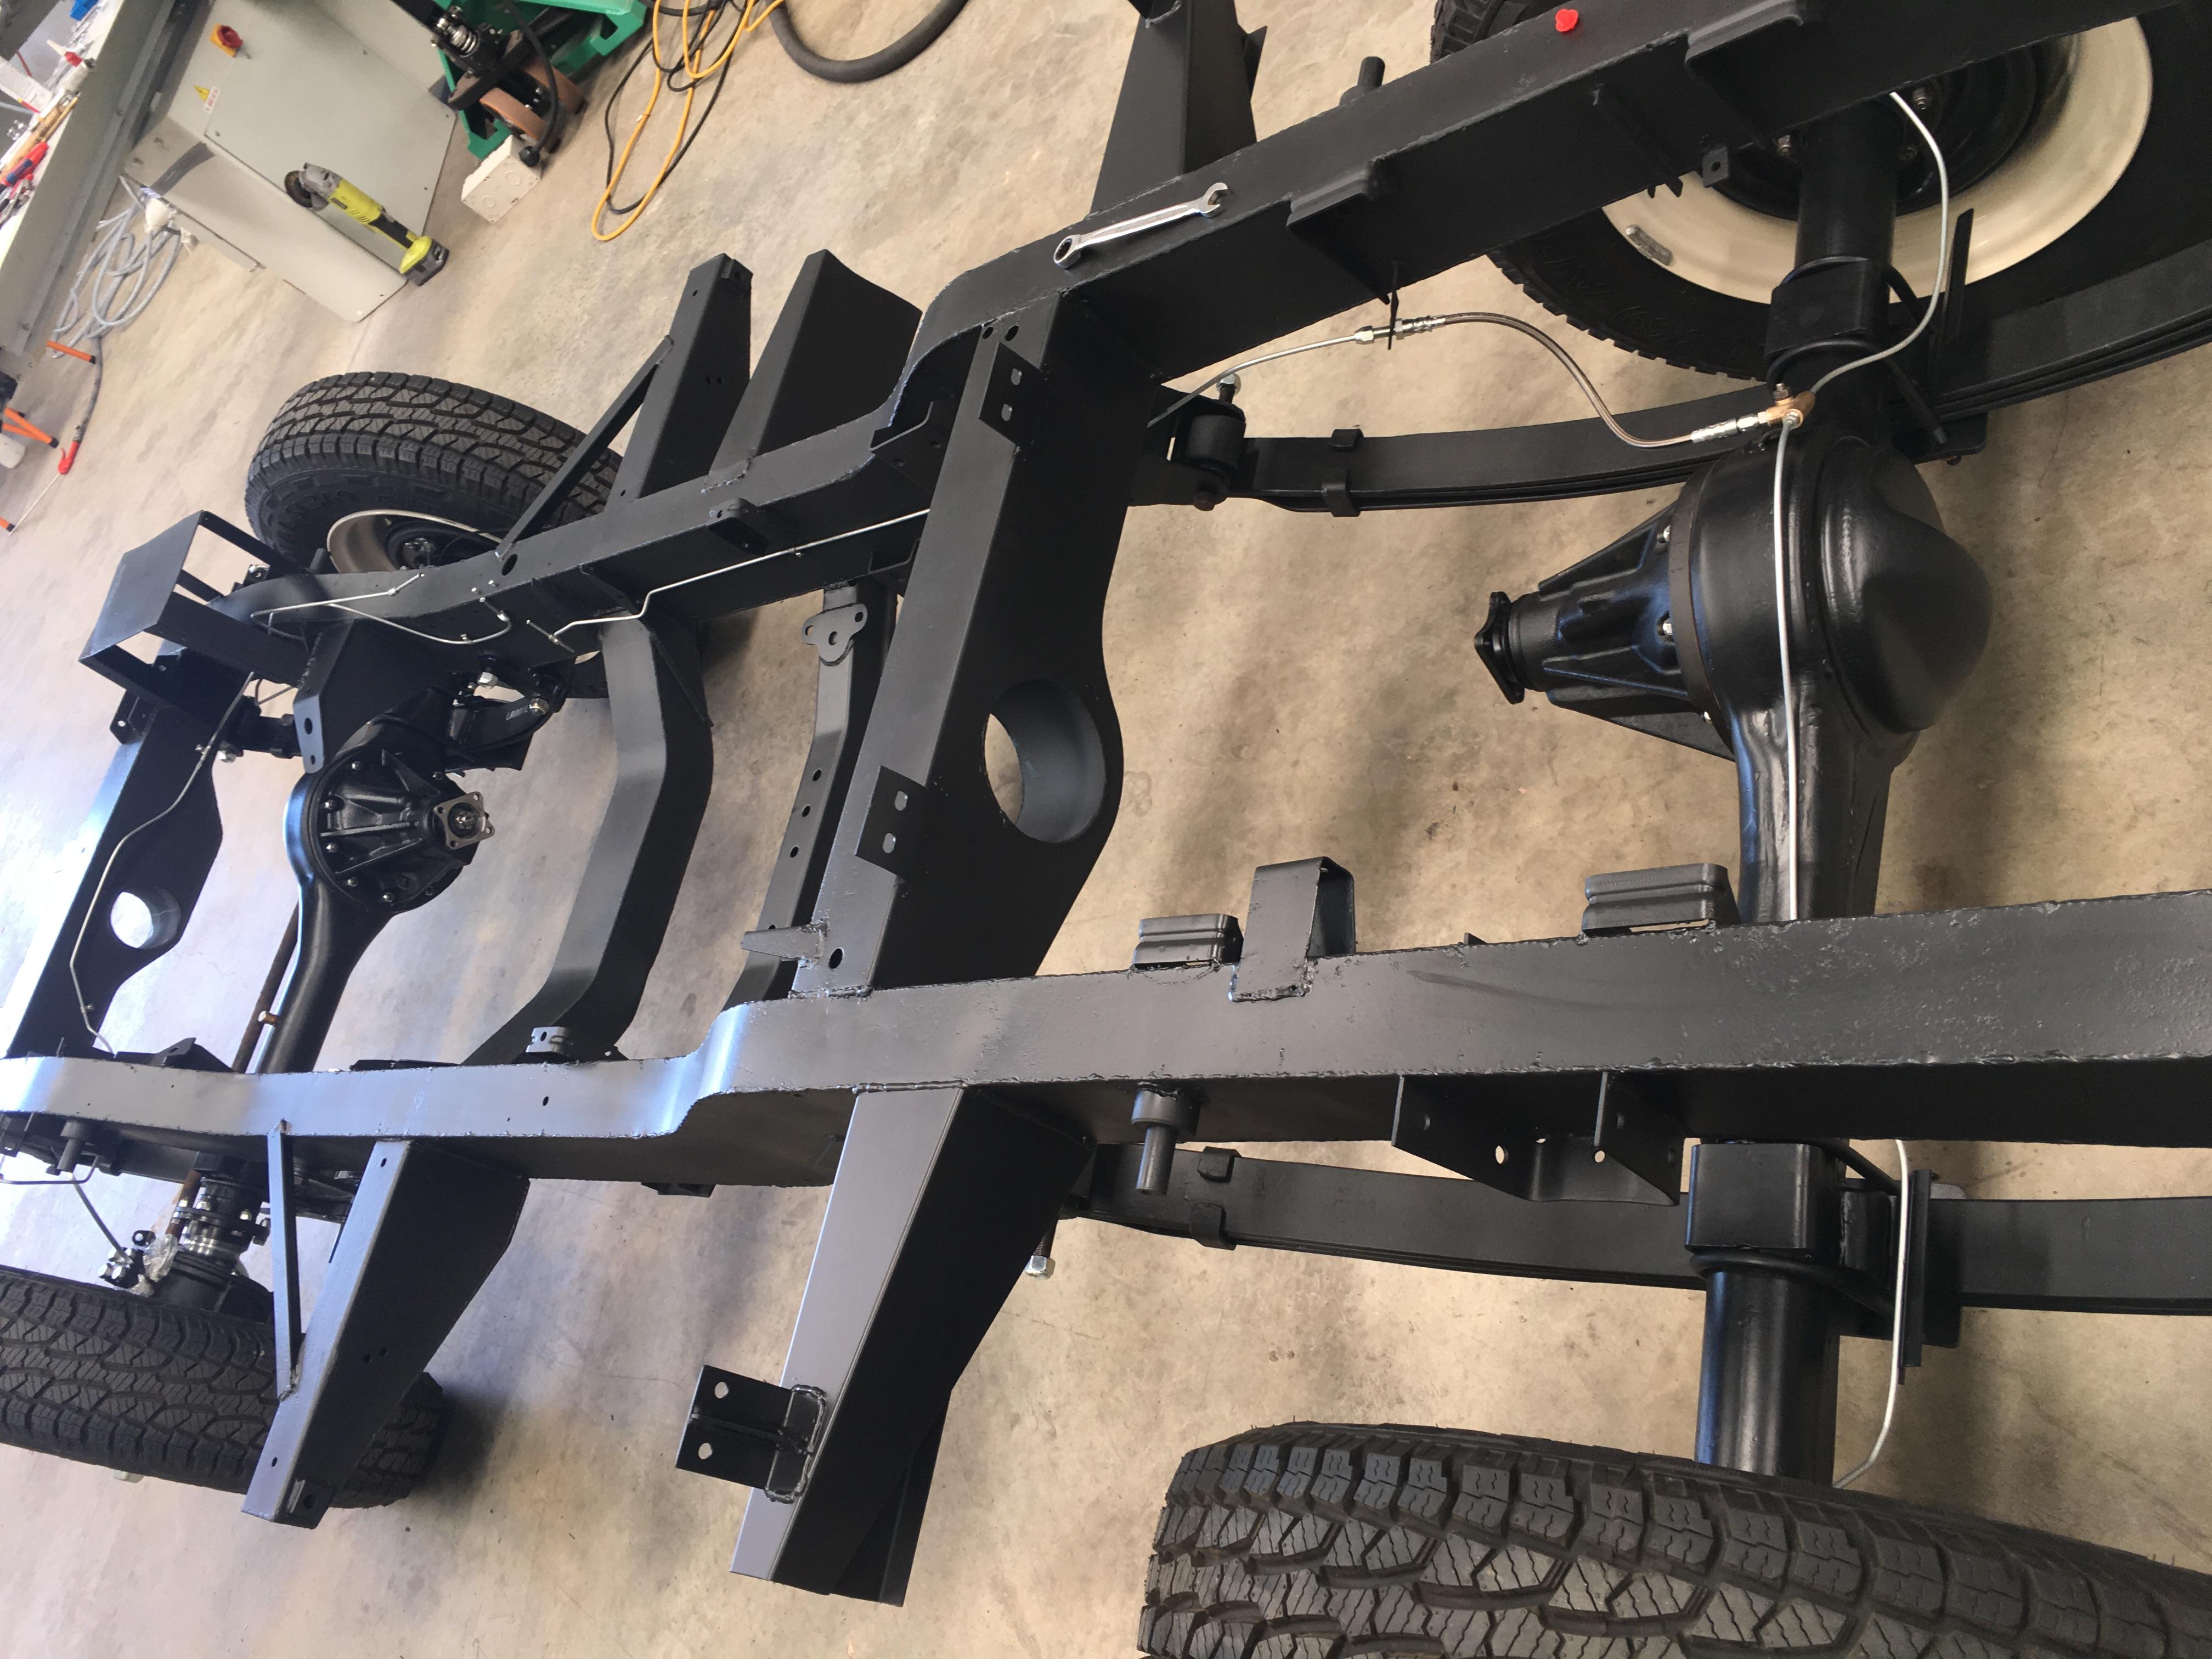
    Rear axle tube preparing for surgery, (and yes that's bubble wrap, don't want to scratch my freshly painted axle tubes!)


    When I removed the blanking plugs I found that sand had still managed to get inside So both tubes got a spray of degreaser inside, then flushed out with the pressure cleaner, (on a scale of things I don't want inside the axles sand rates higher than water).


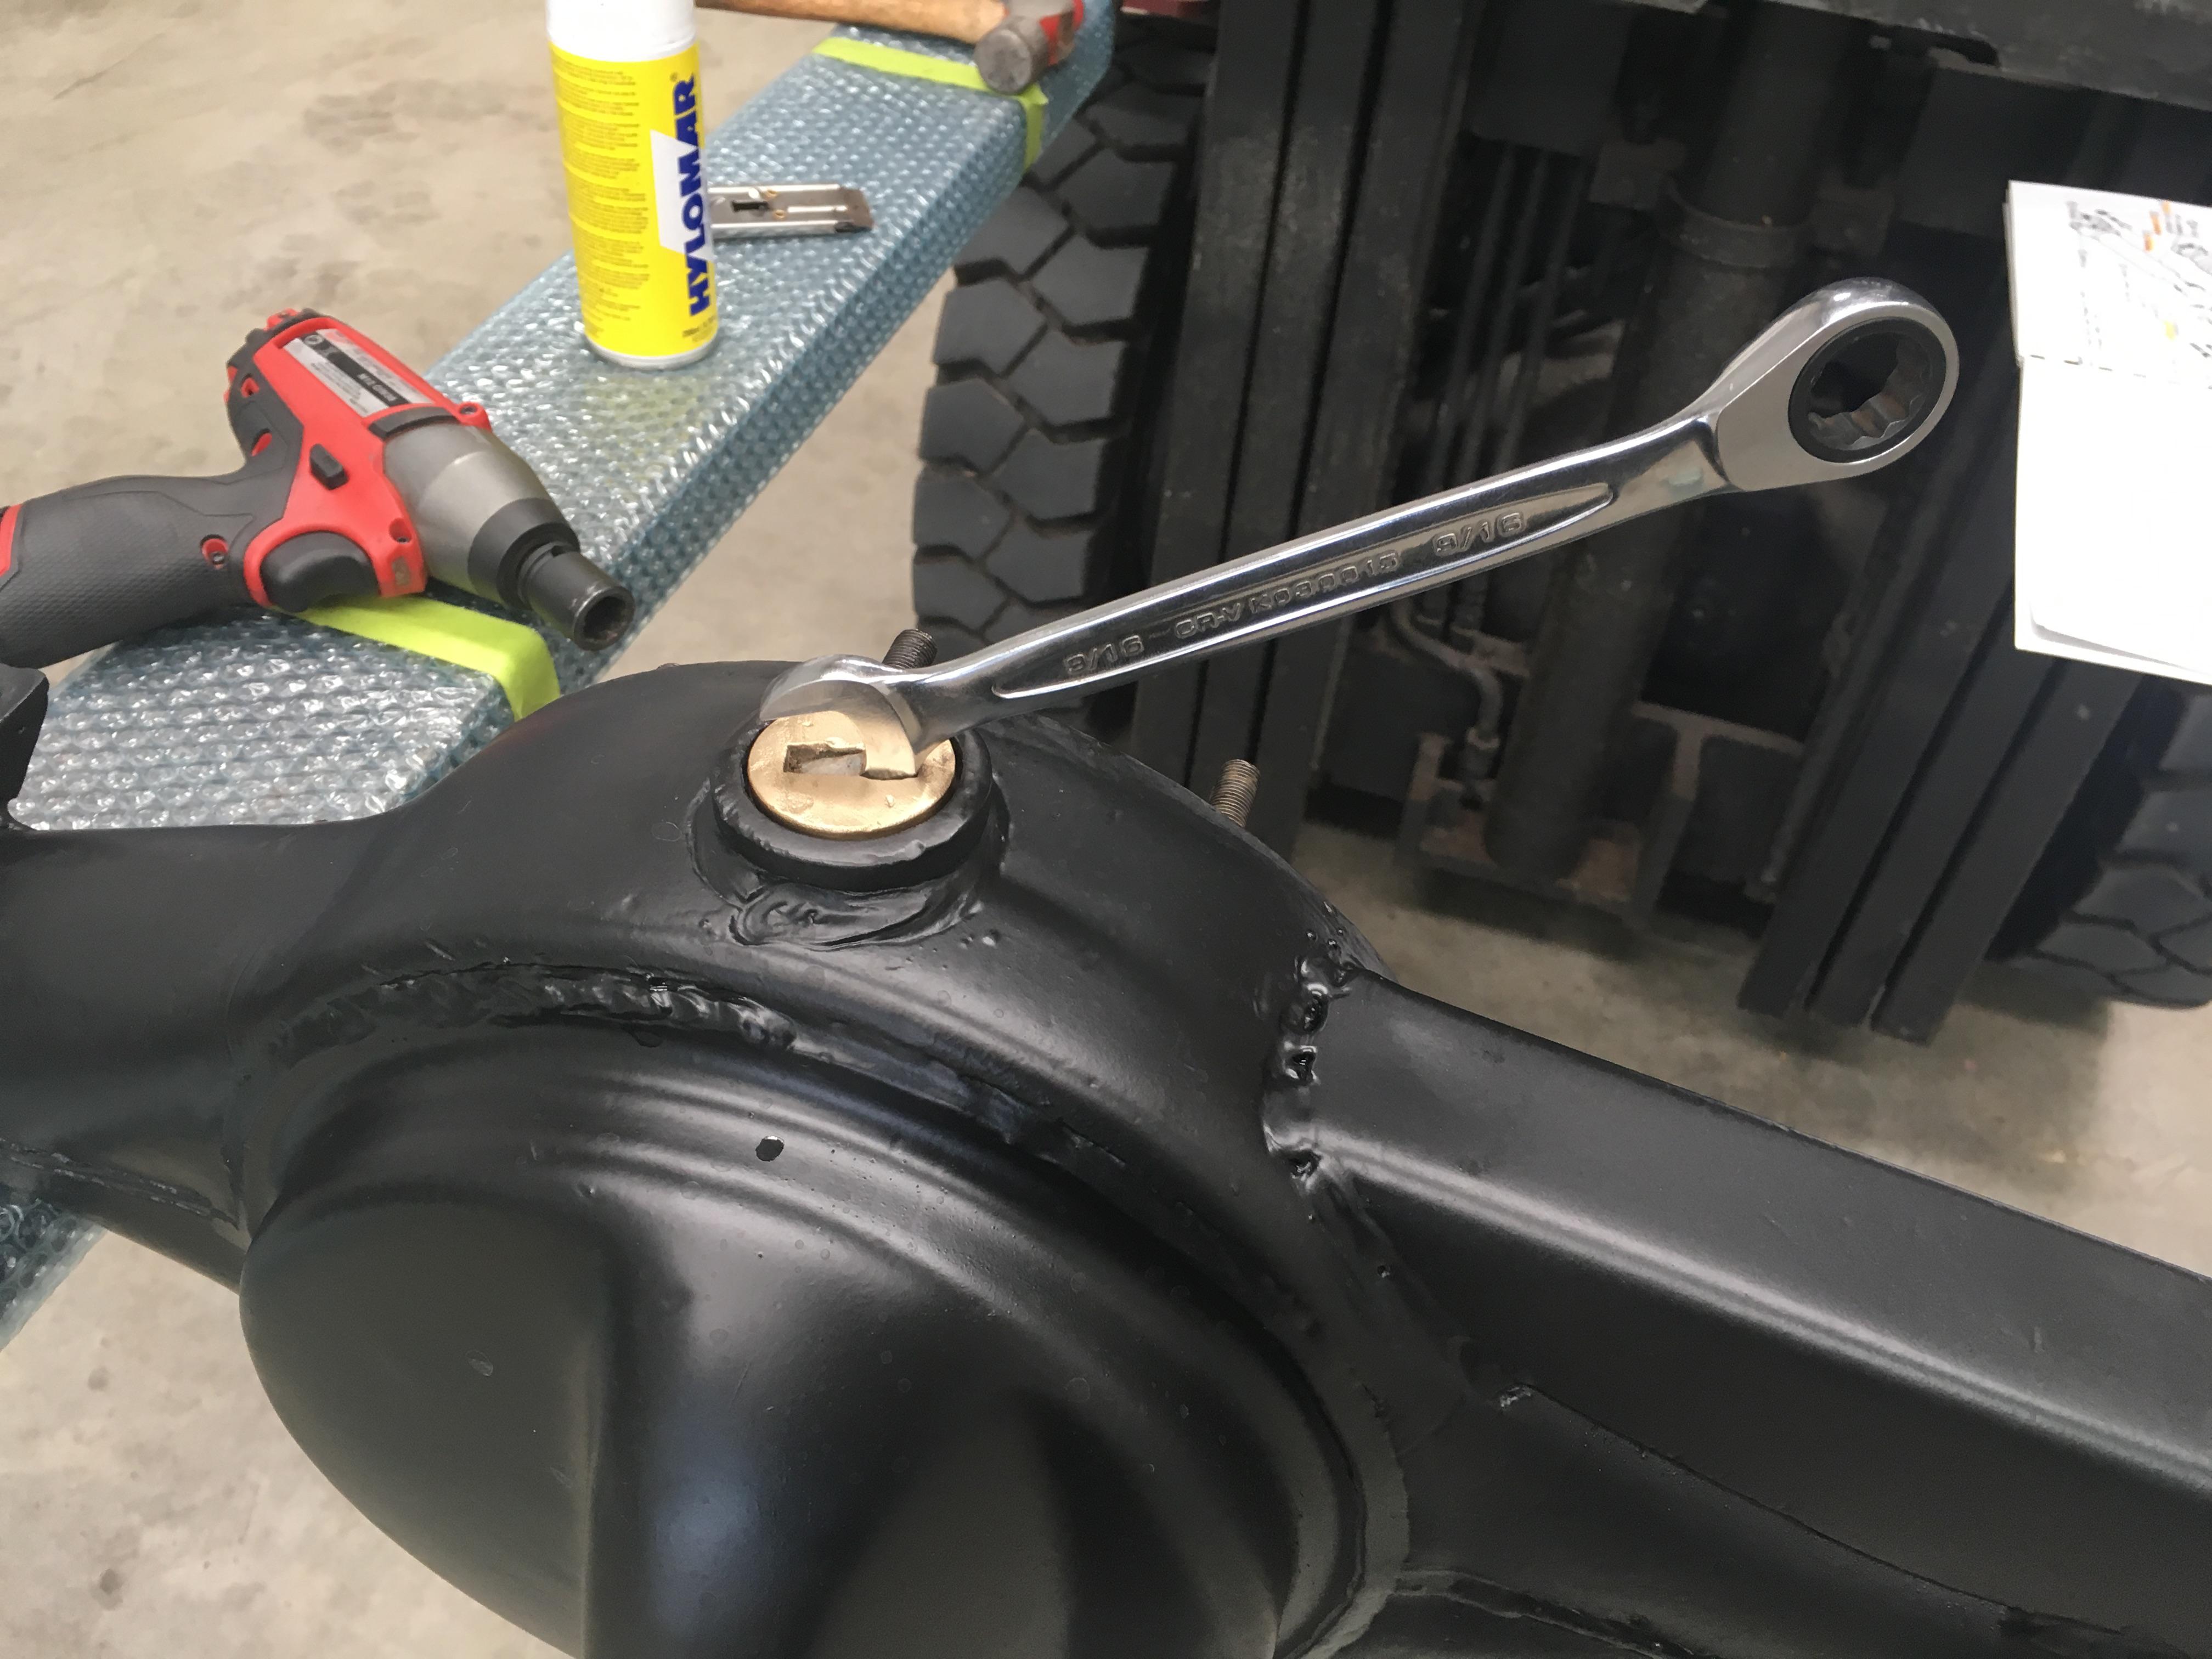
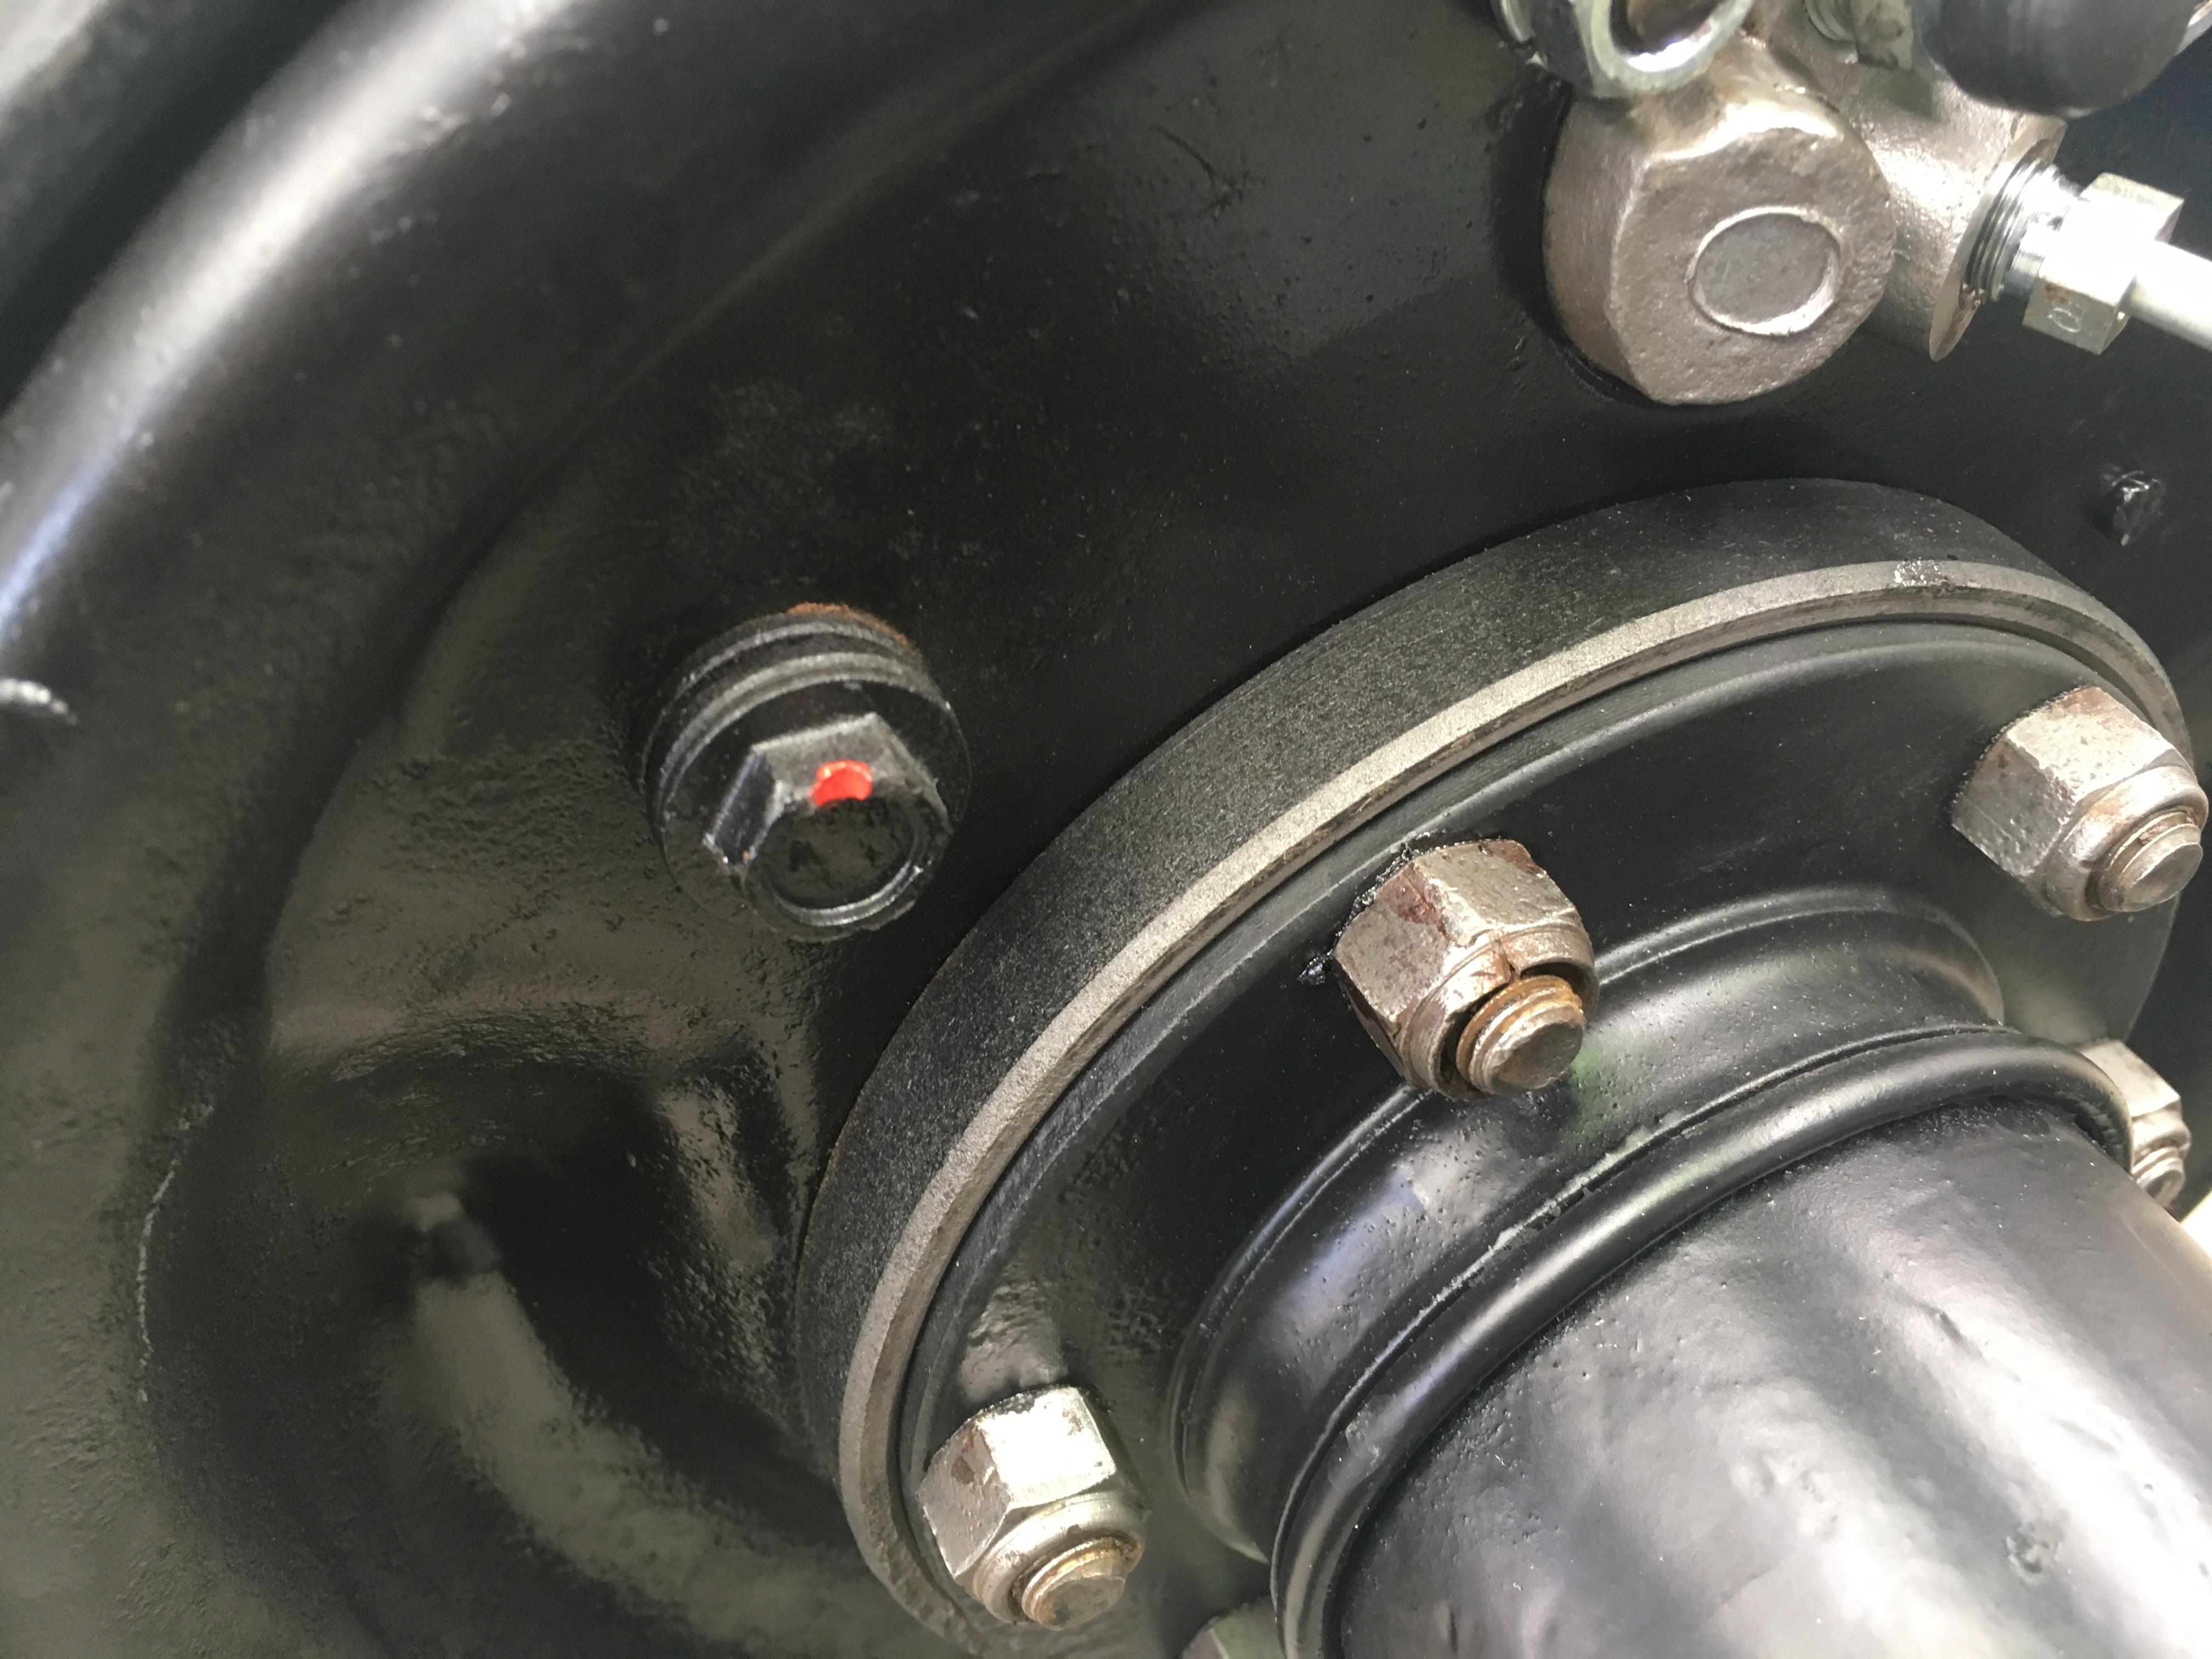
    Refitting the drain bung, wish I'd figured this out earlier


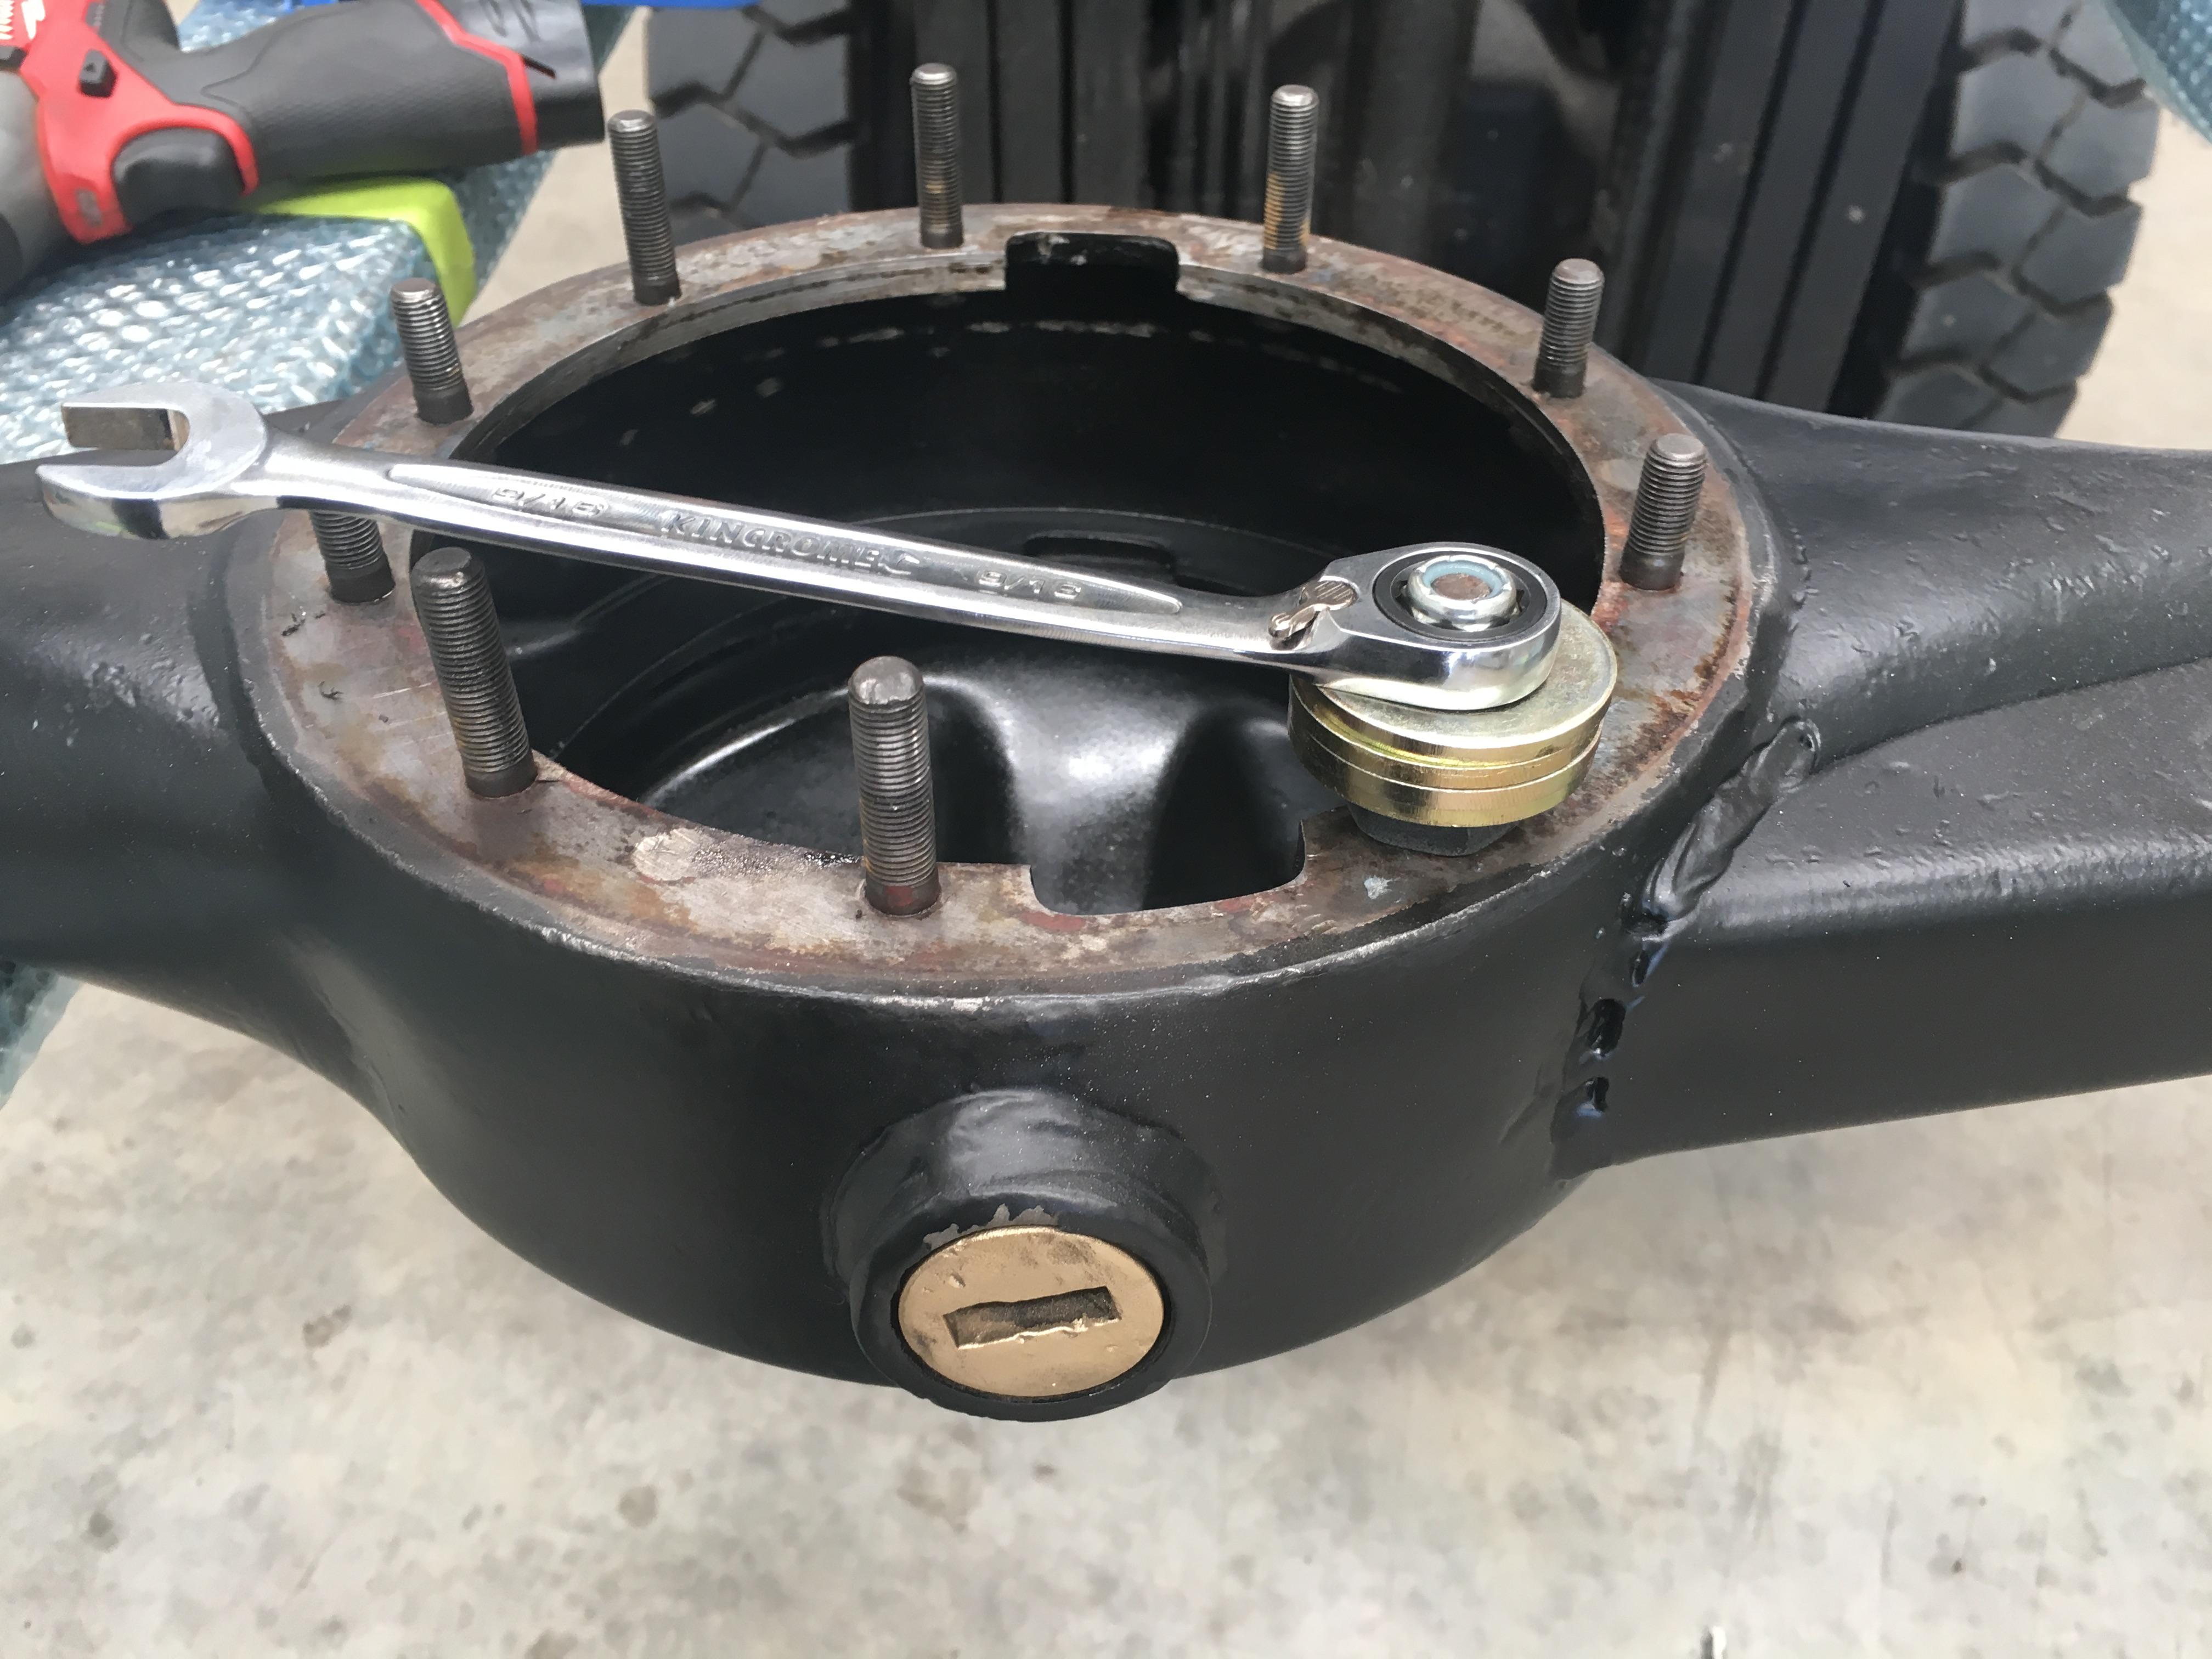
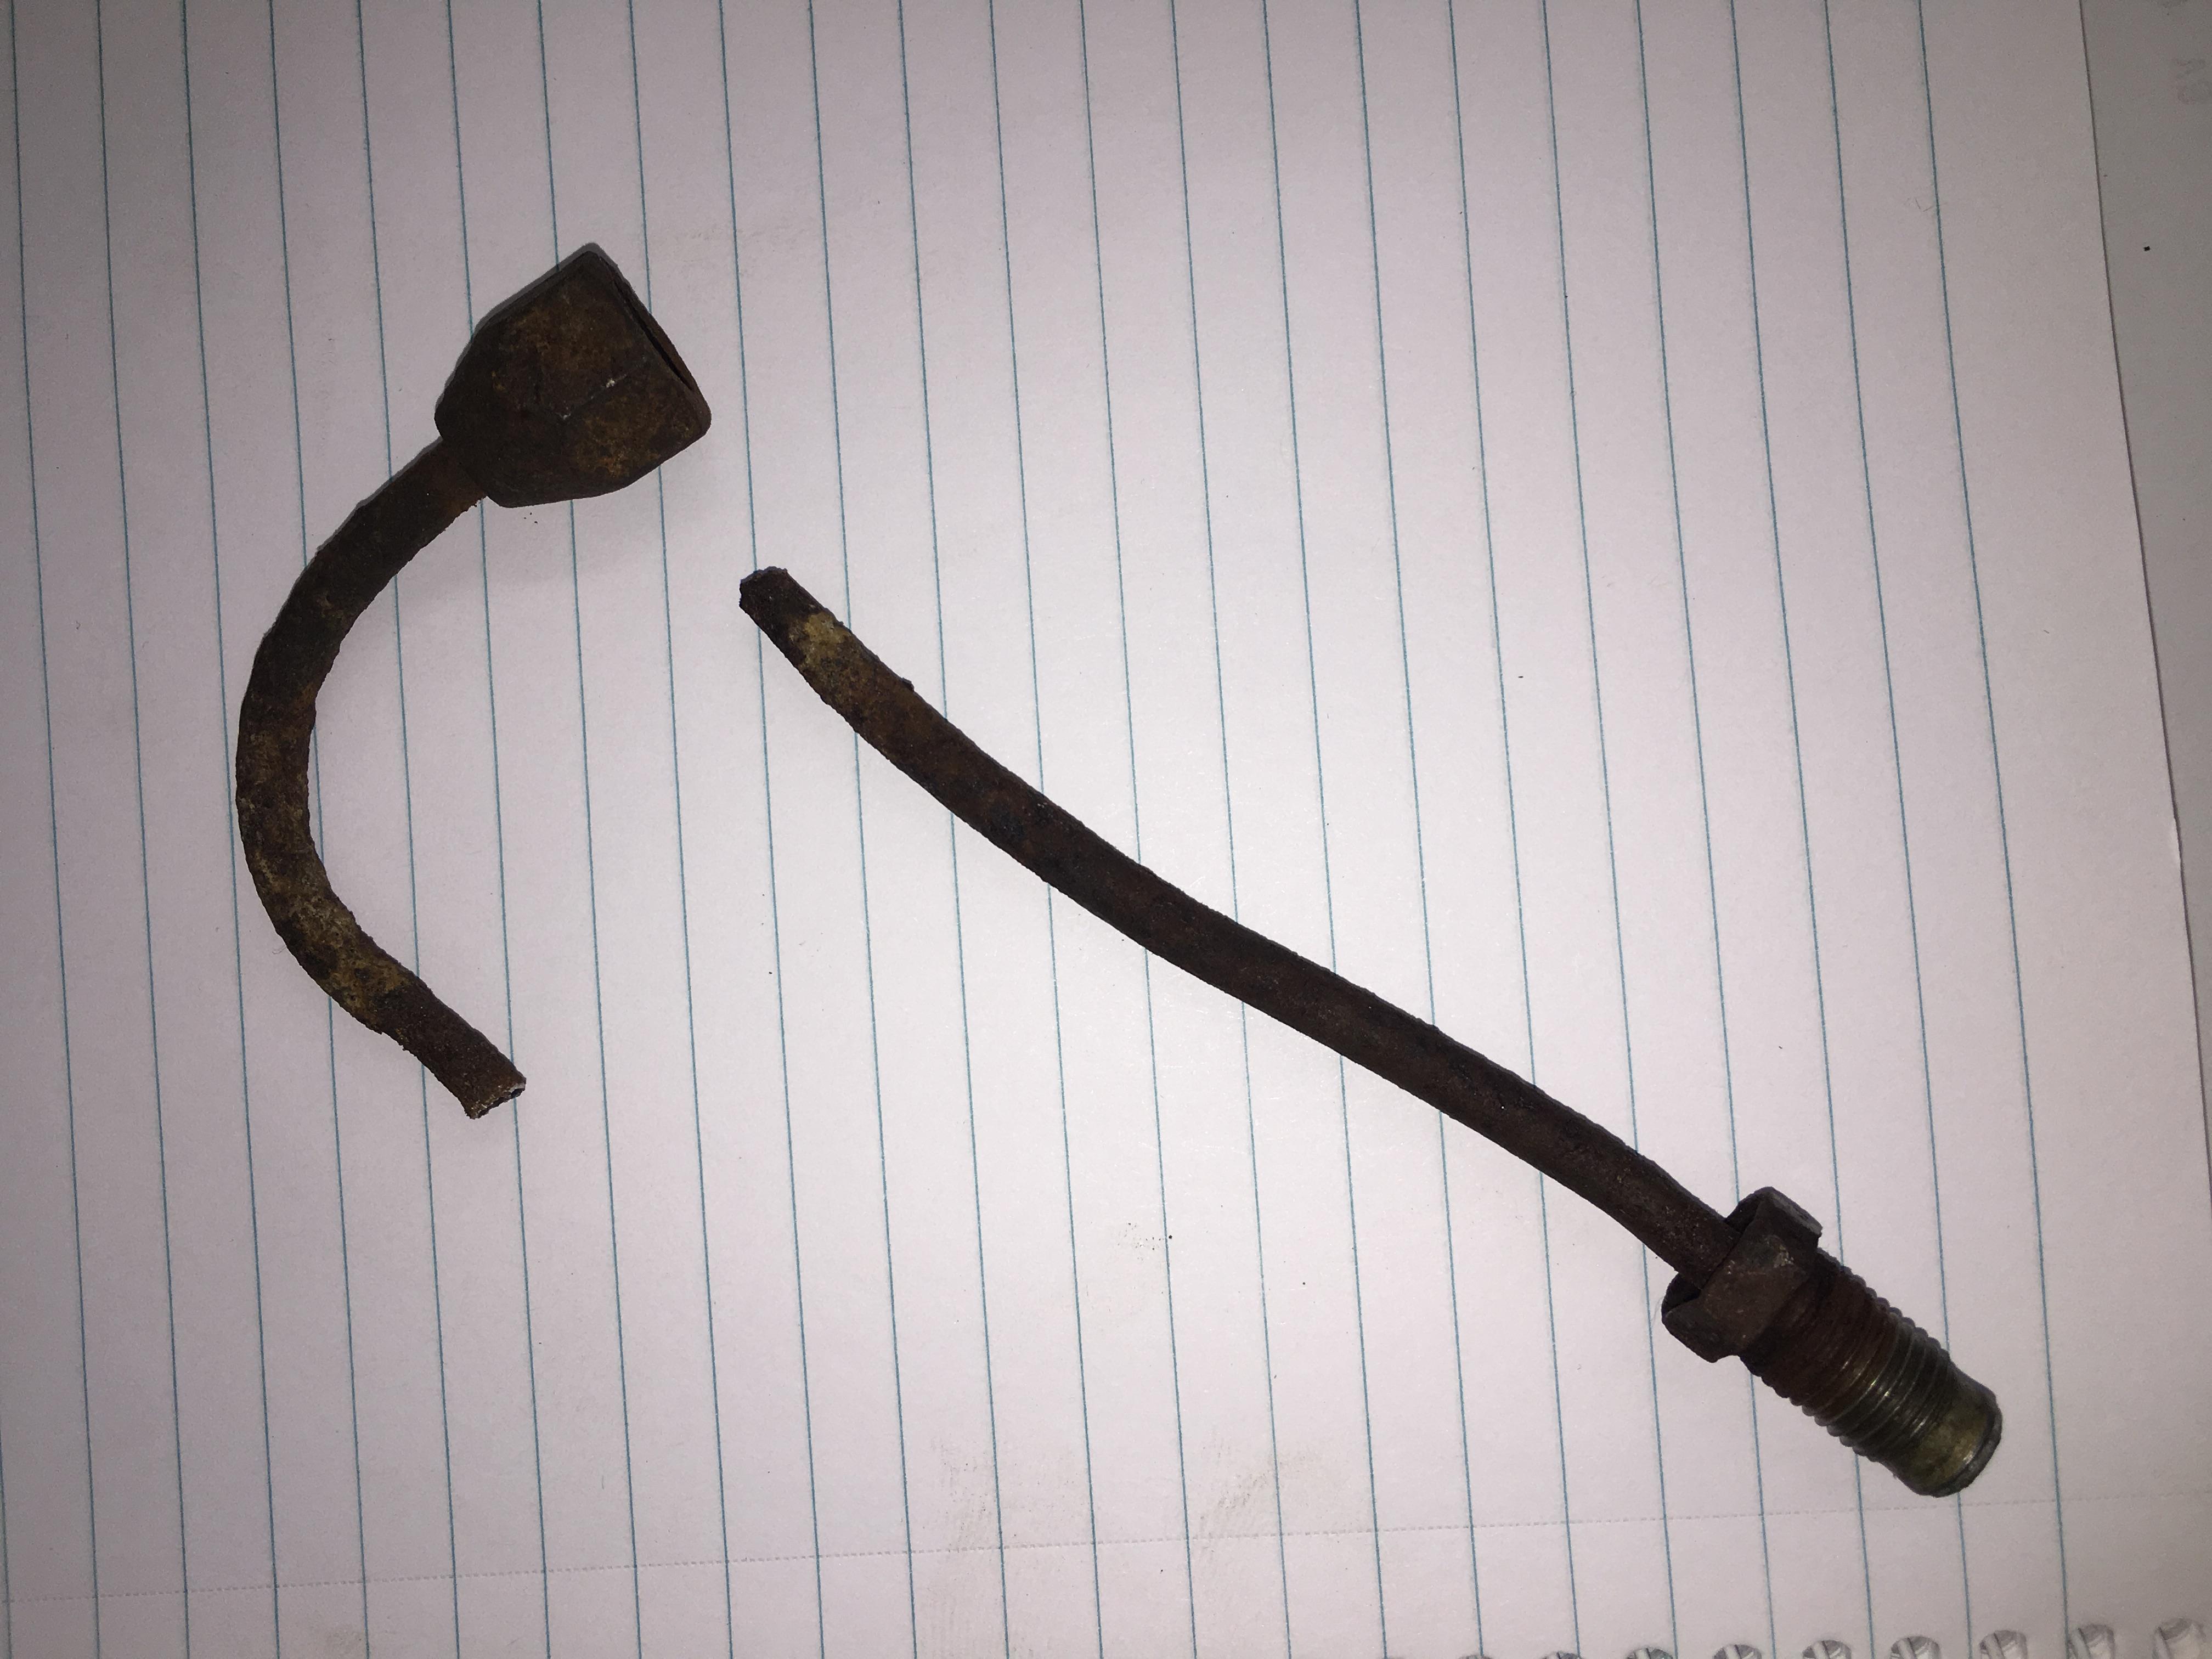
    Dropped the diff center in, and when I was tightening the nuts one of the studs came loose, I had to hold it up with some pliers and cut it off.


    Robbed a spare stud from the spare axle tube and pulled it up tight with some spacers and a nut
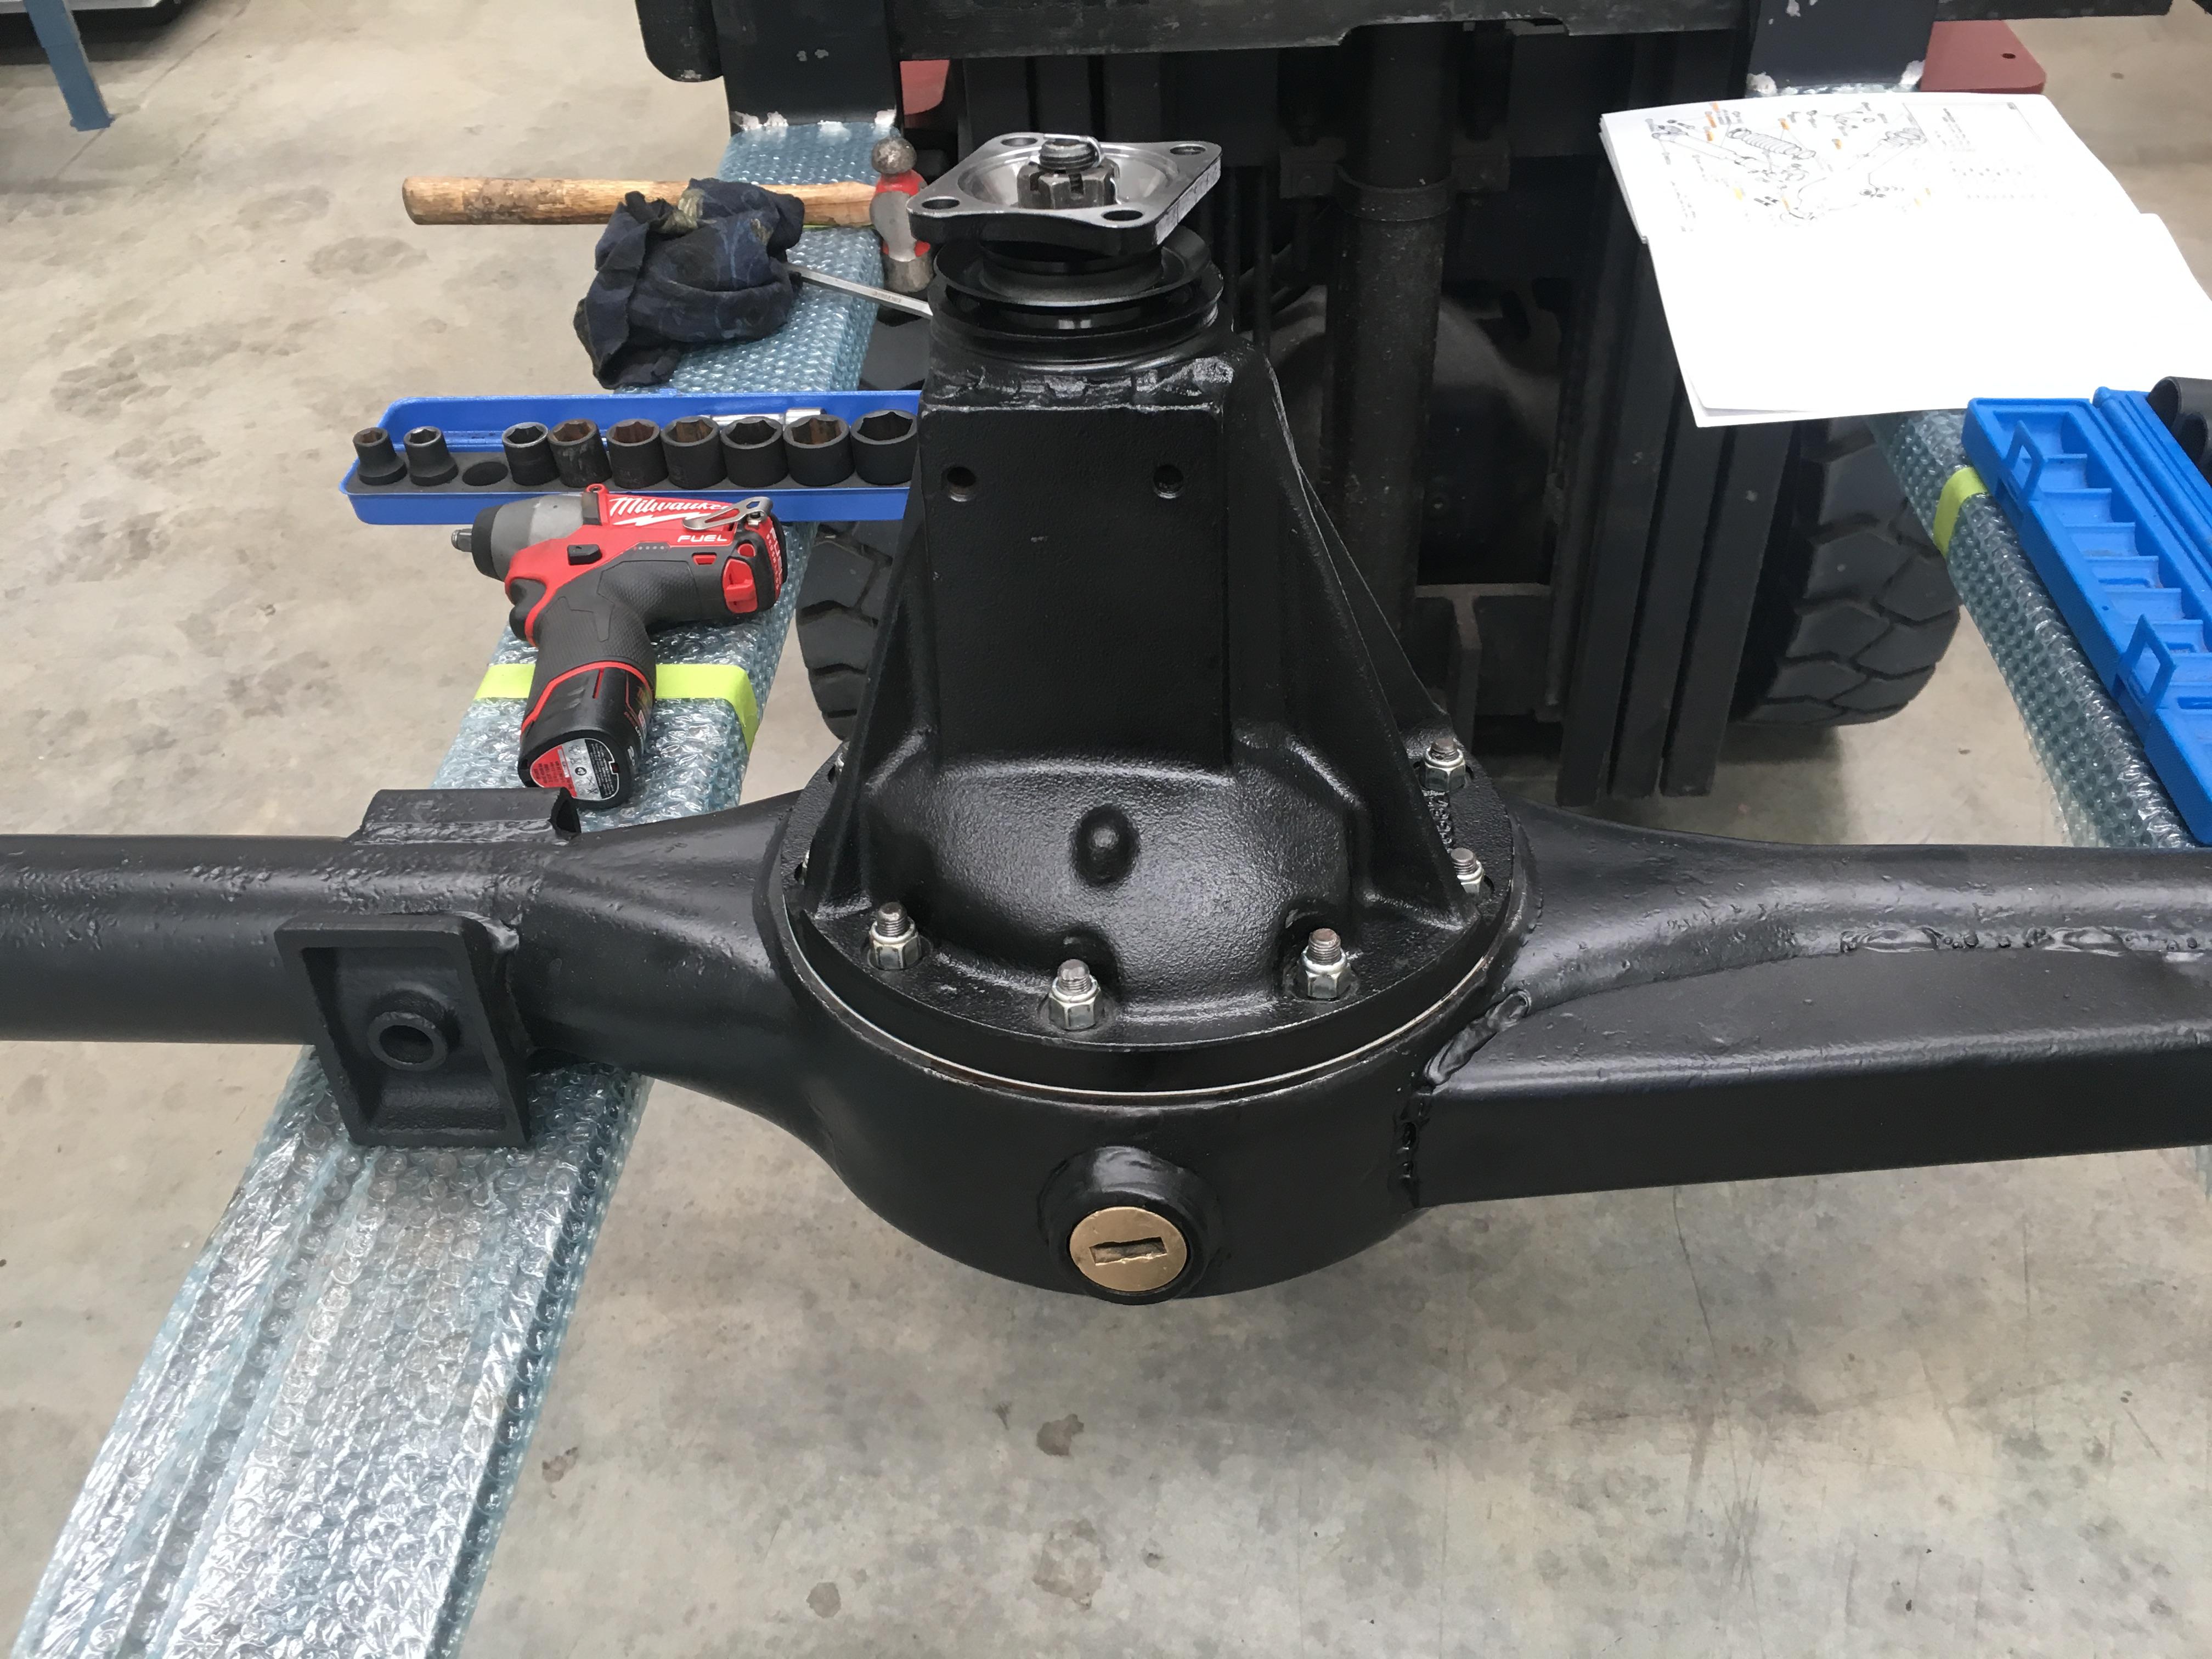


    Diff center in


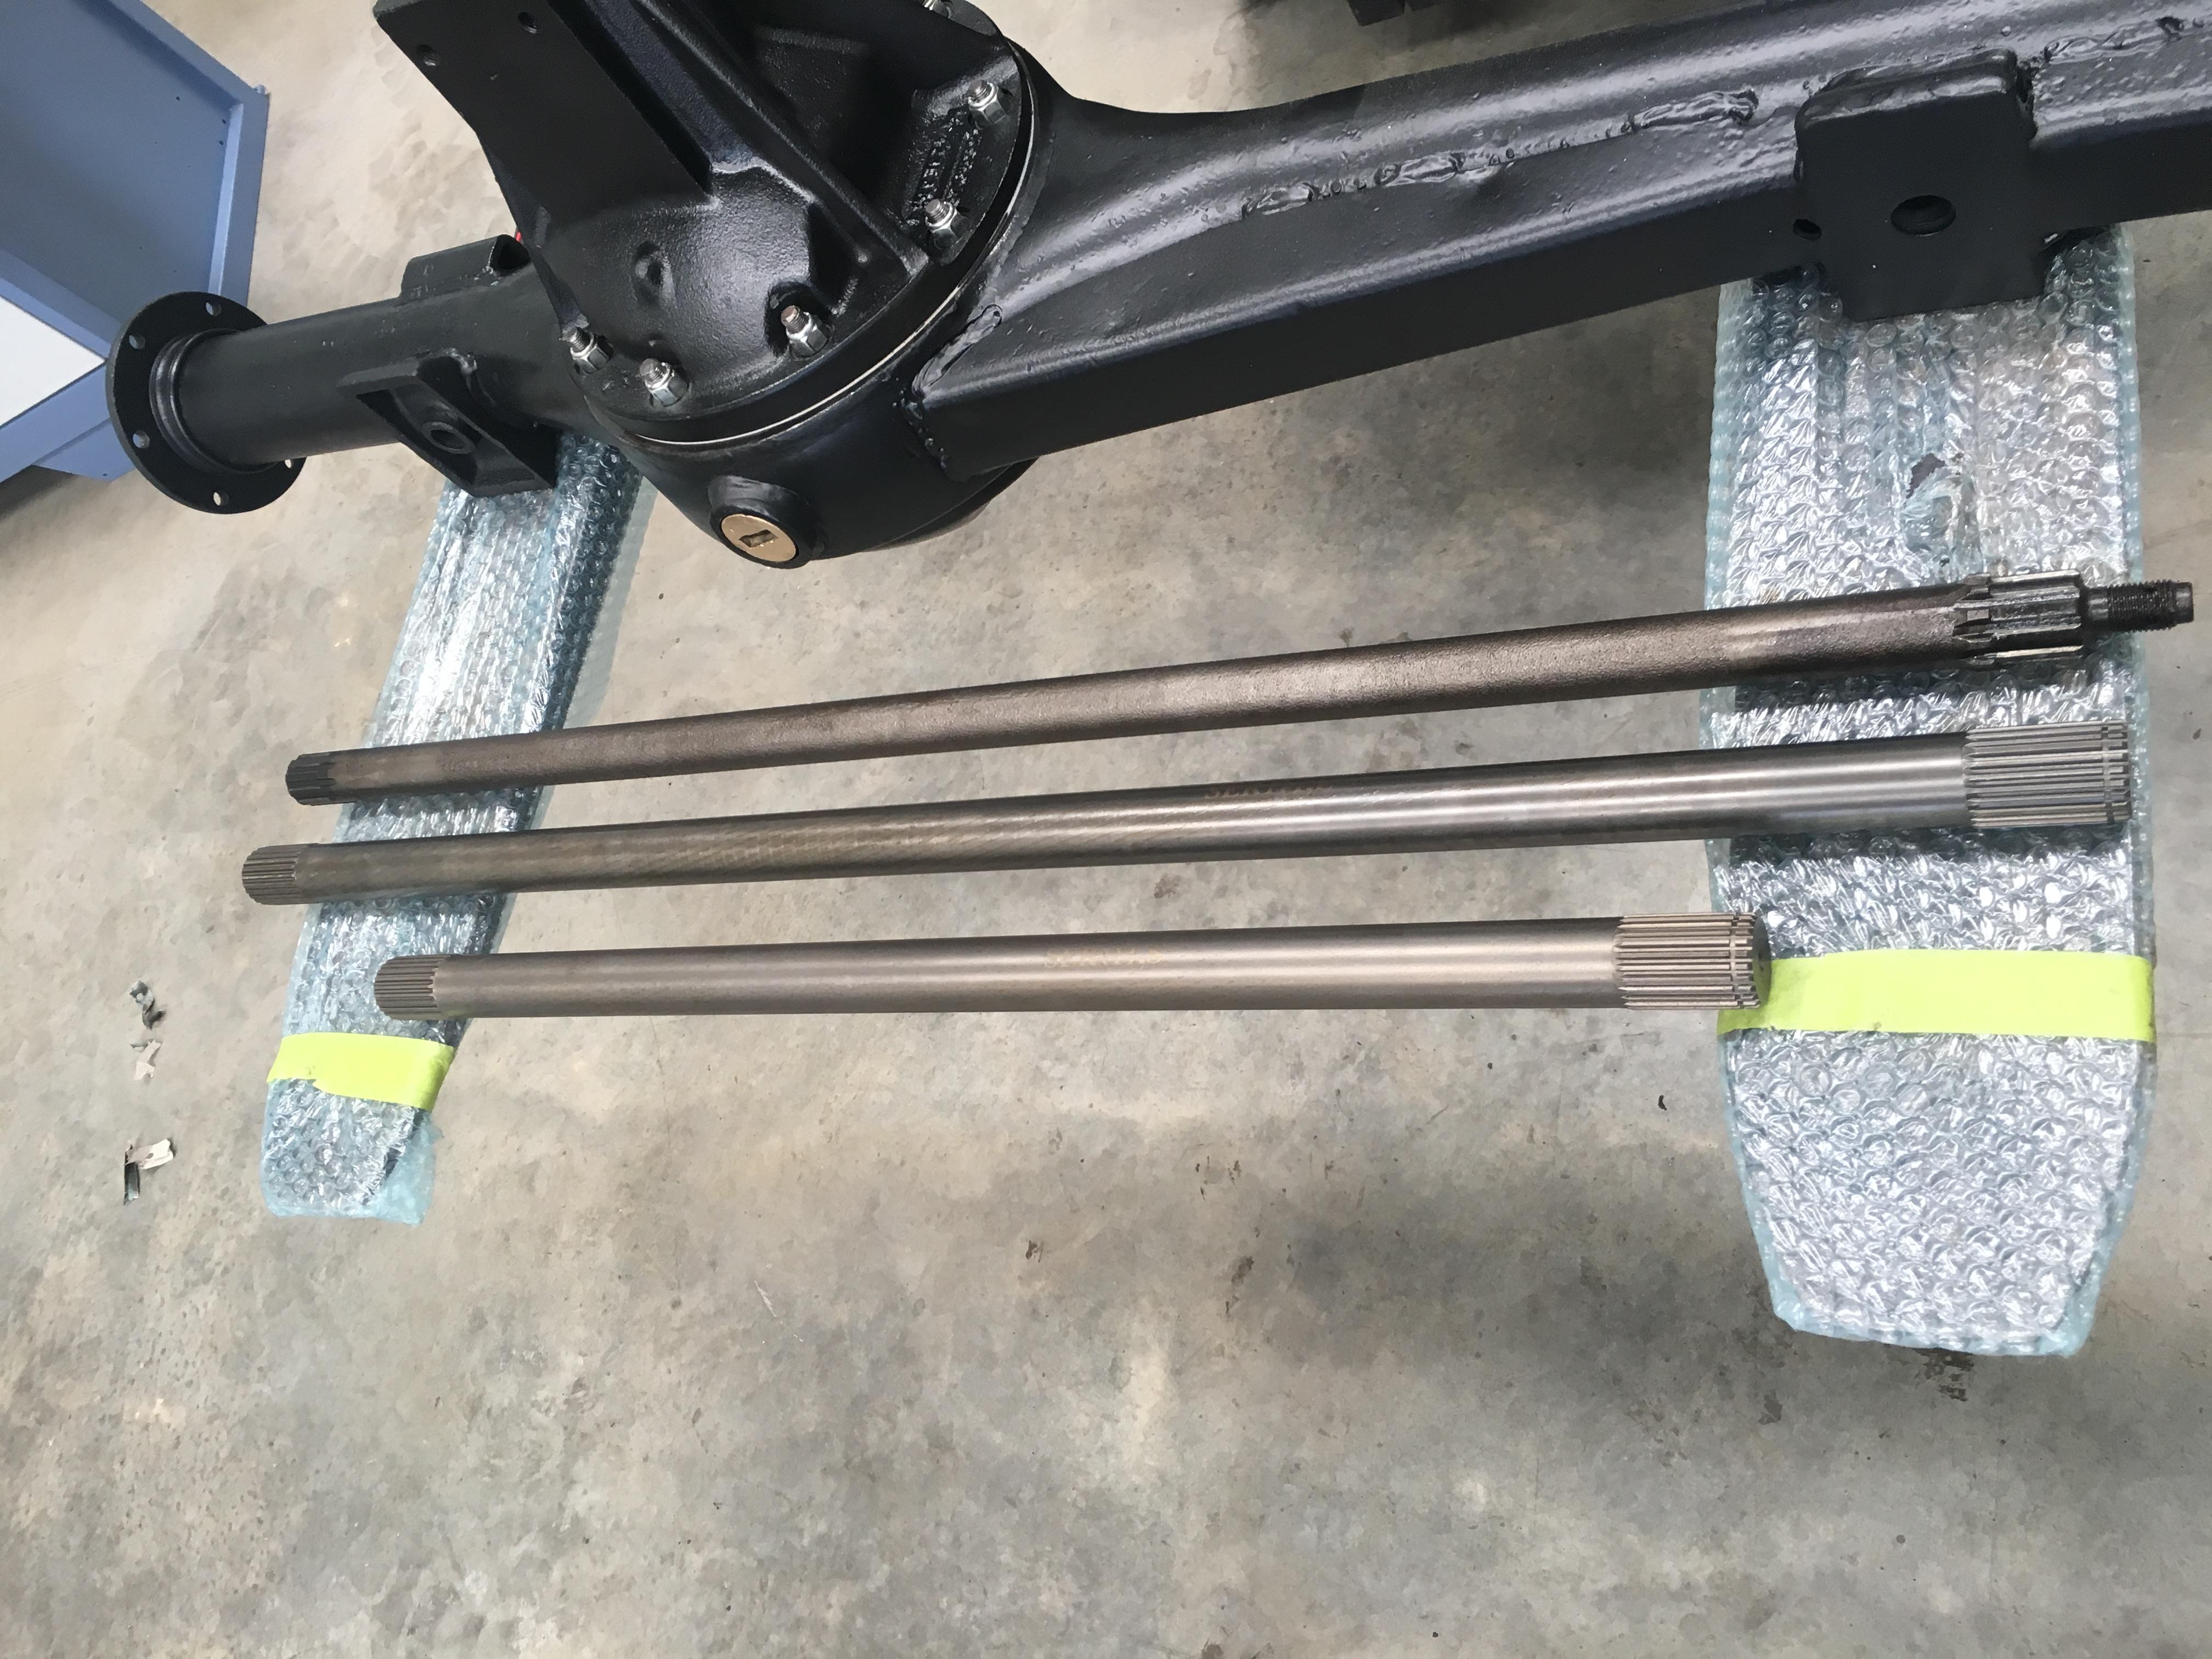
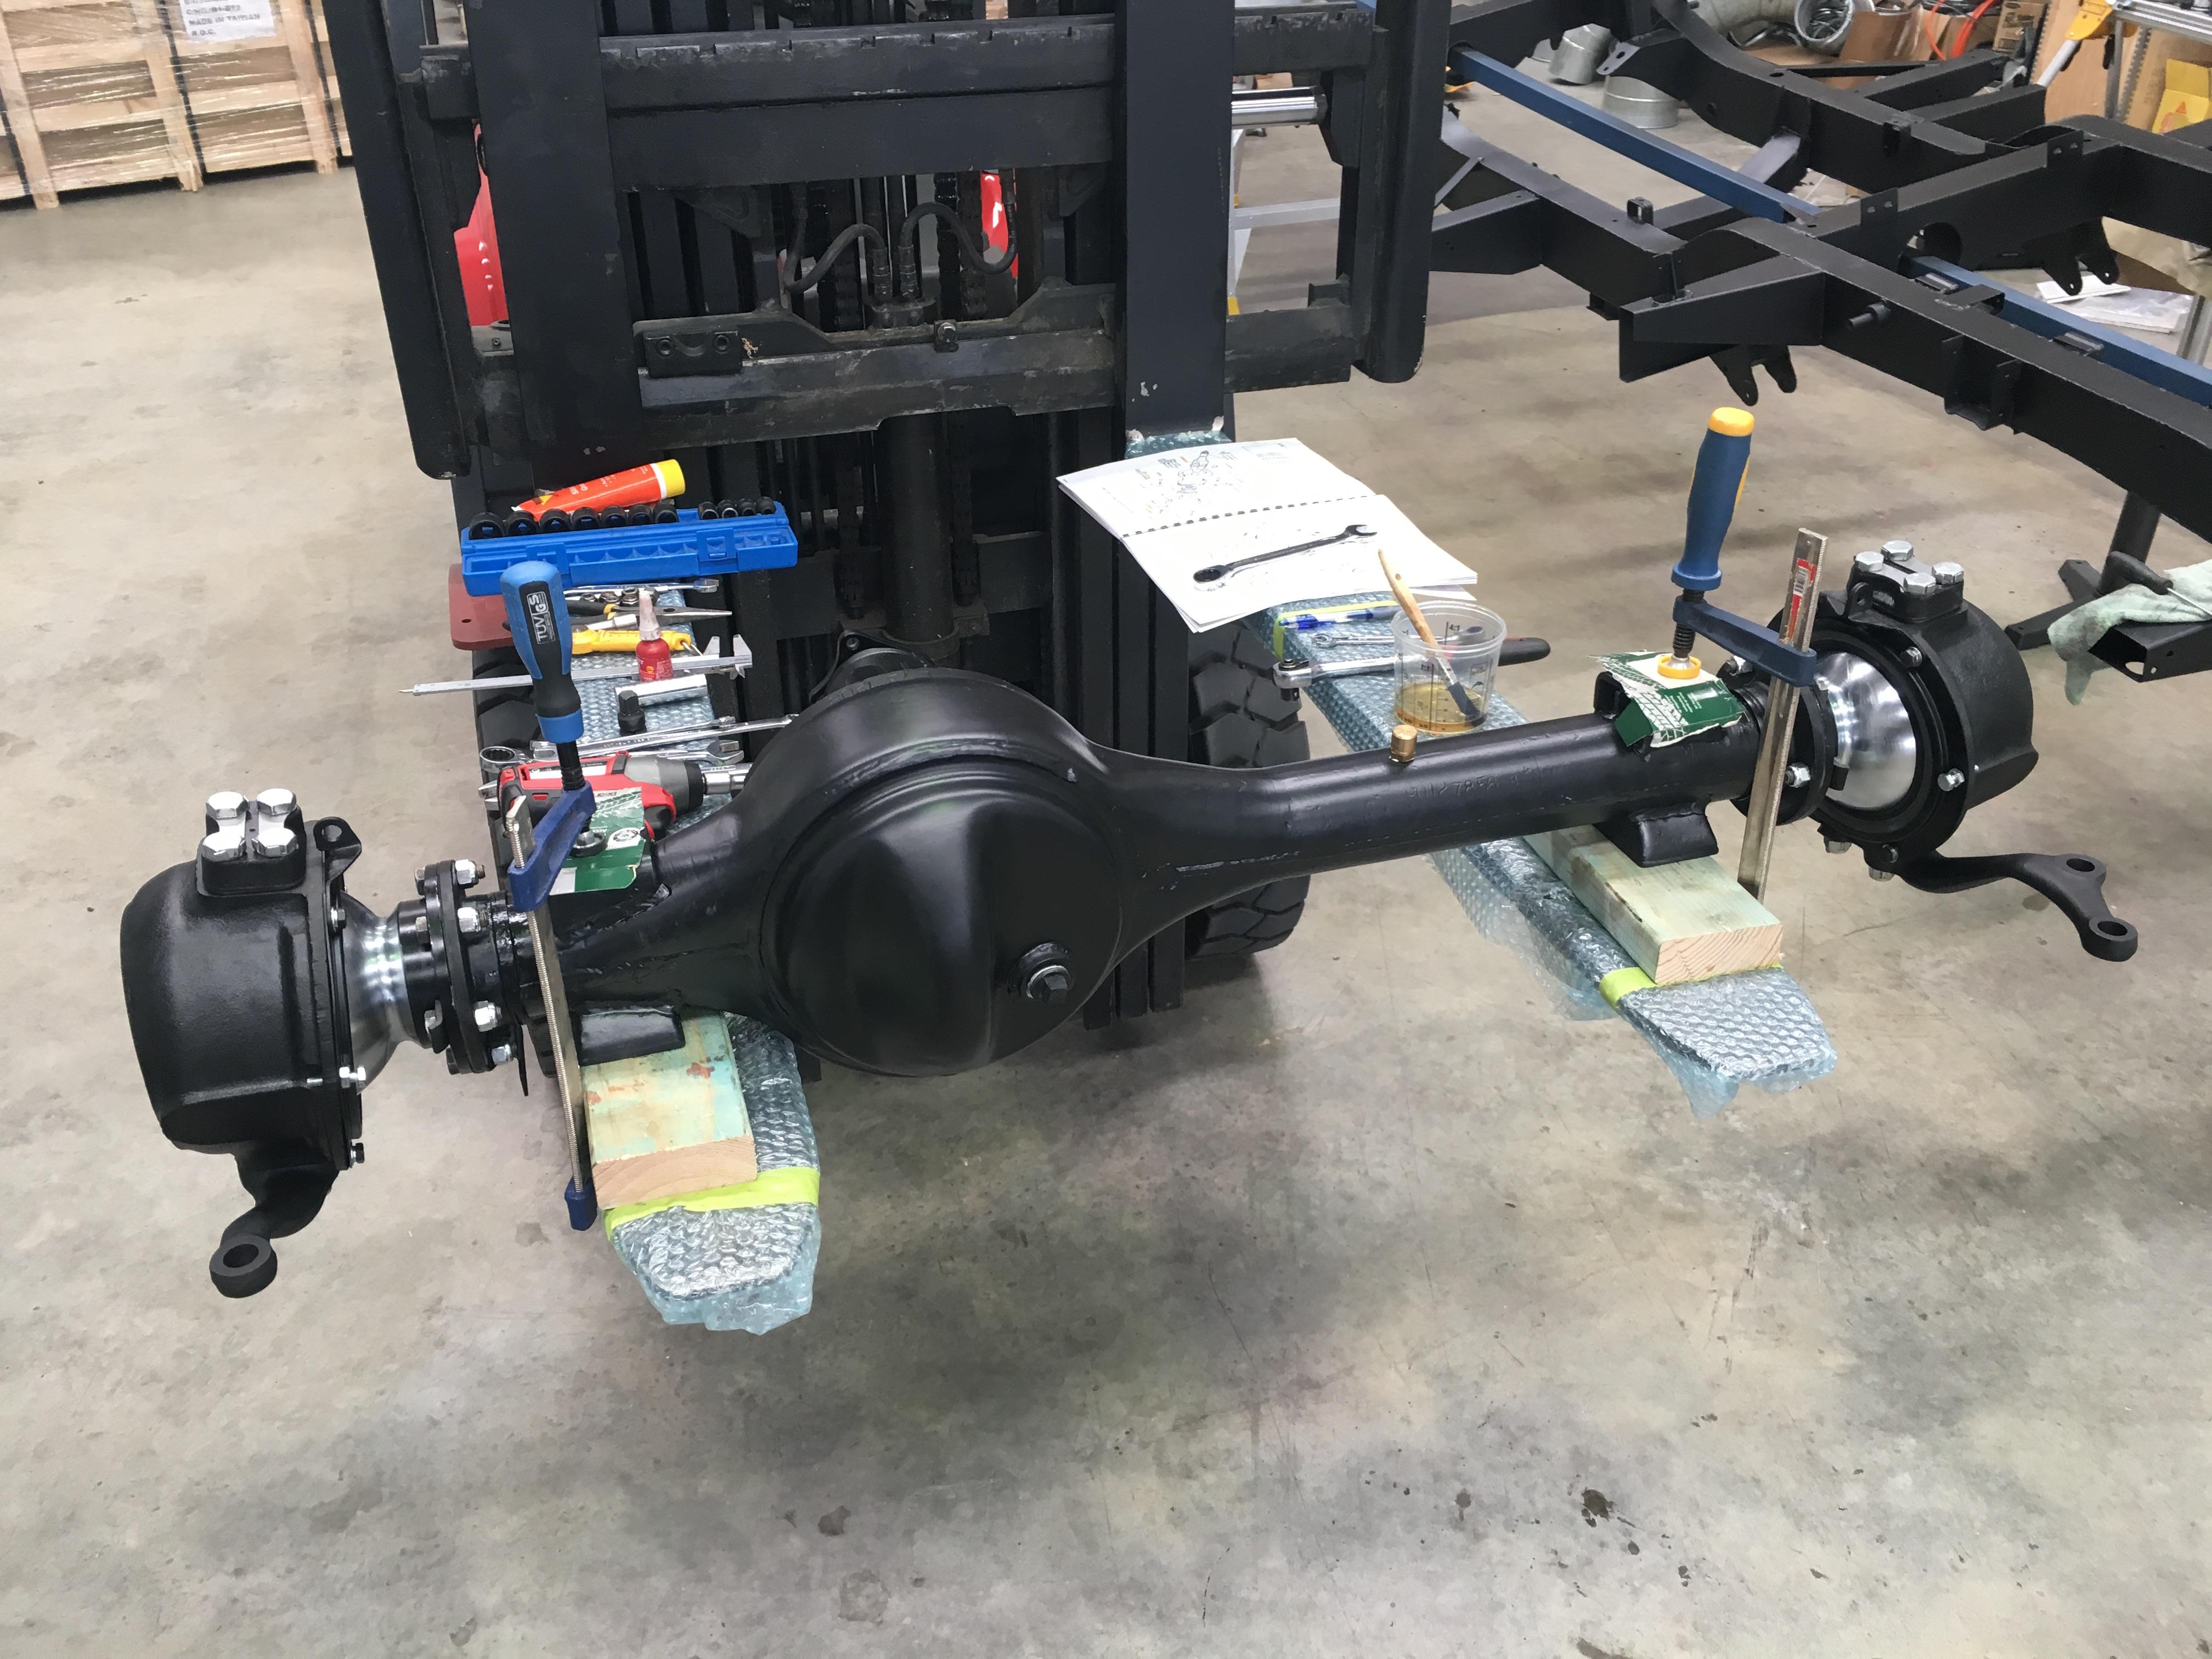
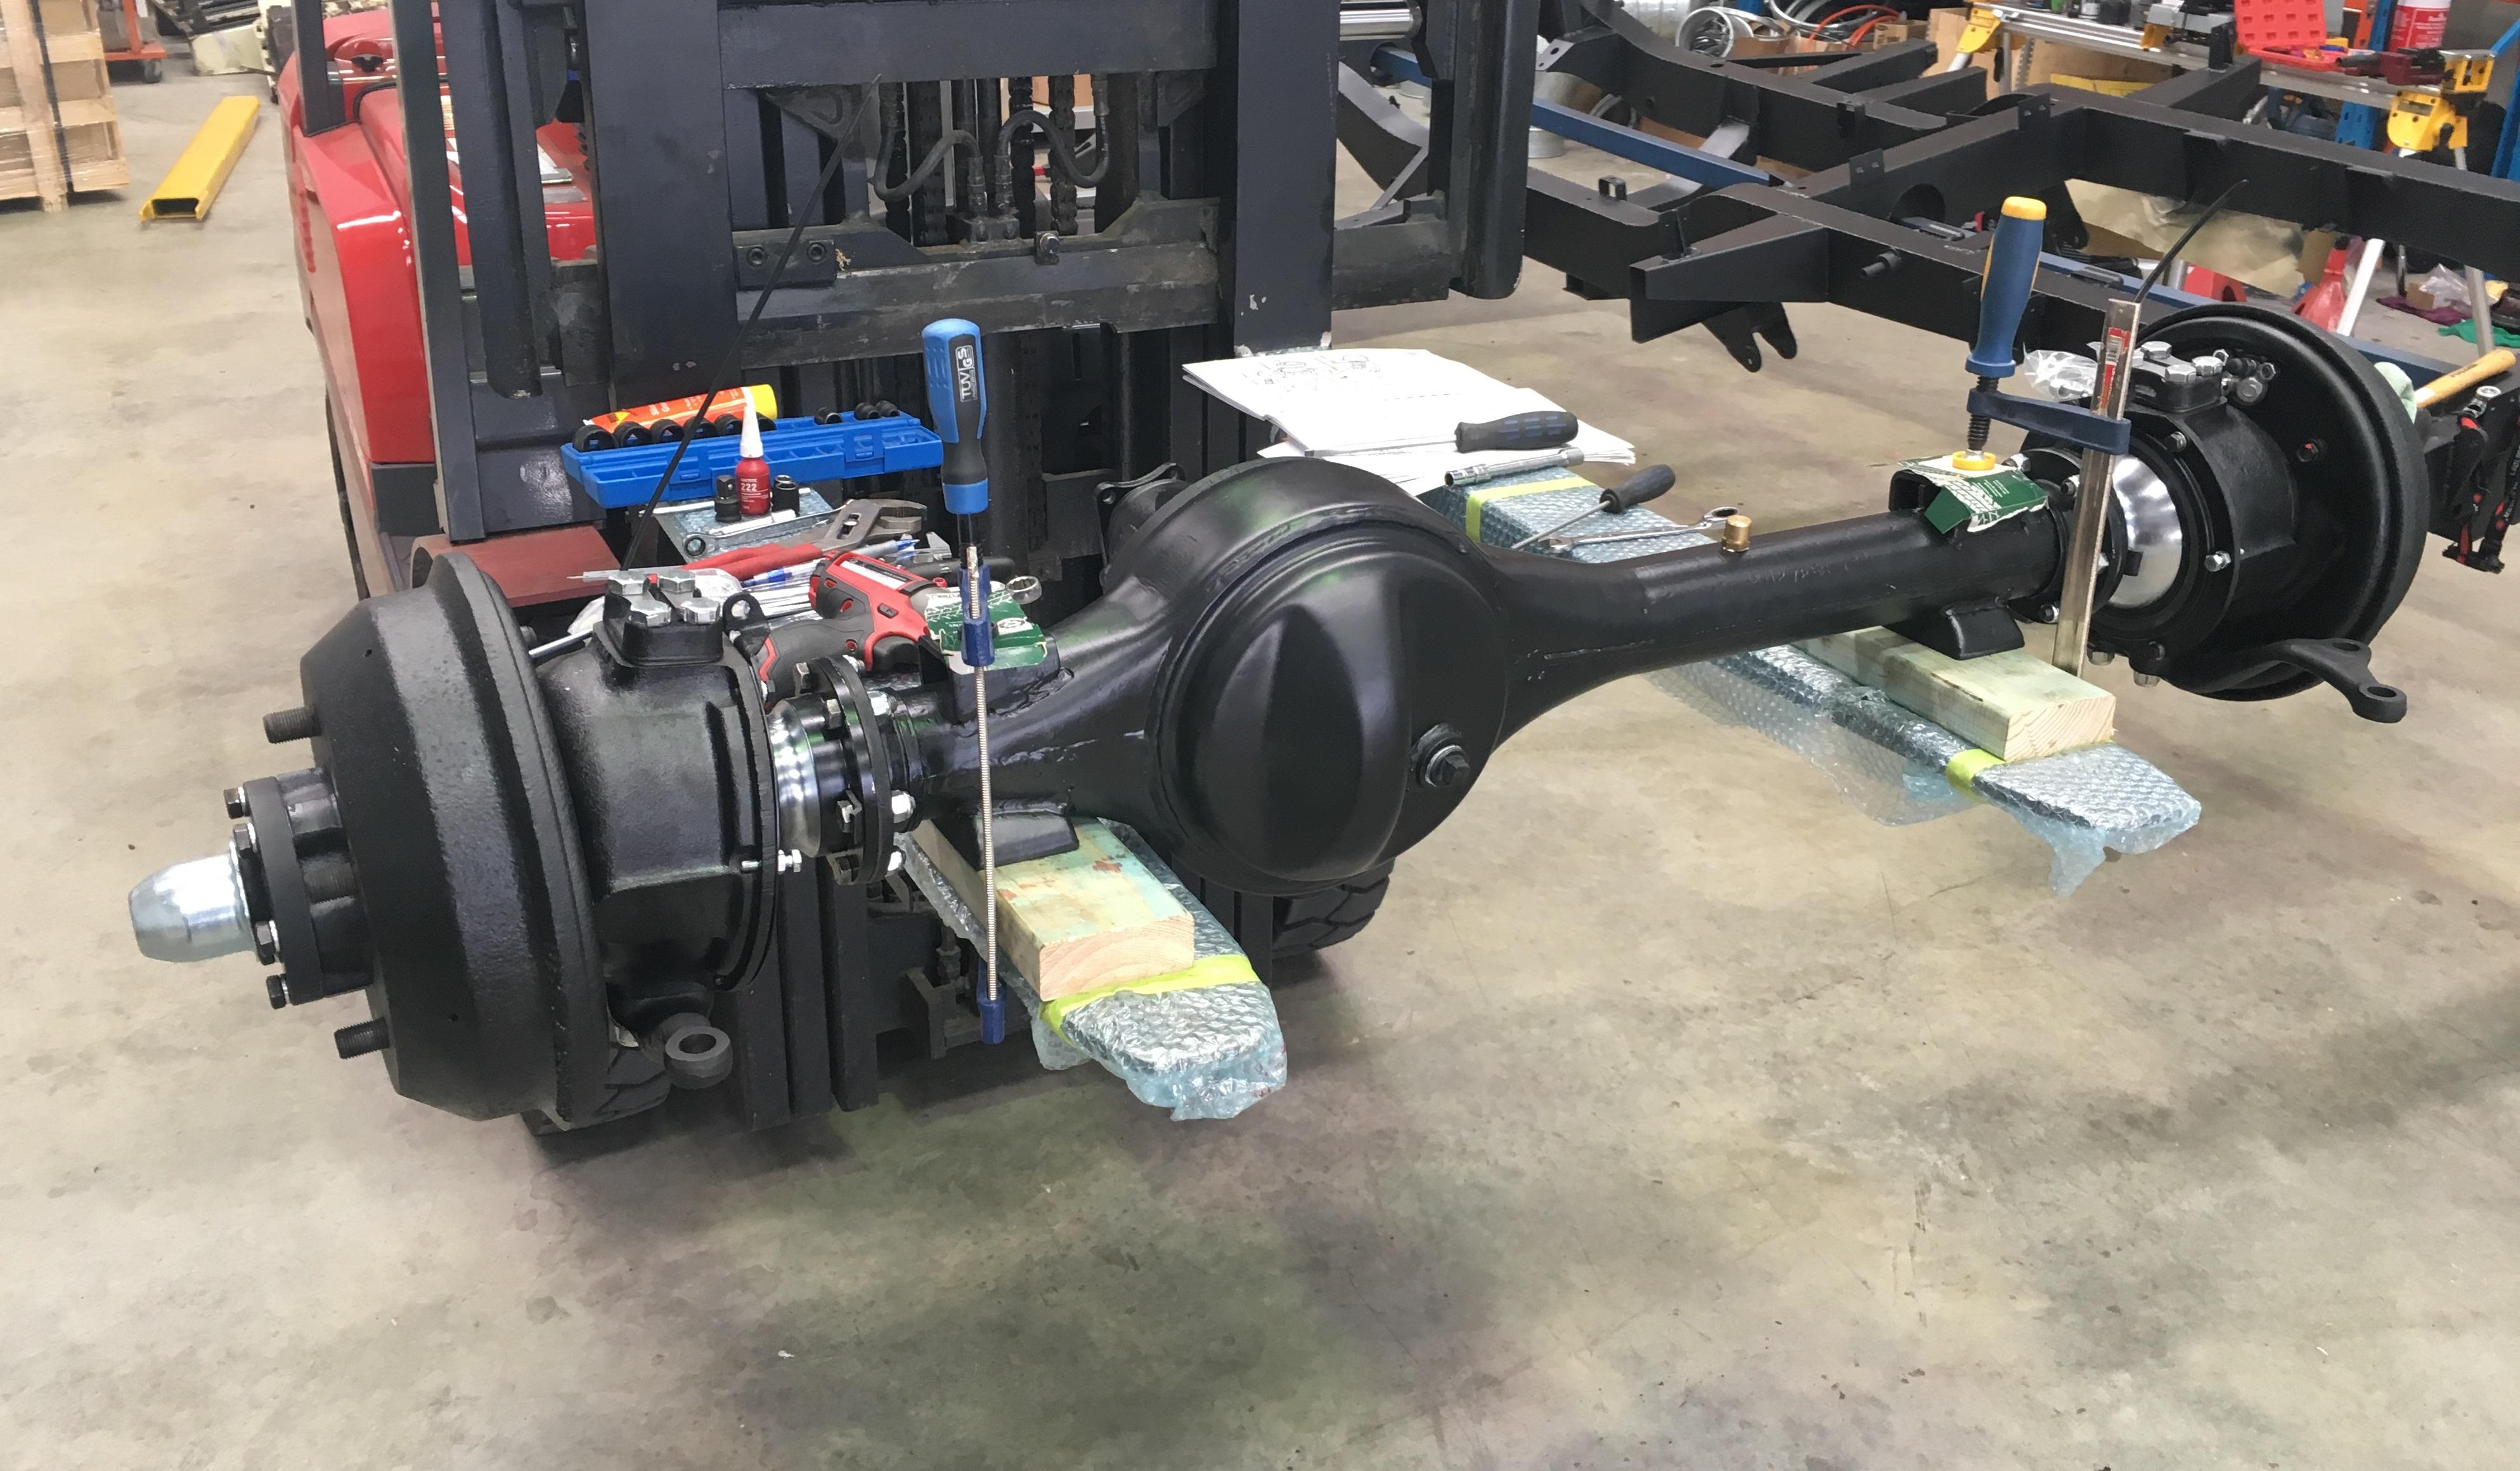
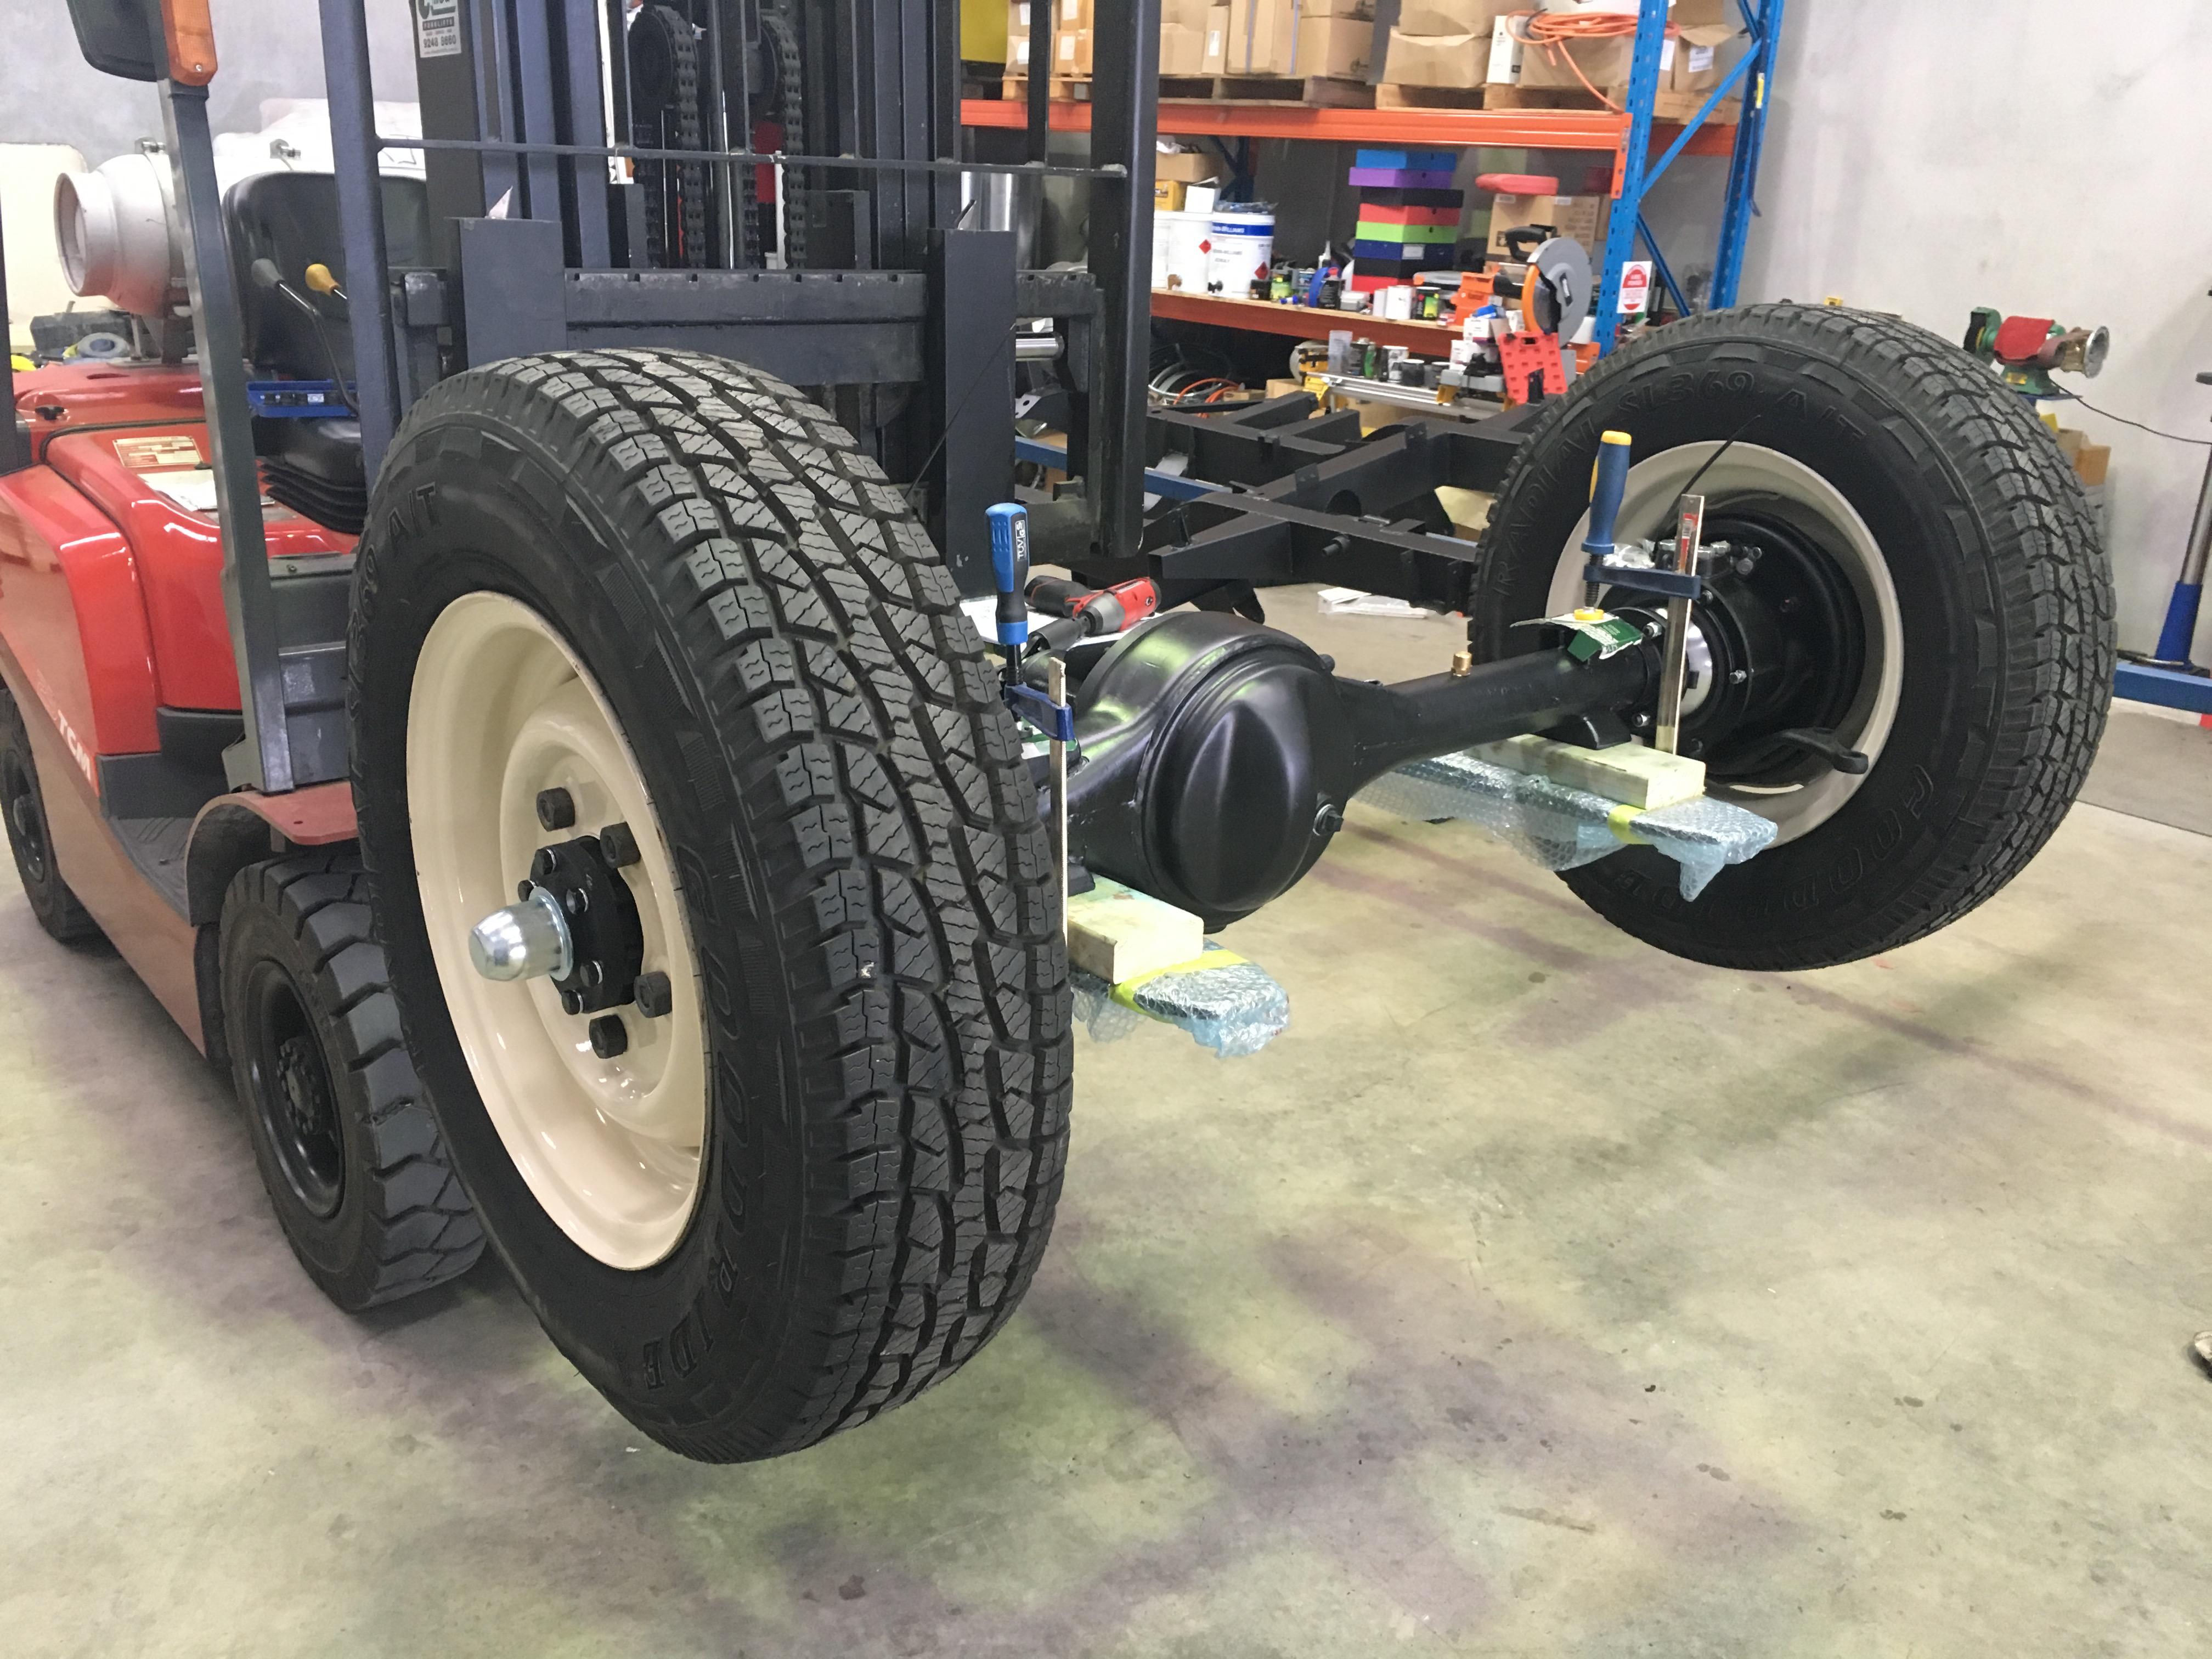
    And the reason for putting the Ashcroft center in the rear diff, new 24 spline HD axles


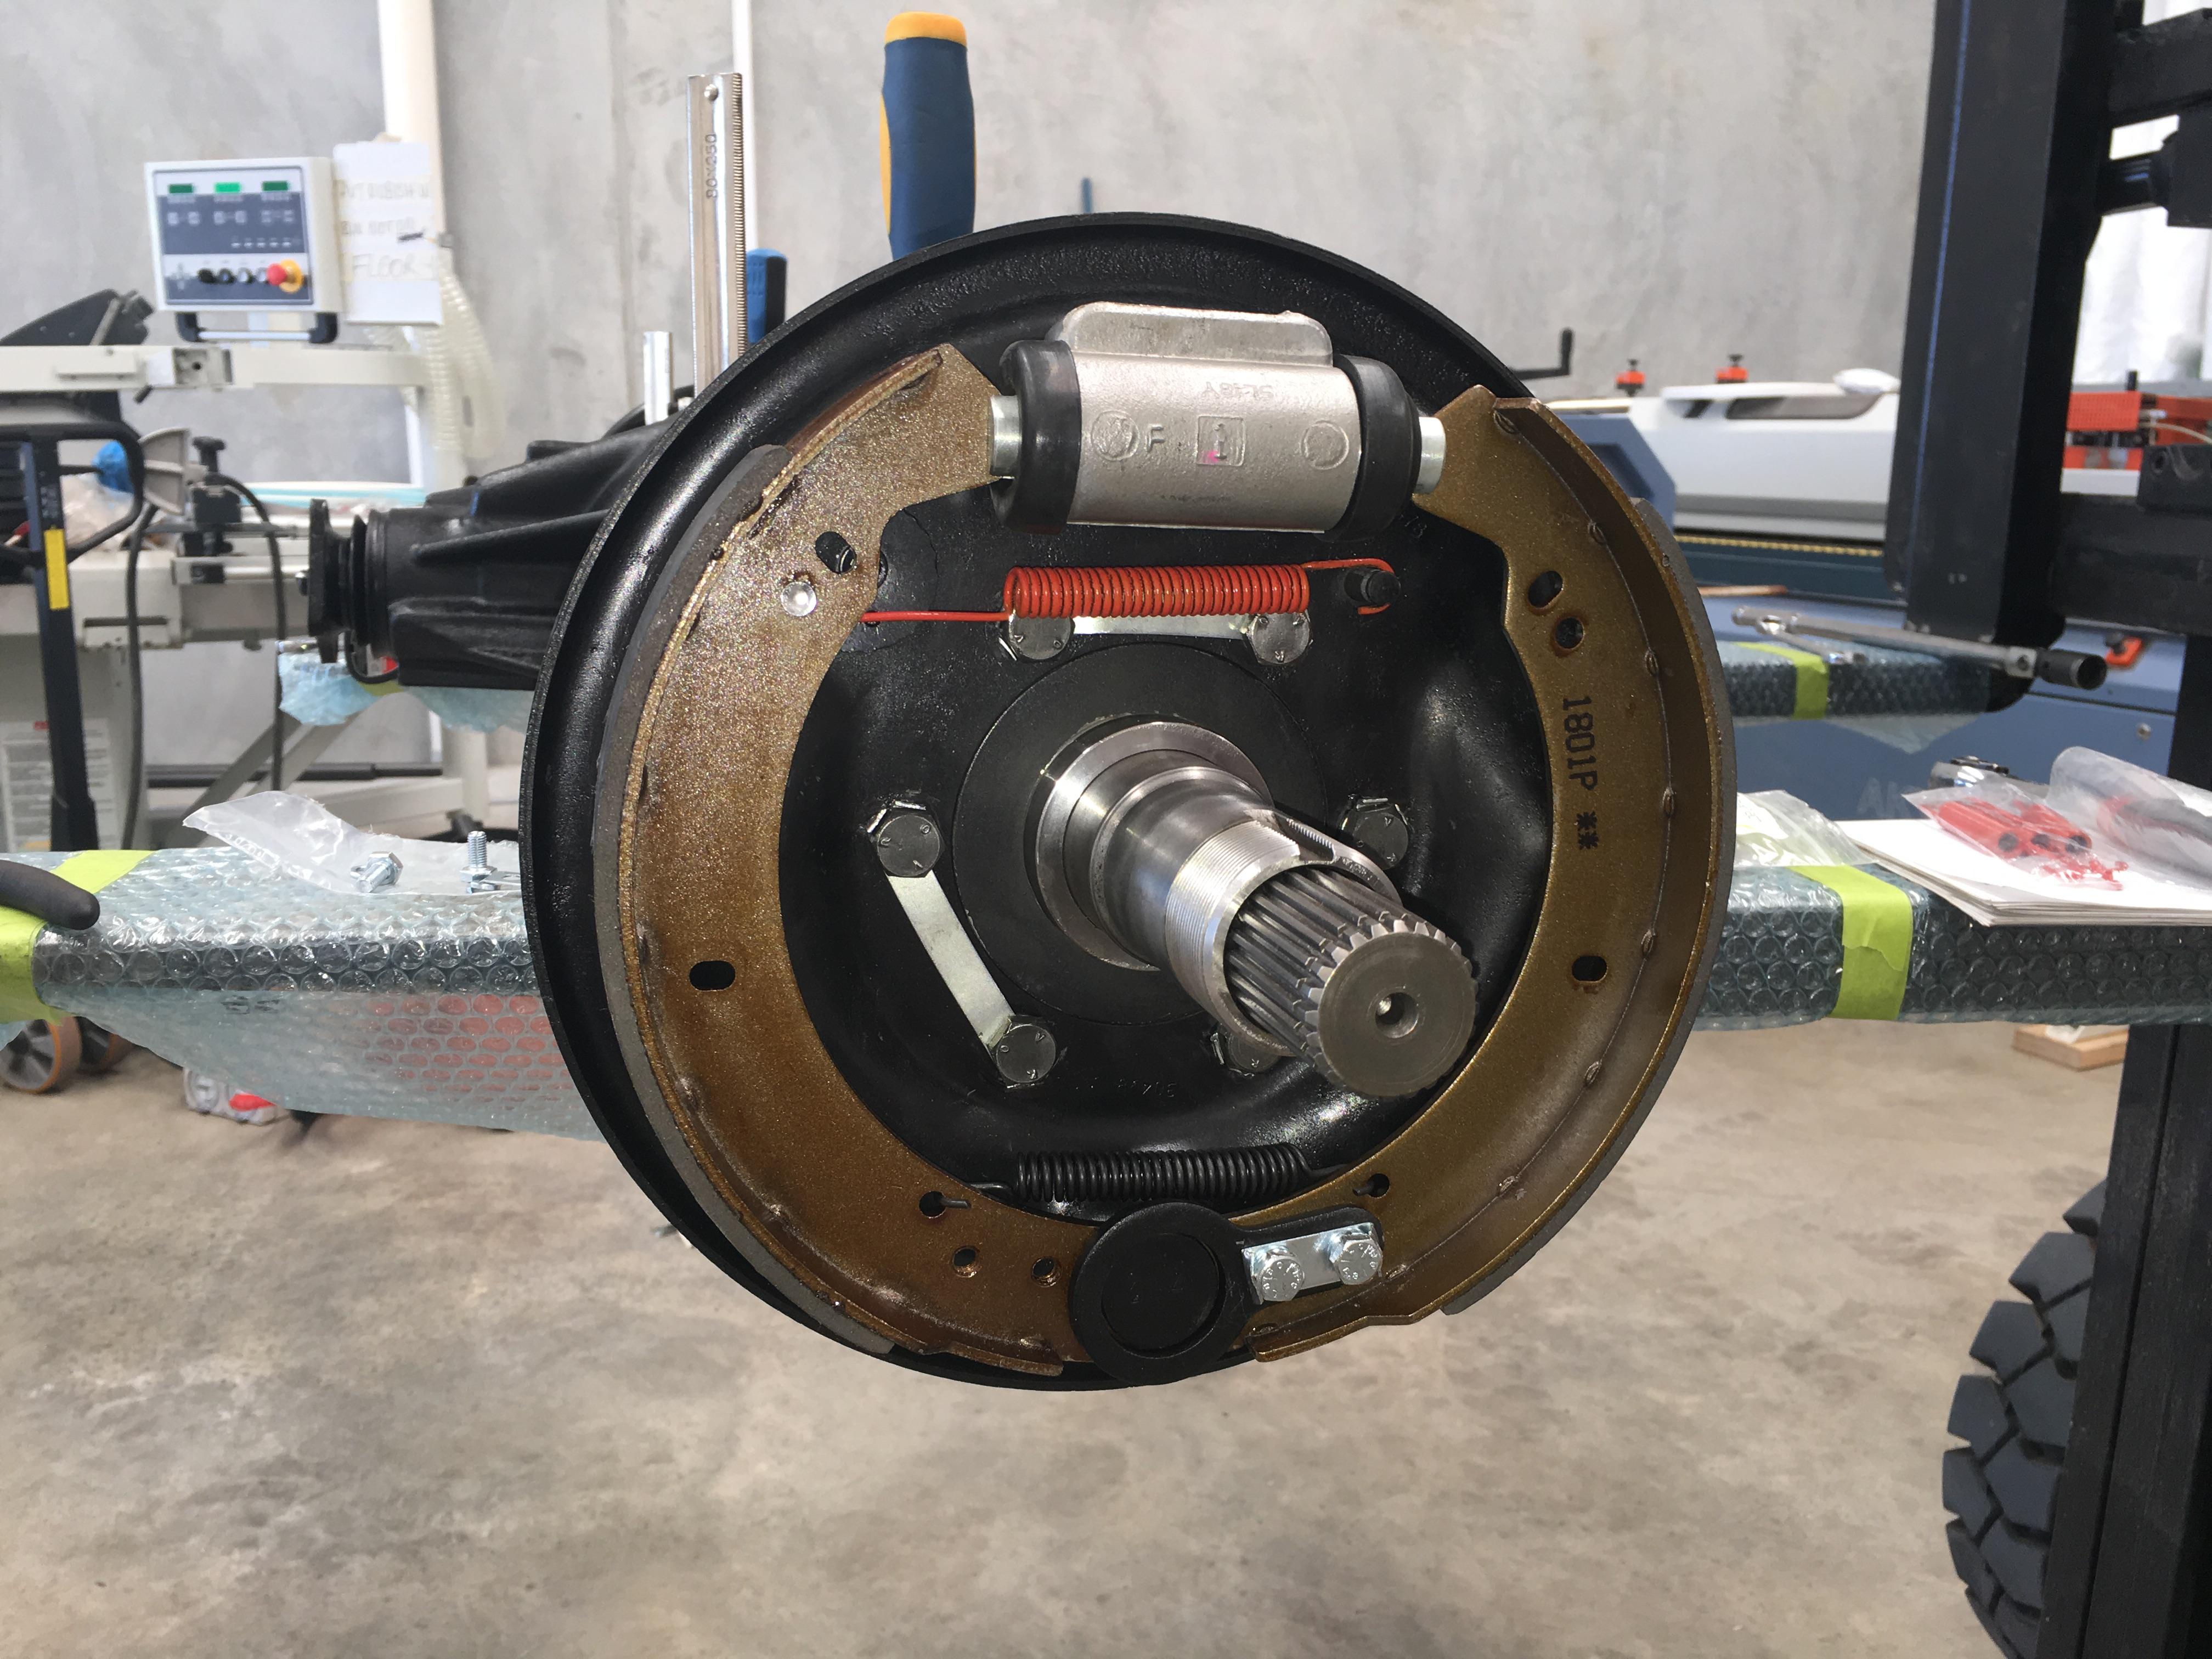
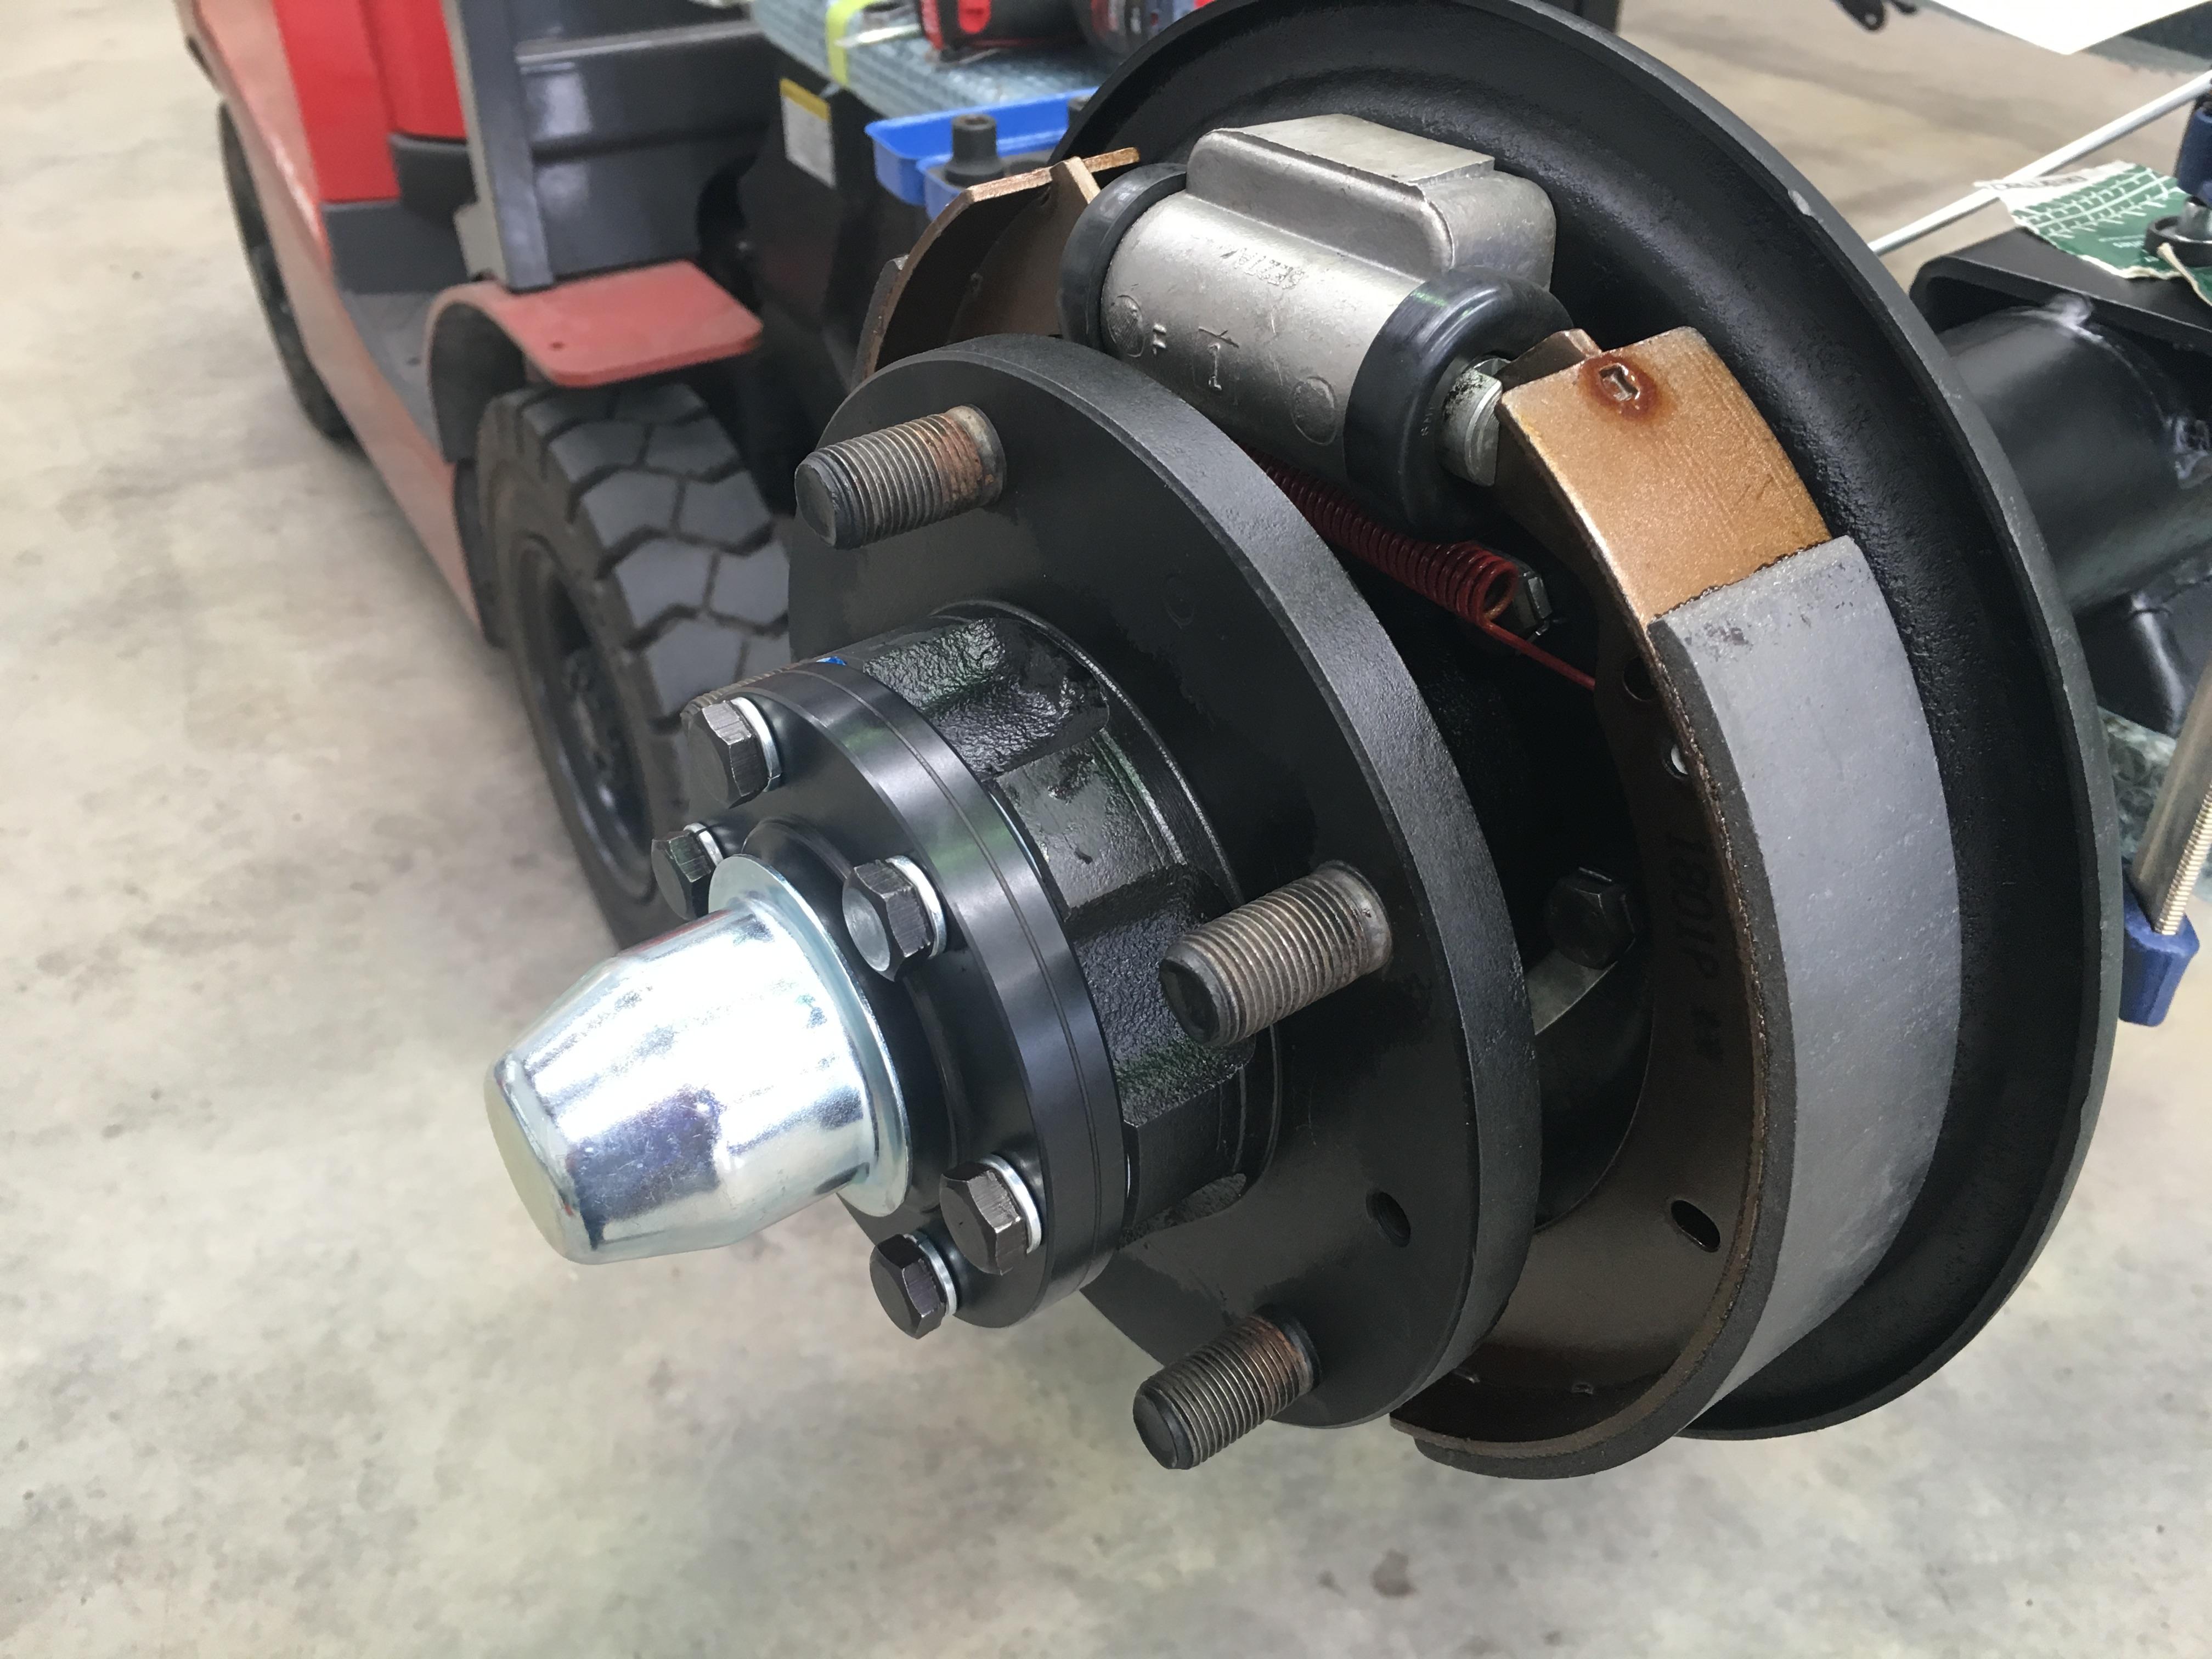
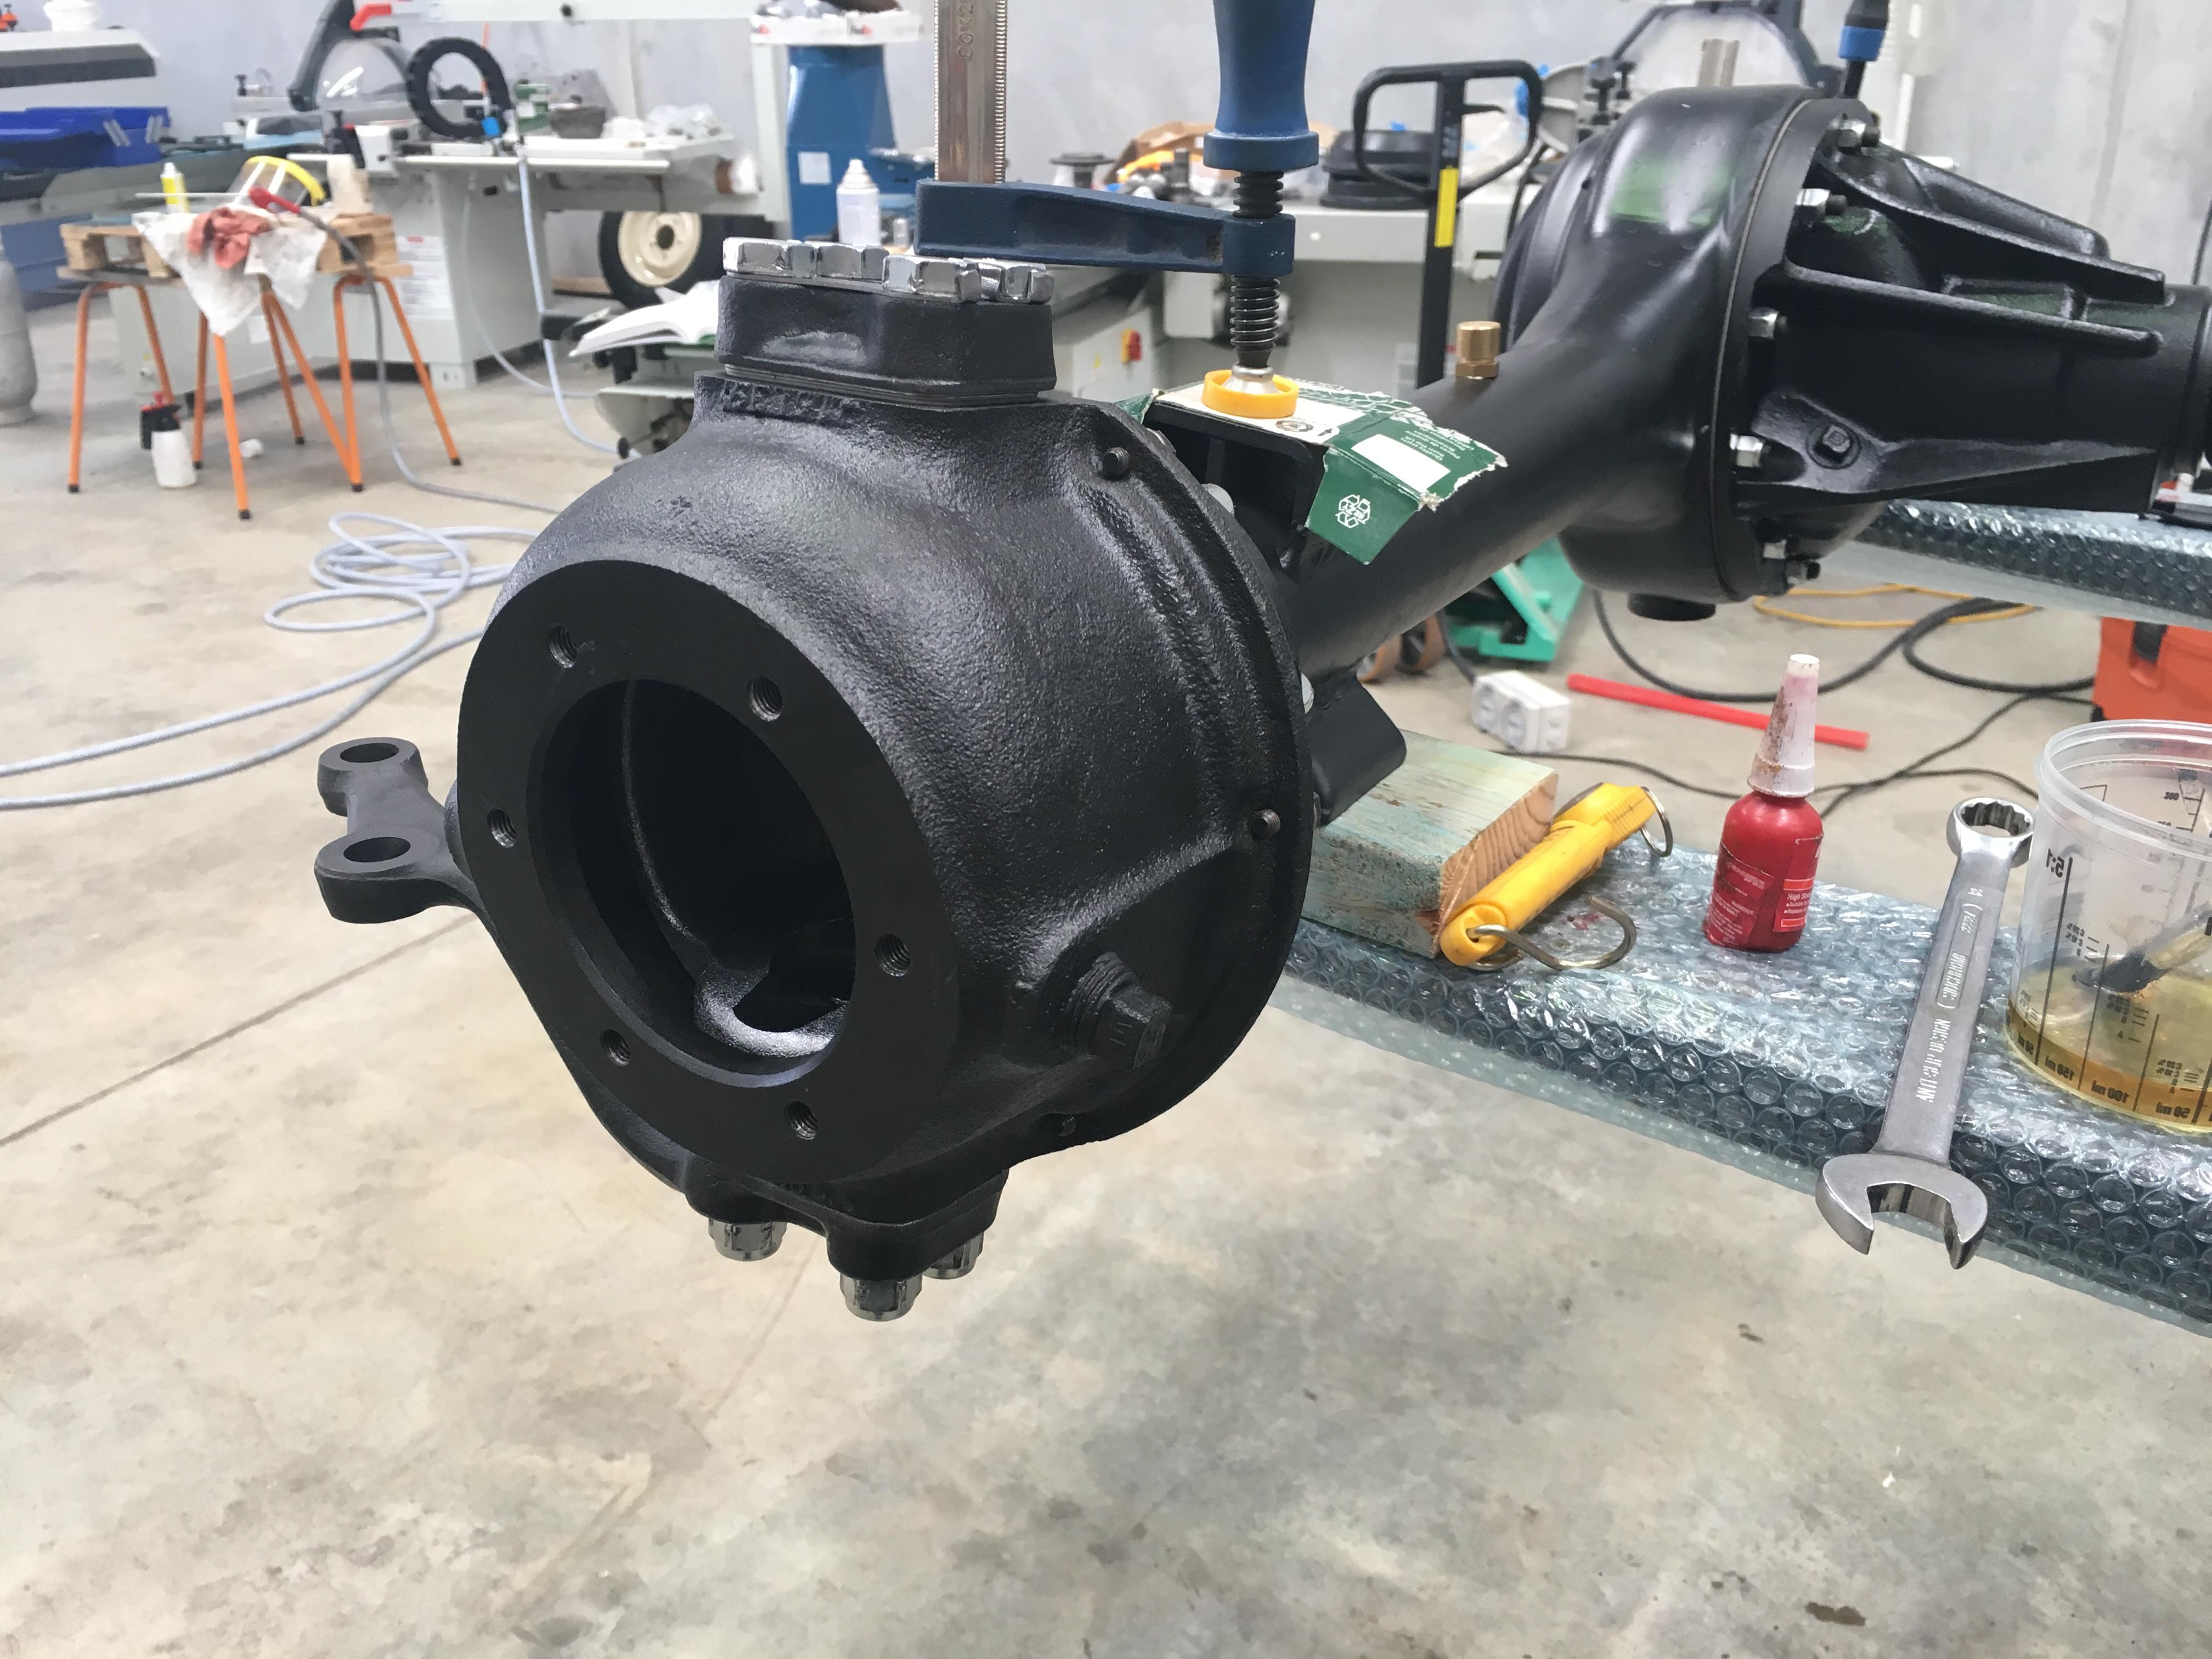
    Brakes on, new shoes, springs, cylinder, hopefully this will provide many good years of stopping!


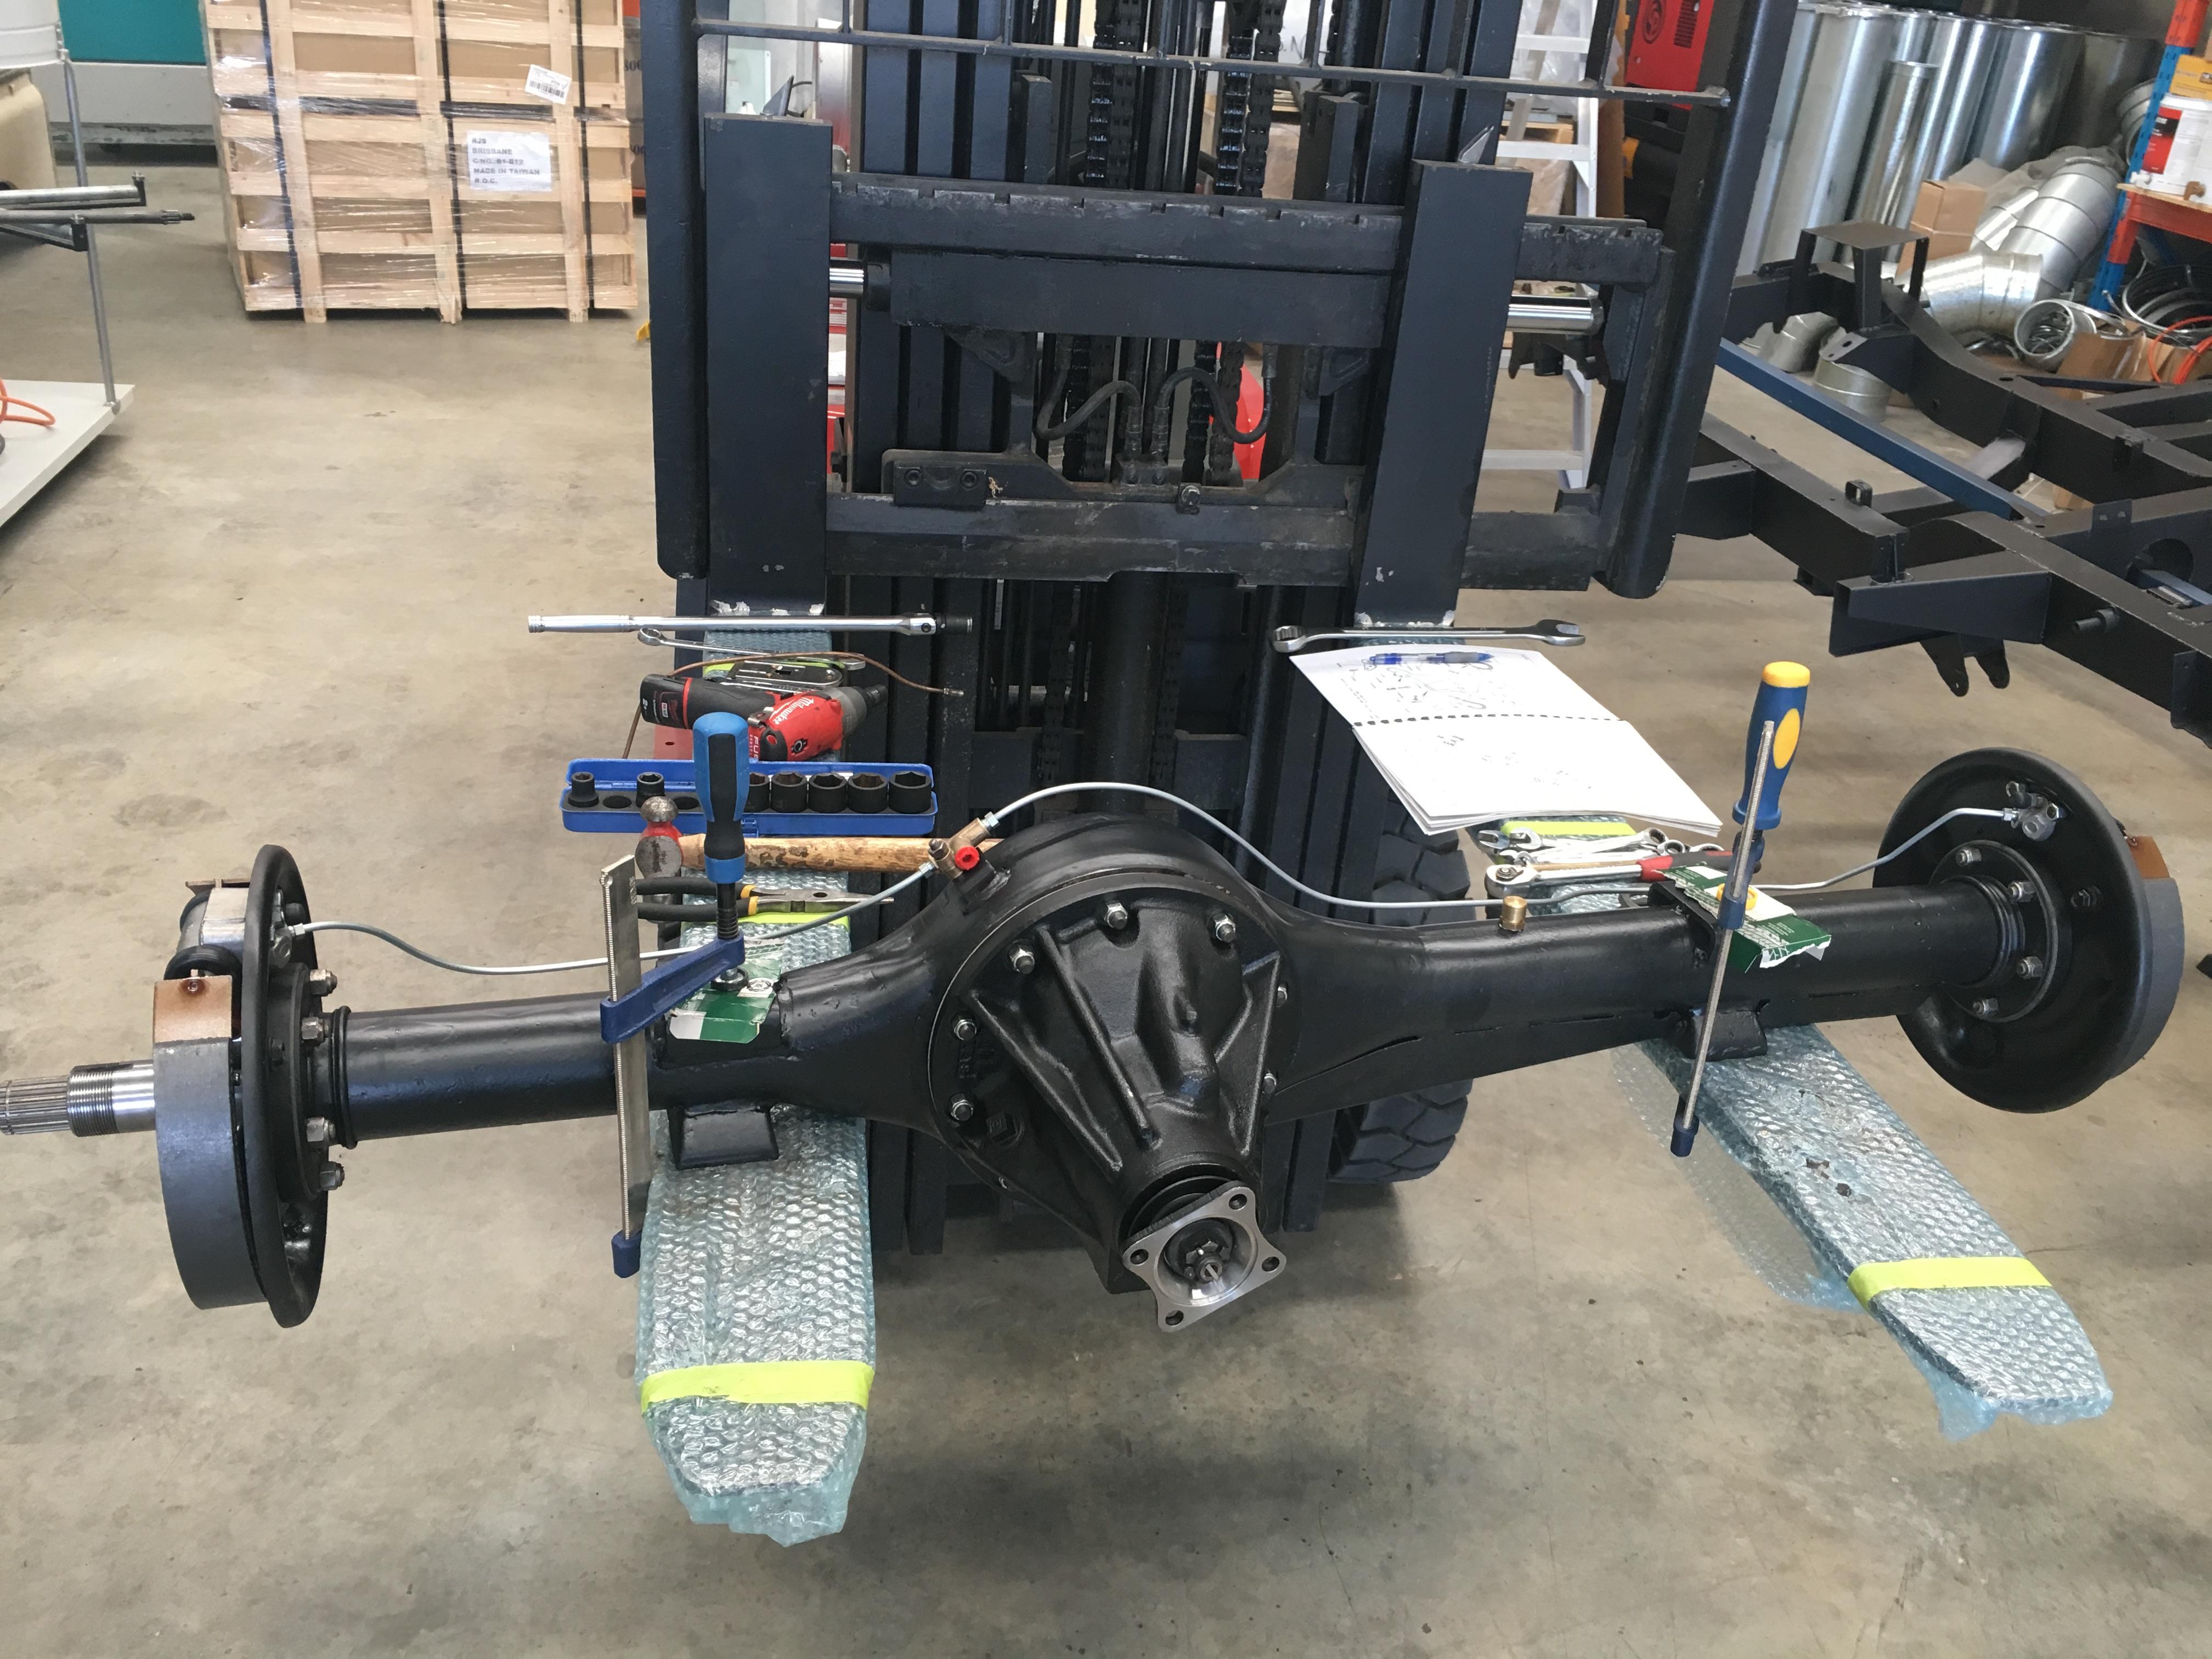
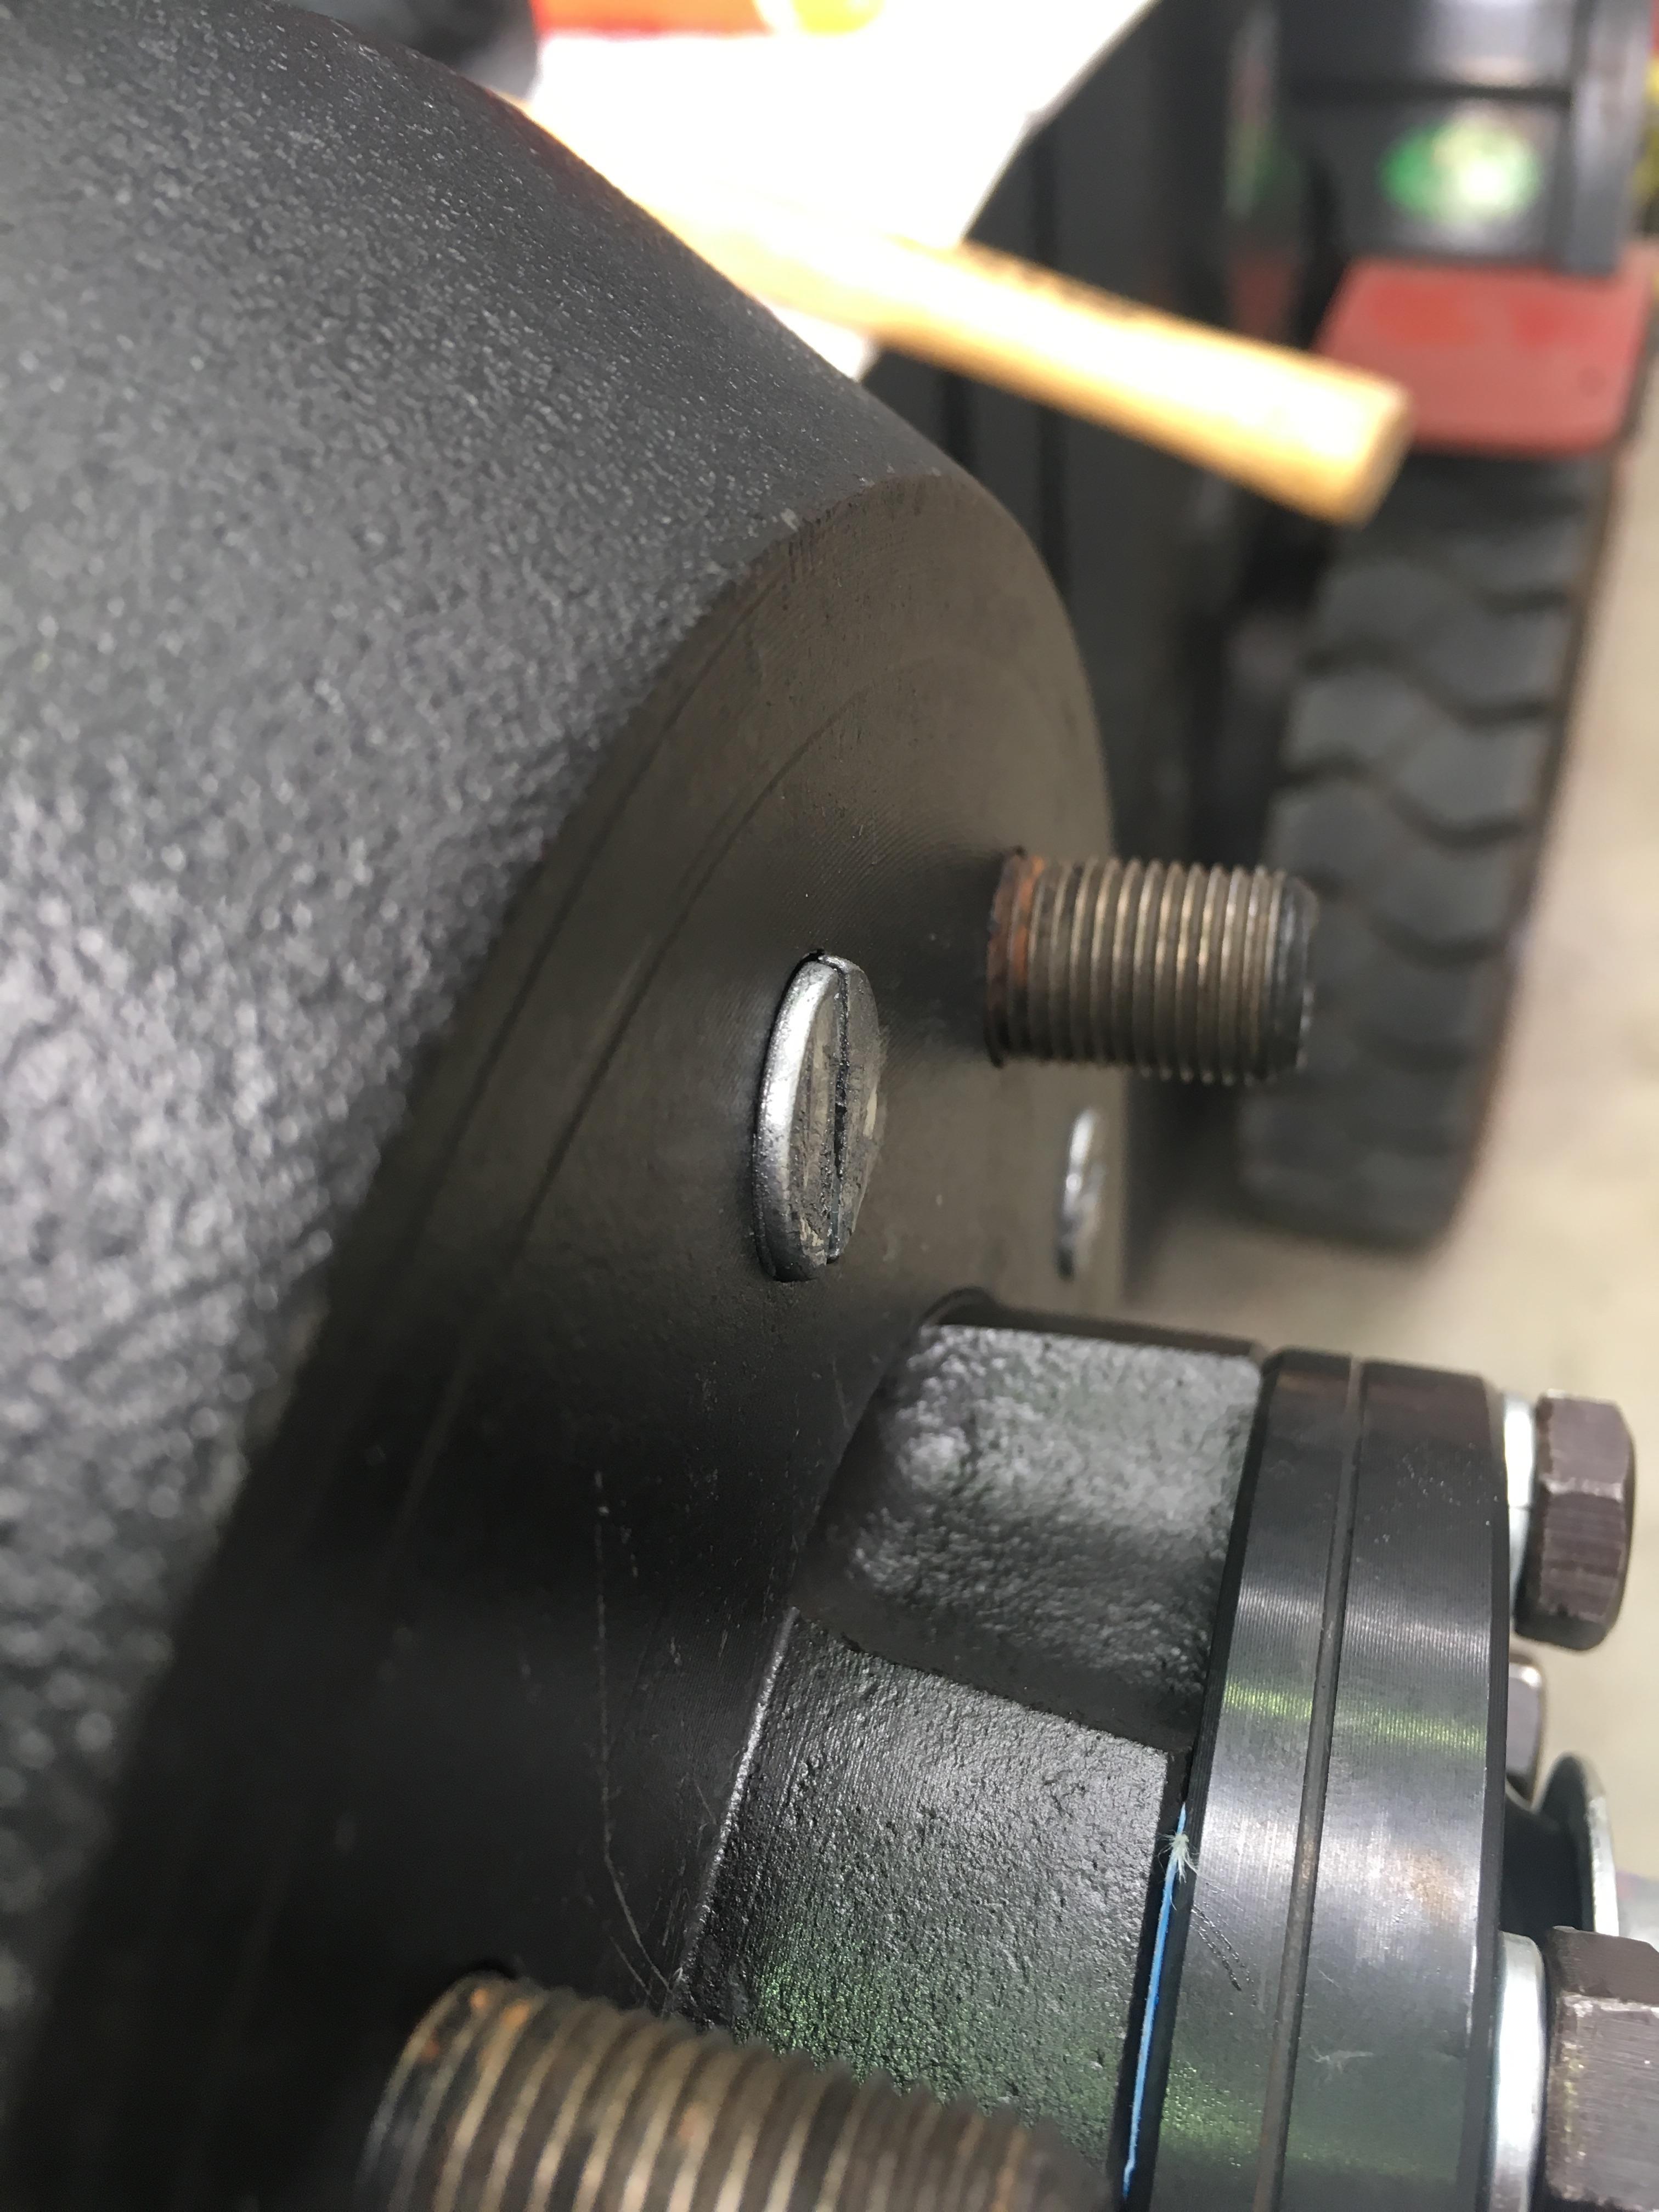
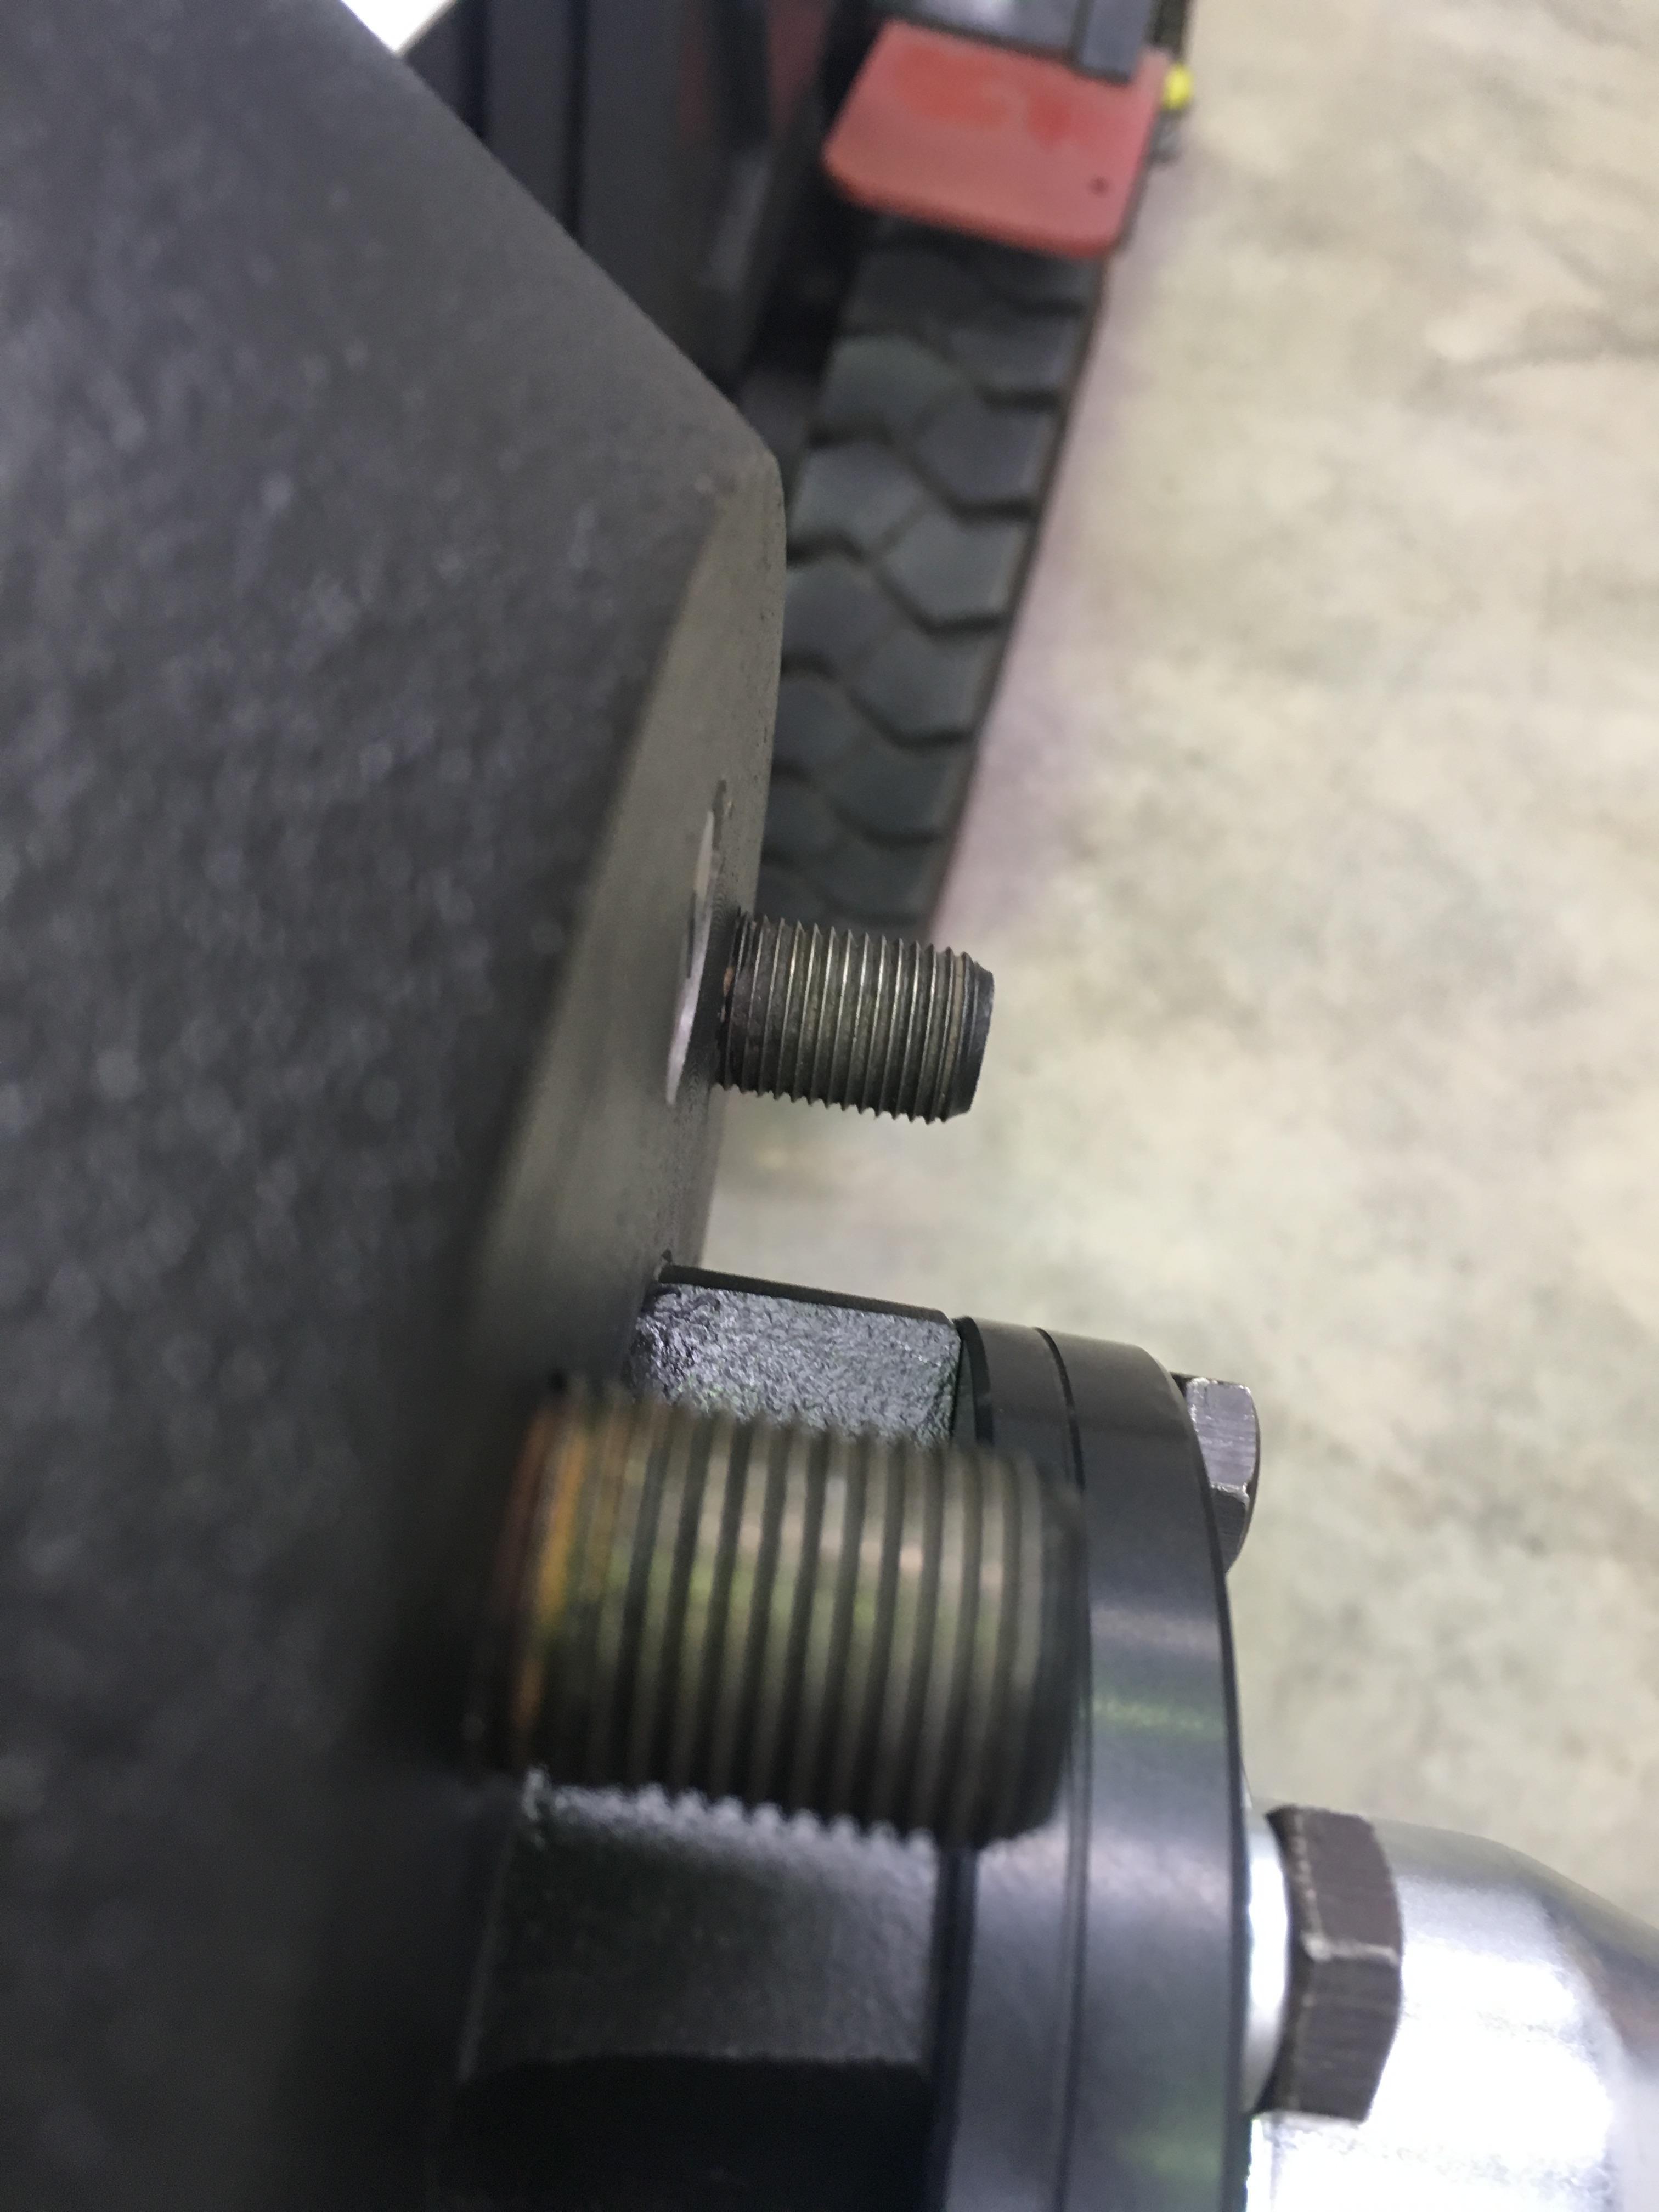
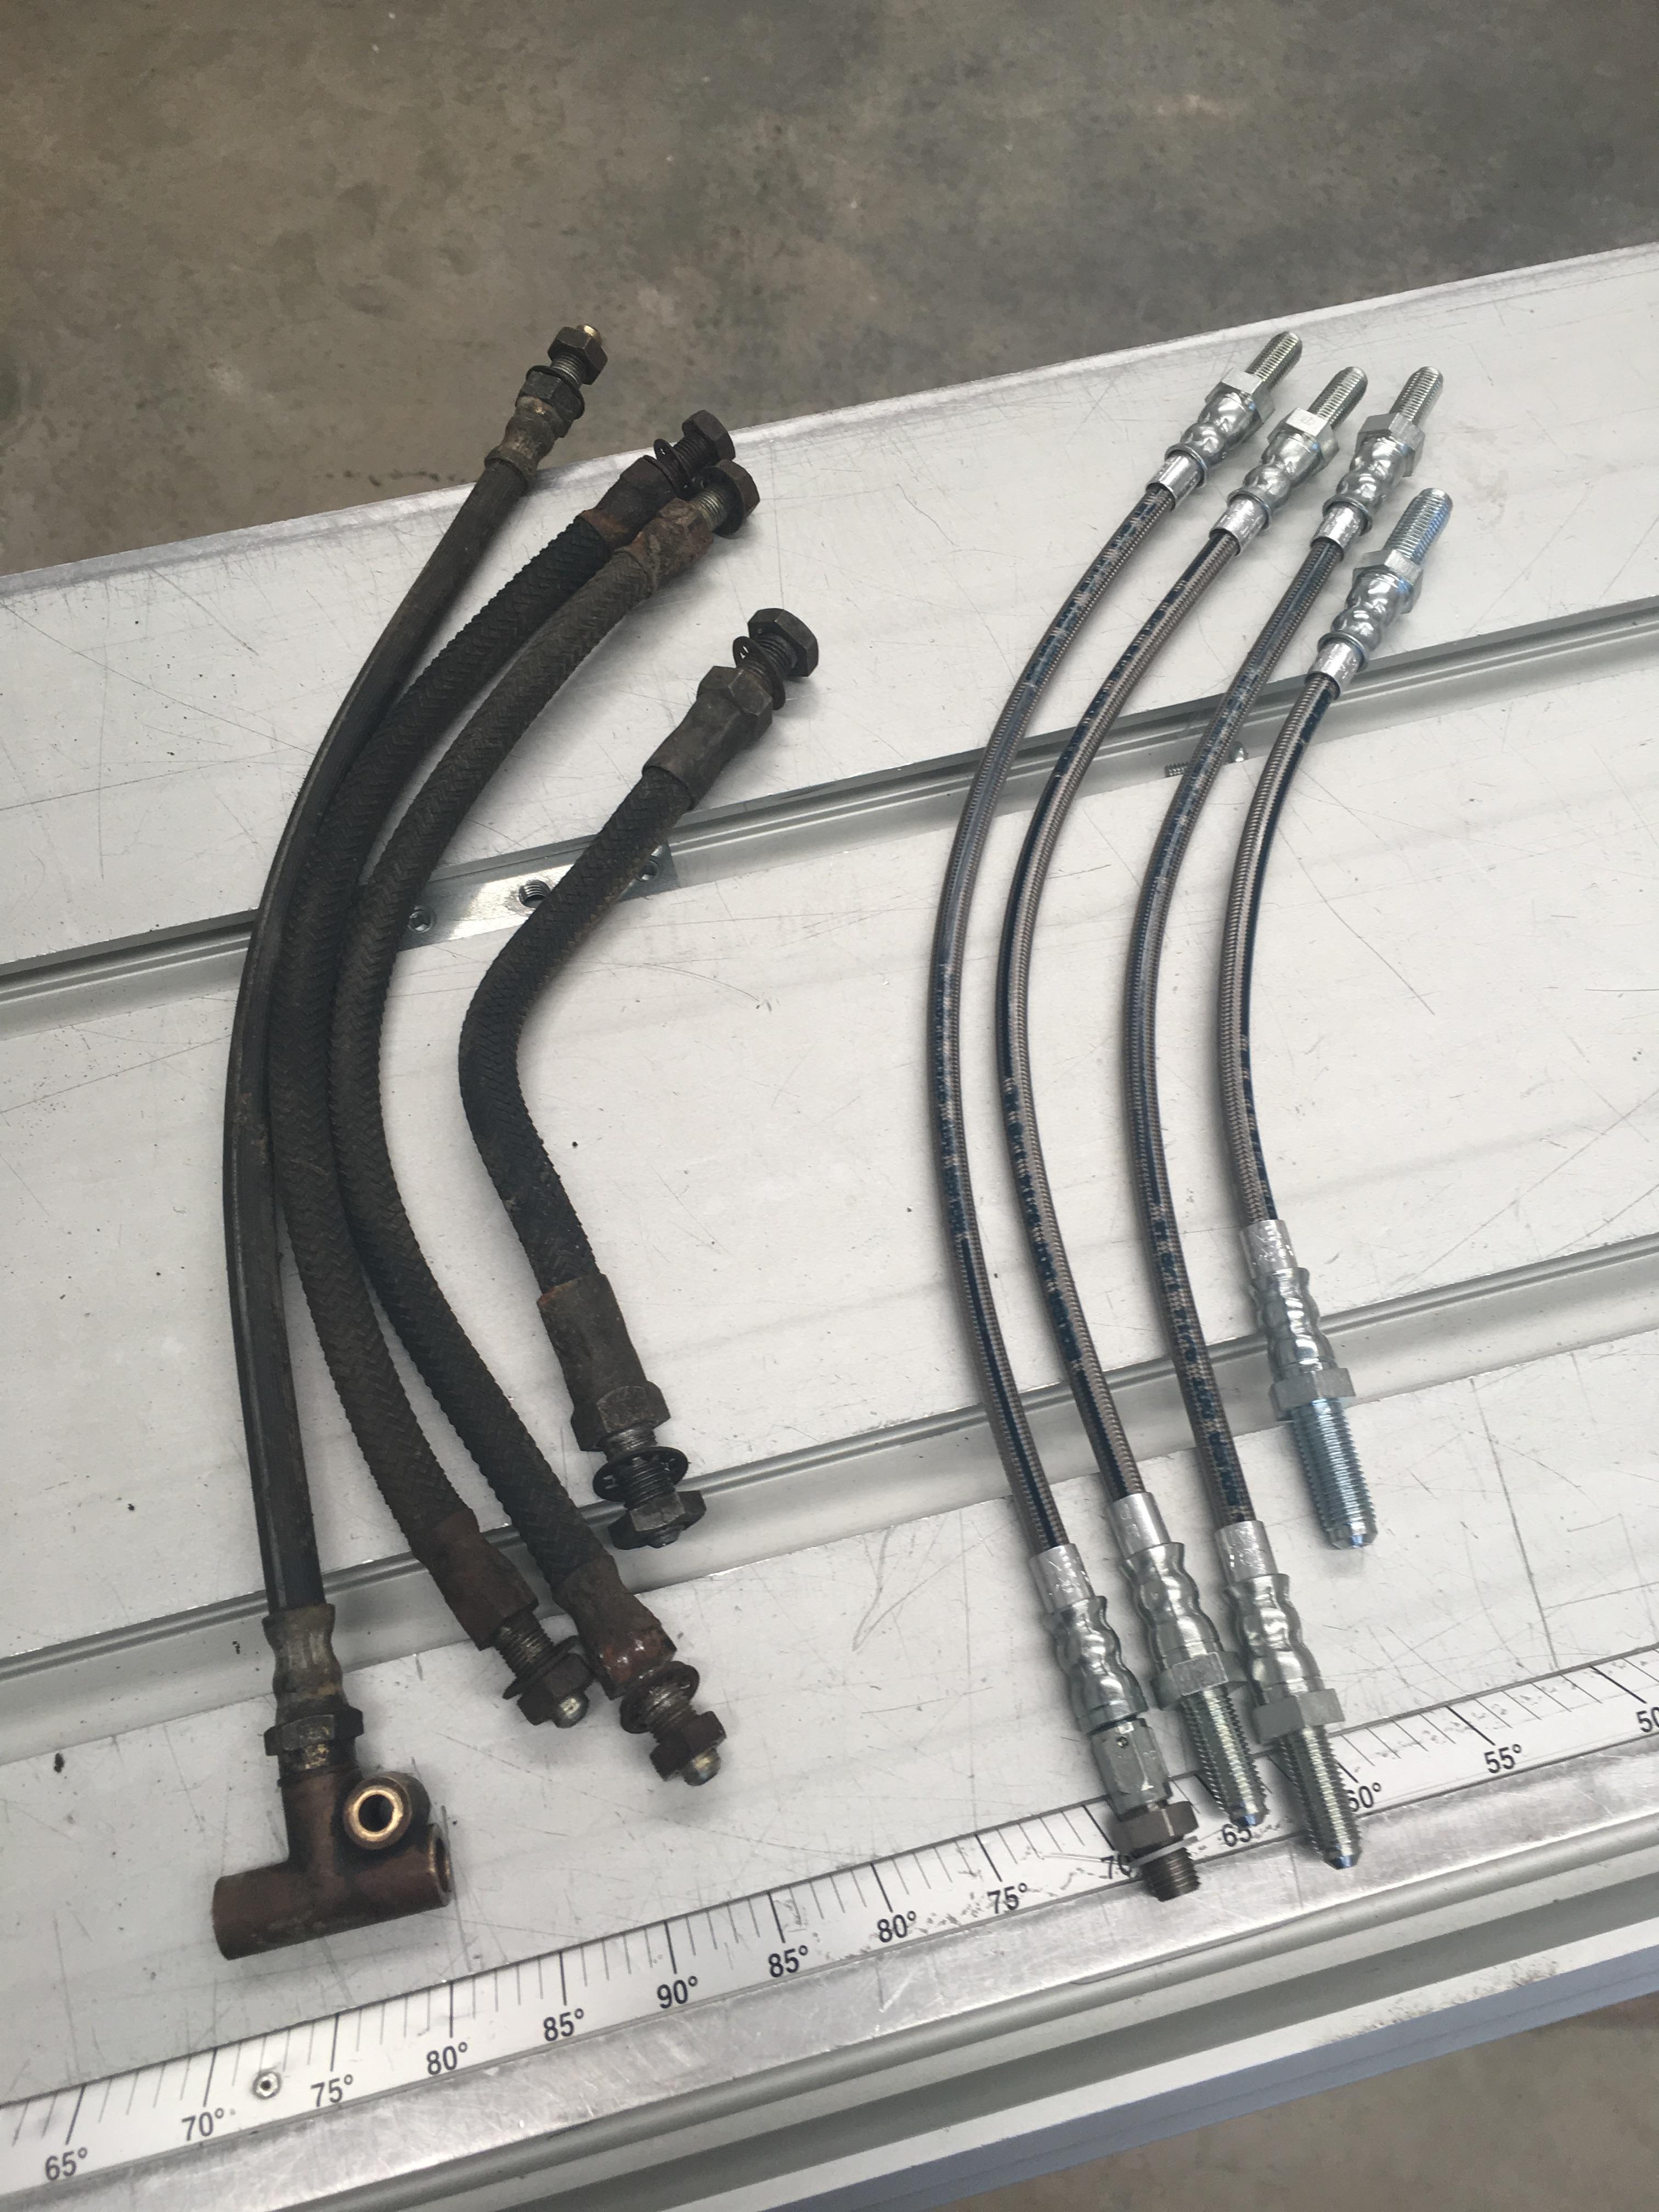
    And, finally, both sides on, and the new lines loosely in place, (they will need some final adjustment when the brackets and springs are fitted).


    Cheers,

  3. #153
    Join Date
    Aug 2007
    Location
    Bunbury, WA
    Posts
    2,507
    Total Downloaded
    0
    Love your work Tim. A real credit to you. It's gunna look special when its finished. Too good to get dirty!

  4. #154
    Join Date
    Mar 2008
    Location
    Perth, WA
    Posts
    1,947
    Total Downloaded
    0
    Thanks Chris, I'll promise to try and not be too precious with it!

    Cheers,

  5. #155
    JDNSW's Avatar
    JDNSW is offline RoverLord Silver Subscriber
    Join Date
    Jan 1970
    Location
    Central West NSW
    Posts
    29,511
    Total Downloaded
    0
    Quote Originally Posted by TimNZ View Post
    Quick question about the hub bearings, with them being oil lubricated do you still pack them with grease? The book says to pack the hub, but makes no mention of the bearings themselves?

    Cheers,
    You pack them with grease to provide lubrication until oil makes its way into the bearings. Early models had a filler plug in the drive flange and you filled the hub with oil after assembly. (Filler plugs deleted about Series 2)

    John
    John

    JDNSW
    1986 110 County 3.9 diesel
    1970 2a 109 2.25 petrol

  6. #156
    Join Date
    Mar 2008
    Location
    Perth, WA
    Posts
    1,947
    Total Downloaded
    0
    And continuing on with the axles

    Drive flanges on


    I always struggle with finding the most "backed off" position of the brake adjusters, so I've ground a notch on the upper most side of the bolt and added some red paint. I know the red paint will probably become invisible after the first few k's, but why not?


    Put the brake drums on only to find the new retaining screws sit proud


    So after a bit of work on the pillar drill with a countersinking bit all is right again


    And all together with the wheels on


    Onto the front alxe, diff center in, and axle seals before I forget!


    Swivel outers ready to go with all the threads cleaned out


    The studs on the bottoms of the swivel outers are supposed to be made up of 2 types, one set of pairs with thin studs, and one set with thick shoulders on the studs. For some reason I ended up with 3 of one type and 5 of the other?


    So after robbing the correct stud off the spare axle, the outers were fitted, and I got to play the spring balance and shim game.


    Seal in and all done. (well, I missed one bit.... ) I packed the swivel seal lips with O-Ring grease, bit more fluid than grease, and a bit heavier than oil.


    And, both sides done:


    Stub axles and brakes on, no more free wheeling hubs:


    And tyres fitted


    Pair of axles ready to go under the chassis, (yes, I know there's a manky, dirty track rod on there! It's yet to be dealt with).


    I'm really happy with how the wheels came up, they're still shod with the cheap tyres I purchased in NZ, but they can stay for now, (even if they seem to be named after a Bond girl!).

    Well, I'm off to have a shower, put my feet up and have an ale!

    Cheers,

  7. #157
    Join Date
    Mar 2008
    Location
    Perth, WA
    Posts
    1,947
    Total Downloaded
    0
    Bit of a frustrating day today, one of those 2 steps forward, 8 steps sideways, 1 step back kind of days.

    Got back to a rolling chassis, sort of..... I've missed ordering 2 of the spring bolts, and the Superpro kit I ordered is for a LWB, (I checked the paperwork and I says SWB thankfully). Fortunately I ordered the kit from a local company, unfortunately they are closed till the new year

    The bolts I missed are 9/16" x 4 1/4", of course the local bolt place has bolts that only go up to 4".... I have to order a new steering relay, so they can come over with that. Until I get the bolts, and the correct suspension bushes, I cannot do up the suspension bolts, as it needs to be compressed to half travel first, (well, according to the book anyway).


    Started on getting the brake lines fitted:


    All the lines are new, since most of the old ones looked like this:


    Was starting to look good, until I came to the bit where the PDWA valve is, (AKA the "it'll never let you bleed the brakes" valve). I'm considering replacing the valve with a level sensor in the master cylinder reservoir, but the junction pieces supplied from the company that did the lines are not threaded deep enough to accept the threaded ends of the lines.

    So, I'm going to have to take them off and get the ends redone tomorrow

    At least I've got the task of getting the rear loom back through the chassis, I mean, how hard can that be?

    Cheers,

  8. #158
    Join Date
    Mar 2008
    Location
    Perth, WA
    Posts
    1,947
    Total Downloaded
    0
    The other decision that I've been putting off, is colour... I'm not too fond of the original colour, (sand/limestone), and have been tossing up between Marine Blue, and Masai Red.

    I am leaning towards Masai Red as it is very close to my company colour, however Red is, (or so I've been told), a difficult colour to paint, and I don't want the car to be too "loud". The roof and hard top sides will be the factory Limestone.

    Cheers,

  9. #159
    Join Date
    Jul 2013
    Location
    Melbourne
    Posts
    166
    Total Downloaded
    0
    Hi Tim, This doesn't appear to be usual rear flexible pipe (see attached) kinds you see on series vehicles. Did you make one yourself?

    BTW awesome job....keep up the good work

    Regard,
    Nav
    Attached Images Attached Images

  10. #160
    Join Date
    Mar 2008
    Location
    Perth, WA
    Posts
    1,947
    Total Downloaded
    0
    Hi Nav,

    They are stainless braided lines in a clear plastic sheath, and were made up by a local company, (Couplers). They have the standard NF fittings on them, so are a direct replacement for the rubber ones.

    From left to right they are: Rear brake line, front brakes left and right, and clutch.


    (Note, the line is only sitting in position, I need to pick up some NF nuts so it can be mounted to the chassis bracket properly).


    Cheers,

Page 16 of 51 FirstFirst ... 6141516171826 ... LastLast

Bookmarks

Bookmarks

Posting Permissions

  • You may not post new threads
  • You may not post replies
  • You may not post attachments
  • You may not edit your posts
  •  
Search AULRO.com ONLY!
Search All the Web!