Page 34 of 51 FirstFirst ... 24323334353644 ... LastLast
Results 331 to 340 of 510

Thread: My 88" Series 3

  1. #331
    Join Date
    Mar 2008
    Location
    Perth, WA
    Posts
    1,947
    Total Downloaded
    0
    And... head all bolted down (Yes, I had the torque wrench calibrated Dave)
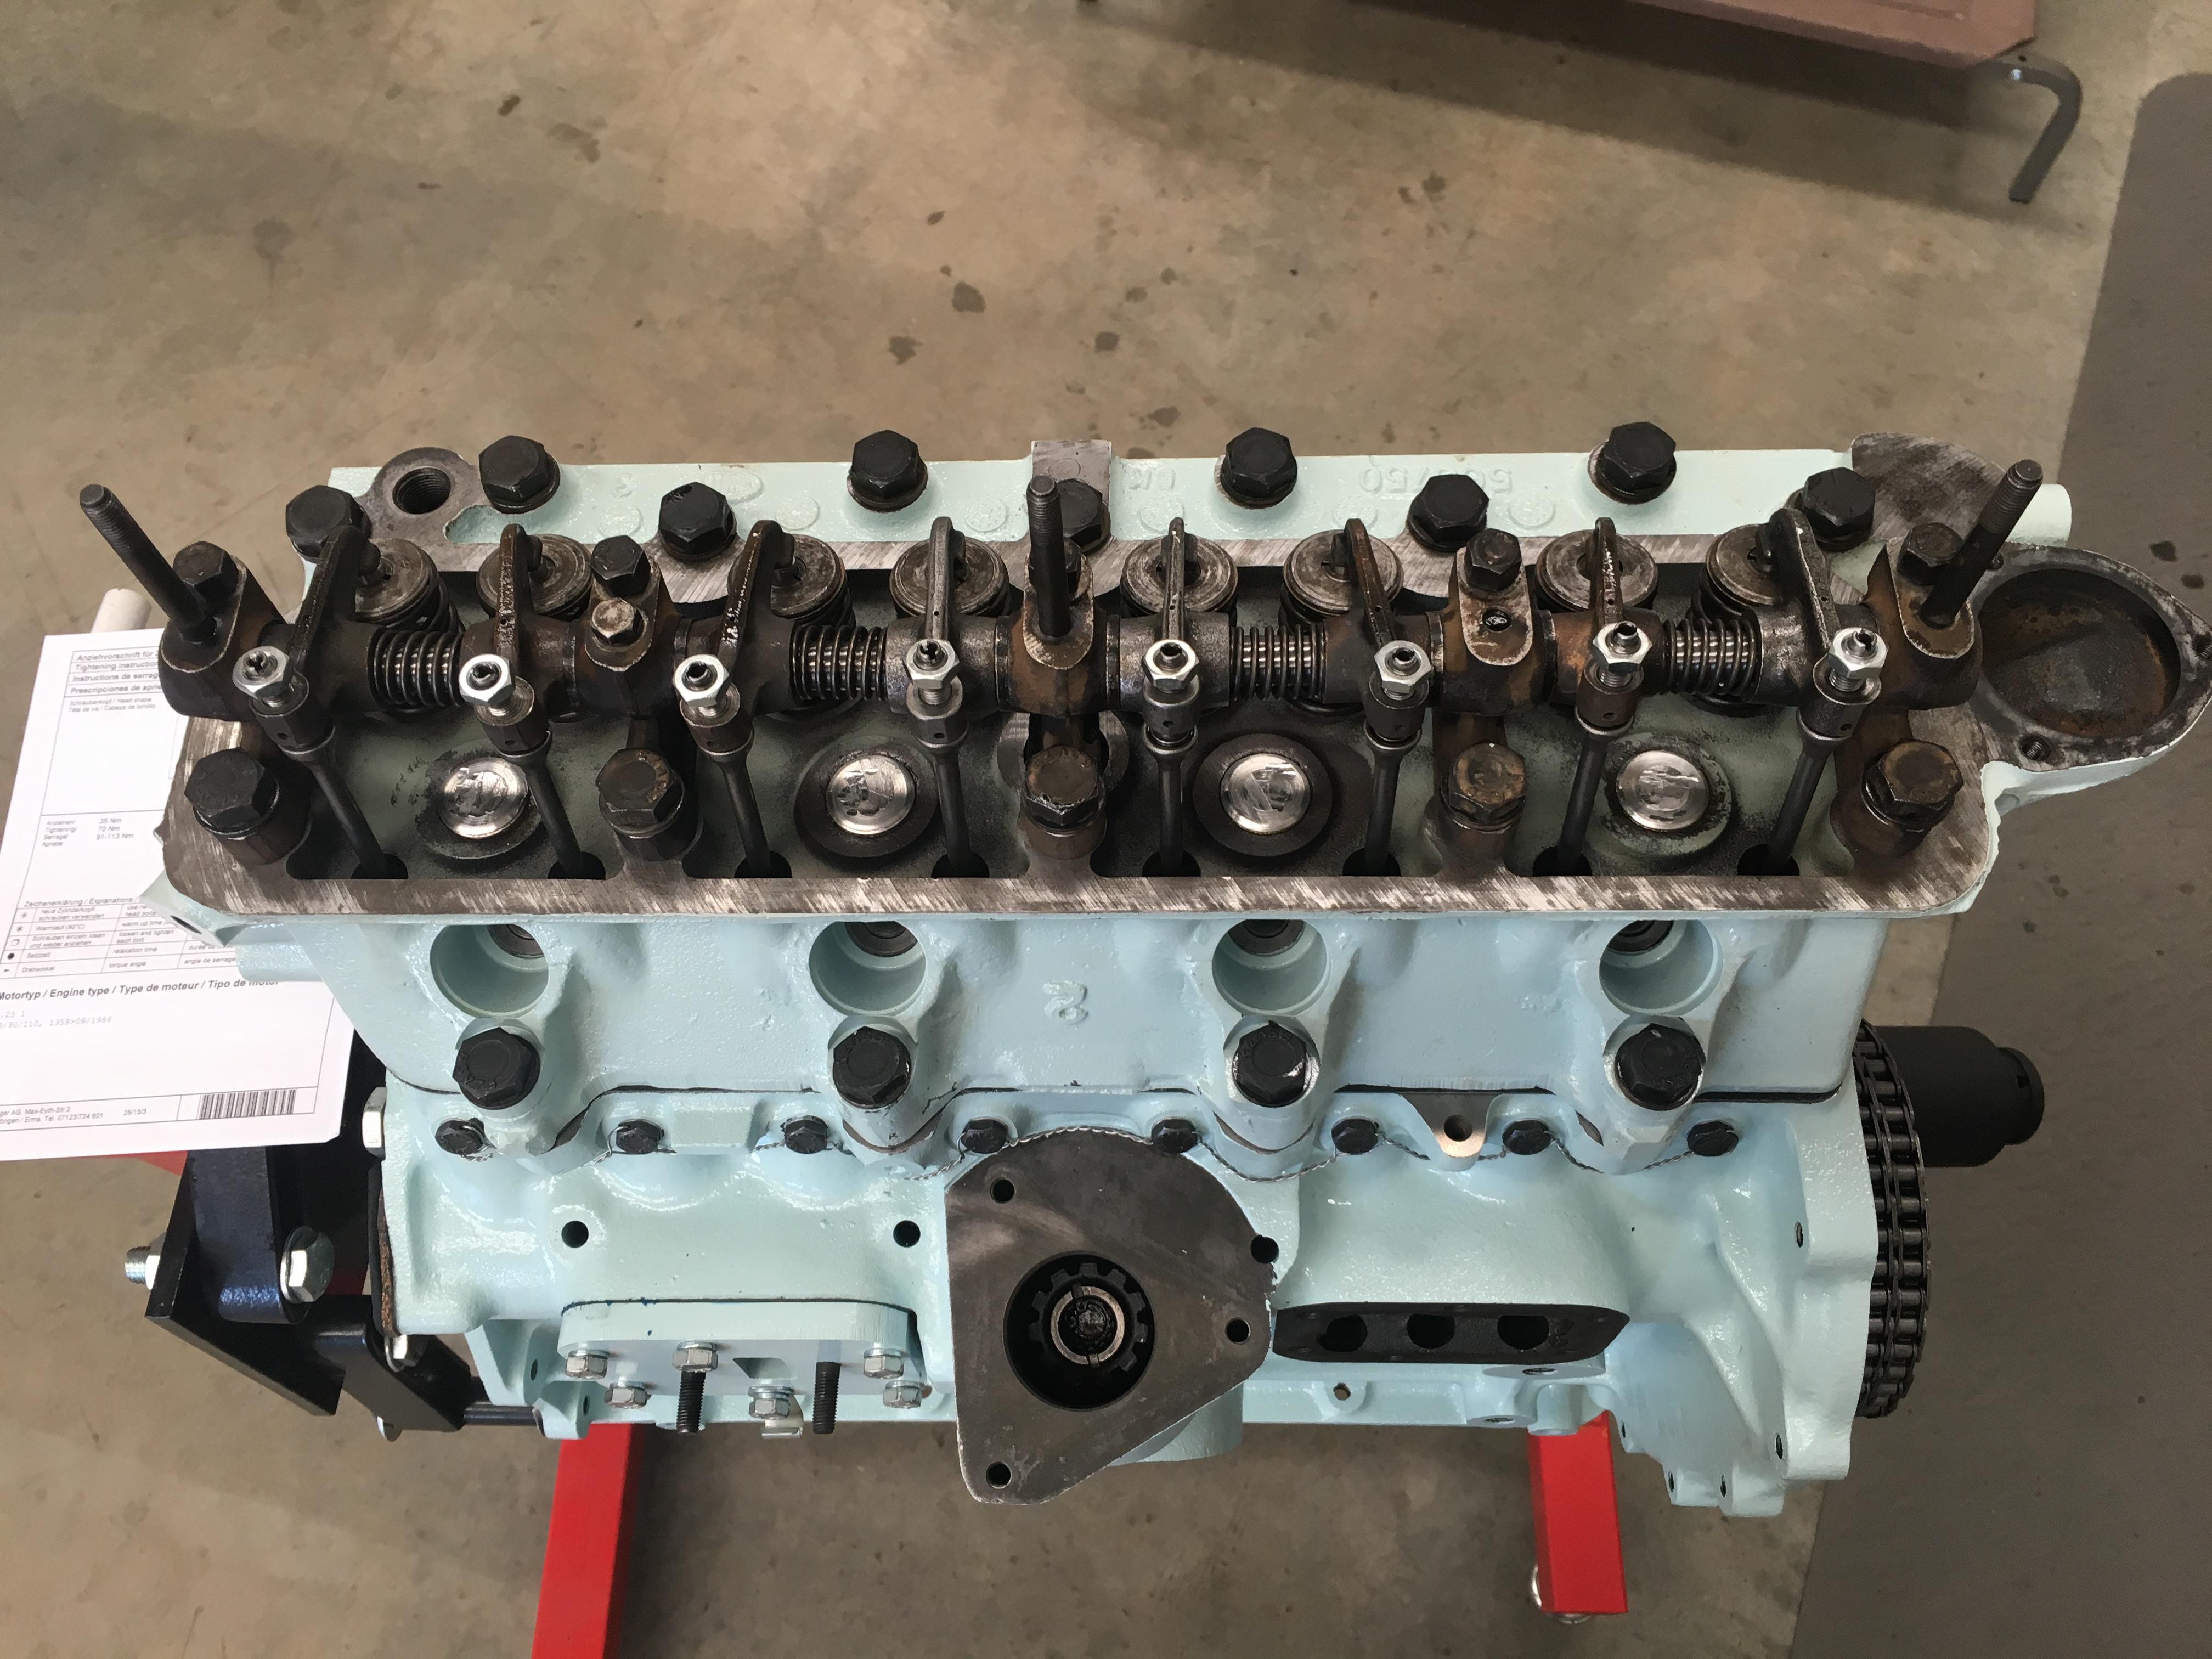


    Then the tappets got set, (10 thou), using the good old rule of 9, (If you are doing No1, No8 needs to be fully open, 8+1=9).

    Next to do was fit the distrubitor, first up the mount got tickled up with the soda blaster and fitted:


    Now, the timing. What a disaster. The good old green bible seems to completely skip the bit where you install the drive gear for the distributor, (and oil pump), except to say with No1 at TDC the distributor dirve dogs should line up in the hole to the front of where the distributor goes in, as such:


    Note: The drive gear can go in 2 ways, (180deg), but there is an odd number of teeth on the drive gear, so it will line up better one way than the other. The drive dogs on the gear, and the spacer where it drives the distributor are both offset, so can only go in one way. Both these points are important for later.

    And if you are completely rebuilding the engine you think, no problem I've just done the cam timing so No1 should be at TDC, which it is, but not on the firing stroke. So everything ends up being 180deg out.

    So the crank gets rotated 360deg, to rotate the cam 180 deg, now No1 is at TDC and on the firing stroke, cam chain and gears now look like this:


    You then **** around getting the distributor drive gear rotated nicely so the drive dogs line up with the reference hole nicely, and fit the distributor, which will only go in one way because of the offset in the driving dogs. Everything is great, except the rotor is pointing at No4.

    Continued below, (I can only post 10 pics per post, and that includes emotes....)

  2. #332
    Join Date
    Mar 2008
    Location
    Perth, WA
    Posts
    1,947
    Total Downloaded
    0
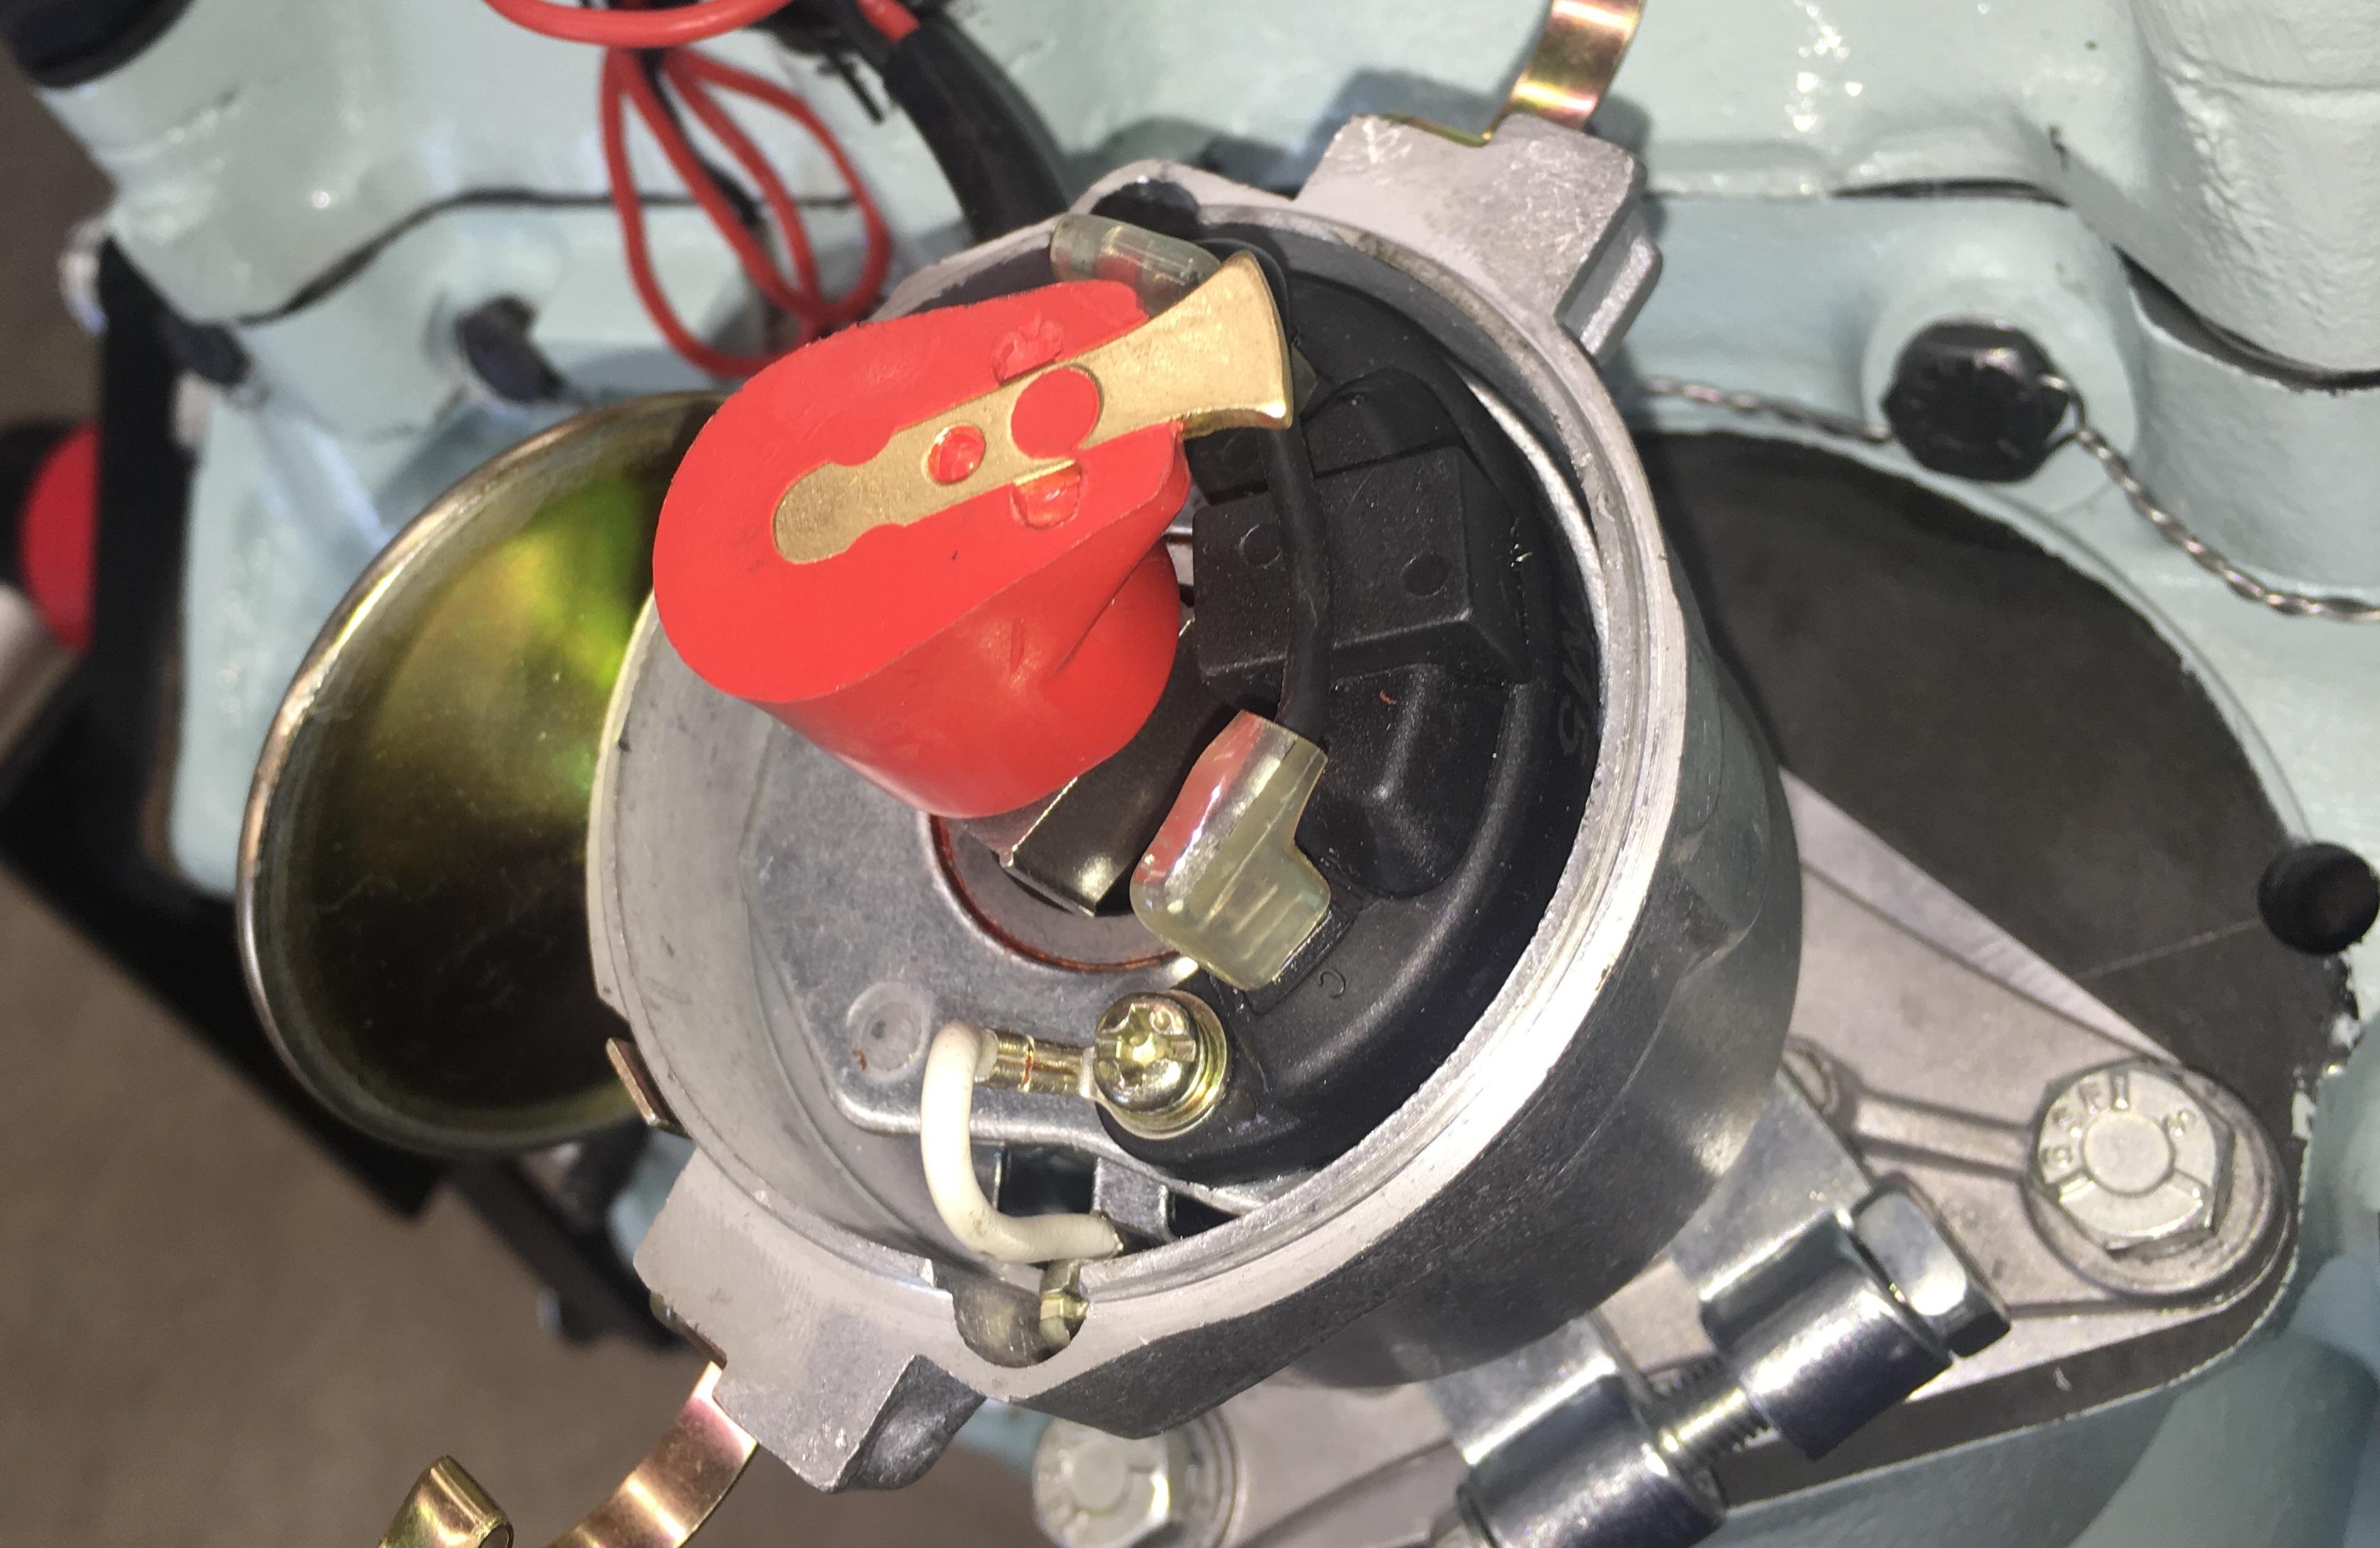
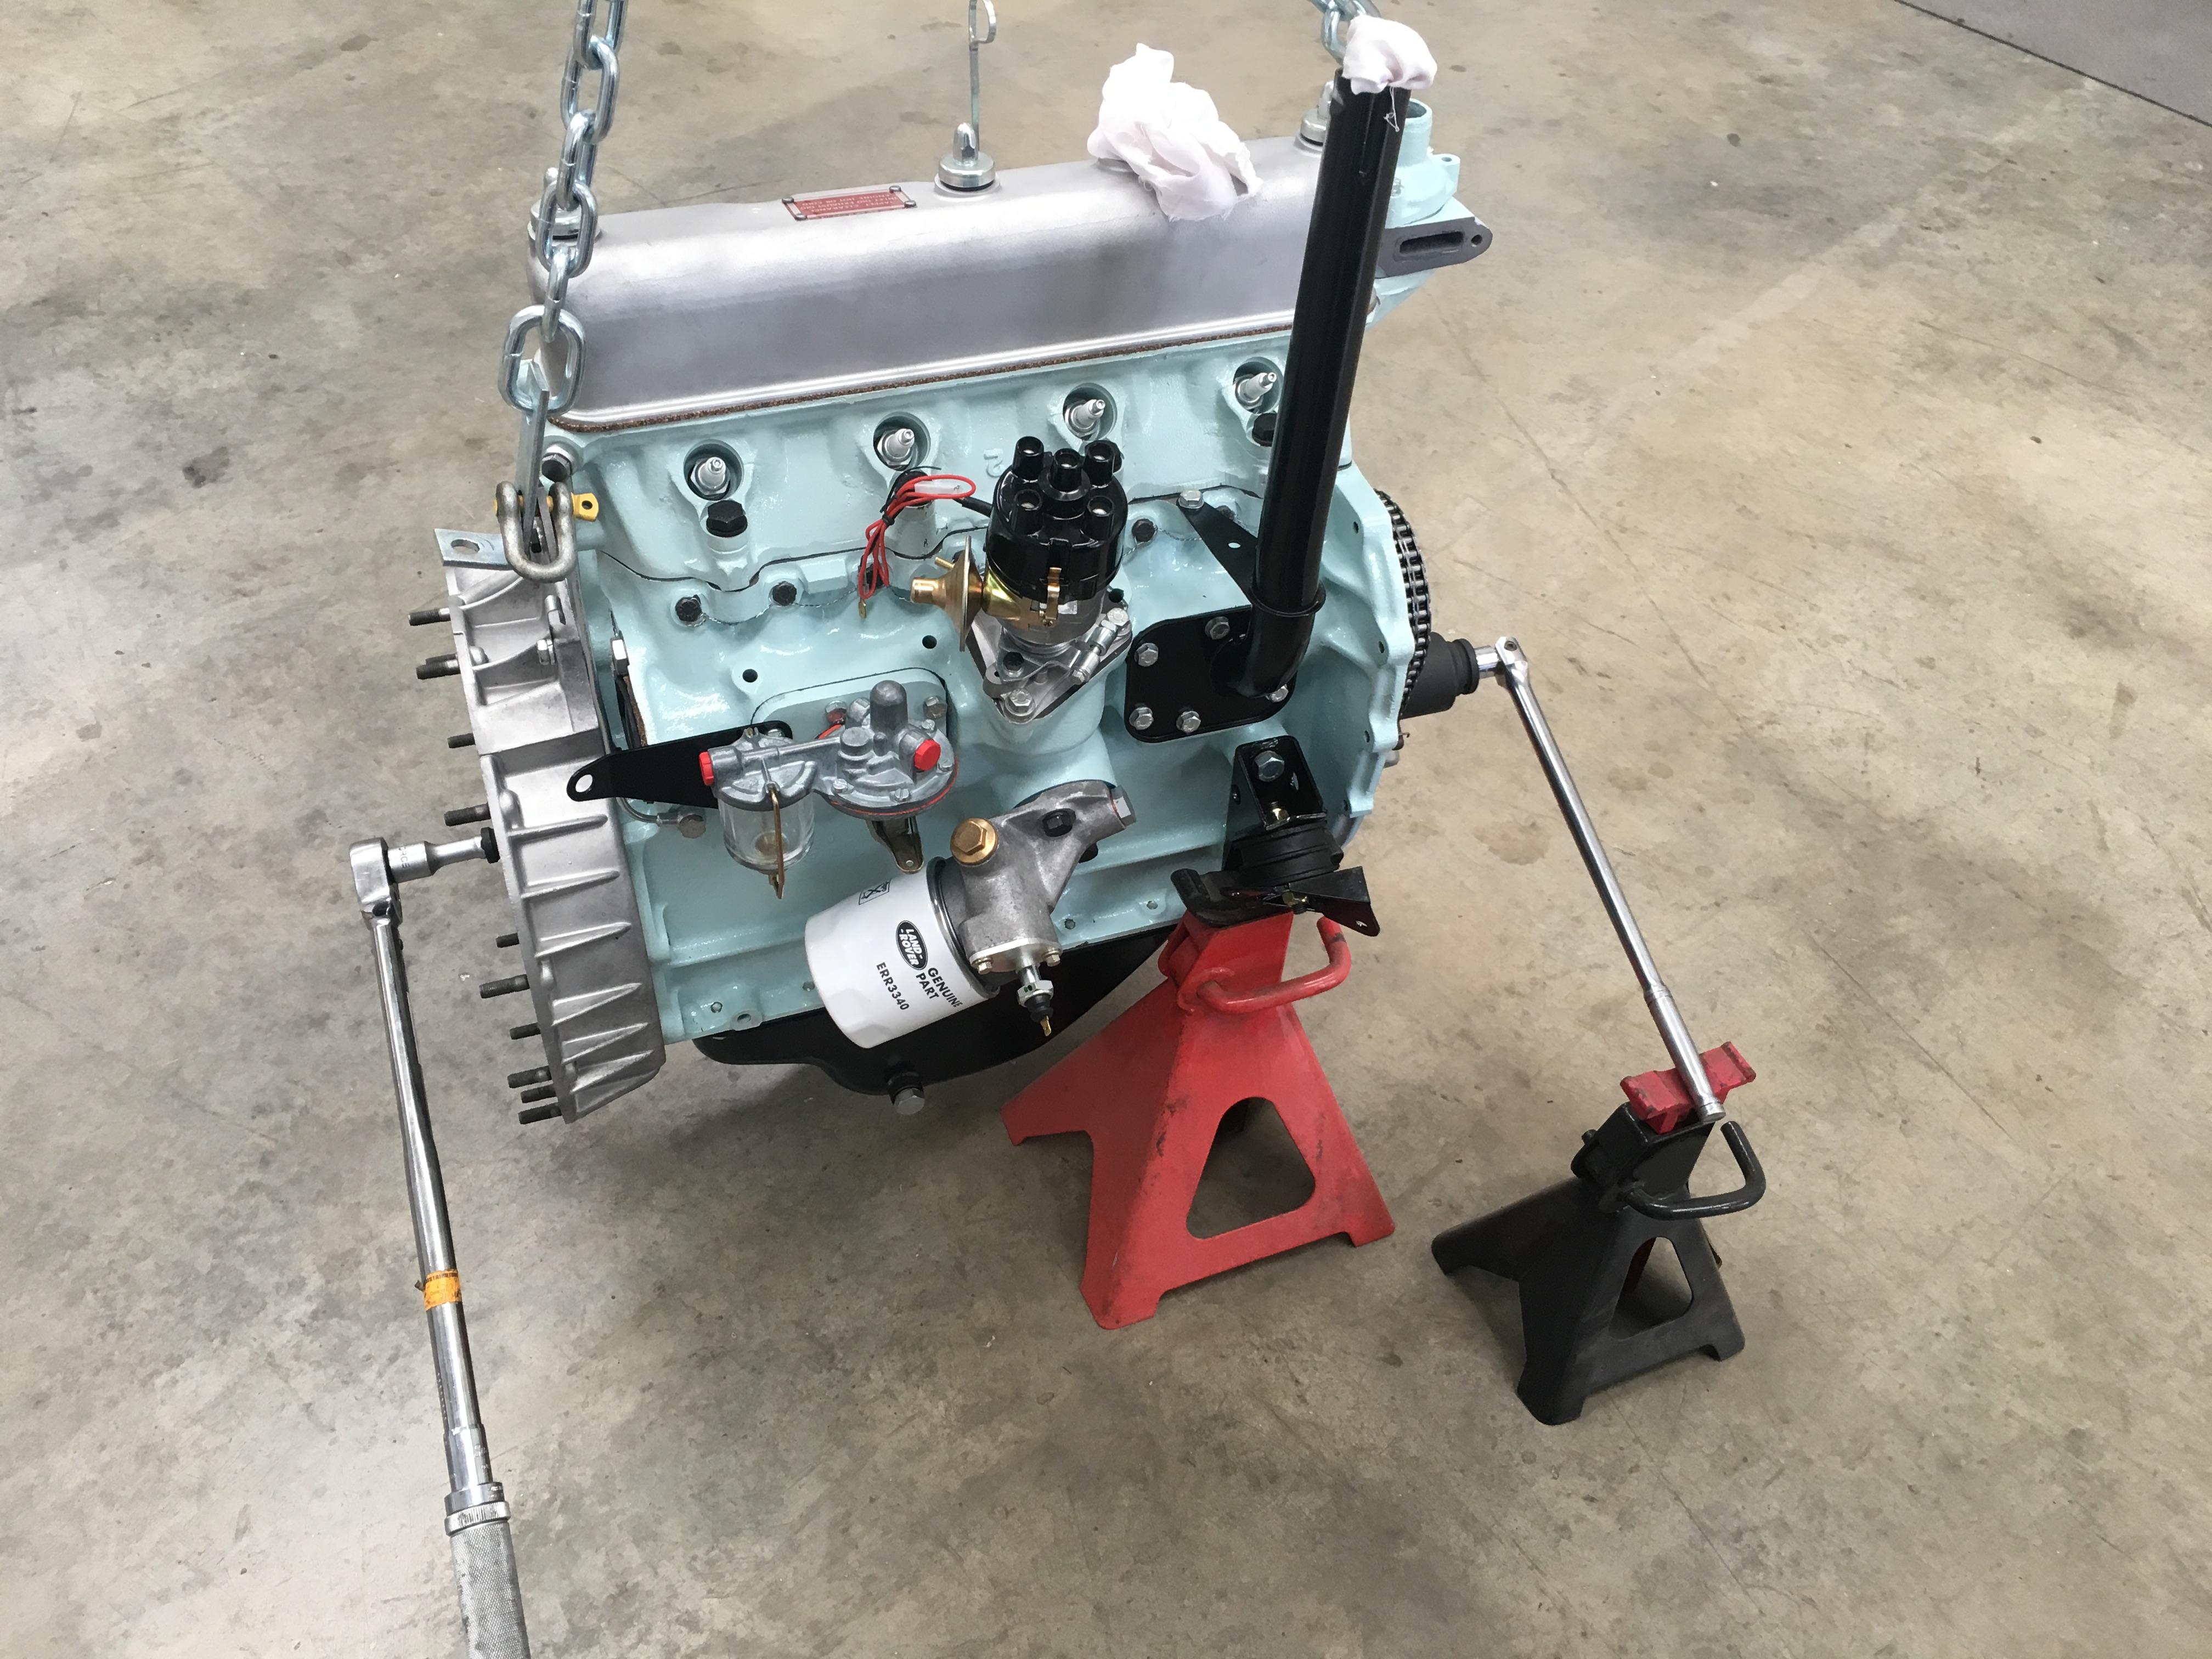
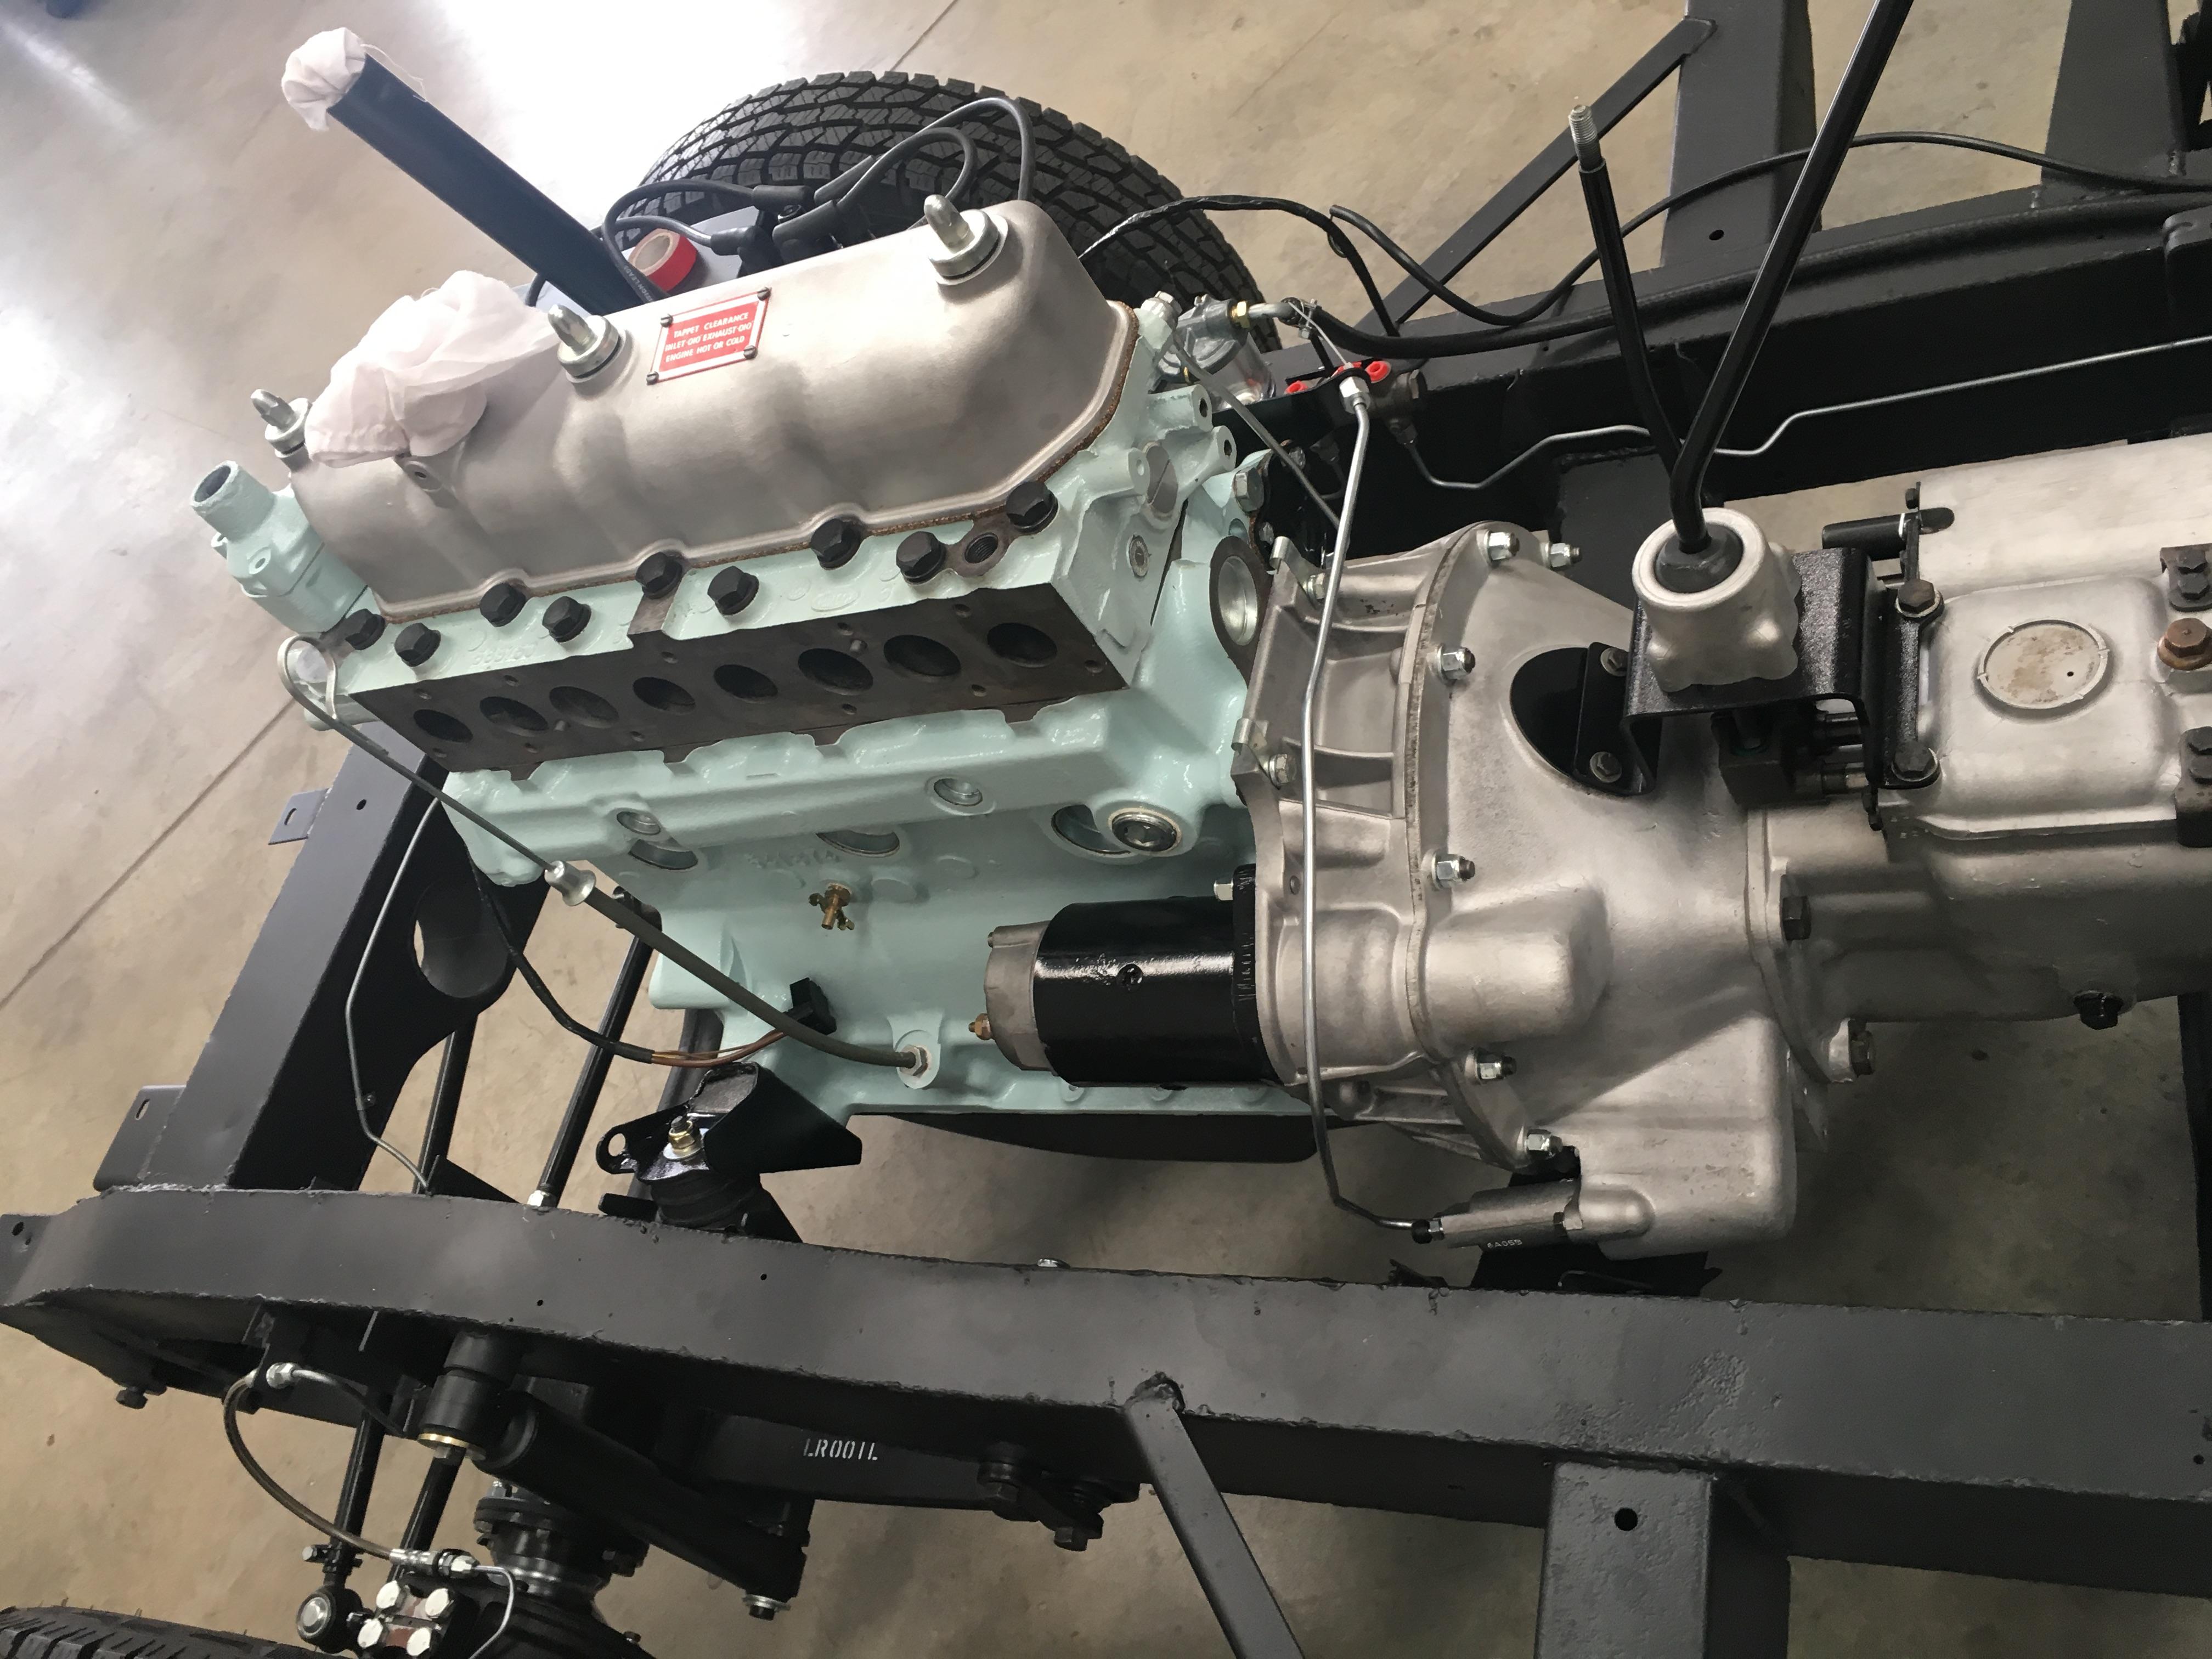
    So, Tims guide to timing the 2.25, (please note this may be completely wrong, and if it is please let me know so I don't bash my head against the wall trying to get the thing started.

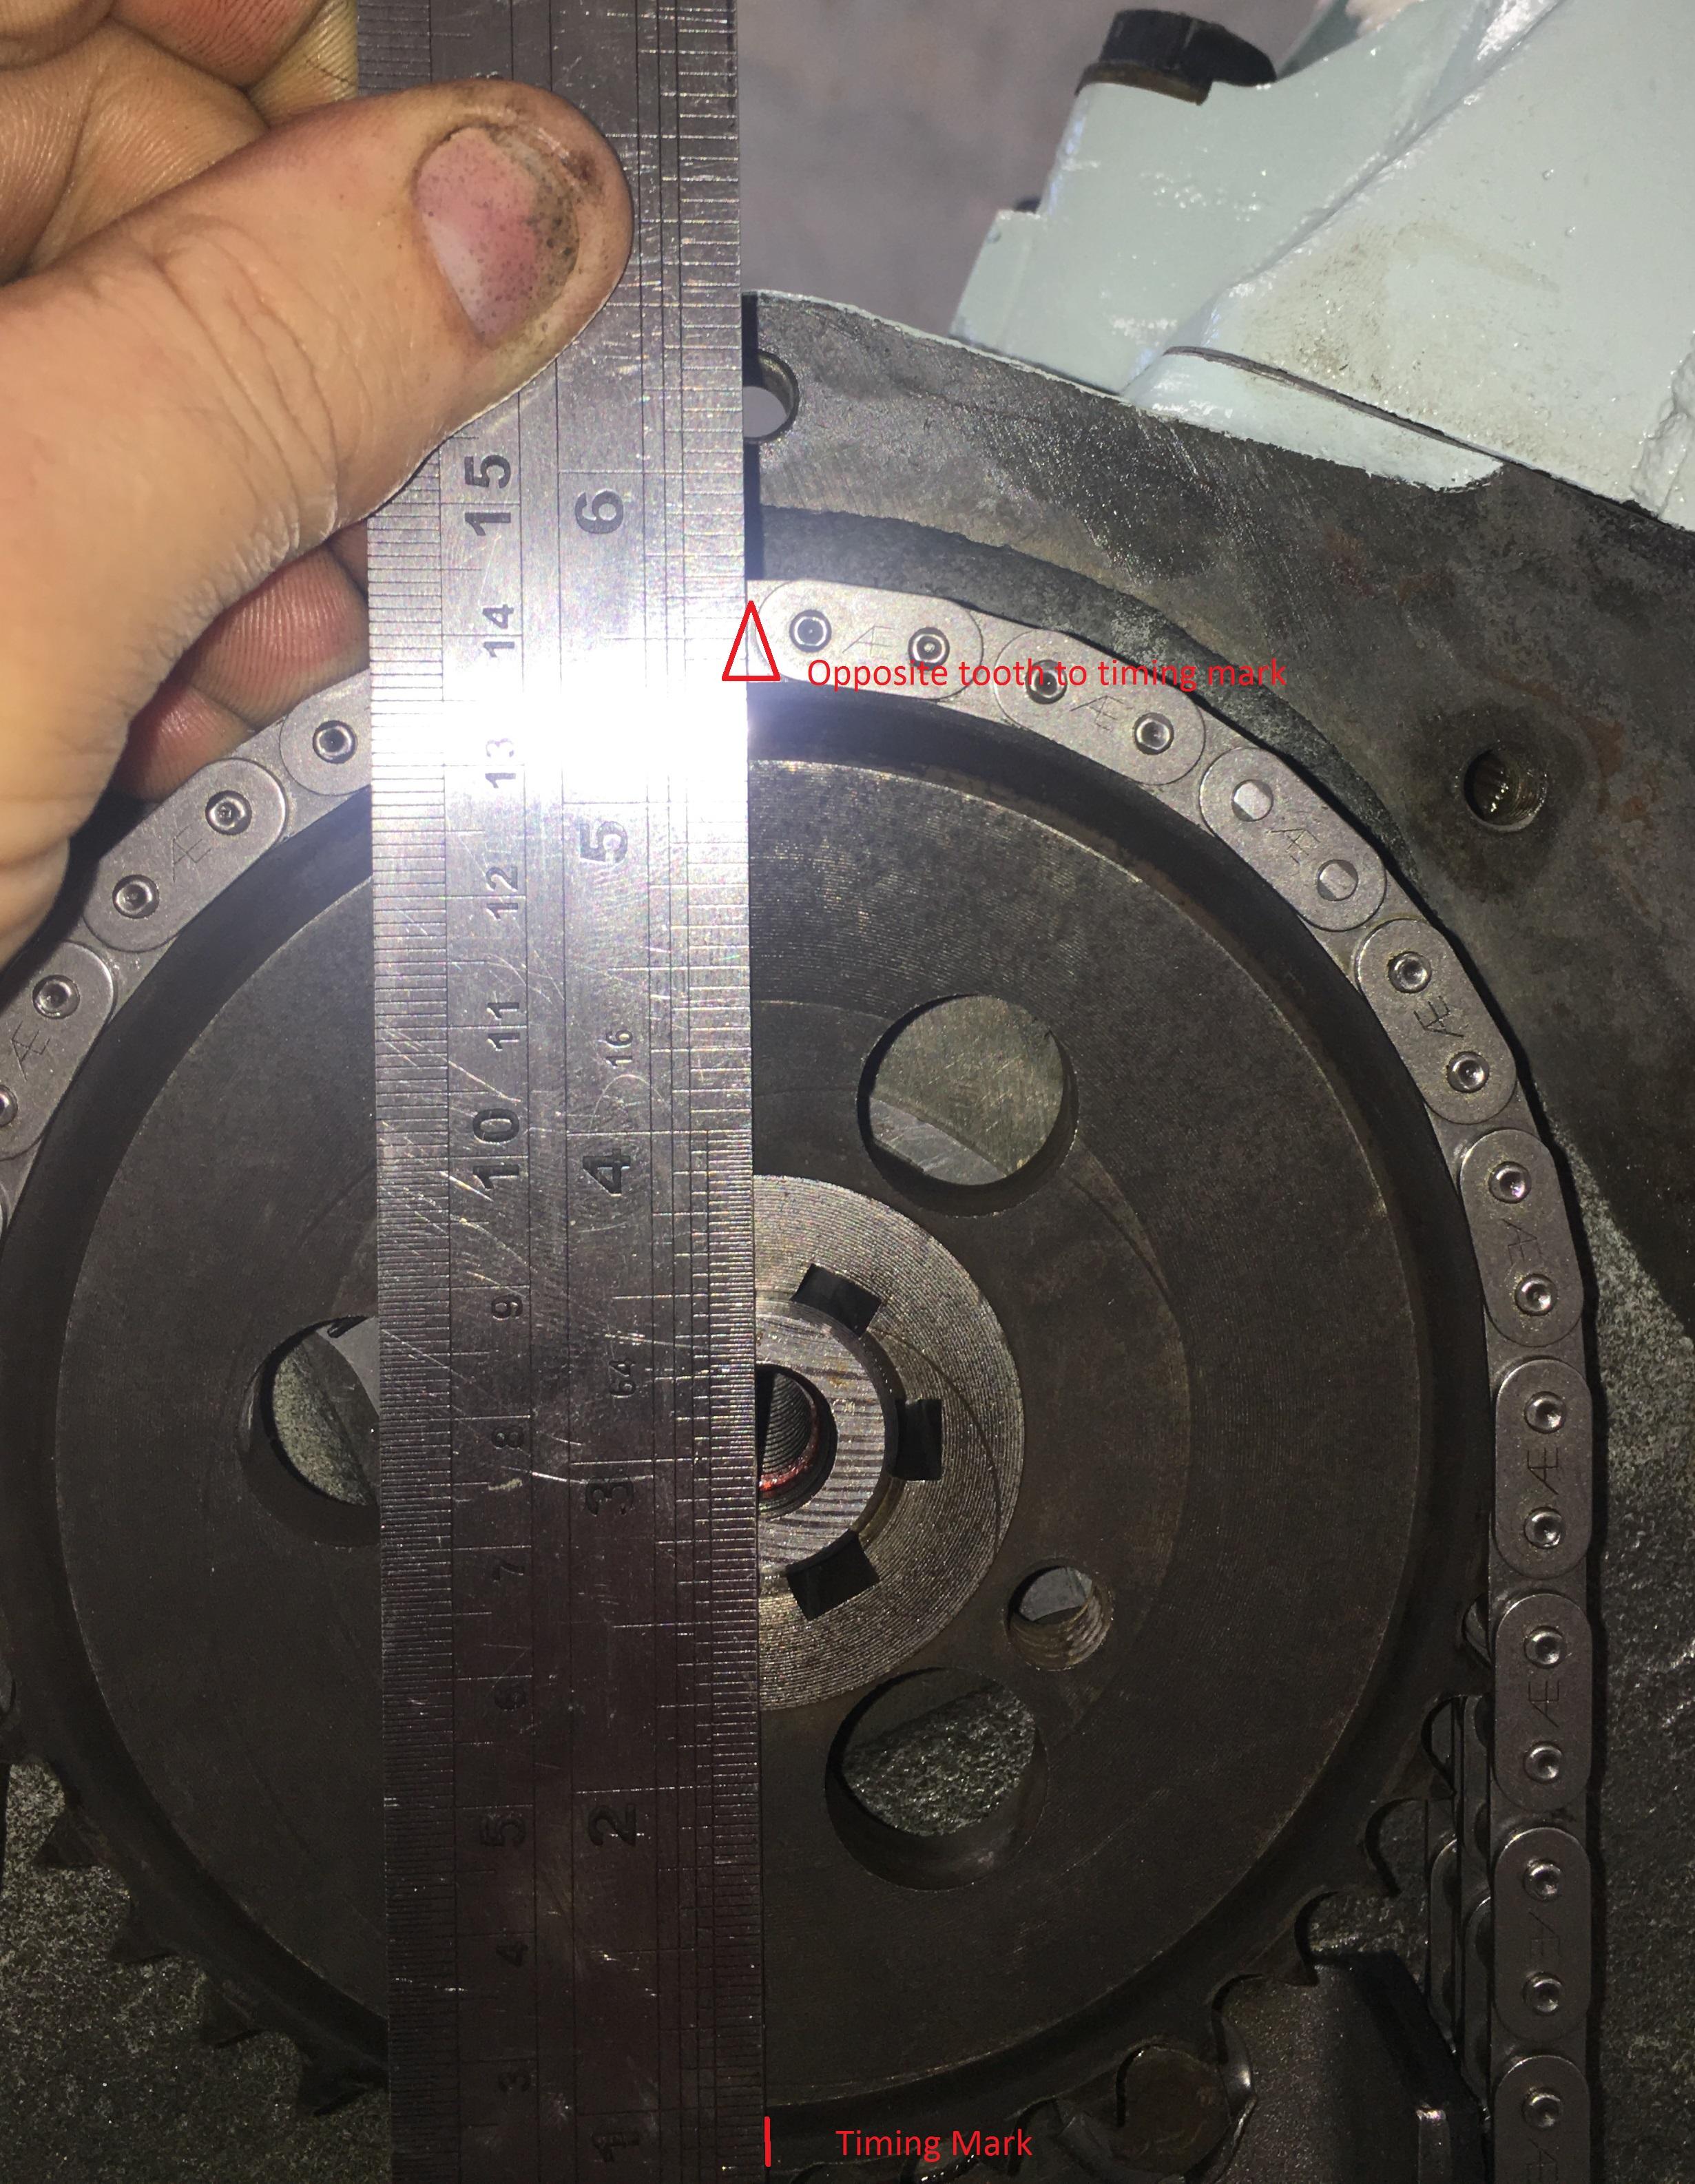
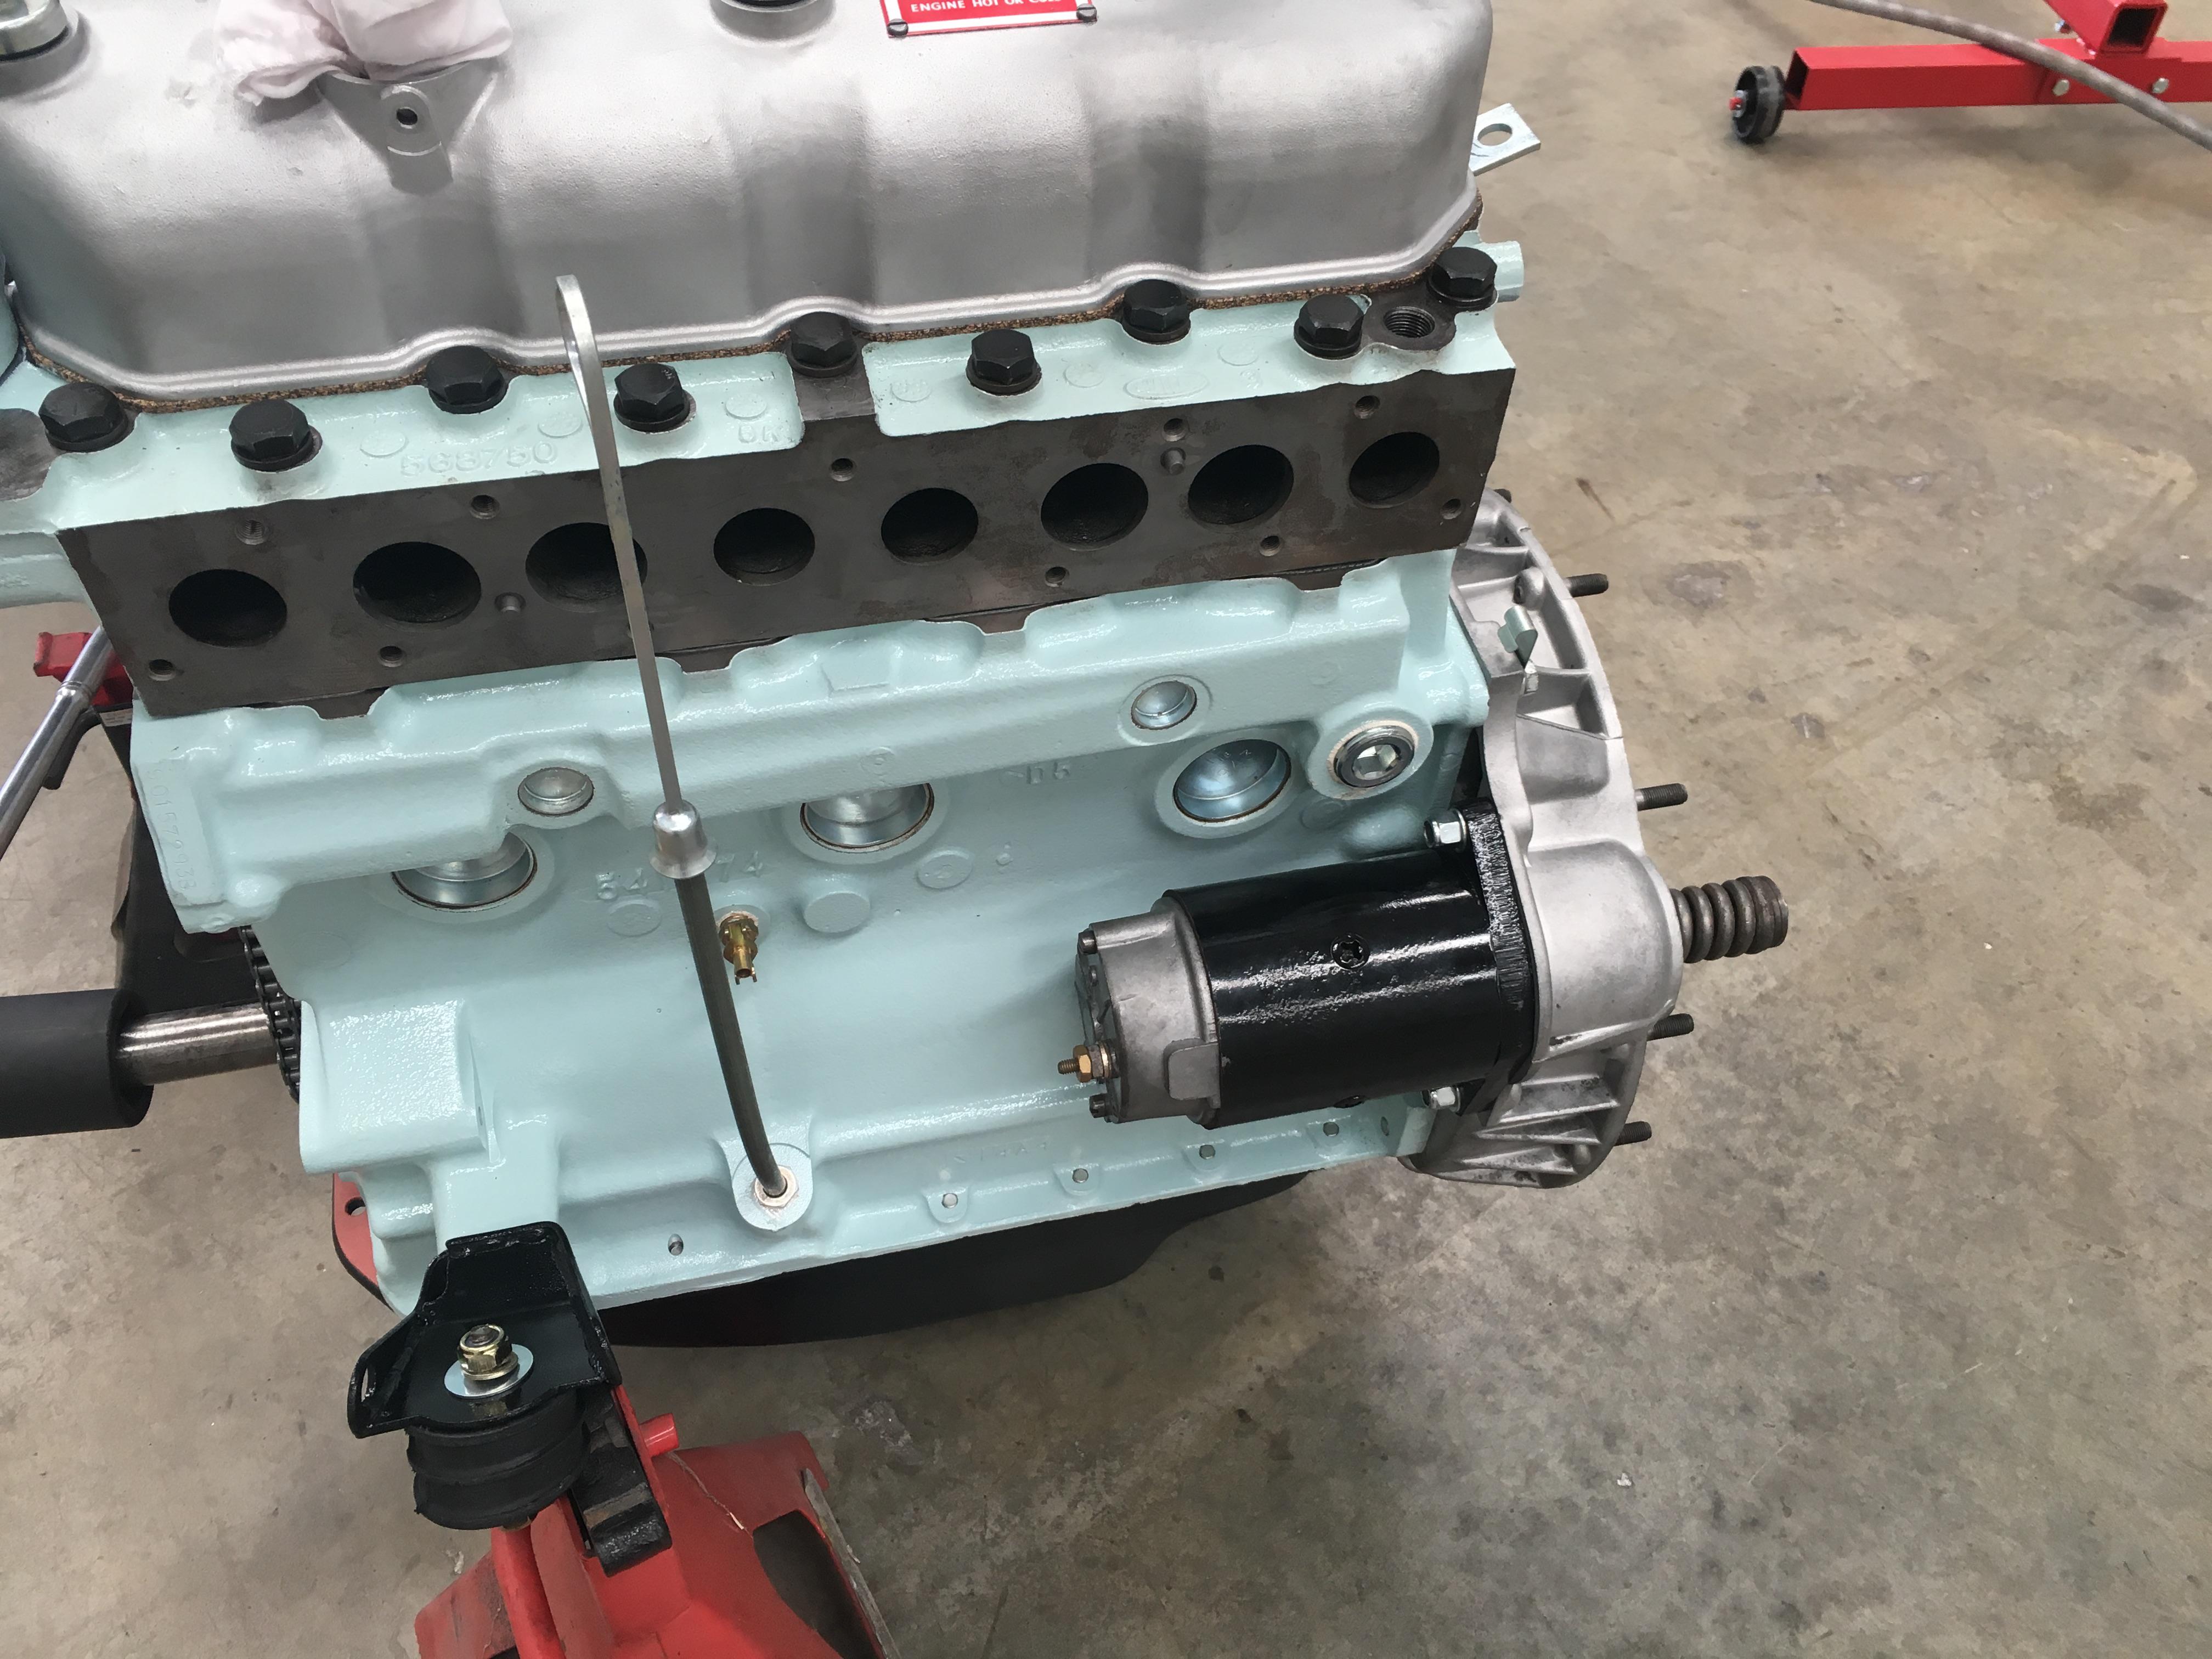
    1, Rotate the crank till No1 is at TDC on the firing stroke, (both tappets loose for cylinder one, and both tappets tight for cylinder four).
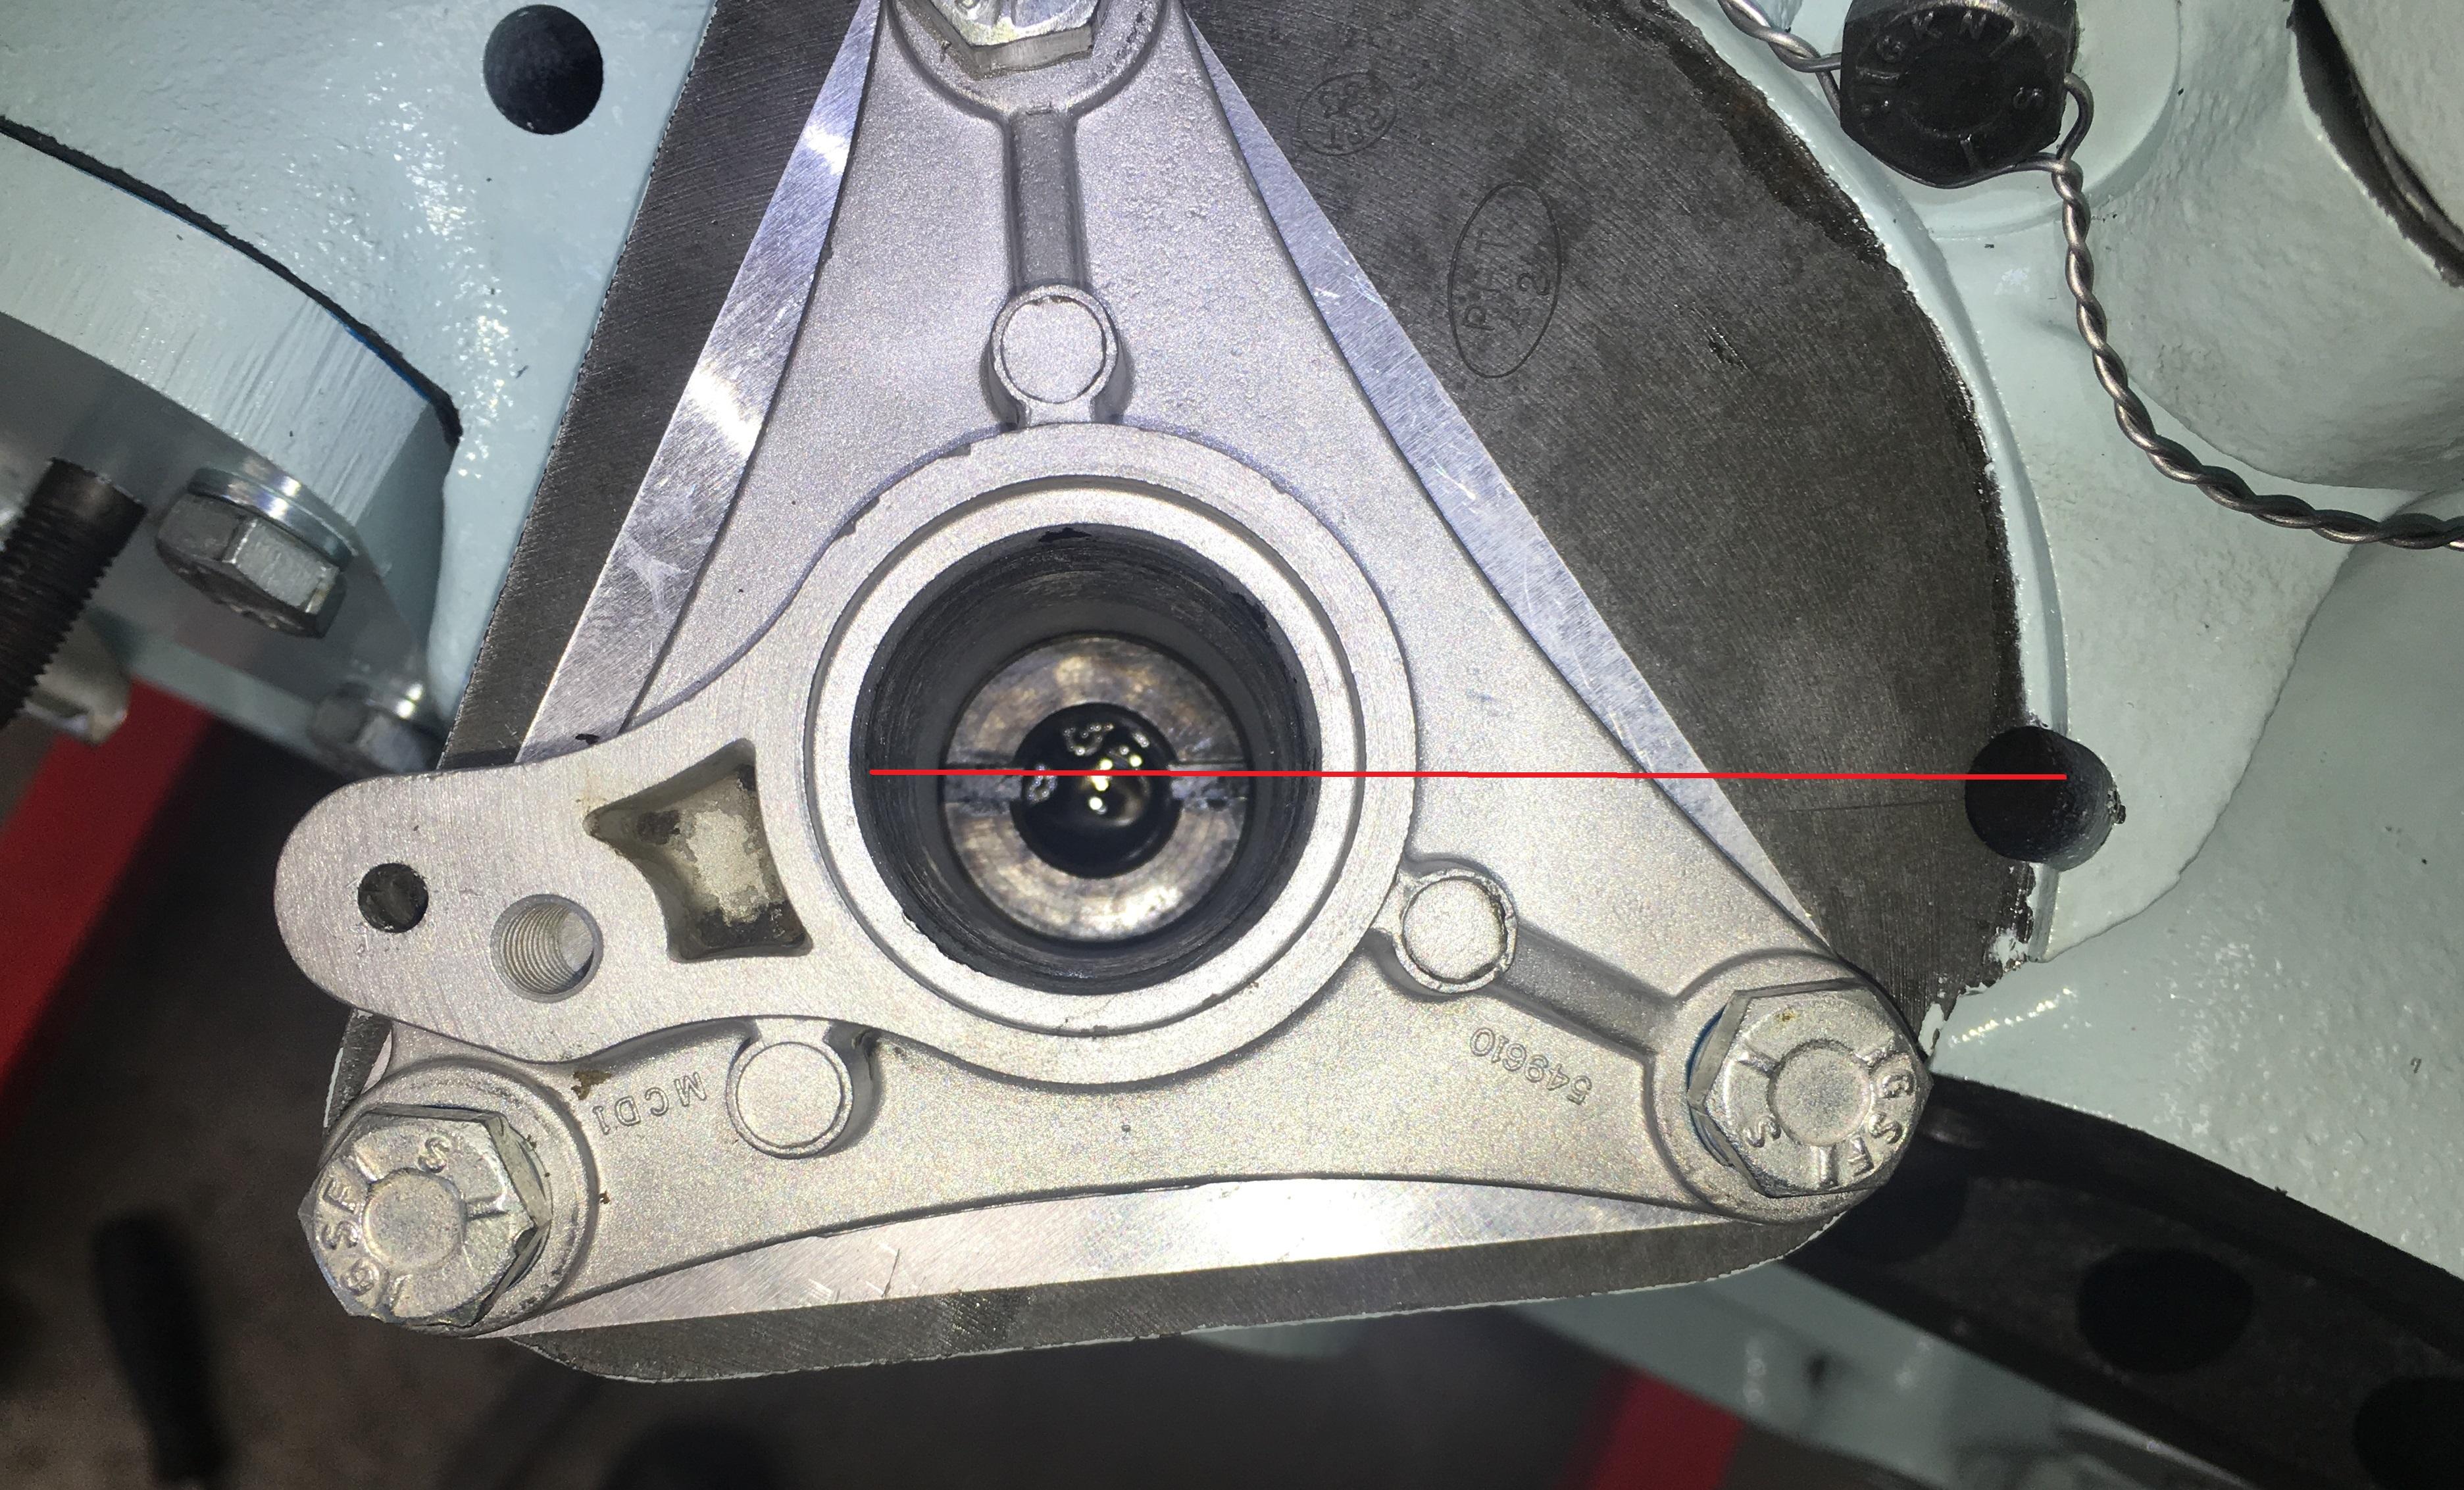
    2, Install the drive gear so the drive dogs, (of the drive spacer), are not nicely pointing at the reference hole, needs to be just before or just after, (counter clock wise rotation). I found the standard points distributor fitted better, i.e. so the vac advance isn't rotated into the head, with the drive dogs before the reference hole, but the aftermarket electronic distributor fitted better with the drive dogs just after the reference hole.

    The rotor should now be pointing at cylinder ones spark plug, and if you put the cap on it should line up with the terminal for No1's spark plug lead. Also the "pointer" on the distributor shaft, (under the rotor), is pointing straight at the (hall effect?) sensor in the box of black magic that makes the electronic distributor work.


    Cheers,

  3. #333
    Join Date
    Mar 2008
    Location
    Perth, WA
    Posts
    1,947
    Total Downloaded
    0
    Next to go in was the oil pump, (which looks worse than it is in the photo, I didn't want to media blast it for fear of contamination).


    Then the rocker cover and sump could go on, the sump will have to come off again later to allow fitment of the front cover, after I get the new cam gear, but I want to seal the engine up as much as possible.


    Then, on with dressing the engine. The fuel pump is an aftermarket one, and with the "experiences" I have had I think I'll be ordering a rebuild kit for the original one :/ I was lucky enough to nab the last spin on filter adaptor that Turners had


    Cheers,

  4. #334
    Join Date
    Oct 2014
    Location
    Northern NSW.Australia
    Posts
    2,023
    Total Downloaded
    0
    Spin on, type oil filter. Nice.
    what adapter did you use for It. ????
    Thanks.

    whitehillbilly

  5. #335
    Join Date
    Mar 2008
    Location
    Perth, WA
    Posts
    1,947
    Total Downloaded
    0
    Hi Whitehillbilly,

    It's the stock LR part from the later engines, 2.5 petrol or diesel, I think even the 200/300tdi parts might fit.

    Cheers,

  6. #336
    Join Date
    Mar 2008
    Location
    Perth, WA
    Posts
    1,947
    Total Downloaded
    0
    Moving right along... Next to go onto the engine was the flywheel housing:


    The engine is sitting on the axle stands to give it a solid base, otherwise the torque setting would be all over the place. Flywheel getting torqued up:


    And starter motor in:


    Next up is the clutch, I was lucky enough to have an input shaft to use as a clutch aligning tool:


    Then up on the forklift, and over to the chassis:


    Motor bolted to the gearbox and mounts


    Cheers,

  7. #337
    Join Date
    Feb 2004
    Location
    Williams West Aust
    Posts
    20,998
    Total Downloaded
    0
    Looking a million Tim.
    You should contact a UK mag and get them to run a story on your build!!!!
    Andrew
    DISCOVERY IS TO BE DISOWNED
    Midlife Crisis.Im going to get stuck into mine early and ENJOY it.
    Snow White MY14 TDV6 D4
    Alotta Fagina MY14 CAT 12M Motor Grader
    2003 Stacer 525 Sea Master Sport
    I made the 1 millionth AULRO post

  8. #338
    Join Date
    Mar 2008
    Location
    Perth, WA
    Posts
    1,947
    Total Downloaded
    0
    Did a fair bit today, but they were those jobs that don't show much! I sorted out all the bolts, brackets, fixings etc that need to go off the get electroplated, mounted the gear stick, clutch hardline went in, and pulled the rear loom through the chassis.


    On the subject of electroplating etc, it's all to easy to go a bit mad and order a whole lot of new brackets, fixings, bolts, etc. In hindsight I wish I'd just gathered up what I had and dropped them off at the platers before ordering new stuff. It's amazing how much some parts clean up.

    Also, I've found it pretty easy to get lazy and think, "oh there's a new pattern part for a few bucks, save me cleaning up the old one". It's been a bit of a lesson to myself to slow down, and not get ahead of yourself. And that new aftermarket does not, (always), compare with the original kit.

    Below is an example of that, one of these parts is a brand new, (reputable?), aftermarket part, the other is a 42 year old part that has been cleaned up.


    Cheers,

  9. #339
    Join Date
    Jan 1970
    Location
    Gold Coast Queensland Australia
    Posts
    6,469
    Total Downloaded
    0
    Original on the left. Looks to be better casting than the new
    Safe Travels
    harry

  10. #340
    Join Date
    Mar 2008
    Location
    Perth, WA
    Posts
    1,947
    Total Downloaded
    0
    You got it in one Harry The replacement casting is full of inclusions.

    Cheers,

Page 34 of 51 FirstFirst ... 24323334353644 ... LastLast

Bookmarks

Bookmarks

Posting Permissions

  • You may not post new threads
  • You may not post replies
  • You may not post attachments
  • You may not edit your posts
  •  
Search AULRO.com ONLY!
Search All the Web!